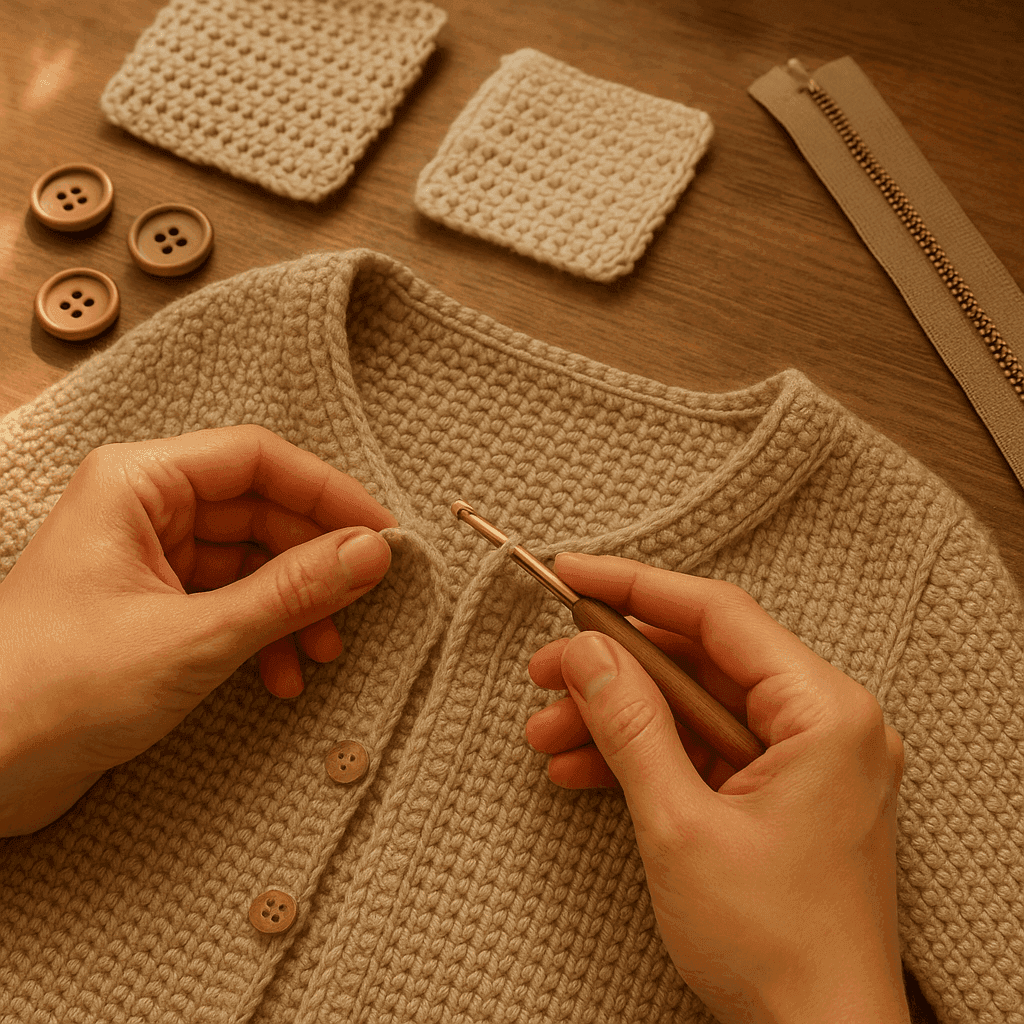
There’s a particular moment in finishing a crochet garment when everything looks right except the edge. The body fits, the stitch pattern behaves, the shaping is flattering—and then the neckline ripples, the button band flares, or the front edge feels a little too flat and homemade when you wanted it to look deliberate, rounded, and polished. Many crocheters have admired the neat, tubular finish of a knitted applied I-cord and wondered how to get that same function without switching tools or building knitting skills just for the trim.
The good news is that crochet has several excellent ways to create a corded, rounded edge that performs many of the same jobs as applied I-cord. You can stabilize a neckline, add a firm but flexible button band, create a soft rolled edge around a zipper, or frame a shawl and bag opening with a trim that looks substantial without becoming clunky. The key is not just choosing a pretty edging stitch, but understanding why certain stitch paths produce a cord-like profile, how pickup ratios affect lie and stretch, and where bulk accumulates at corners, curves, and join points.
This is where crochet really shines: we can engineer the edge. By controlling stitch height, insertion points, row direction, yarn structure, and tension, we can make an edging that mimics the visual and structural role of applied I-cord even though the construction is different. In practice, the best crochet alternatives usually fall into a few families: slip stitch cord edgings, reverse single crochet variants, narrow joined bands worked perpendicular to the edge, camel-stitch and loop-only facings, and compact corded trims built from strategic combinations of chain, slip stitch, and single crochet.
In this guide, we’ll go deep into how to choose among those options and how to work them so they look intentional and wear well. We’ll cover stitch-path options, edge pickup ratios, managing bulk at corners, fiber and ply choices, neckline stabilization, zipper and button-band integration, and finishing strategies for durable rounded trims on garments and accessories.
What an applied I-cord does—and what your crochet edge needs to do
Before choosing a crochet substitute, it helps to define the function of applied I-cord. In knitting, applied I-cord creates a narrow tube or pseudo-tube attached to an edge as you go. It visually rounds the perimeter, slightly encloses the raw edge, adds structure, and often helps prevent stretching or collapse. It can also clean up color changes, transitions, and uneven selvedges.
A crochet alternative does not need to be tubular to do the same job. It only needs to achieve most of these goals:
- Create a rounded visual line rather than a flat decorative border
- Firm the edge without making it rigid
- Control stretch, especially at necklines and front openings
- Cover or tidy the turning edge of the fabric
- Navigate curves and corners without flaring or cupping
- Stay durable through wear, washing, and repeated handling
For garments, especially cardigans, tanks, pullovers, and baby pieces, you’re usually balancing three properties:
- Recovery – the edge should bounce back after wear
- Stability – the edge should resist growing out of shape
- Comfort – the edge should not feel hard or bulky against the skin
That balance will determine whether you reach for a very compact slip stitch cord, a softer single-crochet-based trim, or a folded facing that creates a cord-like roll.
The main crochet stitch-path options for corded edges
When we talk about “stitch path,” we mean the direction and structure of the edging relative to the garment edge. This matters just as much as stitch choice.
1. Worked directly around the edge: slip stitch or compact edging
This is the most immediate option. You work into the edge of the garment—along row ends, stitch tops, or foundation spaces—with one or more rounds/rows of compact stitches.
Best choices include:
- Slip stitch (sl st)
- Single crochet (sc)
- Reverse single crochet (crab stitch)
- Half slip stitch or tight waistcoat-like constructions in select fabrics
- Combinations such as chain 1, slip stitch in next stitch for a beaded cord effect
Advantages:
- Minimal planning
- Easy to customize pickup ratio in real time
- Excellent for necklines and armholes
- Useful when you only need light structure
Limitations:
- Can tighten too much if tension is firm
- Can ripple if pickup count is too high
- A single pass may look more decorative than structural unless engineered carefully
2. Joined perpendicular band: short rows attached as you go
This is one of the closest crochet analogues to applied I-cord in function. You create a very narrow strip—often 2 to 4 stitches wide—worked in rows perpendicular to the garment edge, joining one edge of the strip to the garment as you go.
Common constructions:
- 2-sc or 3-sc band in back loop only, slip stitched to the garment edge each row
- 3-hdc band for a fuller rounded trim
- Slip stitch band worked through back loops for elasticity and a corded fold line
Advantages:
- Highly controlled shaping on curves
- Naturally creates a rounded ridge or roll
- Easy to vary join frequency for corners and necklines
- Excellent for button bands and front openings
Limitations:
- Slower than direct edging
- Join rhythm must be monitored carefully
- Can become bulky if yarn is thick or stitches are too tall
3. Folded facing or turned edge
In this method, you build a narrow extension, then fold it to the wrong side or around the edge and secure it, creating a plump finished perimeter. This is particularly useful if the original edge is messy, stretchy, or needs reinforcement.
Typical approaches:
- Work 3–6 rows in BLO/FLO to create a hinge, then fold and seam
- Create a narrow casing-like edge around a neckline
- Work a zipper facing with a fold line and stitched-down inner edge
Advantages:
- Extremely neat and stable
- Great for zippers and button bands
- Can hide reinforcement thread or tape inside
Limitations:
- More finishing work
- More bulk than a single-pass edging
- Needs careful planning at corners
4. Surface or overlay cord effect
This is more decorative but can also tidy an edge. A slip stitch or chain-like line worked through edge stitches or around a previously stabilized border creates the visual impression of a cord.
Advantages:
- Beautiful for contrast edging
- Useful over an existing firm band
- Good for adding polish without major restructuring
Limitations:
- Less structural by itself
- Not ideal as the only stabilization on a neckline
Choosing the right yarn, ply, and hook for a corded edge
A crochet edge that mimics applied I-cord depends heavily on yarn behavior. The same stitch pattern can look crisp and tailored in one yarn and limp in another.
Fiber choices
Wool and wool blends
- Best all-around option for recovery and resilience
- Great for necklines and button bands
- Slight halo can soften the edge beautifully
- Ideal for garments that need elastic memory
Cotton
- Crisp, defined, and excellent for bags or baby garments needing durability
- Less recovery than wool
- Can become heavy or grow if used for long front bands
- Best with compact stitch counts and firm structural planning
Acrylic
- Variable behavior depending on construction
- Can work well for easy-care garments
- Softer acrylics may need more stabilization because they can relax over time
Linen, bamboo, silk-heavy blends
- Gorgeous drape, but often less spring
- Better for decorative corded edging than for structural neckline control unless reinforced
Ply and spin
High-twist, plied yarns are ideal for corded trims. They:
- Define stitches clearly
- Resist abrasion better at high-touch edges
- Create a more rope-like look
Low-twist or single-ply yarns can blur the edge. They’re lovely in soft rolled trims but may not hold a crisp rounded band.
Yarn weight recommendations
For most garments:
- Fingering/sport: refined necklines, baby garments, lightweight cardigans
- DK/light worsted: excellent for most adult garment bands and trims
- Worsted/aran: works for outerwear, cozy cardigans, bags, and home accessories, but watch bulk at corners
Hook size strategy
For corded edges, many crocheters get better results by going down 0.25 mm to 1.0 mm from the hook used for the body fabric.
Examples:
- Body worked with 4.0 mm hook → edge with 3.5 mm or 3.75 mm
- Body worked with 5.0 mm hook → edge with 4.5 mm
This smaller hook helps the trim round up and hold shape. However, if your natural tension is already tight, keep the same hook or go down only slightly.
Pickup ratios: the secret to smooth, non-ripply edges
If there is one technical detail that makes or breaks a polished crochet edging, it is pickup ratio. This is the relationship between how many edge stitches you work and the length of the edge you’re covering.
Too many pickups = flare or ripple. Too few pickups = puckering, pulling, or a neckline that sits too tight.
Standard starting ratios
These are starting points, not laws:
- Along horizontal stitch tops: 1 stitch in each stitch
- Along vertical row ends in single crochet fabric: about 1 stitch per row end, sometimes 3 stitches per 4 rows if row ends are tall or loose
- Along vertical row ends in half double crochet fabric: about 3 stitches per 4 row ends
- Along vertical row ends in double crochet fabric: about 2 stitches per row end, or 3 stitches per 2 row ends depending on row height and fabric density
- Along curved necklines: often fewer pickups on inner curves, slightly more on outer curves
Practical ratio testing
Do not trust formulas blindly. Instead:
- Mark the edge into quarters.
- Estimate stitches for each section.
- Work the first pass.
- Lay the piece flat with no stretching.
- Check whether the trim waves or draws in.
If the edge ripples, remove 5–10% of your stitches in that section. If the edge cups or pulls, add 5–10%.
Example: cardigan front edge
Suppose one front edge measures 22 inches and your gauge in edging single crochet is 5 sc per inch. That suggests 110 sc if worked along a straight foundation. But because you are picking up along mixed row ends and shaping, the actual successful count may be closer to 100–106 sc.
A practical distribution might be:
- Lower straight section: 48 sc
- Shaped neckline section: 38 sc
- Shoulder/top section: 18 sc
Total: 104 sc
Then work your cording pass over that stabilized base.
A reliable base setup for most corded trims
In many projects, the neatest result comes from a two-stage approach:
- Foundation edge round/row to regularize the edge
- Corded finishing round/rows to build the rounded profile
Foundation setup
Work 1 round/row of single crochet around the edge using an appropriate pickup ratio.
For necklines or fronts:
- Use a hook 0.5 mm smaller than body hook if needed
- Place markers at center back, shoulder seams, V-point, top/bottom of button band, and any curve transition
- Keep stitch count written down
This foundation round is where you fix uneven row ends, absorb shaping transitions, and establish symmetry.
Why single crochet first?
Single crochet gives you:
- A uniform set of loops for the next pass
- Better stitch count control
- A cleaner look than working a cord directly into inconsistent selvedges
For very fine yarns, you can use slip stitch as the foundation. For heavier yarns, single crochet is usually easier to control.
Method 1: Slip stitch cord edging
This is the cleanest and often the closest in spirit to applied I-cord for lightweight garments.
How it works
A row or round of slip stitches worked into a stabilized edge compresses the outer perimeter and creates a subtle rounded bead.
Basic setup
- Yarn: same as body or slightly lighter for reduced bulk
- Hook: 0.5–1.0 mm smaller than body hook
- Foundation: 1 row/round sc around edge
Step-by-step
- With right side facing, join yarn at a discreet point.
- Work 1 sc in each foundation sc around, if you need extra firmness, or skip this if foundation sc is already complete.
- Work 1 slip stitch in each stitch around, keeping loops slightly taller than you think you should. Tight slip stitches distort the edge.
- At corners, work one of the following depending on shape:
- Sharp outer corner: (sl st, ch 1, sl st) in corner stitch
- Gentle curve: 2 slip stitches spread across 2 neighboring stitches rather than stacking in one point
- Fasten off and block lightly.
Stitch counts
If your foundation row has 104 sc, your slip stitch pass will usually also be 104 sl st unless you intentionally adjust at corners.
Best uses
- Scoop necks
- Crew necks
- Baby cardigans
- Lightweight shawl edges
- Zipper frames after stabilization
Common mistakes
Problem: Edge shrinks noticeably after slip stitch round. Fix: Use a larger hook for the slip stitch pass or consciously pull up slightly taller loops.
Problem: Edge twists toward the right side. Fix: Your slip stitches may be too tight, or the base stitch count is too low.
Method 2: Reverse single crochet as a corded perimeter
Crab stitch creates a rope-like outer edge and is an excellent no-knit option when you want definition without building a separate band.
Why it works
Because reverse single crochet stacks and twists the yarn path, it naturally forms a rounded corded outline.
Step-by-step
- Work a foundation round/row of sc around the edge.
- Without turning, work reverse sc in each sc back in the opposite direction.
- At outer corners, work 2 reverse sc in the corner stitch.
- At inner corners or V-necks, either:
- Skip the marked center stitch and work to either side, or
- Work a decrease over 3 stitches if the angle is gentle.
Stitch counts
- Straight edges: same count as foundation row
- Outer corner: add 1 stitch as needed
- Inner V point: subtract 1 stitch if needed
Best uses
- Bag tops
- Child garments
- Cardigan fronts needing visible structure
- Decorative but sturdy pocket edges
Caution
Crab stitch can look chunky in worsted or bulky yarns, especially on small necklines. If the trim feels heavy, switch to slip stitch cord or a narrow perpendicular band.
Method 3: Narrow perpendicular joined band
If you want a true built-up rounded edge with excellent control, this is often the best crochet alternative to applied I-cord.
Basic 3-stitch joined band
This version works beautifully for necklines and button bands.
Foundation: Work 1 row/round of sc around edge.
Band setup:
- Ch 4
- Row 1: Starting in 2nd ch from hook, work 3 sc (3 sts)
- Slip stitch to next 1 or 2 foundation stitches depending on shaping
- Turn
- Row 2: Skip sl st(s), work 3 sc in BLO across (3 sts)
- Repeat Row 2 around edge
This forms a ribby narrow strip whose attached edge hugs the garment and whose free outer edge rounds slightly like a cord.
Join frequency = shaping control
This is the crucial concept.
- Join to 1 foundation stitch per row when you need the band to travel slowly, useful on inner curves or shorter edges.
- Join to 2 foundation stitches per row when you need the band to cover more distance, useful on outer curves or to reduce excess fullness.
Think of this as the crochet equivalent of easing.
Example: scoop neckline
Suppose your neckline foundation round contains 84 sc.
You might work the joined band like this:
- Left shoulder to upper front: join to 1 stitch per row for 20 rows
- Front curve: alternate joining to 1 stitch, then 2 stitches, across 28 foundation stitches
- Center front or deepest curve area: mostly join to 1 stitch if you need more flexibility
- Mirror on other side
Your band rows might total 58–70 rows depending on join rhythm. The exact row count matters less than whether the band lies smooth and rounded.
For button bands
A 4-stitch band often works better than 3 stitches if you need buttonholes.
Try:
- Ch 5
- Row 1: 4 sc
- Join to edge
- Subsequent rows: 4 sc BLO
This gives enough depth for buttonholes while preserving a rounded outer edge.
Buttonhole spacing
For a 4-stitch perpendicular band:
- Work buttonholes across a designated row by ch 1, skip 1 or ch 2, skip 2 depending on button size
- Reinforce in the next row by working firmly into chain spaces
Example:
- Band length along edge: 18 inches
- Desired buttons: 6 total
- Top and bottom margins: 1 inch each
- Remaining space: 16 inches
- 5 intervals = 3.2 inches apart
Always mark button positions physically on the garment before committing.
Method 4: Folded crochet facing for zipper and polished fronts
When you want a cardigan or pouch opening to look very finished—and especially when inserting a zipper—a folded facing can outperform a simple edging.
Structure
You create a narrow extension with a turning ridge, then fold it and stitch it down. The fold creates the rounded front edge.
Step-by-step
- Work a foundation row of sc along the opening edge.
- Work 2–4 rows sc or hdc.
- Work 1 hinge row in BLO (or FLO, depending on fold direction).
- Work 2–4 more rows sc.
- Fold along hinge row to wrong side.
- Slip stitch, whip stitch, or sew inner edge down neatly.
- Insert zipper by hand sewing through facing and zipper tape, not through only one loose layer of crochet.
Stitch counts
If your opening edge has 96 sc, all facing rows remain 96 stitches unless shaping is built in.
Why this is good for zippers
- The zipper tape is hidden or framed cleanly
- The edge resists stretching while worn open or zipped
- You can add reinforcement thread inside the fold
Bulk management tip
For DK or heavier yarns, work the inner facing rows with a slightly smaller hook or even a lighter-weight yarn in a matching shade. That preserves the rounded edge while reducing thickness.
Neckline stabilization: keeping rounded edges from growing
Necklines get tugged every time a garment goes on and off. If your trim is beautiful but not stabilized, it may spread with wear.
Best stabilization methods
1. Foundation slip thread or cord Work your first round over a thin support strand:
- Matching sewing thread
- Fine crochet cotton
- Elastic thread only when very gentle recovery is needed
This is especially helpful for boat necks and wide scoop necks.
2. Sewn reinforcement after edging After finishing, run a line of backstitch or small running stitch along the inside of the neckline just beneath the corded trim.
3. Folded facing with concealed support For garments with soft, drapey fibers, insert a narrow twill tape, ribbon, or stable crochet chain inside the facing.
Pickup strategy for necklines
Necklines often need slightly fewer stitches than you first expect, especially at the front curve. If a neckline flips outward, the issue is often not the edging stitch but excess pickup.
A good rule for a rounded neckline:
- Start with your measured ratio
- Remove a few stitches near the deepest curve if the edge stands away
- Keep the shoulder area especially tidy and stable
V-neck specifics
For a V-neck, mark the center stitch. On your foundation row:
- Work to 1 stitch before marker
- Work sc3tog over the center area or sc, ch 1, sc depending on whether you want a pointed or softened V
For corded alternatives, a softened V often looks better than a hard point, especially with thicker yarn.
Managing corners and curves without bulk
Corners are where “cord-like” trim either looks custom or clumsy.
Outer corners
Too few stitches at an outer corner = pulling and flattening. Too many = dog ears and blobs.
Good starting strategies:
- Slip stitch edging: sl st, ch 1, sl st in corner point
- Single crochet foundation: 3 sc in corner stitch, then normalize on next round
- Perpendicular band: join two consecutive rows into the corner area, then reassess after turning the corner
Inner corners
Inner corners need subtraction.
Good options:
- Skip 1 center stitch
- Work a decrease over 3 stitches
- For a joined band, join fewer foundation stitches across the inside turn
Curves
Think in terms of differential feeding:
- Outer curves need more distance coverage from the band
- Inner curves need less
For a perpendicular joined band, this means varying the number of foundation stitches consumed per row.
For a direct edging, it means subtly changing pickup density.
Button band integration: function first, polish second
Button bands need more than beauty. They need to resist stretching, support buttonholes, and align cleanly across the body.
Best structures for crochet button bands
- Perpendicular BLO band – best all-around for tailored cardigans
- Folded facing band – excellent for heavier garments or zippers plus buttons
- Foundation sc + reverse sc edge – good for casual pieces with small buttons
Preventing button-band flare
- Work the band with a smaller hook than the garment body
- Consider reducing pickup ratio slightly, especially in vertically worked garments
- Add a reinforcement strand if using superwash wool, bamboo blends, or soft acrylic
Stitch count planning example
Suppose your cardigan front opening edge measures 20 inches. Your perpendicular band row gauge is 6 rows per inch.
That means the finished band length needs about 120 rows.
If you want 7 buttons:
- Top margin: 0.75 inch
- Bottom margin: 1.25 inches
- Usable center span: 18 inches
- 6 intervals between 7 buttons = 3 inches apart
At 6 rows/inch, place buttonhole centers about 18 rows apart.
Mark both fronts before crocheting both bands to ensure symmetry.
Zipper integration: making crochet and hardware cooperate
A zipper needs a stable edge, smooth tape support, and enough depth that the teeth do not snag yarn.
Best crochet setups for zippers
- Folded facing with sewn zipper
- Foundation sc edge plus narrow band, then sewn zipper
- Dense slip stitch edge over a stabilized opening
Tips for success
- Steam or block the opening to final dimensions before inserting zipper
- Baste zipper in place first
- Sew through stable stitches or facing layers, not airy fabric alone
- Keep zipper teeth 1–2 mm away from the thickest corded edge
If the edge waves beside the zipper
Usually one of three issues is happening:
- Opening edge stretched before zipper insertion
- Zipper tape is shorter than the finished opening
- Too many edge stitches were worked before attaching the zipper
Correct by remeasuring the blocked opening and easing the crochet edge—not the zipper—into alignment.
Finishing strategies for a professional result
The final 10% matters enormously with corded trims.
Invisible joins
For rounds, finish with:
- Cut yarn
- Pull through
- Use a tapestry needle to mimic the final stitch
This avoids a jog at neckline edges.
Blocking
Block the garment body before adding critical trim whenever possible. Then block lightly again after trimming.
- Wool: steam or wet block gently
- Cotton: wet block and shape carefully
- Acrylic: use caution with steam; too much can flatten the corded texture permanently
Seaming down facings
Use a flexible sewing method:
- Mattress-like hand stitch for invisibility
- Slip stitch seam for speed
- Whip stitch only if worked loosely enough not to ridge
Weaving ends
At high-stress edges like button bands and necklines, weave ends in more than one direction if possible. Edge wear is real, and a short lazy end can work loose quickly.
Troubleshooting common problems
The edge ripples
Likely cause: too many pickups or too much height in the edging stitch.
Fixes:
- Remove 5–10% of stitches from the offending section
- Switch from sc to sl st for the outer pass
- Use a smaller hook
- On a perpendicular band, join to 2 foundation stitches more frequently on outer sections
The edge cups inward too much
Likely cause: too few pickups, very tight tension, or a slip stitch pass that is choking the perimeter.
Fixes:
- Add stitches in the affected area
- Use the same hook size as body for the cording pass
- Replace sl st edge with reverse sc or a 3-stitch joined band
The neckline stands away from the body
Likely cause: excess pickup, especially at front curve; insufficient stabilization.
Fixes:
- Reduce pickup count at the deepest curve
- Add a support thread or sewn reinforcement
- Use a perpendicular band that can be eased more precisely
Corners are bulky
Likely cause: too many stitches stacked in one point, or yarn too thick for the chosen trim.
Fixes:
- Spread increases over multiple stitches rather than one corner stitch
- Switch from reverse sc to slip stitch edge
- Use a lighter yarn or smaller hook just for the trim
Buttonholes sag
Likely cause: buttonholes are too large, band too soft, or surrounding stitches too loose.
Fixes:
- Make smaller buttonholes than you think you need; crochet relaxes with wear
- Work adjacent rows with a smaller hook
- Reinforce buttonhole edges with matching sewing thread if needed
Zipper edge looks lumpy
Likely cause: uneven pickup, thick facing fold, or zipper sewn without basting.
Fixes:
- Build a cleaner foundation row first
- Grade the bulk by using a smaller hook or lighter yarn inside facing
- Hand baste zipper before permanent stitching
Variations to try
Once you understand the engineering, you can adapt the look.
Faux tubular trim
Work:
- Foundation sc
- BLO sc row
- Slip stitch row on outer loops
This gives a rounded fold-like profile without a full facing.
Camel stitch cord band
Working half double crochet in the third loop or using camel stitch techniques can create a raised top ridge that reads as corded, especially on medium-weight yarns.
Best for:
- Casual sweater necklines
- Hat brims
- Bag edges
Contrast-color cord edging
Use a firm contrast yarn for the outer pass only. This highlights the cord and can disguise slightly irregular selvedges beneath.
Soft baby-garment trim
For baby pieces, use:
- Sport or DK merino
- 1 foundation sc round
- 1 slip stitch or reverse sc round
Keep the trim shallow and supple to avoid stiffness near the neck.
Structured bag or pouch opening
Use cotton or cotton blend:
- Foundation sc
- Reverse sc or 3-stitch perpendicular band
- Optional hidden cord or tape reinforcement
This creates excellent wear resistance.
A practical decision guide
If you’re unsure which method to choose, use this shorthand:
- Need the least bulk and a refined finish? Use foundation sc + slip stitch cord.
- Need visible rope texture and quick structure? Use foundation sc + reverse sc.
- Need the best shaping control for necklines and button bands? Use a 3- or 4-stitch perpendicular joined band.
- Need zipper support or a couture finish? Use a folded facing.
- Need extra stabilization for drapey yarn? Add reinforcement thread or hidden tape.
A sample recipe: polished cardigan neckline and button bands
Here is one dependable workflow for a DK-weight cardigan.
Materials
- DK wool or wool blend cardigan body
- Same yarn for trim
- Body hook: 4.0 mm
- Trim hook: 3.5 mm
- Tapestry needle
- Removable markers
Step 1: Block body pieces or finished garment Make sure front edges and neckline are at final dimensions.
Step 2: Mark key points Place markers at:
- Bottom of right front
- Start of neckline shaping
- Shoulder seam
- Center back
- Opposite shoulder
- Matching point on left front
- Bottom of left front
Step 3: Work foundation sc around entire opening Pick up evenly around both fronts and neckline.
Example count:
- Right front: 52 sc
- Right neckline curve: 18 sc
- Back neck: 28 sc
- Left neckline curve: 18 sc
- Left front: 52 sc
Total: 168 sc
Step 4: Check lie Lay flat. Adjust now if needed.
Step 5: Work a 4-stitch perpendicular band At bottom of right front:
- Ch 5
- Row 1: 4 sc
- Sl st into first 1–2 foundation sc as needed
- Turn, work 4 sc BLO across
- Repeat around opening
Use mostly 1-stitch joins around neckline curves for flexibility, and a balanced mix on straighter front edges.
Step 6: Add buttonholes on left front band If working bands separately, mirror carefully. If working one continuous band, mark buttonhole rows in advance.
Sample buttonhole row:
- Sc 1, ch 2, skip 2, sc 1 on a 4-stitch row
Test with the actual button.
Step 7: Finish and block lightly Use an invisible join where appropriate and steam or wet block gently.
The result is a front edge with much of the polish and practicality people often seek from applied I-cord, while remaining fully in crochet.
Key takeaways
A polished crochet edge that substitutes for applied I-cord is less about copying the exact knitted structure and more about reproducing its job: rounding the edge, stabilizing the opening, and making the finished piece feel intentional.
The most successful crochet alternatives usually begin with a clean foundation row, use a slightly smaller hook, and pay close attention to pickup ratio. For light, elegant trims, slip stitch edging is hard to beat. For quick rope-like definition, reverse single crochet works beautifully. For the best shaping control on rounded necklines and button bands, a narrow perpendicular joined band is often the true workhorse. And when hardware or extra durability enters the picture, a folded facing gives you a remarkably professional finish.
If you remember only a few technical lessons, make them these:
- Stabilize first, decorate second
- Test pickup ratio section by section
- Manage corners with distributed increases or decreases
- Match trim structure to yarn behavior
- Use smaller hooks and firmer yarns when you need a crisp corded result
Most of all, treat finishing as design, not cleanup. The edge is not an afterthought—it is the frame that tells the eye the piece is complete. Once you start viewing crochet trims as engineered structures rather than simple borders, you gain the freedom to build rounded, durable, no-knit finishes that are every bit as elegant and functional as their knitted inspiration.