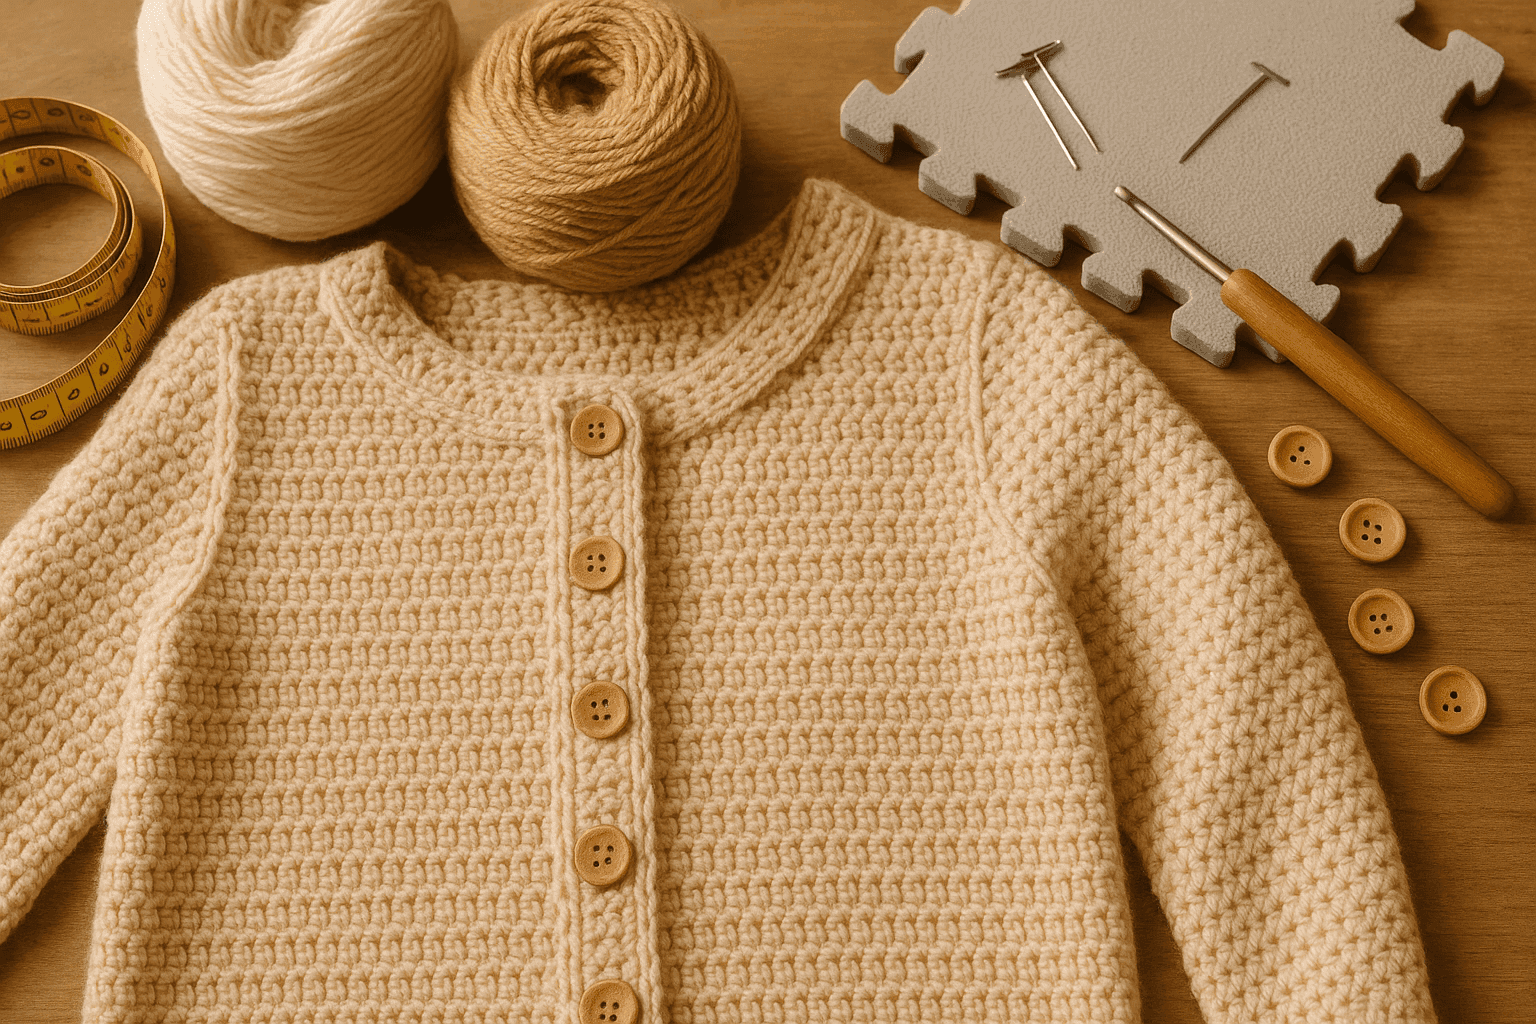
There is a very specific kind of disappointment that only garment makers understand: you finish a cardigan, sew on the buttons, try it on, and the front edge tells the truth immediately. The button band buckles between buttons. The bust area pulls open. The lower hem flares out. Or worse, the whole closure looks perfect on the table and grows into a wavy ladder after one wash and a day of wear.
Most of us have been there at least once. Button bands look deceptively simple because they are narrow, repetitive, and often left until the end. But closure edges are engineering. They are stress points, grain decisions, fiber decisions, spacing math, and reinforcement strategy all wrapped into a strip only a few stitches wide. When they work, a handmade garment looks polished and reliable. When they fail, even beautiful stitchwork can look homemade in the least satisfying way.
The good news is that stable crochet openings are absolutely buildable on purpose. You do not have to guess your way through buttonholes or rely on luck and blocking. Once you understand band orientation, pickup ratios, fiber recovery, reinforcement, and placement strategy, you can design button bands that hold their shape under real use.
This guide goes deep into the practical side of crochet buttonhole bands and closure edges for cardigans, coats, cuffs, plackets, and any opening that needs to close neatly without gapping, rippling, tunneling, or stretching out. I’ll treat this the same way I do in my own garment notebook: as a combination of fabric behavior and repeatable math.
Why button bands fail
Before fixing anything, it helps to know what usually goes wrong. Most closure problems come from one or more of these issues:
- The band is worked in the wrong orientation for the fabric stress.
- Too many or too few stitches are picked up along the edge.
- The band fabric is too loose, too drapey, or too stretchy for the garment.
- The buttonholes are not reinforced and lengthen with use.
- Button spacing ignores strain points like bust, full belly, or high hip.
- The closure edge lacks support from facings, tape, slip-stitch reinforcement, or firm seaming.
- The yarn has poor recovery and grows after washing or wear.
- The band is expected to “block flat” instead of being structurally stable.
If you’ve ever seen a band that kicks outward, tunnels inward, ripples like lettuce, or strains open in exactly the wrong place, you’ve seen these factors at work.
The first big decision: with-grain vs cross-grain bands
In sewing, grain matters because fabric stretches differently in different directions. Crochet has its own version of grain, and it matters just as much in closure design.
With-grain bands
A with-grain band is worked in the same direction as the garment edge. Usually this means you pick up stitches along the front opening and work rows directly onto the edge.
Common examples:
- Picking up along a cardigan front and working several rows of single crochet, half double crochet, or ribbing.
- Working a placket upward from the hem as part of the body.
Advantages:
- Easy to attach neatly.
- Good for clean, integrated finishes.
- Convenient for buttonhole placement because you can work holes directly in selected rows.
- Especially useful when the body edge is already stable.
Risks:
- If the pickup ratio is wrong, the band will ripple or draw up.
- If the stitch pattern is stretchy vertically, the band may lengthen and gap.
- If the garment body edge is unstable, the band inherits the problem.
Cross-grain bands
A cross-grain band is worked perpendicular to the garment edge, then attached as you go or sewn on afterward. Think of a strip worked side to side, often in slip stitch or back-loop ribbing.
Common examples:
- A narrow ribbed band worked in rows of slip stitch or single crochet in back loop only.
- A folded facing strip worked separately and sewn to the opening.
Advantages:
- Better control over horizontal stretch and recovery.
- Excellent for bands that need spring, especially on cardigans and cuffs.
- Ribbed cross-grain strips can hug the body and rebound better than with-grain rows.
- Easier to intentionally build negative ease into the band.
Risks:
- Buttonhole placement requires planning because holes must be integrated into the strip structure.
- If the attachment ratio is off, the band can pucker the body edge or flare away from it.
- Some cross-grain bands distort if the stitch pattern is too deep relative to band width.
Which orientation should you choose?
Use this rule of thumb:
- Choose with-grain when the garment edge is already stable, the yarn has good recovery, and you want a crisp integrated placket.
- Choose cross-grain when the opening needs more spring, more control, or more resistance to vertical growth.
- Choose a faced or reinforced band when the garment is heavy, open-fronted, or likely to carry stress from large buttons or frequent wear.
For lightweight cardigans in wool or wool blends, either can work. For long coats, bamboo-rich yarns, superwash wool, or heavy textured fabrics, I strongly favor a more controlled band structure: cross-grain ribbing, a firmer stitch pattern, or reinforcement with tape/facing.
Fiber recovery: your band is only as stable as your yarn
You can engineer a beautiful button band and still lose the battle if the yarn stretches and stays stretched.
Best fibers for stable closures
- Non-superwash wool: excellent bounce and recovery.
- Wool blends with nylon: durable and springy.
- Cotton blends with elastic recovery support from wool or acrylic: more stable than pure cotton.
- Acrylic with memory: varies by brand, but some hold bands well.
Fibers that need extra support
- Superwash wool: often grows after washing and hanging.
- Cotton: strong but can sag under garment weight.
- Bamboo, rayon, silk-heavy blends: lovely drape, weaker rebound.
- Alpaca-heavy yarns: warm and soft, but often prone to growth.
If you are using a fiber with low recovery, assume you need one or more of the following:
- Smaller hook for the band than for the body.
- Firmer stitch pattern.
- Reinforcement tape or sewn backing.
- Turn-under facing.
- Cross-grain band with slight negative ease.
Hook size strategy
A simple stability upgrade is to go down 0.5 mm to 1.5 mm for the band.
Examples:
- Body worked in worsted weight with a 5.0 mm hook; band worked with 4.5 mm or 4.0 mm.
- DK body worked with 4.0 mm hook; band worked with 3.5 mm.
Recommended starting points:
- Fingering weight: body 3.0–3.5 mm, band 2.5–3.0 mm
- Sport/DK: body 3.5–4.5 mm, band 3.0–4.0 mm
- Worsted/aran: body 4.5–6.0 mm, band 4.0–5.0 mm
- Bulky: body 6.0–8.0 mm, band 5.5–7.0 mm
Always swatch the body and the band separately. A band that looks tidy before washing may still relax significantly after blocking.
Stitch patterns that behave well in button bands
Not every crochet stitch belongs in a closure edge.
Reliable choices
- Single crochet (sc): compact, stable, great for facings and plackets.
- Half double crochet (hdc): slightly more flexible but still useful.
- Slip stitch ribbing: excellent for spring and recovery.
- Back loop single crochet ribbing: sturdy and slightly elastic.
- Waistcoat stitch/center single crochet: dense and polished.
- Linked stitches: reduce holes and increase firmness.
Use with caution
- Tall stitches like double crochet or treble crochet in the band.
- Lacy textures at the actual closure edge.
- Highly dimensional post-stitch textures that add bulk and uneven tension.
A stable closure edge usually wants density, predictability, and limited distortion. Decorative edges can happen outside the actual stress line if you want ornament without sacrificing performance.
Pickup ratios: the difference between flat and flared
If you work a with-grain band by picking up stitches along a finished edge, your pickup ratio determines whether the band lies flat.
Too many pickups = rippling or flaring. Too few pickups = drawing in, tunneling, or a front edge that looks starved.
Because crochet row heights differ by stitch and individual tension, there is no one universal pickup ratio. But there are reliable starting ranges.
Practical pickup ratios by stitch height
When picking up along a row-end edge:
- For single crochet rows, start with 3 stitches picked up for every 4 row ends.
- For half double crochet rows, start with 2 stitches for every 3 row ends.
- For double crochet rows, start with 1 stitch in nearly every row end, then reduce occasionally as needed, such as 4 stitches for every 5 row ends.
When picking up along a stitch-top edge where stitches are already live or clearly defined, often you can work 1 stitch in each stitch.
These are starting points, not laws. The real test is whether the band lies flat in the same state the garment will be worn: supported by its own weight, not stretched flat on a blocking board.
A quick test swatch for pickup ratio
Make a swatch in the garment stitch, at least 20 rows tall and 30 stitches wide. Wash it as you will wash the garment. Then test three pickup ratios on the row-end side.
For example, if you have 20 row ends:
- Test pickup of 15 stitches
- Test pickup of 16 stitches
- Test pickup of 17 stitches
Work 4 rows of your intended band stitch on each test area. Hang the swatch vertically or pin it upright. The section that remains smooth without drawing in or ruffling gives you your best working ratio.
Formula for calculating pickups
If your garment edge has a measured length and your band gauge differs from the body gauge, use this:
Pickup stitches needed = edge length × band stitch gauge per inch
Example:
- Front opening length = 22 inches
- Band stitch gauge = 4.5 sc per inch
- Pickup target = 22 × 4.5 = 99 stitches
Then compare that target to actual row ends or stitches available and distribute increases or decreases in pickup frequency.
Designing band width
A band that is too narrow can look flimsy and strain around buttonholes. Too wide and it may buckle or stand away from the body.
Good starting widths:
- Light cardigan: 1 to 1.5 inches
- Classic cardigan: 1.25 to 2 inches
- Coat or heavy jacket: 1.75 to 3 inches
- Shirt-style placket: 0.75 to 1.25 inches
- Cuff closure: 0.75 to 1.5 inches
In stitch terms, approximate widths at common gauges:
- At 5 sc per inch, a 1.5-inch band = about 7 to 8 stitches
- At 4 sc per inch, a 2-inch band = about 8 stitches
- In cross-grain slip stitch ribbing, width is counted by rows rather than stitches; for a 1.5-inch band at 6 rows per inch, work about 9 rows
If your buttons are large, the band should be wide enough so the button sits comfortably without distorting the edge. A useful visual rule is:
Band width should be at least the diameter of the button, or about 75% of the diameter for small flat buttons on lightweight garments.
Buttonhole engineering: size, shape, and reinforcement
Buttonholes fail for two reasons: the opening itself stretches too much, or the surrounding fabric distorts under repeated use.
Flat buttons vs shank buttons
- Flat buttons spread pressure more evenly, but need secure sewing and sometimes a thread shank if the band is thick.
- Shank buttons sit well on thicker fabrics but concentrate stress in a smaller area, so the buttonhole and opposite band need stronger reinforcement.
How large should a crochet buttonhole be?
Do not size a crochet buttonhole exactly to the button diameter. Crochet fabric has give, and the needed opening depends on button thickness, shape, and the density of the band.
Starting guidelines:
- For a flat button, aim for a buttonhole length about 70% to 90% of the button diameter in a firm band.
- For a thick or shank button, test closer to 80% to 100% of the button diameter, depending on fabric density.
Always swatch with the actual button.
Example:
- Button diameter = 1 inch
- Firm sc band may need a hole measuring 0.75 to 0.875 inch relaxed
- Thick rounded button may need closer to 0.875 to 1 inch relaxed
Common buttonhole types in crochet
Chain-space buttonhole
This is the most common: chain a certain number, skip the same number of stitches, then re-establish the row.
Best for:
- Medium-firm bands
- Simple cardigan plackets
- Moderate button sizes
Risk:
- Chains can stretch over time, especially in slippery fibers.
To improve stability:
- Work the following row tightly into chains.
- Edge the hole with slip stitches or a whipstitched thread reinforcement.
- Use fewer chains than you think and test aggressively.
Worked slit buttonhole
You divide the row and work the two sides of the slit separately for a row or more, then rejoin.
Best for:
- Tailored bands
- Larger buttons
- Dense fabrics
Advantage:
- Often more stable than a chain-space hole.
Eyelet-style buttonhole
A small round hole made with a chain-1 or chain-2 space.
Best for:
- Tiny buttons
- Baby garments
- Cuffs and narrow plackets
Risk:
- Easy to over-stretch if used for buttons that are too large.
Reinforcing buttonholes
This is one of the most overlooked finishing steps.
Options:
- Surface slip stitch around the hole using matching yarn.
- Hand overcast or buttonhole stitch using sewing thread or fine matching yarn.
- Sew-in reinforcement on the wrong side with lightweight twill tape, ribbon, or seam tape.
- Duplicate stitch style reinforcement around the stress corners of slit holes.
For garments that will be worn often, I strongly recommend at least light reinforcement at every buttonhole, especially in superwash wool, cotton, bamboo blends, and children’s wear.
Button spacing math: where the strain actually happens
Even perfectly made buttonholes will gap if the spacing ignores body contours.
A common mistake is placing buttons at equal distances from top to bottom and calling it done. But human bodies create uneven strain. The opening may pull hardest at:
- Full bust
- Full belly or abdomen
- High hip
- Waist, if the garment is fitted
- Throat/neck if the collar is under tension
The anchor-point method
Instead of evenly spacing everything first, place buttons at the key strain points before filling in the rest.
For a cardigan, identify:
- Top anchor near the neckline or upper chest
- Bust anchor at fullest bust level
- Waist or underbust anchor if fitted
- Belly anchor at fullest abdomen if relevant
- High hip anchor if the garment ends or fits snugly there
- Bottom anchor above the hem so the hem can hang cleanly
Then distribute the remaining buttons between anchors.
Example spacing plan
Suppose the finished button band length from top usable edge to bottom usable edge is 24 inches. You want 7 buttons.
Instead of spacing every 4 inches automatically, map body landmarks:
- Top anchor at 1 inch below neckline
- Full bust at 8 inches down
- Waist at 12 inches down
- Belly/high hip at 16.5 inches down
- Bottom anchor at 22.5 inches down
That already gives 5 meaningful placements. Then add 2 buttons where the gaps are longest, perhaps at 5 inches and 19.5 inches.
Final positions from top:
- 1
- 5
- 8
- 12
- 16.5
- 19.5
- 22.5 inches
This arrangement usually performs better than blindly placing them every 3.58 inches.
Spacing formula for evenly distributed buttons
If you do want approximate even spacing between fixed top and bottom margins:
Spacing = usable band length ÷ (number of spaces)
If you have 6 buttons, there are 5 spaces between them if both ends are fixed by margins.
Example:
- Usable length = 20 inches
- 6 buttons = 5 gaps
- Spacing = 20 ÷ 5 = 4 inches
Then adjust one or two buttons to align with bust or belly strain points.
How many buttons do you need?
General guidance:
- Light cardigan: one button every 3.5 to 5 inches
- Fitted cardigan over bust: every 2.5 to 4 inches near strain area
- Coat or heavy jacket: every 3 to 5 inches, with stronger anchors
- Cuffs/plackets: enough to prevent twisting, usually 1 to 3 buttons depending on length
More buttons are not always better. Too many can stiffen a garment or create a fussy appearance. But too few invite gaping between stress points.
Turn-under facings and built-in reinforcement
If you want a closure edge that feels more tailored and resists stretching, a turn-under facing is one of the best tools available.
What is a turn-under facing?
It is an extension of the front edge that folds to the inside and is sewn down, creating a doubled band. This can be worked as part of the garment or added afterward.
Benefits:
- Doubles the thickness at the closure edge.
- Hides wrong-side pickup lines or floats.
- Provides a clean layer for sewing on buttons and reinforcing holes.
- Greatly reduces post-wear stretching.
Basic turn-under facing method
- Work or pick up a band wide enough to fold in half plus seam allowance effect.
- Create a fold line with a looser row, back-loop row, or simply a natural turning ridge.
- Fold to the inside so the finished visible band width is achieved.
- Steam or block lightly into shape.
- Sew the inner edge down with flexible but firm stitching.
Example:
- Desired finished visible band width = 1.25 inches
- Work total width closer to 2.5 inches
- Fold in half to create a clean doubled band
This is especially useful for:
- Coat fronts
- Long cardigans in drapey yarn
- Bands holding large statement buttons
- Child garments that need wash durability
Seam tape, twill tape, and ribbon support
You can also stabilize the inside of a band using a non-stretch or low-stretch support.
Good options:
- Cotton twill tape
- Petersham ribbon
- Grosgrain ribbon for firm support
- Lightweight seam tape
How to use:
- Prewash the support material if the garment will be washed.
- Cut to finished band length without stretching the crochet.
- Hand sew to the wrong side, catching stitches discreetly.
- Do not pull the tape tighter than the crochet edge.
This method is excellent for preventing vertical growth in long openings.
Step-by-step: designing a stable crochet button band from scratch
Here is the sequence I recommend when engineering a closure edge.
Step 1: Swatch the body fabric and wash it
Make a generous swatch, at least 6 x 6 inches, in the garment stitch. Wash and dry it exactly as you will treat the finished piece. Measure:
- Stitch gauge per 4 inches
- Row gauge per 4 inches
- Fabric recovery after gentle stretching
Write those numbers down.
Step 2: Swatch the band fabric separately
Use your intended band stitch and at least two hook sizes.
Measure:
- Band stitch gauge per 4 inches
- Band row gauge per 4 inches
- Recovery after stretching around a button
- Whether the fabric rolls, spreads, or grows
If the body is on a 5.0 mm hook, test the band on 4.5 mm and 4.0 mm.
Step 3: Decide orientation
Ask:
- Does the opening need elasticity or rigidity?
- Is the garment heavy?
- Does the yarn have memory?
- Will there be stress over bust or belly?
Choose with-grain, cross-grain, or faced/reinforced construction accordingly.
Step 4: Determine finished band width
Pick a width based on garment scale and button size.
Example:
- Worsted cardigan with 1-inch flat buttons
- Finished visible band width = 1.5 inches
- At 5 sc per inch, work 8 sc wide for a firm band
Step 5: Calculate pickup or attachment count
Measure the finished front opening.
Example:
- Front opening length = 23 inches
- Band gauge = 5 sc per inch
- Target stitches = 115 stitches
If your body edge has 138 row ends and your test ratio says 5 pickups per 6 row ends:
- 138 × 5 ÷ 6 = 115 pickups
That is a beautiful confirmation that your math and swatch agree.
Step 6: Mark strain points on the garment
Try the garment on or use the schematic. Mark:
- Upper chest
- Bust apex/full bust line
- Waist
- Full belly if needed
- High hip
Use removable markers directly on the opening edge.
Step 7: Plan button number and placement
Example:
- Usable closure length = 21 inches
- Need stronger closure over bust and belly
- Choose 6 buttons
Place anchors first:
- 1.5 inches below neckline
- At 7.5 inches for bust
- At 11 inches for waist
- At 14.5 inches for belly
- At 18 inches for high hip
- At 20.5 inches for lower anchor
Step 8: Make a buttonhole test strip
This is non-negotiable. Work a strip in the exact band stitch, width, yarn, and hook. Add 3 or 4 buttonhole variations.
For example, on an 8-sc-wide band:
- Version A: ch-2, skip 2
- Version B: ch-3, skip 3
- Version C: slit hole over 2 stitches
Test with the actual button after washing the strip.
Step 9: Work the first band
For a with-grain band example:
- Pick up 115 sc evenly along the edge.
- Row 1: sc across, 115 sc.
- Row 2: sc across through back loop only for subtle rib if desired, 115 sc.
- Row 3: sc to marker, form buttonholes as planned, continue across, 115 sts including chains/skipped sts matched.
- Rows 4–8: sc evenly, maintaining stitch count at 115.
If your band width target is 1.5 inches and your row gauge is 5 rows per inch, work about 7 to 8 rows.
Step 10: Work the opposite band to match
Count rows carefully and mirror placement exactly. For many makers, this is where a written checklist saves frustration.
Step 11: Reinforce before sewing buttons
Before attaching buttons:
- Weave ends securely away from stress points.
- Reinforce buttonholes if needed.
- Add inner tape or facing support if planned.
Step 12: Sew buttons with purpose
Use strong sewing thread or doubled thread appropriate to the button weight.
For flat buttons on a thick band:
- Sew with a small thread shank so the button can sit over the thickness of the opposite band without pulling.
For shank buttons:
- Catch enough of the band structure, not just superficial loops.
- Consider a small backing button on the inside for very heavy outer buttons.
Reinforcing buttons so they do not tear through crochet fabric
Crochet is open compared to woven fabric. Even dense stitches can be vulnerable to concentrated stress from a button.
Best practices
- Sew through multiple strands/legs of stitches, not just one loop.
- Use a small backing button on the inside for heavy buttons or coats.
- Add a tiny patch of matching fabric, ribbon, or dense crochet facing behind the button area if needed.
- For very thick bands, create a thread shank under flat buttons.
Backing button method
- Position the decorative button on the outside.
- Place a smaller flat button on the inside opposite it.
- Sew through both buttons and the band.
- Tension firmly but not so tightly that the fabric puckers.
This distributes force beautifully on coat fronts and long cardigans.
Troubleshooting common closure problems
Problem: The band ripples or flares outward
Causes:
- Too many pickup stitches
- Band stitch too loose
- Hook too large
- Band too wide for the fabric support
Fixes:
- Reduce pickups by 5–10% and retest.
- Drop hook size by 0.5–1.0 mm.
- Use a denser stitch like sc instead of hdc or dc.
- Add internal support tape if mild waviness remains.
Problem: The band tunnels or draws inward
Causes:
- Too few pickup stitches
- Band worked too tightly
- Cross-grain attachment too compressed
Fixes:
- Increase pickups gradually, for example add 1 stitch every 8 to 12 row ends in the next test.
- Go up one hook size if the band is stiff and cupping inward.
- Recalculate using actual band gauge rather than eyeballing.
Problem: The cardigan gaps at the bust
Causes:
- No button at the fullest point
- Band too stretchy
- Buttonholes too large
- Garment has insufficient ease distribution
Fixes:
- Add or reposition a button at the full bust line.
- Reinforce the band and holes.
- Use smaller buttonholes.
- Consider hidden snaps between buttons for extra security.
Problem: The lower front flips open or flares near the hem
Causes:
- Bottom button too high
- Too many pickups near hem edge
- Hem/body shaping pushes the band outward
Fixes:
- Add a lower anchor button above hem.
- Check pickup ratio in the lower section specifically.
- Work short-row shaping or slight band taper if the body widens.
Problem: Buttonholes stretch out after wear
Causes:
- Chain-space holes too large
- Soft yarn with low recovery
- No reinforcement
Fixes:
- Rework with a shorter chain-space or slit hole.
- Add hand-sewn reinforcement around the existing holes.
- Wash and dry flat, then reassess before deciding the strip is lost.
Problem: The whole front edge grows after washing
Causes:
- Fiber growth, especially superwash, cotton, alpaca, bamboo blends
- Band worked too loosely
- No vertical stabilization
Fixes:
- Add seam tape or ribbon on wrong side.
- Rework with a smaller hook and denser pattern if severe.
- In future, use cross-grain rib or doubled facing for drapey fibers.
Problem: The band twists relative to the body
Causes:
- Uneven pickups n- Attachment tension varies
- One front edge is longer than the other after blocking
Fixes:
- Measure and mark quarter points before picking up.
- Match markers between body edge and band.
- Reblock garment fronts symmetrically before adding bands.
Special cases: cuffs, sleeve plackets, and coat fronts
Cuffs with buttons
Cuff closures deal with concentrated stress and repeated manipulation.
Recommendations:
- Use dense sc or slip stitch rib.
- Keep buttonholes small and reinforced.
- For a cuff circumference under 9 inches, 1 to 3 buttons is typical.
- Build in enough overlap that the cuff does not strain at the wrist.
Example cuff placket:
- DK yarn, 3.5 mm band hook
- 1-inch wide band = about 5 sc or 6 rows of slip stitch rib
- 2 small buttons spaced 1.25 inches apart on the most stable section
Sleeve plackets
If you are borrowing from shirt construction, a faced placket works beautifully in crochet. A narrow folded strip is often more stable than a simple chain-space edging.
Coat fronts
Coats need stronger infrastructure.
Recommendations:
- Wider bands: 2 to 3 inches common
- Turn-under facing or internal ribbon support
- Backing buttons for heavy closures
- Larger but reinforced buttonholes
- More anchors to manage weight
I rarely trust an unsupported loose crochet band on a long heavy coat. The extra finishing work pays off every single time.
Variations and advanced options
Hidden snap support
Buttons can be decorative while snaps carry some of the strain.
Best for:
- Bust gap prevention
- Heavy bands with spaced-apart buttons
- Situations where you want a clean outer look but more hold
Faux button band over zipper or snap tape
For children’s wear, outerwear, or high-stress garments, you can build a crochet button band over a hidden structural closure.
Elastic thread reinforcement
Very fine elastic can be woven or stitched invisibly into the edge of a band, especially around cuffs or neck closures. Use sparingly and test carefully so the band does not pucker.
Tapered bands
Sometimes the same band width from top to bottom is not ideal. A coat may want a slightly wider upper front and narrower lower section, or vice versa. You can shape the band subtly while maintaining stable stitch counts in key areas.
Decorative outer edge, structural inner edge
One of my favorite strategies is to keep the actual closure zone dense and stable, then add decorative texture or edging outside that line. That way you get beauty without asking a lacy shell edge to behave like tailoring.
A sample planning worksheet
When I design a crochet closure, I write down the following:
- Yarn fiber and recovery notes
- Body hook size
- Band hook size
- Body gauge after wash
- Band gauge after wash
- Front opening finished length
- Chosen band orientation
- Pickup ratio tested
- Total pickup stitch count
- Finished band width
- Button size and type
- Buttonhole test winner
- Number of buttons
- Anchor positions in inches from top
- Reinforcement method
- Whether a facing/tape/backing button is needed
This sounds fussy until you’ve remade a button band twice. Then it feels wonderfully efficient.
The biggest mistakes to avoid
If you want the shortest list of what not to do, here it is:
- Don’t skip washing your swatches.
- Don’t use the same loose hook size as the body without testing.
- Don’t assume evenly spaced buttons are automatically the best choice.
- Don’t put the first real strain point between buttons.
- Don’t trust a large chain-space hole in a drapey yarn without reinforcement.
- Don’t sew heavy buttons to unsupported open crochet fabric.
- Don’t rely on blocking alone to fix structural instability.
Final takeaways
Good crochet closures are not just decorative finishes. They are load-bearing parts of a garment. The best button bands combine the right grain direction, the right stitch density, the right pickup ratio, and the right reinforcement for the fiber and use case.
If you remember only a handful of things, make them these:
- Choose band orientation based on stress and recovery, not habit.
- Swatch the band separately and wash it.
- Pick up stitches by tested ratio, not intuition alone.
- Use a smaller hook and denser stitch for stability.
- Place buttons at strain points first, then fill in the gaps.
- Reinforce buttonholes and heavy buttons.
- Use facings, tape, or backing buttons when the fabric or garment weight calls for them.
A button band is a narrow strip, but it carries enormous responsibility. When it is engineered well, the whole garment settles into itself. The fronts hang straight. The closure feels trustworthy. The buttons sit where they should. And the piece keeps looking like itself after washing, wearing, and buttoning and unbuttoning through real life.
That kind of reliability is not luck. It is design. And once you start treating closure edges with that level of care, your crochet garments look better, wear better, and last longer.