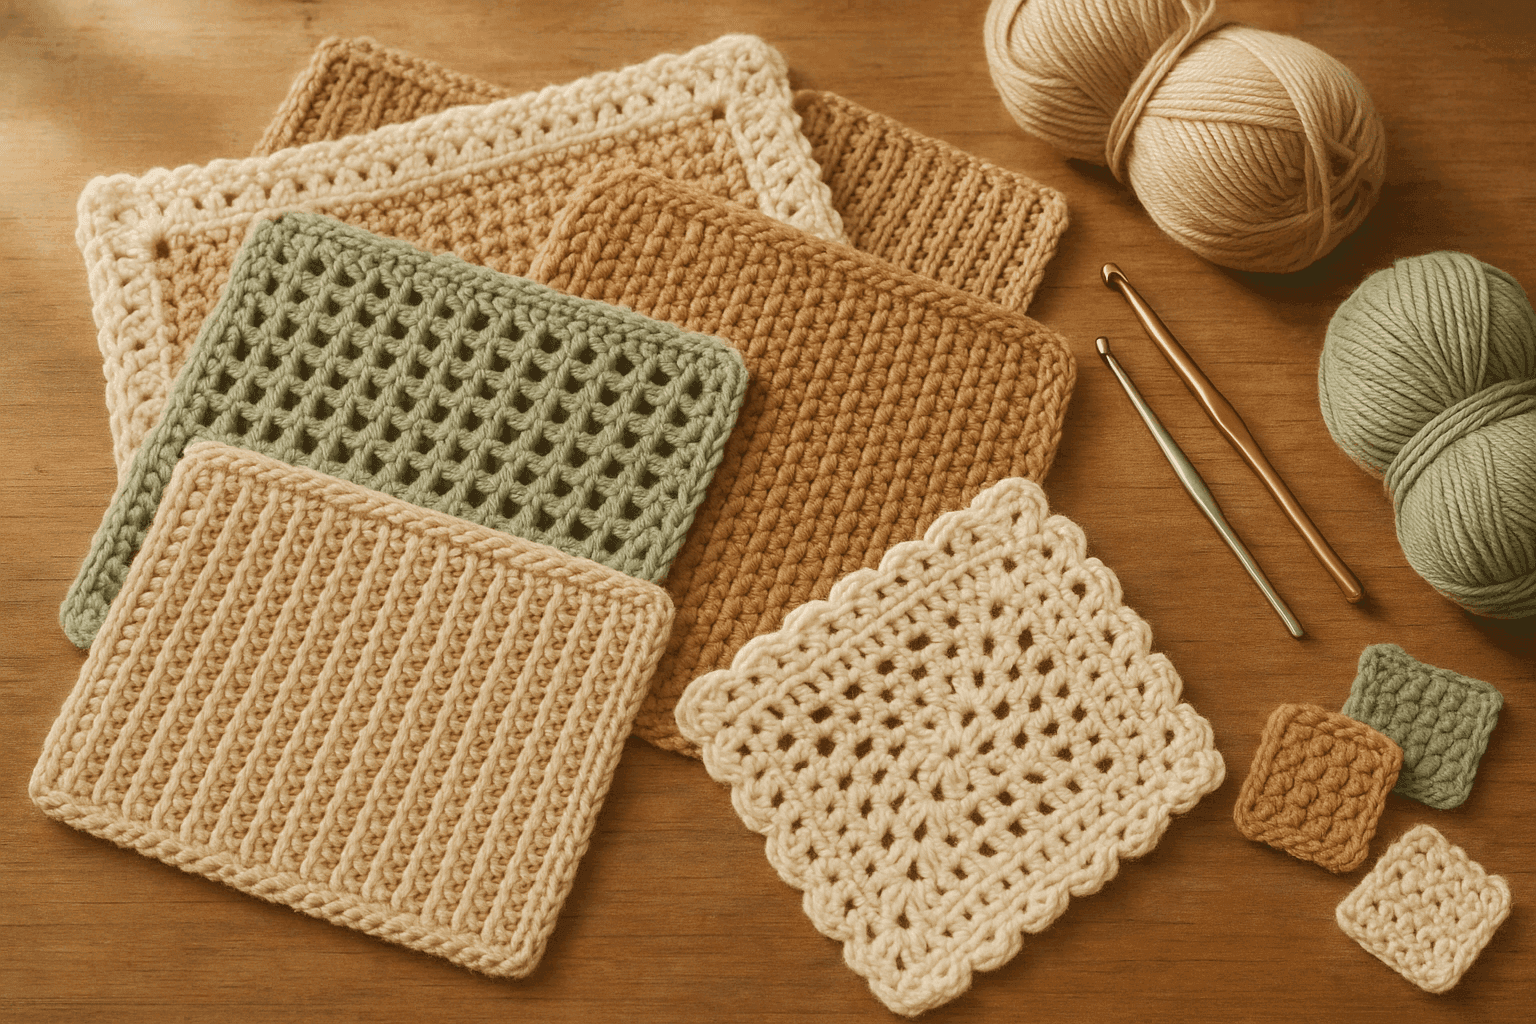
There is a particular moment many of us reach sooner or later in crochet: you make a fabric that is perfect in one way and completely wrong in another. The ribbed band is beautifully stretchy, but the body attached to it bags out. The mesh panel drapes like a dream, but the shoulder seam grows after an hour of wear. A bag looks gorgeous in a textured stitch, then slumps the first time it holds anything heavier than a phone and lip balm. Or perhaps a sculptural piece has exactly the surface you want, but not nearly enough internal structure to hold the shape.
That is usually the point where crochet stops feeling like “just stitches” and starts feeling like fabric engineering.
Compound-fabric lamination is one of the most useful ways to think like a fabric engineer while still working with familiar crochet tools. In simple terms, it means combining two or more crochet fabrics, or a crochet fabric with another textile layer, so the finished piece behaves as a composite. Instead of asking one stitch pattern to provide stretch, recovery, drape, opacity, strength, warmth, surface interest, and stability all at once, you assign those jobs to different layers or stitch fields and then connect them deliberately.
This is especially powerful in crochet because our fabrics are so structurally varied. A front-post rib and an open chain mesh do not merely look different. They resist force differently, hang differently, compress differently, and react to washing differently. Once you begin pairing them on purpose, you can make garments with supportive waist zones and fluid skirts, bags with handsome outer texture and hidden load-bearing interiors, or sculptural pieces with decorative skin over a shaping core.
The core idea of this article is that lamination is not just “sewing two pieces together.” It is deciding how the layers will share stress, where they may move independently, and where they must behave as one fabric. We will cover how to choose compatible stitch structures, how to anchor them selectively, how to manage floats and trapped yarns, how fiber content changes the outcome, how to account for shrinkage and color interaction, and how to plan transitions cleanly at seams and edges.
What compound-fabric lamination means in crochet
In crochet, lamination can take several forms:
- Full-face coupling: two fabrics are joined over most of their surface so they act almost like one thicker cloth.
- Selective anchoring: two fabrics share edges and a few strategic anchor points, but remain partially independent between anchors.
- Zoned layering: some areas are laminated for support or opacity, while others remain single-layer for drape or ventilation.
- Functional inner and outer layers: an inner layer provides shape, recovery, or strength; an outer layer provides the visible texture or color effect.
- Hybrid stitch-field coupling: two stitch patterns are worked together in one piece, either simultaneously or in sequence, so one stabilizes the other.
If you come from sewing, think of the difference between a fully fused interfacing, a bag lining tacked at seams only, and an underlining basted to a fashion fabric. Crochet can mimic all of these concepts, but because the structure is loop-based, the way force transfers between layers matters even more.
Why different stitch fields behave so differently
Before combining fabrics, it helps to name what each one contributes. Crochet fabrics differ across several functional qualities:
Stretch direction
A row-wise rib made with back-loop-only single crochet or front-post/back-post work often has strong lateral stretch and decent recovery. A dense single crochet panel tends to stretch less and resist distortion more. A chain mesh can expand dramatically under gravity, especially on the bias.
Drape
Tall stitches and open spacing generally create better drape than short, packed stitches. Fiber also matters: wool can be springy, cotton can hang heavily, and bamboo blends can become extremely fluid.
Stability under load
This is the big one in bags, straps, and structural garments. Dense stitches in non-slippery fibers resist deformation better. Open or tall stitches can become longer under sustained weight.
Recovery
Some fabrics bounce back after stretching. Others grow and stay grown. Elastic behavior comes from both the stitch architecture and the fiber.
Surface thickness and thermal behavior
A puff-stitch outer layer traps air. A dense inner layer blocks wind. A filet mesh breathes. Stack them, and you can tune warmth and comfort.
Opacity and show-through
An open outer layer over a solid inner can create lace-like effects without sacrificing modesty or utility.
When you laminate, you are not trying to erase these differences. You are using them.
The three planning questions to ask first
Whenever you plan a laminated crochet fabric, answer these questions before swatching in earnest:
-
What job does each layer do?
Be specific. “Outer texture” is a job. “Prevent strap stretch” is a job. “Hide carried floats” is a job. -
Where should the layers move together, and where should they move independently?
A waistband and body may need shared edge control but independent movement across the torso. A bag outer and lining may need almost total coupling at the base and handles, but only occasional anchoring on the sides. -
Which layer carries the load?
If one layer stretches more, the less stretchy layer may eventually absorb most of the stress. That can be good, but only if planned.
These questions prevent the most common mistake in compound crochet: combining fabrics because their appearance seems compatible, rather than because their behavior is compatible.
Swatching for lamination: the non-negotiable step
For ordinary projects, some crocheters skip swatching. For laminated fabrics, skipping it is asking for warped edges, bubbling, torque, growth, or puckering.
Make at least a 6 x 6 inch / 15 x 15 cm swatch of each stitch field, ideally larger. Then make a laminated sample from the same yarns and hook sizes.
Recommended starting hook sizes by yarn weight
These are only starting points. Laminated fabrics often benefit from a slightly smaller hook on the stabilizing layer.
- Fingering weight: 2.25-3.25 mm
- Sport weight: 3.0-3.75 mm
- DK weight: 3.5-4.5 mm
- Worsted weight: 4.5-5.5 mm
- Aran weight: 5.0-6.0 mm
- Bulky weight: 6.0-8.0 mm
If pairing two layers in the same yarn:
- Use the standard hook for the drape layer.
- Try 0.5 mm smaller for the support layer.
Example: a DK mesh outer layer may look best on a 4.0 mm hook, while a dense single crochet inner support layer may perform better on a 3.5 mm hook.
What to record from the swatch
For each layer, note:
- Stitch and row gauge over 4 inches / 10 cm
- Relaxed width and height
- Width and height after gentle vertical hanging for 12-24 hours
- How it looks after blocking
- Any edge curl, skew, or bias
- Recovery after 10-15% stretch
For the laminated swatch, note:
- Does one layer buckle?
- Do the edges align after washing?
- Does the fabric feel boardy or balanced?
- Are anchor points visible on the public side?
- Does color from one layer visually dominate through the other?
Understanding load-sharing between layers
Load-sharing is the heart of compound-fabric lamination. If two layers are joined, force does not automatically distribute evenly. Usually one layer takes more strain because it is shorter, denser, less stretchy, or more firmly anchored.
A useful practical rule
- The shorter or tighter layer tends to become the controlling layer.
- The more elastic layer tends to absorb movement first, then transfer stress later.
- The more frequently anchored layer behaves as though it is more “in charge.”
Imagine a ribbed inner waistband laminated to a decorative shell stitch outer waistband.
- If the ribbed layer is slightly shorter and the shell layer is anchored every row end, the rib controls fit and the shell rides along.
- If the shell layer is longer but anchored tightly at top and bottom, it may ripple or bubble because it has excess length with nowhere to go.
How much negative or positive ease between layers?
A good starting point:
- Supportive inner layer for garments: 5-12% smaller circumference than outer layer, depending on fiber elasticity.
- Bag support inner layer: equal or 2-5% smaller than outer layer.
- Decorative open outer over solid inner: equal finished dimensions after blocking.
- Thermal inner under decorative outer: equal or 2-3% smaller so the outer does not collapse inward.
If you are unsure, begin with equal dimensions at blocked size and manipulate behavior via anchor frequency rather than large dimensional differences.
Selective anchoring methods
How you join layers is at least as important as which layers you choose. Here are the main methods.
1. Edge-only anchoring
The layers are joined at perimeter edges, seams, or hems, with no internal tacking.
Best for
- Outer lace over opaque underlayer
- Capelets, overlays, and draped garments
- Pieces where independent movement adds softness
Pros
- Maximum drape
- Clean inner space between layers
- Least chance of visible anchor distortion
Cons
- Layers may shift relative to each other
- Heavy use can cause twisting or sagging
- Less suitable for load-bearing items
Example stitch planning
Suppose both layers are 80 stitches wide.
- Outer layer: chain mesh worked to a width of 80 sts equivalent
- Inner layer: half double crochet panel measuring the same blocked width
- Join sides with 1 slip stitch through both layers every row end
- Join hem with 1 single crochet through both layers in each stitch
- Leave upper body free except at shoulder seams or neckline
2. Grid anchoring
Layers are joined at regular intervals across the surface.
Best for
- Bags
- Cushions
- Structured garment zones like yokes or waist panels
- Sculptural work
Pros
- Better load distribution n- Prevents shifting and sagging
- Keeps layers aligned after wash and wear
Cons
- Too much anchoring can kill drape
- Visible dimpling if tension is too tight
Starting anchor spacing
- Light drape retention: every 2-3 inches / 5-7.5 cm
- Moderate support: every 1.5-2 inches / 4-5 cm
- Heavy support or bags: every 1 inch / 2.5 cm or at every major stitch repeat
Example
A bag panel measuring 40 stitches x 36 rows in outer texture and matching inner support.
- Place anchor columns at stitches 1, 10, 20, 30, 40
- Place anchor rows at rows 1, 12, 24, 36
- Work small anchoring slip stitches or sewn tacks at intersections
- Total anchors: 20 points across panel
That is enough to distribute stress without fully quilting the surface.
3. Structural-line anchoring
Join layers only along the lines where force naturally concentrates.
Best for
- Shoulder seams
- Bag handle insertion zones
- Bust darts or side support panels
- Corset-inspired shaping
Pros
- Efficient and elegant
- Maintains flexibility elsewhere
- Good for targeted reinforcement
Cons
- Requires accurate stress prediction
- Uneven strain if reinforcement ends abruptly
Good structural lines to anchor
- Neckline edges
- Armhole edges
- Waistline seam
- Side seams
- Base corners of bags
- Handle attachment paths
4. Spot tacking with hidden catches
Tiny invisible joins catch just one loop or one bar from the outer layer and secure to a corresponding point in the inner layer.
Best for
- Delicate outer textures
- Lace overlays
- Colorwork fronts with hidden support layer
Tip
Use matching sewing thread or very fine yarn only if it behaves compatibly in washing. If using the project yarn, split it or use a finer strand to reduce bulk.
Managing floats and trapped yarn paths
In layered work, “floats” may mean colorwork carries, long connecting strands, or the unanchored spans between coupled points. Poor float management can create snags, shadow lines, and restricted stretch.
General principles
- Keep long carries off exposed surfaces if possible.
- Trap or couch long floats behind the stable layer.
- Never let a hidden float become shorter than the visible fabric span, or it will pucker the surface.
- In stretch zones, avoid rigid floats crossing the direction of stretch.
Practical float limits
- In non-stretch decorative zones, avoid exposed floats longer than 1.5 inches / 4 cm.
- In active stretch zones like cuffs or waistbands, keep hidden carries under 0.75 inch / 2 cm before trapping.
- For bag interiors, longer floats are acceptable only if fully contained between layers and anchored so they cannot snag.
A reliable method
If working a decorative outer layer with intermittent color or motif changes over a stable inner layer:
- Crochet the inner layer in a plain dense stitch.
- Work the outer layer separately or concurrently.
- Carry motif floats on the wrong side of the outer layer.
- At each anchor line, catch the float lightly to the inner layer without pulling it taut.
- Test stretch and drape before continuing.
Fiber compatibility: one of the biggest make-or-break factors
You can laminate different fibers beautifully, but you must anticipate their differences.
Good compatible pairings
Wool + wool blend
Usually excellent for garments. Similar blocking behavior, decent memory, and forgiving recovery.
Cotton outer + cotton/linen or cotton inner
Good for bags, home goods, and warm-weather garments if you account for weight and limited recovery.
Acrylic + acrylic/wool blend
Often practical for easy-care pieces, though heat sensitivity during finishing varies.
Wool outer + silk/wool or alpaca/wool inner
Lovely for thermal and drape combinations, but swatch carefully for growth.
More challenging pairings
Superwash wool + non-superwash wool
They can grow and bounce back differently after washing.
Cotton + wool
Possible, but they respond differently to moisture, heat, and gravity. Cotton may lengthen while wool springs back.
Linen + elastic ribbing yarn with high recovery
The linen can relax and drop while the rib remains taut.
Bamboo-heavy blends + dense acrylic support
Very different drape and friction behavior can cause shear and slippage between layers.
Differential shrinkage checklist
Before committing, wash and dry your swatches exactly as the finished object will be treated. Compare:
- Width change %
- Length change %
- Thickness change
- Surface bloom or halo
- Twist or skew
A difference greater than about 3-5% in blocked dimensions between layers deserves redesign, especially for full-face lamination.
Color interaction across stacked fabrics
Layering changes color perception. An openwork outer layer lets the inner layer act like a shadow or glow. Even dense fabrics can shift appearance if fibers are lofty or if the outer stitch has relief.
What to consider
- Contrast: high contrast emphasizes stitch openings and texture.
- Value match: similar lightness creates subtle depth.
- Halo fibers: mohair-like fibers blur the line between layers.
- Shine differences: matte under glossy reads very differently than glossy under matte.
Easy color strategies
- Open dark outer over light inner = graphic, pronounced stitch pattern
- Open tonal outer over slightly deeper inner = depth without harsh contrast
- Decorative cream outer over matching solid cream inner = texture-focused elegance
- Bright accent inner seen through neutral mesh outer = modern athletic feel
Swatch tip
Hold the layered swatch at arm’s length and in daylight. Then crumple it lightly and let it hang. Some combinations that look beautiful flat become visually muddy once folds overlap.
Step-by-step: planning and building a laminated crochet fabric
Let’s walk through a practical process you can adapt to garments, bags, and sculptural pieces.
Step 1: Define the performance map
Sketch the piece and label zones by function.
For a cardigan, for example:
- Cuffs: stretch and recovery
- Front bands: stability and button support
- Shoulders: anti-growth support
- Body panels: drape
- Lower back hem: shape retention
For a tote bag:
- Base: rigidity and abrasion resistance
- Side walls: moderate structure
- Upper edge: anti-stretch support
- Handle insertion area: heavy reinforcement
- Exterior: decorative texture
For a sculptural basket:
- Base: firm support
- Mid-walls: controlled curve
- Rim: memory and anti-collapse
- Exterior relief: decorative only
Step 2: Choose stitch fields deliberately
A few high-value combinations:
Elastic + stable
- Inner: back-loop-only single crochet rib
- Outer: plain half double crochet or decorative shell pattern
- Use for waistbands, cuffs, neckbands
Dense support + fluid drape
- Inner: single crochet or linked double crochet
- Outer: V-stitch, mesh, or filet
- Use for skirts, overlays, bag sides
Thermal inner + decorative outer
- Inner: waistcoat stitch, extended single crochet, or moss stitch
- Outer: post-stitch cables, puffs, or lace texture
- Use for cold-weather accessories, coats, vessel forms
Hidden structural scaffold + statement surface
- Inner: tightly worked plain panel
- Outer: freeform textures or motif joins
- Use for art pieces and dimensional objects
Step 3: Match dimensions through gauge math
This is where stitch counts matter.
Suppose your outer drape panel in DK yarn on a 4.0 mm hook gives:
- 18 stitches and 10 rows = 4 inches / 10 cm
Your inner support panel in the same yarn on a 3.5 mm hook gives:
- 22 stitches and 14 rows = 4 inches / 10 cm
You want a finished panel width of 16 inches.
Outer layer stitch count
18 sts per 4 in = 4.5 sts per inch
16 in x 4.5 = 72 stitches
Inner layer stitch count
22 sts per 4 in = 5.5 sts per inch
16 in x 5.5 = 88 stitches
Even though the layers finish at the same width, their stitch counts differ. That is normal. You will join by measured span, not one-to-one stitch correspondence.
Now suppose you want the inner support layer 6% smaller for mild control:
16 in x 0.94 = 15.04 inches target
15.04 x 5.5 = 82.72, round to 83 stitches or adjust to stitch repeat, perhaps 84 stitches.
This kind of math is the backbone of successful lamination.
Step 4: Make and block both layers before final coupling when possible
For complex fabrics, it is often easiest to complete each layer first, block them, then couple them. This reveals mismatch early.
Exceptions:
- Simultaneous crochet-through-both-layer methods
- Very firm structures where one layer must shape the other as you work
- Tiny accessories where separate blocking is impractical
Step 5: Decide anchor frequency
Use the behavior map, not aesthetics alone.
Starting recommendations
- Garment overlay with free drape: perimeter only + shoulder and side seam tacks
- Waist support panel: perimeter + vertical anchor lines every 1.5-2 inches
- Tote bag body: perimeter + grid anchors every 1 inch near base, every 2 inches elsewhere
- Sculptural vessel: dense anchoring along shaping curves and rim, lighter in decorative zones
Step 6: Work the coupling stitches
Common coupling stitches include:
- Slip stitch through both fabrics
- Single crochet through both fabrics
- Mattress-style sewn joins at selected points
- Surface slip stitch used decoratively and structurally
- Needle-woven tacks catching bars or back loops only
Tension rule
Anchoring stitches should sit firmly enough to prevent drift, but loosely enough that they do not draw the two layers into puckers. A good test is that the laminated fabric should bend smoothly around your hand without seeing anchor dimples from the public side.
Step 7: Finish edges and transitions cleanly
The edge is where laminated fabrics either look intentional or improvised.
Clean edge options
- Enclose both layers with a single crochet border
- Join layers, then work a crab stitch edge for firmness
- Use an applied i-cord style crochet edge for a polished garment finish
- Fold one layer over the other before edging to conceal raw-looking joins
For bags or sculptural pieces, a reverse single crochet (crab stitch) or a tight slip stitch round can add valuable edge stability.
Seam and edge transitions between different fabric behaviors
The trickiest spots are where one area is laminated and the next is not, or where the controlling layer changes.
Transition principle 1: taper support gradually
If a bag side is fully reinforced at the base but not at the top, do not stop all anchors in one row. Reduce anchor density over several rows.
For example:
- Rows 1-8 from base: anchors every 1 inch
- Rows 9-14: anchors every 2 inches
- Rows 15-20: perimeter only
This avoids a hard hinge line.
Transition principle 2: match edge tension before joining
If a ribbed panel edge is much shorter than a mesh panel edge, add a regulating round.
Example:
- Ribbed edge has 48 row ends over 12 inches
- Mesh panel edge has 60 stitch spaces over the same span
- Work a transition round on one or both edges to normalize counts, perhaps 54 single crochet evenly spaced on each, then join 54 to 54
Transition principle 3: hide the control layer where possible
If an inner support panel ends at bust level or at a bag upper edge, use:
- A decorative band
- A folded hem casing
- A surface braid or slip stitch line
These details disguise the point where the fabric architecture changes.
Troubleshooting common problems
Problem: Bubbling or rippling between layers
Causes
- One layer is too large
- Anchors too far apart for the excess
- Differential blocking changed dimensions
Fixes
- Reduce the larger layer by 3-8%
- Add more anchor points in a grid or structural lines
- Reblock both layers to measured dimensions before rejoining
- If minor, convert excess into deliberate ease concentrated at drape zones
Problem: Puckering at anchor points
Causes
- Anchoring too tightly
- Anchor spacing too dense for a drape fabric
- Float or carry strand too short behind outer layer
Fixes
- Rework anchors one hook size looser or with a needle tack instead of crochet-through join
- Increase anchor spacing
- Lengthen hidden carry paths slightly
Problem: Outer layer twisting around inner layer
Causes
- Edge-only anchoring on a high-friction use item
- Bias in one stitch field
- Asymmetrical stretch direction
Fixes
- Add structural-line anchors at side seams or center lines
- Reorient one layer so both stretch directions align appropriately
- Block out bias before final assembly
Problem: Bag still stretches despite lining layer
Causes
- Decorative outer layer still carries handle load
- Reinforcement not connected into handle path
- Inner layer too soft or too open
Fixes
- Route handles through or into the support layer, not just the outer shell
- Add dense anchor columns from handle base to bag base
- Replace inner stitch with tighter single crochet, linked stitches, or even corded reinforcement band
Problem: Garment feels stiff and board-like
Causes
- Layers both too dense
- Anchored too frequently across whole surface
- Hook too small on both layers
Fixes
- Open one layer with taller stitches or chain spaces
- Reduce anchor frequency outside high-stress zones
- Use a larger hook for the visible drape layer
Problem: Differential shrinkage after washing
Causes
- Fiber mismatch
- Incompatible finishing method
Fixes
- Always pretest laundering on swatches
- If mismatch is mild, reshape while damp and dry flat under measurement control
- If mismatch is severe, separate and redesign with more compatible fibers or looser anchoring
Problem: Inner layer shadowing looks muddy
Causes
- Color values too similar without enough contrast in hue
- Halo or shine interference
- Openwork too busy over mottled underlayer
Fixes
- Simplify one layer n- Increase value contrast
- Use solid underlayer under complex outer texture
Variations for garments, bags, and sculptural crochet
Garments: support where it matters, drape where it flatters
Waist-stabilized sweater or dress
- Inner waist panel: BLO single crochet rib, worked to 10-15% negative ease depending on yarn elasticity
- Outer body: drapey half double crochet or mesh with zero or slight positive ease
- Anchor at side seams, waistline, and every 1.5-2 inches across center front/back if more support is needed
Shoulder-stable cardigan
- Inner shoulder yoke: dense linked double crochet or single crochet strip
- Outer yoke/body: decorative lace or textured stitch
- Extend anchors from neckline across shoulder to upper armhole to reduce garment growth
Opaque-under-lace summer top
- Inner layer: light cotton camisole panel in mesh-tightened stitch such as moss or fine hdc
- Outer layer: open lace motif field
- Perimeter anchoring only at neckline, armholes, side seams, and hem for soft movement
Bags: hidden engineering for visible beauty
Structured tote
- Outer layer: textured stitch pattern, maybe bobbles or post-stitch columns
- Inner layer: firm single crochet in cotton or cotton blend on a hook 0.5-1.0 mm smaller
- Base panel fully laminated with anchors every 1 inch
- Side walls laminated every 2 inches
- Top edge enclosed with 2 rounds of single crochet or 1 round single crochet plus crab stitch
Soft slouch bag with anti-sag base
- Outer body mostly independent for drape
- Inner base and lower third fully reinforced
- Transition from dense anchoring to perimeter-only over 6-10 rows
Market bag with stretch control band
- Main body can remain stretchy mesh
- Add internal dense upper band and handle path reinforcement to prevent top-edge distortion
Sculptural pieces: form from layered behavior
Basket or vessel
- Inner layer: tightly worked waistcoat stitch or single crochet cylinder
- Outer layer: decorative relief texture, motifs, or surface embellishment
- Laminate heavily at base and rim, lightly at wall midsection if some spring is desired
Wearable sculpture or avant-garde collar
- Inner scaffold: firm geometric panels
- Outer skin: lace, ruffles, bullion-like texture, or freeform motifs
- Use selective anchoring to let surface volume stand away from support frame
Plush or amigurumi armor effect
- Inner form: standard dense amigurumi fabric
- Outer shell: segmented decorative plates attached along seam-like lines only
- Gives mobility while preserving a structured visual surface
Pattern-planning strategies that save frustration
Use a behavior map in your notes
Instead of only charting stitch pattern, chart function. Mark areas as:
- S = stretch
- D = drape
- T = thermal
- R = reinforcement
- O = opacity
Many design errors disappear once you can see where conflicting behaviors meet.
Build from the load path outward
In bags, start with handle path, upper edge, and base. In garments, start with shoulders, neckline, waistband, or bust support zones. The decorative layer should respect the structural path, not fight it.
Normalize counts at joining lines
When joining unlike stitch fields, do not force mismatched counts.
Example:
- Rib panel edge: 36 row ends
- Mesh body edge equivalent: 44 spaces
Work a normalization round:
- Increase rib edge to 40 sc evenly across
- Decrease mesh edge to 40 sc evenly across
- Join 40 to 40
This simple step prevents waviness better than almost anything else.
Keep the stretchiest direction intentional
If one layer stretches horizontally and the other vertically, you may accidentally build torsion into the piece. Align the directions according to function:
- Waistbands: circumferential stretch
- Shoulder stabilizers: low stretch along shoulder length
- Bag sides: limited vertical growth
- Decorative overlays: freedom where folds should form
Sample formulas you can reuse
Anchor spacing formula for garments
For a support zone width in inches, begin with:
Number of anchor columns = width in inches / 2, rounded up + edge anchors
Example: 12-inch front panel
12 / 2 = 6 interior spacing points approximately
Add edge anchors = about 8 anchor columns total including edges
Anchor spacing formula for bags
For medium-load areas:
Anchor spacing = 10% of panel width, but no more than 2 inches
So a 14-inch-wide bag panel gets anchor columns roughly every 1.4 inches.
Inner support width for mild control garment zones
Inner width = outer width x 0.94 to 0.97
Use closer to 0.94 for elastic wool ribs, closer to 0.97 for cotton or lower-recovery fibers.
Common mistakes to avoid from the start
- Choosing two beautiful stitch patterns without testing their blocked dimensions
- Anchoring every stitch because “more secure” feels safer
- Ignoring row gauge mismatch between layers
- Letting decorative outer layers bear handle or strap stress directly
- Mixing fibers with wildly different wash behavior
- Failing to regulate stitch counts at transition lines
- Carrying hidden floats too tightly in stretch areas
- Ending reinforcement abruptly instead of tapering it away
A practical mini-case study
Let’s say you want to design a crocheted crossbody bag with a richly textured outer shell and a non-sagging body.
Materials
- Worsted cotton for both layers
- Outer hook: 5.0 mm
- Inner hook: 4.0 mm
Swatch results
Outer textured stitch:
- 16 sts x 14 rows = 4 inches
Inner single crochet support:
- 20 sts x 18 rows = 4 inches
Finished front panel target
- Width: 12 inches
- Height: 10 inches
Calculated counts
Outer width: 12 x 4 sts/in = 48 sts
Inner width: 12 x 5 sts/in = 60 sts
Outer height: 10 x 3.5 rows/in = 35 rows
Inner height: 10 x 4.5 rows/in = 45 rows
You make both panels, block lightly, and join:
- Full perimeter in single crochet through both layers
- Base reinforcement row worked twice around lower edge
- Vertical anchor columns at 0, 3, 6, 9, and 12 inches
- Horizontal anchor rows at base, 3 inches up, 6 inches up, and top edge
Handle tabs are sewn through the inner support first, then through outer texture second, then boxed with crochet edging at the top. This means the load path reaches the support layer directly instead of relying on the textured surface.
The result is a bag that still looks textural and handcrafted, but behaves more like engineered composite fabric.
Final takeaways
Compound-fabric lamination is one of the most exciting ways to expand crochet beyond a single all-purpose fabric. It gives you permission to stop asking one stitch field to do impossible jobs and instead let multiple structures cooperate.
The key is deliberate planning:
- Choose layers by behavior, not only by appearance.
- Swatch and block every candidate fabric.
- Decide clearly which layer carries the load.
- Use anchor frequency to tune independence versus unity.
- Respect fiber compatibility and wash behavior.
- Normalize stitch counts at joins and taper transitions gradually.
If you keep those principles in mind, you can build crocheted garments that hold shape where needed and flow where wanted, bags that are attractive without being floppy, and sculptural work with real internal logic. In other words, you start designing crochet as a composite material rather than a single sheet of stitches.
And once you start seeing crochet this way, an enormous range of design solutions opens up. The too-stretchy panel, the too-stiff hem, the slouchy bag, the unsupported yoke, the collapsing basket—these stop being frustrating failures and become engineering prompts. You do not need one miracle stitch. You need the right partnership between fabrics.