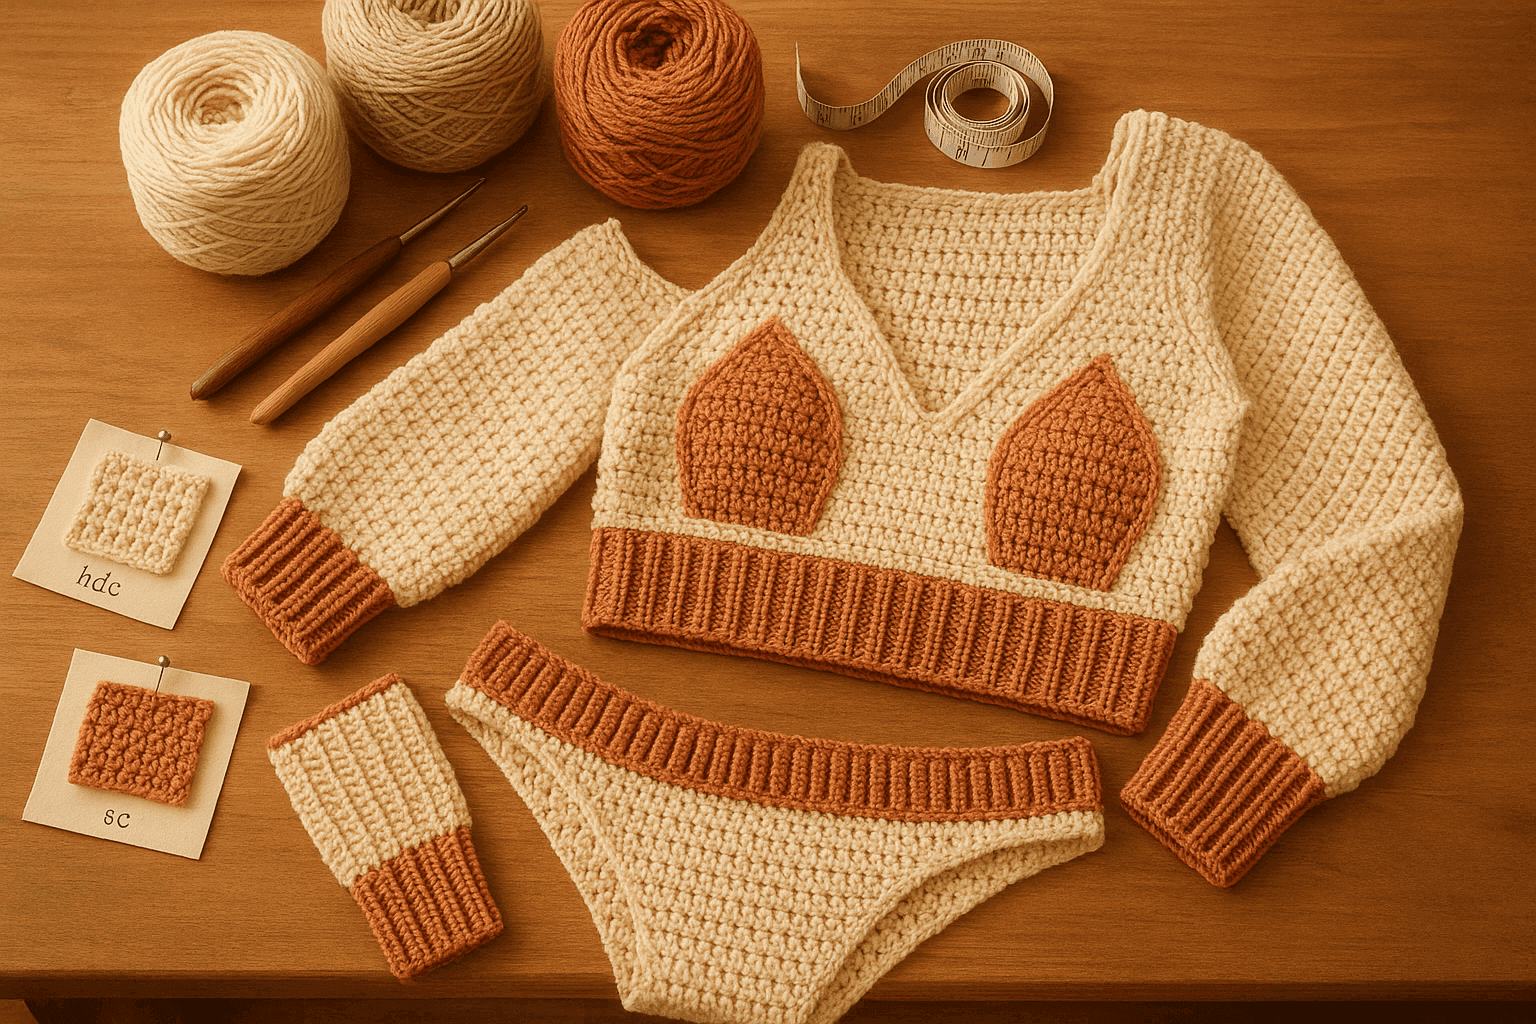
There is a particular kind of disappointment that every garment crocheter eventually meets: you finish a piece that looks beautifully structured on the table, but once it goes on the body, the waistband sags, the underbust band flips, the cuffs relax after an hour, or the “shaping” panel behaves more like decoration than support. The instinctive fix is often to go down a hook size, pull the stitches tighter, or make the whole section smaller. Sometimes that helps for ten minutes. Then the fabric either becomes uncomfortable, loses rebound, or simply stretches right back out where it matters most.
That is where compression zones become one of the most useful ideas in serious crochet garment design. Instead of shrinking a whole piece and hoping it clings, you engineer specific areas to hold, recover, and guide the garment on the body. You create fabrics that resist extension in one direction, recover after wear, distribute pressure over a useful width, and transition smoothly into neighboring fabric so the support feels intentional rather than restrictive.
Compression in crochet is not the same thing as making something tight. True supportive crochet relies on a balance of stitch density, directional elasticity, fiber choice, panel placement, and width. A waistband that stays put without digging, an underbust band that anchors a top, a cuff that hugs the wrist but still lets the hand pass through, or a side panel that gently sculpts the silhouette all depend on how the crochet structure behaves under stress and how well the yarn springs back afterward.
In this guide, we will look at how to build that behavior into your work. We will compare several stitch structures that create controllable hold, including slip stitch ribs, short post-stitch ribs, linked constructions, and compact mesh. We will also look closely at fiber recovery, because no amount of clever stitch engineering can fully compensate for a yarn that grows, bags, or hardens in wear. Then we will walk through practical methods for designing supportive waistbands, underbust bands, cuffs, and shaping panels, complete with swatching strategies, stitch counts, and troubleshooting.
If you have ever wanted your crochet garments to feel less like soft fabric draped around the body and more like fabric that understands where it is supposed to stay, compression zones are the toolset that gets you there.
What a compression zone really does
A compression zone is a deliberately designed area of crochet fabric with greater resistance, better rebound, or more directional control than the surrounding fabric. It may be narrower in circumference than the garment above it, but that is only one part of the equation. The more important questions are these:
- How far can the fabric stretch before it pushes back?
- Does it recover to its original size after repeated extension?
- Is the resistance mostly horizontal, vertical, or both?
- Does the edge stay flat, or does it roll?
- Is the pressure spread over enough rows or rounds to feel supportive rather than pinching?
- Does the compression blend into the neighboring fabric, or does it create a visible ridge, flare, or buckle?
Good compression zones do three jobs at once:
- Anchor the garment where you want it to stay.
- Shape the garment visually and physically.
- Remain wearable through movement, sitting, breathing, and repeated wear.
That last point matters. Compression in crochet should nearly always be described as supportive hold, not firm shapewear-level squeeze. Crochet is a looped structure, and even very dense crochet usually has more texture and thickness than knitted shapewear fabric. You can create meaningful hold, but comfort must stay central.
The four building blocks of crochet compression
Before we talk about specific bands and panels, it helps to understand the four main variables that create compression.
1. Stitch density
Denser stitch patterns generally stretch less and provide more resistance. That density can come from:
- shorter stitches
- linked stitches that close gaps
- tighter row or round gauge
- heavily textured columns like post stitches
- smaller hook sizes relative to yarn weight
- strategic layering or folding
Density alone does not guarantee support, though. Some dense fabrics are rigid but collapse after wear. Others are springy. The difference often comes from stitch architecture and fiber.
2. Directional elasticity
Crochet does not stretch equally in every direction. A rib worked in rows and then attached around a body opening behaves very differently from the same yarn worked in rounds as vertical posts. You can use that to your advantage.
For example:
- Back-loop slip stitch rib worked side to side stretches strongly across the rib width and recovers well, making it excellent for waistbands and cuffs.
- Post-stitch rib worked in rounds has visual ribs but often less spring and more bulk, useful when you want moderate hold with decorative structure.
- Linked stitches reduce lateral gapping and make broader, smoother compression panels.
- Compact mesh can distribute pressure with some breathability, especially for larger zones that should not feel armored.
Always decide which direction needs resistance and which direction needs flexibility.
3. Fiber recovery
Two swatches can feel equally snug when first made and behave completely differently after three hours of wear. Recovery is the difference.
- Wool generally offers the best natural rebound, especially breeds and blends with elasticity. It is often the easiest path to comfortable supportive zones.
- Elastic blends can add impressive snap-back, especially when a small percentage of elastic fiber is blended into wool, cotton, or synthetics.
- Cotton provides firmness and crispness but often has weaker recovery. It can hold shape initially, then relax or bag if over-stretched.
- Acrylic varies widely. Some acrylics rebound surprisingly well; others stretch and stay stretched, especially in heavy garments.
Fiber is not just about stretch amount. It is about what happens after the stretch.
4. Placement and width
A narrow band with strong squeeze can cut in or flip. A wider band with gentler compression often performs better. Placement matters just as much. An underbust band placed too low will ride upward. A waist panel that stops at the side seam may not control the front the way you hoped. A cuff that is compressive only at the edge may bell out above it.
When in doubt, distribute hold over a broader zone.
Comparing stitch structures for controllable compression
Let us look at four of the most useful crochet structures for supportive zones and how they behave in real making.
Slip stitch rib: high control, strong recovery, narrow-profile support
Back-loop slip stitch rib is one of the most effective crochet structures for true elastic behavior, especially in bands. Worked in rows, each row is short and compact. Once joined edge to edge into a ring or attached to a garment, the rib stretches across the row depth and springs back well.
Best uses
- waistbands
- underbust bands
- cuffs
- neckbands that need grip
- base edges of crop tops and fitted sweaters
Recommended yarns
- sport to worsted weight wool or wool blend for best recovery
- elastic-blend yarns for more snap
- cotton blends only if swatched carefully for bagging
Hook guidance
- fingering yarn: 2.75 to 3.5 mm
- sport yarn: 3.25 to 4 mm
- DK yarn: 3.5 to 4.5 mm
- worsted yarn: 4 to 5 mm
For compression zones, many crocheters will go 0.5 to 1 mm smaller than they use for the body fabric.
Basic waistband sample
For a waistband approximately 2.5 in / 6.5 cm deep in DK yarn:
- Ch 13
- Row 1: Sl st in 2nd ch from hook and each ch across. (12)
- Row 2: Ch 1, turn, BLO sl st in each st across. (12)
- Repeat Row 2 until the strip measures about 15 to 20% smaller than the body opening it must fit.
If the waist opening of the garment body is 32 in / 81 cm, begin by making the rib to fit about 26 to 28 in / 66 to 71 cm unstretched, depending on desired hold and yarn recovery.
Strengths
- excellent horizontal stretch and recovery
- clean, flat profile under body fabric
- easy to control depth and circumference separately
- less visually bulky than post-stitch ribs
Weaknesses
- slower to work
- can be too firm if the hook is too small
- can bias or twist if joined unevenly
- cotton versions may feel hard rather than springy
Common mistake
Mistake: Making the rib too short in circumference because it seems stretchy.
Fix: Swatch and measure extension range. A slip stitch rib can stretch far, but wearing ease depends on recovery and comfort. For many waistbands, aim for 10 to 20% negative ease, not the maximum possible stretch.
Short post-stitch ribs: moderate compression with visual structure
Front-post/back-post ribbing or shorter variations worked in half double crochet or double crochet are very popular because they look familiar and decorative. But structurally, they are not the same as knitted or slip stitch ribbing. They often have less snap and more bulk, though they can still be excellent for moderate support.
Best uses
- sweater hems needing some grip but not firm compression
- underbust areas on outerwear or layered tops
- cuffs where texture matters
- zones where appearance and moderate structure both matter
Recommended yarns
- wool and wool blends perform best
- acrylic/wool blends often work well
- pure cotton can look crisp but may relax over time
Hook guidance
Use the same hook as the body fabric or 0.5 mm smaller.
Sample ribbed underbust band in rounds
Using worsted yarn and a 4.5 mm hook:
- Foundation: Ch to fit lower bust with 10 to 15% negative ease, join carefully without twisting, or use fsc.
- Round 1: Hdc evenly around. Join. Example count: 96 sts.
- Round 2: Ch 1, FPhdc around next st, BPhdc around next st; repeat around. Join. (96)
- Rounds 3 to 8: Repeat Round 2.
A 6 to 8 round band in worsted yarn gives moderate support. For more hold, reduce hook size, shorten the circumference slightly, or combine with a denser interior panel.
Strengths
- visually attractive, classic rib look
- easier and faster for many crocheters than slip stitch rib
- blends well into many garment bodies
Weaknesses
- less recovery than slip stitch rib in many fibers
- bulkier at seams and transitions
- can flare or collapse if too tall without support
Common mistake
Mistake: Assuming deeper post-stitch rib automatically means stronger support.
Fix: More rounds can help distribute pressure, but the spring comes from structure plus fiber. If the yarn lacks rebound, a taller rib may simply fold.
Linked structures: smooth, dense panels with controlled stretch
Linked crochet stitches reduce the gaps between standard tall stitches by pulling up loops through designated bars or previous stitch points. The result is smoother, more stable fabric with less lateral spread than ordinary dc or tr fabrics.
Linked stitches are especially useful when you want a shaping panel that blends into a garment without looking like a ribbed band.
Best uses
- side shaping panels
- lower abdomen support panels
- bust support sections under decorative shells or lace
- broad waist zones in fitted dresses or tops
Yarn and hook guidance
- sport to DK yarn often shows linked structures beautifully
- use the body-fabric hook or 0.5 mm smaller
- linked half double crochet and linked double crochet are both useful; linked hdc is often more compressive
Sample side shaping panel
Suppose the front and back body are worked in a standard hdc fabric, and you want a firmer side panel.
For each side panel in DK yarn with a 4 mm hook:
- Panel width: 12 sts
- Panel height: same row count as body
- Work linked hdc across 12 sts every body row
If the front is 36 sts and the back is 36 sts, total circumference is 96 sts with two 12-st side panels and 36-st front/back centers. The linked side panels will resist horizontal spread more than the center sections, creating mild sculpting without reducing overall garment size dramatically.
Strengths
- smoother visual integration than ribbing
- excellent for broad support zones
- less gap-prone than standard tall stitches
- easier to shape gradually with increases/decreases
Weaknesses
- not as springy as true rib structures
- can become stiff if overworked too tightly
- requires careful swatching because row height may differ from neighboring fabric
Common mistake
Mistake: Replacing only a few stitches with linked fabric and expecting major support.
Fix: Linked structures work best across meaningful widths, usually at least 1.5 to 3 in / 4 to 7.5 cm depending on garment size and purpose.
Compact mesh: breathable, distributed support
Compact mesh sounds counterintuitive for compression, but certain mesh structures can provide broad, moderate hold while keeping the fabric more breathable and less bulky than a fully solid panel. The key is choosing a mesh with small openings and stable columns.
Examples include:
- 1 ch mesh anchored by sc or hdc with small hook
- offset mesh with linked anchors
- narrow filet-style sections worked at a tight gauge
Best uses
- broad torso shaping panels in warm-weather garments
- support zones layered over a lining or bralette base
- cuffs or sleeve lower sections where airflow matters
Basic compact mesh panel sample
Using sport yarn with a 3.5 mm hook:
- Foundation row: Multiple of 2 + 1
- Row 1: Sc in 2nd ch from hook, ch 1, sk next ch, sc in next ch across.
- Row 2: Ch 1, turn, sc in first sc, ch 1, sc in next ch-1 sp across.
Worked tightly, this creates a fabric that stretches somewhat but resists distortion better than open lace. For more hold, work the anchors in hdc or linked sc-like structures and reduce hook size.
Strengths
- lighter and cooler than solid dense fabrics
- useful for larger support areas
- can layer well over internal structure
Weaknesses
- less firm than dense ribbing or linked fabric
- can grow if made with low-recovery fibers
- mesh size must stay genuinely compact to be supportive
Common mistake
Mistake: Using standard loose mesh and expecting control.
Fix: Treat support mesh like engineering, not lace. Keep openings small, columns aligned, and hook size disciplined.
Fiber behavior under repeated stretch
Compression zones are stress zones. They experience repeated extension every time the wearer pulls on the garment, sits, reaches, bends, or breathes. Fiber choice can make or break the design.
Wool
Wool is usually the easiest recommendation for supportive crochet because it offers natural elasticity and good recovery. Even when wool stretches in wear, it often rebounds once rested.
Best qualities for compression
- springy rebound
- comfort against the body in many blends
- easier to build negative ease safely
Watch for
- superwash wool may grow more than non-superwash
- very soft drapey merino can relax more than expected in heavy garments
- heat and agitation in care can alter the size of supportive zones
Recommendation
For waistbands, cuffs, and underbust bands, wool or wool-rich blends in sport, DK, or worsted are often the most reliable starting point.
Elastic blends
Yarns containing a small percentage of elastic fiber can provide outstanding recovery. They are especially helpful when you want the fabric to snap back repeatedly without over-tightening the stitch pattern.
Best qualities for compression
- strong rebound
- support with less bulk
- useful for frequently stretched areas like cuffs and bralette bands
Watch for
- stitch definition may vary
- some elastic blends feel warmer or denser
- tension consistency matters because the yarn can mask uneven stitching during work but reveal it in wear
Recommendation
Use for garments requiring repeated on/off stretching, especially fitted tops, cuffs, and performance-inspired accessories.
Cotton
Cotton is beloved for crisp stitch definition and cool wear, but in compression zones it must be handled carefully. Cotton tends to have less memory, meaning it may stretch and not fully rebound.
Best qualities for compression
- firm hand initially
- excellent definition for linked and ribbed structures
- comfortable in warm climates
Watch for
- bagging at knees, elbows, waist, and underbust zones
- rolling edges if the fabric is too narrow and dense
- harsh pressure if the hook is too small
Recommendation
If using cotton, choose blends when possible, widen the compression zone, reduce reliance on aggressive negative ease, and swatch for wear over time, not just immediate snugness.
Acrylic
Acrylic is the most variable category. Some acrylics are pleasantly resilient; others lengthen under weight and repeated use. Yarn construction matters enormously.
Best qualities for compression
- accessible and washable
- can work well in moderate-support zones when the yarn has bounce
- blended acrylics often perform better than flat, slippery acrylics
Watch for
- permanent growth in heavy garments
- heat sensitivity during blocking
- inconsistent recovery depending on brand and ply structure
Recommendation
Always hang-test and wear-test acrylic compression swatches. Do not assume a springy skein behaves the same once crocheted.
How to swatch for pressure, recovery, rollover, and comfort
A compression swatch is not just a gauge square. It is a performance test.
For each support structure, make a swatch at least 5 x 5 in / 12.5 x 12.5 cm, and preferably larger for bands. Label yarn, hook, stitch pattern, and row/stitch counts.
Step 1: Measure basic gauge
Record:
- stitches per 4 in / 10 cm
- rows per 4 in / 10 cm
- relaxed width and height
Example slip stitch rib swatch in DK yarn, 4 mm hook:
- 20 rows = 4 in / 10 cm
- 12 sts = 2.5 in / 6.5 cm deep
For a band, row gauge often determines circumference if worked side to side.
Step 2: Test extension
Stretch the swatch to the likely wearing amount and measure.
For example, a rib strip that measures 4 in relaxed might stretch comfortably to 5 in and maximally to 5.75 in. Record both:
- comfortable extension: 25%
- maximum extension: 43%
Design around comfortable extension, not maximum extension.
Step 3: Test recovery
Stretch the swatch for 30 seconds, release it, and measure after 1 minute and after 10 minutes.
Example:
- relaxed width: 4 in
- after stretch/release at 1 min: 4.25 in
- after 10 min: 4.1 in
That tells you the swatch has good but not perfect recovery. If it remains at 4.5 in, it may bag in wear.
Step 4: Hang test
Pin or clip the swatch and hang a small weight from it for several hours. Even a few clothespins or metal notions can simulate the pull of a garment body. Then remeasure.
This is especially important for:
- cotton
- acrylic
- superwash wool
- broad underbust and waistband zones supporting larger garment sections
Step 5: Rollover test
Wrap the swatch around your wrist, forearm, lower ribcage, or waist area depending on use. Move, sit, bend, and note:
- does the top edge roll?
- does the lower edge flip?
- does it crease sharply?
- does it dig in after five minutes?
A band can feel supportive while standing still and become intolerable once seated.
Step 6: Comfort test against skin or over a layer
Some dense structures become abrasive or sweaty. This matters for underbust and cuff zones especially. If the fabric feels scratchy, hot, or hard-edged, redesign before committing.
Engineering specific compression zones
Now let us apply the principles to common garment areas.
Supportive waistbands
A good crochet waistband anchors without folding over or cutting the midsection into segments.
Design principles
- Aim for a width of 2 to 4 in / 5 to 10 cm for most adult garments.
- Use 10 to 20% negative ease depending on yarn recovery and desired hold.
- Favor slip stitch rib or a folded dense band for strongest performance.
- Transition gradually into the body fabric to avoid flaring.
Example waistband calculation
Body waist target: 30 in / 76 cm Desired waistband negative ease: 15% Band circumference target: 25.5 in / 64.75 cm
If your slip stitch rib gives 5 rows per inch, then you need about:
25.5 in x 5 rows = 127.5 rows
Round to an even join-friendly number if needed, such as 128 rows.
If the depth is 14 sts = 3 in, work:
- Ch 15
- Each row: 14 BLO sl sts
- Total rows: 128
- Join short ends
Then work the garment body into one long edge, picking up or evenly spacing body stitches. A common starting ratio is 3 body stitches into every 4 rib rows for hdc or dc-based bodies, but swatch this. Too many body stitches cause flare; too few cause puckering.
Common waistband mistakes
- Too narrow: rolls or cuts in. Make it wider.
- Too many body stitches attached: top edge ripples. Reduce pickup ratio.
- Using cotton with aggressive negative ease: band bags out after wear. Use blend, reduce negative ease, or add structural fold.
Underbust bands
Underbust zones need to stabilize the garment while allowing breathing and sitting comfort. The biggest design error is concentrating all the hold into a narrow edge.
Design principles
- Width of 1.5 to 3 in / 4 to 7.5 cm works well for many tops.
- Place the narrowest point exactly where support is needed, not lower on the upper waist.
- For larger bust support needs, broaden the zone rather than over-tightening a skinny band.
- Pair the band with bust shaping above it so the whole garment is not tugging downward.
Best structures
- slip stitch rib for strongest hold
- short post-stitch rib for visible banded look with moderate support
- linked hdc panel hidden beneath decorative outer texture
Example underbust band in sport yarn
Lower bust measurement: 34 in / 86 cm Negative ease goal: 12% Target band circumference: about 30 in / 76 cm
If using side-to-side slip stitch rib at 6 rows per inch:
30 in x 6 = 180 rows
For a 2 in deep band:
- Ch 11
- Work 10 BLO sl sts per row
- Work 180 rows
- Join into ring
Then work cups or upper body onto the top edge. If the upper body needs 120 stitches and the rib has 180 rows, begin with a pickup ratio of 2 stitches for every 3 rows and adjust according to swatch.
Common underbust mistakes
- Band rides up: too narrow, too low, or upper bust shaping insufficient.
- Band feels tight when seated: not enough vertical depth to distribute pressure.
- Top edge flips: body fabric too heavy or too open compared with band. Use a denser transition round.
Cuff zones
Cuffs need a different kind of compression: enough to close the sleeve opening and recover after the hand passes through, but not so firm that dressing becomes a struggle.
Design principles
- Use 15 to 30% negative ease depending on cuff depth and stretch behavior.
- A depth of 1.5 to 3 in / 4 to 7.5 cm is common.
- Slip stitch rib is often ideal because it stretches generously for dressing but rebounds well.
Example cuff in worsted yarn
Wrist measurement: 7 in / 18 cm Target cuff circumference: 5.75 to 6 in / 14.5 to 15 cm
If your rib gauge is 4.5 rows per inch:
6 in x 4.5 = 27 rows
Round to 28 rows for symmetry.
Depth:
- Ch 9
- Row 1: 8 sl sts
- Row 2 onward: 8 BLO sl sts
- Work 28 rows
- Join and attach to sleeve
Common cuff mistakes
- Too shallow: stretches out at sleeve join. Make cuff deeper.
- Too many sleeve stitches attached: sleeve blouses awkwardly above cuff. Reduce attachment ratio or decrease sleeve before cuff.
- No hand-pass test: cuff fits wrist but not hand. Always test over the hand before final join.
Sculpting side and center panels
Compression panels can visually refine a silhouette without making the whole garment skin-tight. These work especially well in dresses, fitted tops, and cardigans.
Placement options
- side panels from underarm to hem
- center front lower abdomen support panel
- center back stabilizing panel
- princess-like vertical shaping zones
Best structures
- linked hdc or linked dc
- compact mesh for moderate support in larger areas
- alternating dense and standard columns
Example side panel layout
Garment total stitch count around bust/waist area: 120 sts
Proposed distribution:
- Front center: 42 sts standard hdc
- Back center: 42 sts standard hdc
- Each side panel: 18 sts linked hdc
Because linked hdc spreads less, the side zones will feel firmer and visually pull inward. If additional shaping is needed, decrease 1 stitch at each side panel edge every 6th row for 3 to 5 shaping events, then restore as needed lower down.
Common panel mistakes
- Panel too narrow to matter: increase width.
- Panel too stiff compared to body: go up a hook size only in the panel or choose linked dc instead of linked hdc.
- Buckling at panel edge: row heights differ between structures. Swatch and compensate.
How to increase support without simply sizing down
This is the heart of good compression engineering. If a zone needs more hold, try these in order before drastically shrinking circumference:
- Change structure to a more recoverable stitch.
- Change fiber to one with better memory.
- Increase width of the compression zone.
- Reduce hook size modestly by 0.5 mm.
- Blend structures such as rib edge plus linked panel above.
- Distribute decreases over a larger area rather than removing too much all at once.
Sizing down alone often creates pressure points, distortion, and edge flip. Structural support nearly always wears better.
Troubleshooting real-world problems
Problem: The band feels snug at first, then loosens within an hour
Likely causes:
- low-recovery fiber
- excessive initial stretch beyond comfort range
- too-narrow band concentrating stress
Fixes:
- switch to wool or elastic blend
- reduce negative ease slightly but increase band depth
- change to slip stitch rib if currently using post stitches
Problem: The top or waistband rolls
Likely causes:
- dense narrow edge attached to a heavier body
- insufficient band depth
- imbalance between vertical and horizontal tension
Fixes:
- widen the band
- add a transition round in sc or linked stitches
- avoid attaching too many body stitches into the band edge
Problem: Compression panel creates a visible ridge
Likely causes:
- panel stitch too bulky relative to surrounding fabric
- abrupt transition in stitch height or gauge
Fixes:
- choose linked hdc rather than post-stitch textures
- fade into the panel over a few stitches or rows
- swatch the seam line between fabrics
Problem: The cuff grips but does not recover after pulling over the hand
Likely causes:
- cotton or weak acrylic recovery
- overstretched circumference design
- too few rows for the band depth needed
Fixes:
- switch fiber or blend
- deepen the cuff
- reduce sleeve bulk before joining the cuff
Problem: Underbust band feels supportive but uncomfortable
Likely causes:
- too much negative ease
- yarn too hard or scratchy
- pressure concentrated in a narrow zone
Fixes:
- widen the band and reduce squeeze
- choose softer springier yarn
- use a denser but less abrasive structure, such as linked hdc panel plus modest rib edge
Smart variations and advanced combinations
Once you understand the individual structures, you can combine them for more nuanced results.
Folded waistband casing effect
Work a deep slip stitch or sc/linked hdc band, fold it to the inside, and join it down. Even without inserting elastic, the doubled fabric increases stability and reduces rollover. If desired and appropriate for the design, this folded casing can also house elastic, but the crochet itself should still be doing meaningful structural work.
Rib plus panel hybrid
Use a strong rib at the edge, then transition into linked hdc for 2 to 4 additional inches. This is excellent for underbust support and waist-sculpting tops because the hold does not stop abruptly at one seam line.
Graduated compression
Instead of one fixed level of hold, engineer a gradient:
- edge rib at highest support
- middle linked structure at moderate support
- body fabric at lower support
This often feels more comfortable than one hard boundary.
Direction-shifted panels
A side-to-side rib inserted vertically at the side body can create a highly elastic shaping panel with very different behavior from the surrounding horizontal rows. This takes planning but can be remarkably effective for fitted pieces.
Compact mesh over lining
For summer garments, a compact mesh outer panel can provide gentle shaping while a sewn or knit lining handles some of the actual support. This is particularly practical for fitted tanks and beachwear-inspired tops where pure dense crochet might feel too warm.
Practical takeaways for designing wearable support
If you remember only a handful of principles from this technique, let them be these.
First, compression is not achieved best by brute force. Smaller circumference alone is not engineering. The most wearable support comes from combining the right stitch structure with the right fiber and distributing pressure across enough area.
Second, slip stitch rib remains one of the strongest options for true crochet bands that need grip and recovery. It is slow, but it earns its keep in waistbands, cuffs, and underbust edges.
Third, post-stitch ribs are best understood as moderate-support textured ribs, not miracle elastic. Use them when you want visible structure and some hold, especially in wool-rich yarns.
Fourth, linked structures shine in shaping panels because they create smoother, denser zones without heavy visual ribbing. They are ideal for sculpting and stabilizing broad areas.
Fifth, compact mesh can absolutely be part of a support strategy when worked tightly and used for distributed, breathable control rather than maximum compression.
Sixth, fiber memory is as important as stitch pattern. Wool and elastic blends usually recover best. Cotton needs caution. Acrylic must be proven by swatching, not guessed.
Finally, swatching for support is different from swatching for gauge. Measure extension, test rebound, hang the swatch, wrap it around the body, sit down in it, and notice edge behavior. The swatch should answer not just “does this fit?” but “does this hold, recover, and stay comfortable?”
That is the shift from hoping a crocheted garment stays in place to designing one that truly does. When you start thinking in compression zones, you stop fighting gravity and fiber limitations with smaller hooks alone. Instead, you place support where it belongs, choose fabrics that know how to spring back, and build garments and accessories that feel intentional on the body. That is not just better shaping. It is better crochet engineering.