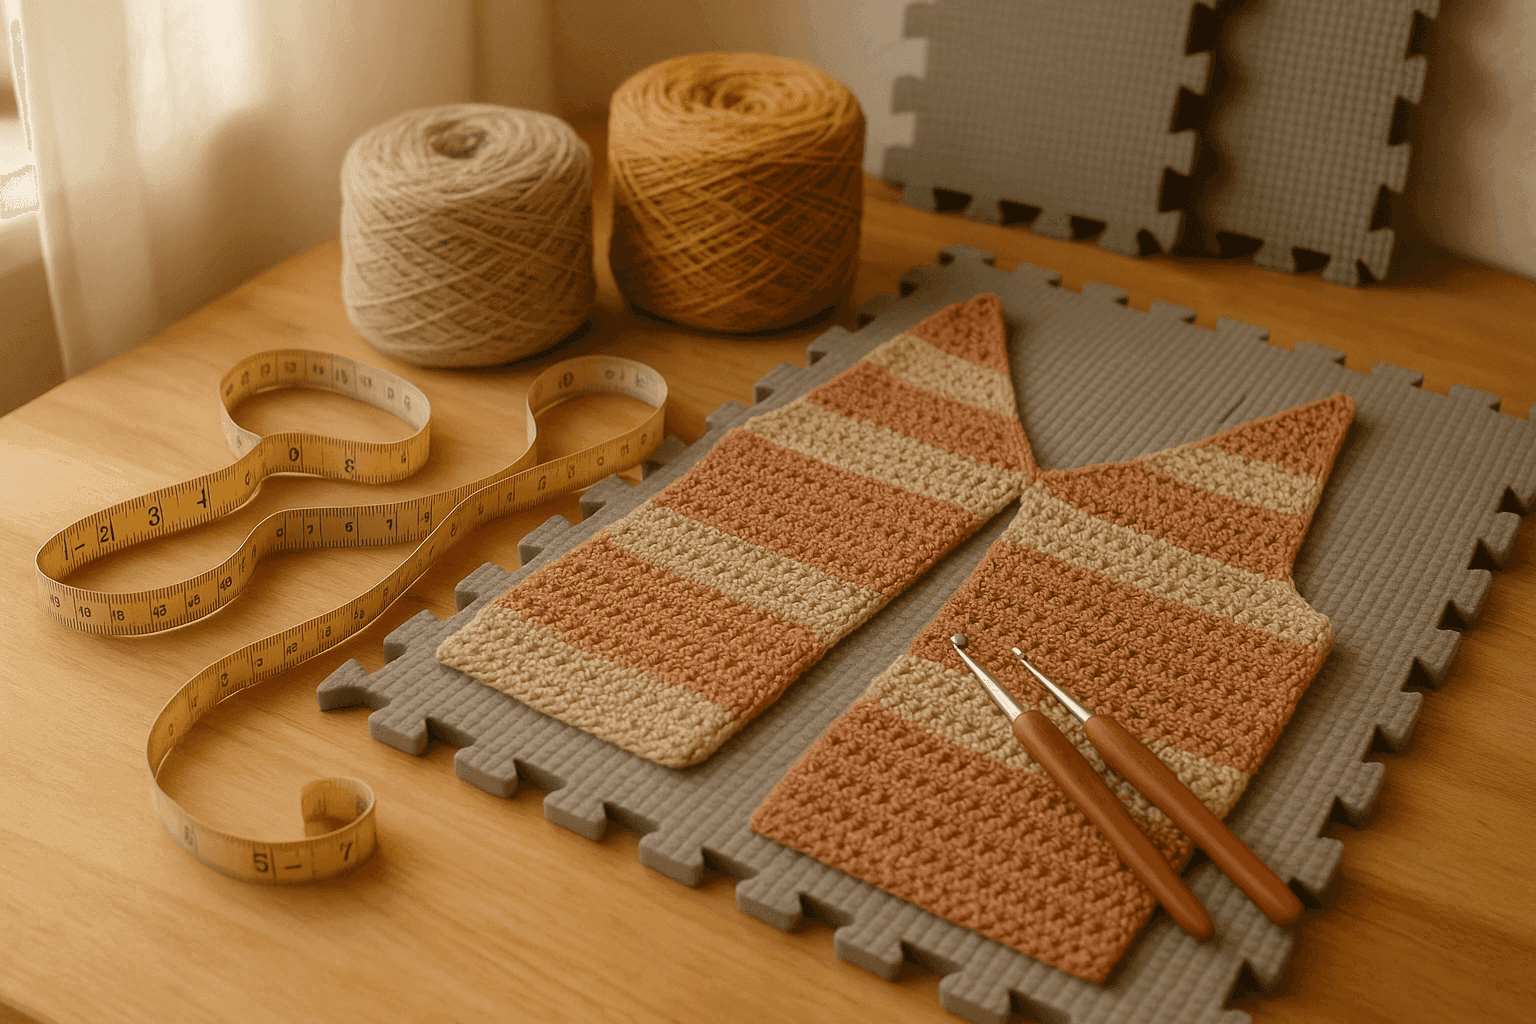
There’s a moment many of us hit in garment crochet when we realize the problem is not the yarn, not the hook, and not even our tension—it’s the direction of the fabric. You swatch a stitch pattern that looks beautiful flat, then turn it into a sweater worked from hem to shoulder and discover the piece grows longer than expected, or the ribbing pulls in oddly, or the stripes emphasize width when you wanted length. Another time, a sideways scarf suddenly has glorious swing and softness that the same stitch never had when worked conventionally. That is the moment cross-grain construction stops feeling like a novelty and starts becoming a design tool.
Working cross-grain means building your crochet fabric with the rows running in a different direction from the way the finished piece will be worn. Instead of crocheting from hem to shoulder, for example, you might crochet from cuff to cuff, or from side seam to side seam, or even on the bias so the fabric sits diagonally across the body. The magic is that crochet behaves differently stitch-wise than row-wise. It stretches differently, drapes differently, stripes differently, and resists distortion differently depending on which direction you place against the body.
Once you begin noticing this, a whole range of design decisions becomes more intentional. You can map the stretch around the bust instead of from shoulder to hem. You can let sleeve rows create elasticity around the arm. You can use row ends as side edges when you want flexibility, or avoid them when you need a crisp button band. You can make variegated yarn pool in long directional runs, or interrupt striping to create subtle chevrons. In short, you can engineer movement instead of fighting it.
This article is a technique-deep guide to using cross-grain construction in crochet garments and accessories. We’ll look at what changes when you rotate the fabric, how to swatch for sideways use, how to do the shaping math, how to choose yarn, and how to seam and block pieces so the final garment works with the fabric’s nature. I’ll keep the tone practical: not “here’s a quirky trick,” but “here’s how to design with this on purpose.”
Why row direction matters in crochet
Crochet fabric is anisotropic, which is a fancy way of saying it behaves differently in different directions. In most stitch patterns, the horizontal direction across a row and the vertical direction across stacked rows are not equal in stretch, bounce, density, or recovery.
As a general rule:
- Across the row (stitch-wise width) often has one kind of stretch and stitch definition.
- Along the row stack (row-wise length) often has another kind of drape, compression, and recovery.
- Diagonal movement can create a third behavior entirely, especially in openwork or taller stitches.
The exact balance depends on stitch pattern. Single crochet, half double crochet, extended stitches, linked stitches, slip-stitch crochet, Tunisian-inspired textures, mesh, post-stitch ribs, and lace all have their own directional personalities.
For example:
- Single crochet is relatively stable and dense, but still tends to have more give in one direction than the other.
- Half double crochet can relax and drop vertically, especially in soft fibers.
- Double crochet and taller stitches often gain significant drape along the row stack and can bias more easily.
- Slip-stitch or BLO ribbing can become highly elastic across the rows when worked sideways.
- Mesh and lace can stretch dramatically under garment weight if their more elastic direction is placed vertically.
This means the orientation of your rows in a finished object is not just visual; it affects fit.
Thinking in stretch maps instead of flat measurements
One of the most useful mindset shifts in cross-grain design is to stop asking only, “What are the finished dimensions?” and start asking, “Where do I want this fabric to stretch, recover, collapse, and hold?”
That is stretch mapping.
Imagine designing a pullover. In a traditional bottom-up or top-down build, your rows usually move more or less vertically through the body. In a cross-grain body worked from side seam to side seam, the rows travel horizontally around the torso. Suddenly the direction with greater elasticity may wrap around the bust and upper arm instead of dropping from shoulder to hem.
That can be incredibly useful when you want:
- ease around the bust without adding visible waist shaping,
- a cocoon silhouette that molds to the body,
- a fitted sleeve with comfortable flex at the elbow,
- a neckline edge that stays stable because it uses a firmer orientation,
- vertical visual lines created by row texture even though you crocheted sideways.
It can also create problems if used accidentally:
- a hem that flares because row ends are looser than stitch edges,
- a cardigan front that grows longer with wear,
- armholes that stretch out under sleeve weight,
- shoulders that sag because the more elastic direction sits where stability was needed.
Before designing, sketch the garment and mark these zones:
- Need stretch: bust, upper arm, hips, over-the-head neckline.
- Need recovery: cuffs, hem bands, close-fit waist, ribbed collar.
- Need stability: shoulders, button bands, pocket openings, armholes.
- Need drape: body side panels, shawl collars, dropped sleeves, wraps.
Then orient your rows to place the right fabric behavior in each zone.
What cross-grain construction actually includes
Cross-grain doesn’t mean only one thing. In crochet design, it usually shows up in three forms:
1. Sideways construction
The piece is worked perpendicular to the way it will be worn. A sweater body might be worked from left side seam to right side seam. A sleeve might be worked from cuff to cap or from cap to cuff, but with the primary shaping and visual direction created sideways.
2. Cuff-to-cuff or edge-to-edge construction
A whole garment can be worked from one sleeve cuff across the body to the other cuff. This is one of the most common cross-grain strategies because it lets you exploit row-wise behavior continuously across the arms and torso.
3. Bias construction
The piece is worked so the fabric sits diagonally. This may be achieved by increasing at one edge and decreasing at the other, or by working motifs or panels that assemble at an angle. Bias adds fluidity and can soften fit transitions, but it also increases the need for careful blocking and stabilization.
Each approach changes your math and your finishing choices.
Swatching for cross-grain design
A standard gauge swatch is not enough when you plan to rotate the fabric. You need to know how the fabric behaves in both directions and under load.
Make a swatch at least 6 x 6 in (15 x 15 cm), preferably larger for garment planning. For open or very stretchy stitch patterns, go up to 8 x 8 in (20 x 20 cm).
Recommended swatch setup
- Start with the hook you expect to use, often within these common ranges:
- Sport weight yarn: 3.5–4.5 mm
- DK weight yarn: 4–5 mm
- Worsted weight yarn: 5–6 mm
- Aran/bulky garments: 6–8 mm, depending on stitch openness
- Work at least 30–40 stitches wide and 20–30 rows tall, or enough to exceed your 6-inch measuring window in both directions.
- Block the swatch exactly as you plan to block the finished garment.
- Hang the swatch for a few hours if the stitch is open, tall, or heavy.
Record four measurements
After blocking, record:
- Stitch gauge flat: stitches per 4 in / 10 cm measured across a row.
- Row gauge flat: rows per 4 in / 10 cm measured vertically.
- Stretch gauge widthwise: how wide it becomes with gentle garment-level tension.
- Stretch gauge lengthwise: how long it becomes with gentle garment-level tension.
You do not need to yank the swatch. I use “put it under the amount of tension a sweater body would create on a hanger or around the torso.” Be consistent.
A practical example
Suppose your blocked swatch in half double crochet with a 5 mm hook and DK yarn measures:
- 14 stitches = 4 in
- 11 rows = 4 in
That means:
- 1 stitch = about 0.286 in
- 1 row = about 0.364 in
If you use this fabric conventionally for a body, stitch count mostly controls width and row count controls length.
But if you turn the body sideways, then:
- Rows may control circumference around the body.
- Stitches may control shoulder-to-hem depth.
So a 38 in bust circumference might be created by about 105 rows at flat gauge (38 ÷ 0.364 = 104.4), plus or minus intended ease and stretch.
Meanwhile, a 22 in body length might be created by about 77 stitches (22 ÷ 0.286 = 76.9).
Now add ease based on directional stretch. If the row-wise direction stretches 8% comfortably around the body, you may choose a finished circumference of 35–36 in for a close but comfortable fit instead of 38 in.
This is why cross-grain math starts with behavior, not just gauge.
Choosing stitch patterns for sideways and bias work
Not every stitch pattern rewards cross-grain construction equally. Some become elegant and fluid. Others turn lumpy or unstable.
Strong candidates for cross-grain use
- Back-loop-only single crochet or slip stitch ribbing for cuffs, hems, collars, and fitted garments.
- Half double crochet in the third loop for subtle horizontal texture with good drape.
- Extended single or half double crochet for a balanced fabric that bends well.
- Simple mesh for wraps, summer garments, and swingy layers.
- Linked stitches when you want taller stitches without too much vertical sag.
- Light shells or fans when the sideways orientation enhances drape.
More caution required
- Very tall open stitches in heavy yarns can grow dramatically.
- Dense post-stitch cables may become rigid and bulky when oriented sideways.
- Large motifs may not align gracefully with cross-grain shaping.
- Highly textured bobble fabrics can distort at seams if row direction changes across pieces.
Rule of thumb
If the stitch pattern has obvious directional ridges, test whether you like those ridges running around the body, up and down the body, or diagonally. Sometimes a stitch that feels ordinary in one orientation becomes sophisticated in another.
How row direction changes drape
Drape is the way fabric hangs and folds under its own weight. Cross-grain construction can radically improve drape when you place the more flexible direction where the garment needs swing.
For example, a sideways cardigan front may fall in softer folds than a top-down front in the same stitch because the row stack collapses differently. A bias cowl can settle into spiraling folds rather than standing stiffly.
To maximize drape:
- Use fibers with natural fluidity such as merino, alpaca blends, bamboo blends, silk blends, Tencel blends, or soft cotton blends.
- Choose hook sizes that create a fabric with movement rather than rigidity.
- Avoid over-tight stitching if the goal is swing.
- Let gravity help: garment pieces often behave more truthfully when hung or worn than when laid flat.
To reduce excessive drape:
- Use a slightly smaller hook.
- Choose more stable fibers like woolier wool, cotton with structure, linen blends, or acrylic with bounce.
- Add stabilization rows, facings, or seam reinforcement.
- Reorient the piece so the less droopy direction runs vertically.
How row direction changes elastic response
Stretch is not enough; recovery matters too. A sweater that stretches comfortably at the bust but bags out after two wears is not well engineered.
Cross-grain design lets you place the most elastic direction around the body, but only if the fiber can recover.
Fiber behavior matters
- Wool and wool blends: often best for cross-grain garments needing recovery. They spring back well.
- Alpaca-heavy yarns: lovely drape, but they can grow and may not recover fully in load-bearing areas.
- Cotton: can be beautifully cool and defined, but often less elastic and more likely to lengthen under weight.
- Bamboo/rayon/Tencel: excellent drape, reduced resilience. Better for accessories or loose silhouettes unless stabilized.
- Acrylic: variable; some have excellent bounce, others feel limp. Swatch honestly.
- Linen: softens with wear, often with elegant drape but not much snap-back.
Good uses for high elasticity directions
- around cuffs,
- around the torso in fitted pullovers,
- around hips in tunics needing movement,
- around neck openings that must stretch over the head.
Areas where too much elasticity is risky
- shoulder seams,
- button bands,
- armhole edges,
- pocket openings,
- long cardigan fronts.
Edge stability: stitch edge vs row-end edge
One of the biggest practical differences in cross-grain construction is the type of edge you create.
In crochet, a stitch edge and a row-end edge behave differently.
- Stitch edges are often cleaner, firmer, and easier to count consistently.
- Row-end edges may be more flexible, less uniform, and more prone to rippling if turning chains vary.
This matters because in cross-grain construction, row ends often become hems, side seams, necklines, or fronts.
Use row-end edges intentionally
Row-end edges are useful when you want:
- a softly flexible side seam,
- draped cardigan fronts,
- stretch at a cuff or hem,
- easy pickup for decorative borders.
Stabilize row-end edges when needed
Try one or more of these:
- work a selvedge stitch, such as chaining 1 and making the first and last stitch consistently in the same way every row;
- replace loose turning chains with stacked single crochet, chainless starting stitches, or a deliberately firmer turning method;
- add a single crochet, slip stitch, or reverse single crochet edging;
- sew a light reinforcing seam into shoulders or front bands;
- work short rows or facing bands in a more stable orientation.
Stripe behavior in cross-grain crochet
Stripes are one of the joys of sideways work. When you rotate the fabric, stripes rotate too.
A body worked side-to-side turns row color changes into vertical stripes. A cuff-to-cuff garment can create uninterrupted stripes across sleeves and torso. Bias construction can turn stripes into diagonals or soft zigzags.
This affects not just looks but body perception and shaping emphasis.
- Vertical stripes can elongate visually.
- Horizontal texture lines from stitch anatomy may remain visible even when color stripes turn vertical.
- Variegated yarns may pool differently in sideways construction.
- Self-striping yarns can produce especially dramatic directional effects.
Tips for stripe planning
- Make a larger swatch with actual stripe repeats.
- Track how many rows each stripe takes after blocking.
- Consider whether side seams should match or intentionally shift.
- On mirrored fronts, decide if stripes should mirror or continue sequentially.
If you are using row-based stripes in a sideways garment, count rows carefully. For example, if you stripe every 4 rows and your body circumference requires 108 rows, you’ll have 27 stripe bands total. That is useful for centering motifs or balancing front and back pieces.
Shaping math for cross-grain garments
This is the part that intimidates many crocheters, but it becomes manageable once you separate which dimension is controlled by stitches and which is controlled by rows.
Ask these two questions first:
- In the finished garment, which direction do my stitches run?
- In the finished garment, which direction do my rows stack?
Then assign body dimensions accordingly.
Example: side-to-side sweater body
Let’s design a simple side-to-side pullover body in a stitch pattern with this blocked gauge:
- 15 stitches = 4 in
- 12 rows = 4 in
That gives:
- 3.75 stitches per inch
- 3 rows per inch
Suppose finished targets are:
- Bust circumference: 40 in
- Body length shoulder to hem: 21 in
- Upper body width from left side seam to right side seam is created by rows
- Length from hem to shoulder is created by stitches
Then:
- Bust circumference in rows = 40 × 3 = 120 rows
- Body depth in stitches = 21 × 3.75 = 78.75 stitches, round to 79 stitches before adding any edging logic
If the fabric stretches 10% comfortably in the row-wise direction and you want 2 in of negative ease, you might instead target 38 in actual circumference:
- 38 × 3 = 114 rows
That small shift can make the difference between crisp fit and bagginess.
Where shaping happens
In side-to-side crochet, you often shape by changing stitch count at top or bottom edges while row count continues to build circumference. That means:
- neckline shaping changes stitch count,
- hem curves or high-low shaping change stitch count,
- waist shaping can be created with short rows or selective increases/decreases,
- bust shaping can be worked with short rows surprisingly effectively.
Armhole math
For a drop-shoulder or dolman-like cross-grain design, armhole shaping may be minimal. For a set-in-like look, you need planned shaping.
Example:
- Desired armhole depth: 8 in
- Stitch gauge: 3.75 stitches/in
- Required armhole depth in stitch rows across the body depth dimension = 8 × 3.75 = 30 stitches
You might work the body for 79 stitches total depth, then leave a 30-stitch opening or shape over that zone depending on construction.
Sleeve math in cross-grain construction
A sleeve worked cross-grain can be a joy because the fabric’s stretch wraps the arm naturally.
Suppose sleeve gauge is the same:
- Bicep circumference target: 14 in
- Rows per inch: 3
- Need 42 rows around bicep if rows create circumference
For sleeve length:
- Underarm to cuff: 18 in
- Stitch gauge: 3.75 stitches/in
- Need about 68 stitches in length if stitches create sleeve length
If you want taper from 14 in bicep to 8 in cuff, and rows control circumference, you need to reduce from 42 rows to 24 rows across the sleeve. That can be shaped gradually with short rows, stepped row sections, or separate cuff treatment.
Step-by-step design process for a basic cross-grain garment panel
Let’s walk through a practical method you can apply to a vest, sweater body, or cardigan panel.
Step 1: Choose the silhouette
Decide whether the garment should be:
- fitted,
- boxy,
- oversized,
- cocooned,
- draped open-front.
Cross-grain construction especially shines in boxy, draped, and softly fitted silhouettes, but it can work in close-fit garments if the stitch and yarn recover well.
Step 2: Choose yarn and hook with behavior in mind
Recommendations:
- Fitted garment: wool or wool blend, sport to DK, hook 3.5–5 mm.
- Everyday pullover: DK or worsted with moderate bounce, hook 4.5–6 mm.
- Draped cardigan/wrap: soft DK to aran, maybe alpaca or bamboo blend, hook 5–7 mm, but stabilize shoulders.
- Summer top: cotton or linen blend, sport to DK, hook 3.5–4.5 mm, keep silhouette relaxed.
Step 3: Swatch in the actual stitch pattern
Measure:
- flat gauge,
- blocked gauge,
- directional stretch,
- edge behavior.
Write down whether row ends curl, flare, or stay neat.
Step 4: Decide orientation of rows and stripes
Sketch the piece. Mark:
- rows run side-to-side or diagonally,
- stripes vertical/horizontal/diagonal,
- stable edges vs flexible edges.
Step 5: Assign dimensions to stitches and rows
For example:
- body circumference = row count,
- hem-to-shoulder depth = stitch count,
- sleeve circumference = row count,
- cuff-to-underarm length = stitch count.
Step 6: Calculate starting chain or foundation row
If stitches determine garment depth, your starting chain often equals hem-to-shoulder depth.
Example:
- desired depth = 20.5 in
- stitch gauge = 3.5 stitches/in
- required stitches = 20.5 × 3.5 = 71.75, round to 72 stitches
Add any pattern multiple, for example:
- shell repeat multiple of 6 + 2
- nearest valid stitch count to 72 might be 74 stitches
Always note whether your turning chain counts as a stitch.
Step 7: Work rows to target width/circumference
If rows create circumference, calculate total rows needed.
Example:
- target width around body = 44 in
- row gauge = 2.75 rows/in
- required rows = 44 × 2.75 = 121 rows
If working front and back separately, divide as needed:
- back = 61 rows
- front = 60 rows
Or for mirrored fronts:
- back = 61 rows
- each front = 30 rows, plus edging allowance
Step 8: Add shaping intentionally
Common methods:
- Short rows to create bust room, shoulder slope, or sleeve cap contour.
- Top/bottom edge increases or decreases to shape neckline or hemline.
- Stepped sections for simple armholes and fronts.
- Bias shaping by increasing one edge and decreasing the other every row or every other row.
Step 9: Stabilize load-bearing areas
Shoulders and front edges usually need help in cross-grain garments.
Try:
- slip-stitch reinforcement on wrong side,
- sewn seam through shoulder join,
- crochet facing worked perpendicular to the main fabric,
- tighter hook for bands,
- non-stretchy join methods where appropriate.
Step 10: Block, measure again, then finish
Do not skip the second measurement stage. Cross-grain pieces often “tell the truth” only after blocking.
Measure:
- width under slight tension,
- length hanging vertically,
- armhole openings,
- neckline spread.
Adjust bands or seam allowances based on the blocked reality.
Seaming strategy for cross-grain pieces
The seam itself can either support or sabotage the design.
When two elastic edges are seamed together, the seam may ripple or pop if the join lacks structure. When a very stable edge is joined to a flexible row-end edge, one side may wave.
Good seam choices
- Mattress stitch/sewn seam: excellent for preserving drape while allowing precise easing.
- Slip stitch seam through both loops or back loops: flatter, can be decorative, slightly more restrictive.
- Single crochet seam: sturdier and more visible; useful when you want reinforcement.
- Join-as-you-go crochet seam: good for some open fabrics, but watch for extra stretch.
Best practices
- Match edge types whenever possible.
- If joining row ends to stitch edges, pin thoroughly and distribute ease deliberately.
- Seam shoulders with the garment supported flat, not dangling.
- For sag-prone fibers, add a hidden reinforcement thread or very light sewing thread in shoulders.
Blocking cross-grain crochet
Blocking is not a cosmetic afterthought here. It is part of the engineering.
Cross-grain pieces can expand asymmetrically, especially with lace, tall stitches, cotton, alpaca, and bias panels. Blocking helps the fabric settle, but overblocking can destroy recovery.
Blocking guidelines
- Wet block or steam block according to fiber.
- Lay pieces to measured dimensions, but do not stretch beyond intended wear ease.
- Let row-end edges dry fully supported.
- Hang garment briefly after seaming to test real-life drop.
- Re-check vertical measurements after 12–24 hours.
Special note for bias pieces
Bias crochet may lengthen significantly on the diagonal. Block it fully, then let it rest. For skirts, wraps, and long cardigans, it is often worth hanging the assembled garment overnight before final hemming or edging.
Troubleshooting common cross-grain problems
Problem: The garment grows wider with wear
Cause:
- Rows are running around the body in a highly elastic or low-recovery fabric.
Fix:
- Reduce target circumference by 5–10% in the next version.
- Use a smaller hook.
- Choose a woolier yarn.
- Add side seams or shaping seams for control.
Problem: The hem ripples
Cause:
- Row-end edge is too loose, or edging was added too densely.
Fix:
- Work a firmer selvedge.
- Add fewer edging stitches; a common ratio is to begin around 2 single crochet stitches per row-end pair in many medium-height stitch patterns, then adjust by testing.
- Steam lightly and let settle.
Problem: Shoulders sag
Cause:
- Stretchiest direction placed at shoulder span; no reinforcement.
Fix:
- Shorten shoulder width in pattern by 0.5–1 in per side if fabric relaxes heavily.
- Add sewn stabilization tape or crochet reinforcement.
- Switch shoulder band orientation in future versions.
Problem: Neckline stretches out
Cause:
- Row-end edge or open stitch pattern at neckline.
Fix:
- Add a tighter-band facing with smaller hook.
- Work a slip-stitch or single crochet stabilization round.
- Reduce neckline depth by several stitches in planning.
Problem: Sleeve twists or hangs oddly
Cause:
- Directional drape not matched to arm movement, or asymmetrical blocking.
Fix:
- Reblock both sleeves identically.
- Check whether one sleeve panel was mirrored incorrectly.
- Use a less bias-prone stitch for sleeves.
Problem: Side seams buckle
Cause:
- Unequal edge types or mismatched row counts.
Fix:
- Recount rows and stitches before seaming.
- Ease one side in gradually using mattress stitch.
- Add a border to the more flexible edge before joining.
Variations and design opportunities
Once you understand cross-grain behavior, you can use it in targeted ways rather than making the whole garment sideways.
Cross-grain yokes
Work the body conventionally but add a sideways collar or yoke panel for textural contrast and controlled neckline stretch.
Sideways sleeve only
Keep the body top-down or bottom-up, but work sleeves cross-grain so the arm gets better flex and visual stripe play.
Perpendicular bands
Add hem, cuff, and front bands worked at 90 degrees to the body fabric. This is especially effective with BLO ribbing.
Bias front panels
A cardigan can have bias fronts that fold softly while the back stays stable.
Modular cross-grain piecing
Assemble rectangles, trapezoids, or shaped panels with alternating row direction for intentional movement zones.
Accessories that benefit beautifully
- Shawls: sideways lace can emphasize sweep and edge drama.
- Cowls: cross-grain ribbing improves comfort and fit.
- Scarves: stripes behave differently and often look more polished.
- Bags: use cross-grain only selectively unless you want stretch; stabilize aggressively.
- Hats: classic sideways ribbed hats are a perfect example of directional elasticity used well.
A note on common mistakes beginners make when designing cross-grain
Even confident crocheters can miss these at first:
-
Using ordinary gauge logic without rotating it. If rows become circumference, row gauge becomes critical.
-
Ignoring fiber growth. A sideways alpaca cardigan and a sideways wool cardigan are not the same engineering problem.
-
Trusting unblocked fabric. Especially with drapey stitches, this leads to unpleasant surprises.
-
Treating all edges as equivalent. Row ends and stitch tops are different materials, effectively.
-
Overcomplicating shaping. Many excellent cross-grain garments are built from simple rectangles and gentle short rows.
-
Skipping reinforcement. Shoulders, fronts, and necklines often need deliberate support.
Putting it all together: an example design scenario
Let’s say you want a side-to-side striped pullover with soft drape, a slightly oversized fit, and fitted cuffs.
You choose:
- DK merino blend yarn
- 5 mm hook for body
- 4 mm hook for cuffs and neckband
- stitch pattern: half double crochet in the third loop
Your blocked swatch gives:
- 14 stitches = 4 in
- 11 rows = 4 in
- row-wise stretch around body: comfortable at about 6%
Finished goals:
- actual bust measurement: 38 in
- desired ease: +4 in but because row direction stretches around body, you target 40 in instead of 42 for wear
- body depth shoulder to hem: 22 in
- sleeve circumference at bicep: 13.5 in
- sleeve length underarm to cuff: 17 in
Math:
- stitches per inch = 3.5
- rows per inch = 2.75
- body row target = 40 × 2.75 = 110 rows
- body stitch target = 22 × 3.5 = 77 stitches
So each main panel begins with about 77 stitches, adjusted to stitch pattern if needed.
For a simple drop shoulder, you might work:
- Back: 110 rows straight.
- Front: split into two mirrored pieces of 55 rows each with neckline shaping over the top 18 stitches.
- Cuffs: sideways BLO single crochet ribbing with 10 stitches and enough rows to fit wrist circumference, perhaps 24–28 rows depending on stretch.
You would then seam shoulders with reinforcement, set the sleeves into a mostly square armhole, and add a firm neckband on the smaller hook to pull the neckline into shape.
Notice how many decisions came from directionality, not just from “what sweater shape do I want?” That is the whole point. Cross-grain design is less about being unconventional and more about using crochet’s built-in behavior intelligently.
Key takeaways
Cross-grain crochet is one of the clearest ways to move from following garment patterns to truly designing fabric. When you rotate the row direction, you rotate the fabric’s strengths and weaknesses too.
Remember these core principles:
- Rows and stitches behave differently; identify which direction gives stretch, drape, and stability in your chosen fabric.
- Swatch for orientation, not only for standard gauge.
- Map stretch to the body: put elasticity where the wearer needs movement and stability where the garment carries weight.
- Account for edge type: row ends and stitch edges need different handling.
- Choose fiber intentionally based on recovery as well as drape.
- Do the math with rotated dimensions so row gauge controls what it truly will control in the finished piece.
- Reinforce load-bearing zones and block as part of construction, not as a final touch.
If you have ever loved a crochet stitch but hated it in a finished garment, try not changing the stitch first. Change the direction. Work it sideways. Let it run on the bias. Make the rows serve the shape you want.
That is when cross-grain construction becomes more than a technique. It becomes a language for shaping movement, and once you learn to read it, your crochet garments gain a whole new level of intention.