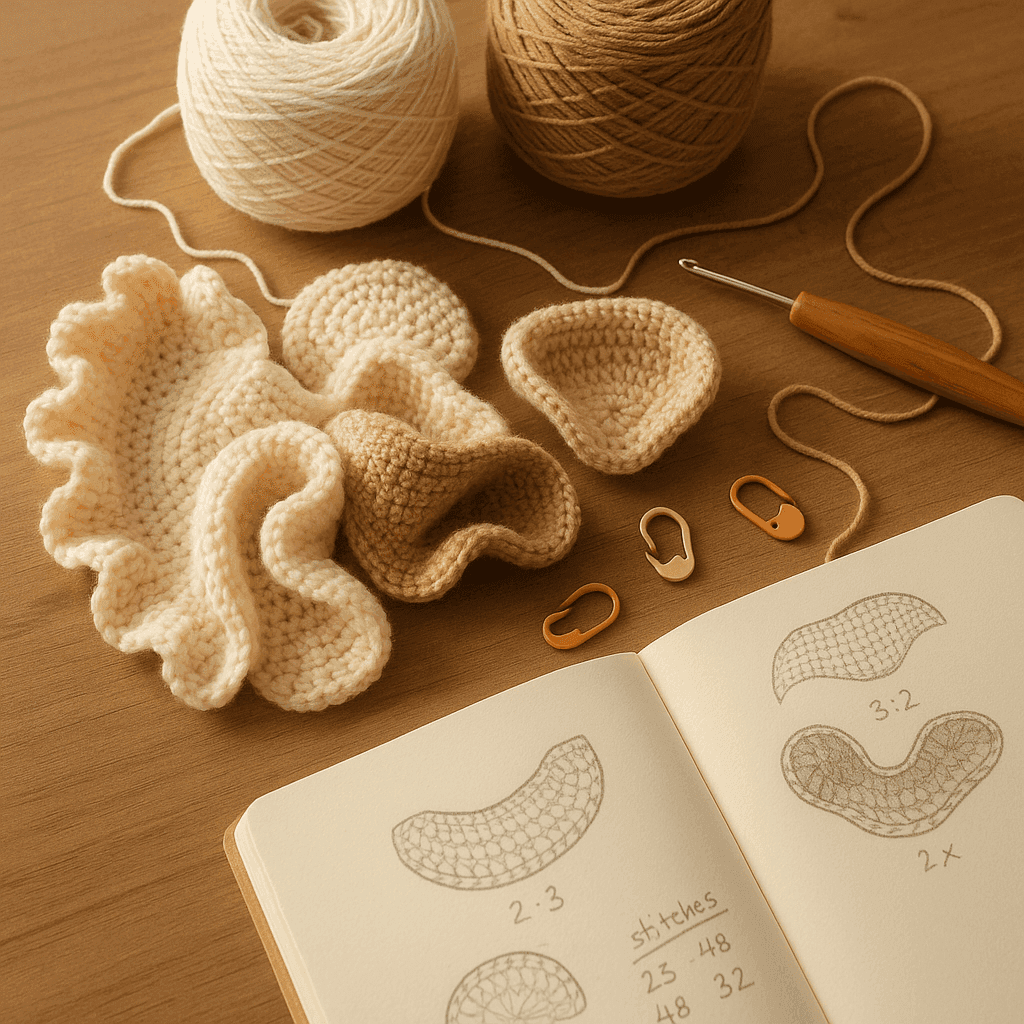
There’s a particular kind of crochet excitement that happens when a flat swatch suddenly refuses to stay flat. One edge begins to ripple like a lettuce leaf, a circle quietly lifts into a bowl, or a panel arches and twists into something that looks more like fabric engineering than ordinary stitch practice. If you’ve ever crocheted a collar that wanted to frill, a bust section that needed more depth, or a flower petal that needed to curve instead of sit limp, you’ve already brushed against the idea behind differential feed shaping.
Most crocheters first learn shaping through increases, decreases, and short rows. Those methods are foundational, and they remain essential. But there’s another powerful way to control form: deliberately feeding different amounts of crochet fabric into adjoining zones so that one part grows faster than its neighbor. That difference in growth forces the fabric to bend, ripple, cup, flare, or saddle.
In sewing, knitwear, and machine fabric handling, “differential feed” describes moving one layer at a different rate from another. In crochet, we can borrow that logic. We build neighboring zones with unequal edge ratios, different row frequencies, or internal rails that act like speed limits and anchor lines. Instead of thinking only in terms of “add a stitch here,” we think in terms of “which area is growing more quickly, by how much, and what shape does that growth difference produce?”
This is an especially useful mindset for sculptural crochet, fitted garments, dimensional accessories, and floral or organic forms. It helps you engineer ruffles and flounces that are intentional rather than accidental. It helps you create collars that stand or fold softly. It helps with bust cups, shoulder forms, petals, berets, saddled surfaces, and any project where a flat rectangle just won’t do the job.
What follows is a deep, practical guide to using unequal edge ratios, internal shaping rails, and stitch frequency to build three-dimensional crochet forms. We’ll talk about the math, the stitches, yarn behavior, blocking, finishing, and the very common mistakes that make a promising sculptural swatch collapse or twist in the wrong direction.
The core idea: adjoining zones with different growth rates
At its heart, differential feed shaping means this: two neighboring parts of the crochet fabric are connected, but they do not grow at the same rate.
That growth difference can happen in a few ways:
- Unequal stitch counts worked into the same span: for example, working 30 stitches along one edge and 45 stitches into the adjoining edge length.
- Different row frequencies: one zone accumulates more rows over the same distance than another.
- Internal rails or anchor lines: a structural line inside the fabric holds one area relatively stable while the fabric on one or both sides grows faster.
- Mixed stitch heights and densities: taller or looser stitches cover distance differently than shorter, denser stitches.
- Intentional selective working: for example, placing increases only on one side of a rail, or working every row into one zone but only every second row into another.
The resulting shapes usually fall into three broad families:
- Positive edge differential produces ruffles or flounces: one edge is longer than the edge it is attached to, so it waves.
- Surface differential produces cupping or doming: one region contains more fabric than the neighboring region, so the piece bends into depth.
- Opposing differentials produce saddle forms: one direction wants to curve up while the perpendicular direction wants to curve down, creating a hyperbolic or saddle-like surface.
If that sounds geometric, it is—but it is also very crochetable. You do not need advanced mathematics to use it well. You do need careful counting, swatching, and an understanding of how your stitch and fiber behave.
Thinking in ratios instead of only increases
A very useful shift is to stop asking only “How many increases should I make?” and start asking “What is my growth ratio between adjoining zones?”
A ratio tells you how much extra fabric one area has relative to another.
For example:
- A 1:1 ratio means both areas grow equally. Fabric stays flat, assuming equal stitch gauge and no other distortions.
- A 1.2:1 ratio means one zone has about 20% more fabric than its neighbor. This gives a mild flare or gentle cup.
- A 1.5:1 ratio produces a much stronger ripple or curve.
- A 2:1 ratio usually gives dramatic ruffling, dense flounces, or very pronounced sculptural behavior.
This can be expressed in actual counts:
- 30 stitches attached to 30 base points = 1:1
- 36 stitches attached across 30 base points = 1.2:1
- 45 stitches attached across 30 base points = 1.5:1
- 60 stitches attached across 30 base points = 2:1
Or in rows:
- 10 rows adjoining 10 rows = 1:1
- 12 rows adjoining 10 rows = 1.2:1
- 15 rows adjoining 10 rows = 1.5:1
The critical thing is not just the count on paper. It is the effective growth after stitch height, width, tension, and fiber response are taken into account. A dense single crochet worked tightly behaves very differently from a relaxed double crochet in a springy wool.
Where differential feed shaping shows up in real crochet
Once you begin looking for it, you see this principle everywhere:
- Ruffled borders: multiple stitches worked into each edge stitch.
- Flounced skirts and cuffs: rounds or rows increased at a faster rate than the body.
- Standing collars: outer edge fed more fabric than inner neckline edge.
- Bust cups and bra tops: center zones gain more fabric than perimeter zones, often around an internal anchor.
- Petals and leaves: edges are encouraged to frill or cup while the center vein acts as a stabilizing rail.
- Berets and tam shapes: crown and sidewall use differing growth rates.
- Amigurumi facial shaping: differential row counts can help build cheeks and muzzles.
- Hyperbolic crochet: systematic increase frequency creates dramatic saddle-like planes.
Short rows can contribute to many of these shapes, but they are not the only answer. Differential feed offers another route, often smoother and more integrated into the fabric.
The three main shaping levers
1. Unequal edge ratios
This is the easiest way to start. You attach a longer edge to a shorter one.
Classic examples:
- Work 2 dc in each stitch around an edge for a firm ruffle.
- Work 3 sc into every 2 edge rows to create a mild flare along a side edge.
- Work 5 stitches across every 4 base stitches on a collar edge for a soft wave.
The more extra stitches you feed in, the more pronounced the curve or ruffle.
2. Internal shaping rails
An internal rail is a line within the fabric that remains comparatively stable while neighboring sections grow differently. Think of it as a seam line, vein, spine, dart leg, or structural hinge.
Crochet rails can be created with:
- A marked center stitch column
- Post stitches
- Slip stitch ridges
- Back loop/front loop transitions
- Surface crochet lines
- Deliberately tighter stitches along a path
- A chain spine that later gets worked into
Examples:
- In a petal, the center rail behaves like a midrib while each side gains extra width.
- In a bust cup, a vertical or diagonal rail can anchor the fullest point while neighboring wedges increase in frequency.
- In a sculptural collar, an inner neckline rail may remain stable while the outer fabric expands.
3. Stitch frequency
Stitch frequency means how often you add growth within a repeat—not just how many stitches total you have.
For instance, these all produce different behavior even if the final count increase is similar:
- Increase in every stitch of one round
- Increase every other stitch over several rounds
- Add one extra row every fourth row on one side of a rail
- Work taller stitches every third repeat while the adjacent zone stays in half double crochet
High-frequency distribution creates smoother, more continuous curves. Low-frequency distribution often creates more segmented, petal-like, or architectural shapes.
The basic geometry of shape outcomes
Let’s simplify the shape logic.
For ruffles and flounces
If the outer edge grows faster than the inner edge, the extra length has nowhere to go but into waves.
Common ratios:
- 1.1:1 to 1.25:1 = soft flare
- 1.25:1 to 1.5:1 = clear ruffle
- 1.5:1 to 2:1 = dramatic frill or flounce
Example border math:
Base edge: 80 stitches
- Soft flare: 88–100 stitches total in border round
- Medium ruffle: 100–120 stitches total
- Strong flounce: 120–160 stitches total
For cups and bowls
If the center region grows faster than the perimeter or neighboring zones, the fabric starts to rise into depth.
You can do this by:
- More stitches per row in the middle
- More rows worked in the middle than at the sides
- Taller stitches in the middle and shorter stitches at the edges
- Wedge-based differential around a center point or line
A cup often needs growth distributed around a focal apex instead of all along one edge.
For saddles and hyperbolic forms
A saddle shape curves in opposite directions along different axes. One area is effectively overfed relative to another in a distributed way.
The easiest crochet method is regular increase frequency across a plane, especially with dense stitches.
Examples:
- Add 1 increase every 4 stitches in every round for strong hyperbolic tendency.
- Add 1 increase every 6 stitches every round for gentler saddle behavior.
- Work a central rail and increase on both sides of it while periodically restricting growth in the perpendicular direction.
The exact result depends heavily on stitch density and fiber memory.
Gauge matters more here than in many flat projects
If you’ve ever gotten away with “close enough” gauge on a shawl, this is not that moment. Differential shaping amplifies small differences.
You need to understand two gauges:
- Horizontal stitch gauge: how many stitches per 4 in / 10 cm
- Vertical row gauge: how many rows per 4 in / 10 cm
Because crochet stitches are rarely square, row gauge and stitch gauge differ. That matters enormously when you attach rows to stitches or build internal rails.
Example swatch in worsted-weight wool with a 5.0 mm hook:
- Single crochet: 16 sts x 18 rows = 4 in / 10 cm
- Half double crochet: 14 sts x 12 rows = 4 in / 10 cm
- Double crochet: 12 sts x 9 rows = 4 in / 10 cm
Notice that the ratios between row and stitch counts change by stitch. If you’re picking up 1 stitch in every row edge without accounting for this, you can unintentionally create ruffling or pulling.
A practical pickup rule
When working into row ends, you often need a ratio such as:
- 3 stitches per 4 rows for sc fabrics
- 2 stitches per 3 rows for hdc fabrics
- 1 stitch per 1 row or 2 per 3 rows, depending on dc height and tension
Always swatch your exact stitch pattern.
Recommended yarns and hooks for sculptural shaping
Fiber choice changes everything.
Best fibers for crisp, stable shaping
- Cotton: clear stitch definition, low elasticity, holds ruffles and architectural edges well.
- Linen blends: beautiful for collars and flounces, especially after washing and pressing.
- Wool: excellent for cupping and forms that benefit from bounce; can be blocked into shape and often retains memory well.
- Wool blends with silk or alpaca: lovely drape, but may soften sharp structure.
More challenging fibers
- Bamboo/rayon: drapey and heavy; can flatten subtle shaping but create elegant fluid ruffles.
- Acrylic: behavior varies widely; some hold shape surprisingly well, others look puffy or limp.
- Slippery plant/synthetic blends: good for soft flounce, less ideal for crisp internal rails.
Hook size strategy
Use hook size as part of your engineering.
- Go down 0.5 mm for rails or stabilizing zones to create firmer anchors.
- Stay at standard hook size for balanced shaping.
- Go up 0.5 mm for overfed zones if you want the extra fabric to bloom softly rather than bunch tightly.
Typical starting points:
- Fingering yarn: 2.75–3.5 mm
- DK: 3.75–4.5 mm
- Worsted: 4.5–5.5 mm
- Aran: 5.0–6.0 mm
For highly sculptural samples, many crocheters prefer a hook at the lower end of the yarn’s suggested range for better control.
Step-by-step method 1: engineering a controlled ruffle edge
Let’s build a swatch with a planned outer ruffle.
Swatch setup
- Yarn: DK cotton or wool
- Hook: 4.0 mm
- Base stitch: single crochet
- Foundation: ch 31
Base panel
- Row 1: Sc in 2nd ch from hook and in each ch across. 30 sc.
- Rows 2–12: Ch 1, turn, sc in each stitch across. 30 sc.
You now have a flat panel with 30 stitches across and 12 rows deep.
Ruffle round along one long edge
We’ll use a 1.5:1 ratio along the row-end edge.
First determine the available attachment points. We have 12 rows. On a sc fabric, a common pickup ratio is about 3 sts per 4 row ends to stay flat. For 12 rows, that baseline is 9 stitches. To create a ruffle at 1.5:1 over flat baseline, we need roughly 13–14 stitches instead of 9.
Option A: mild ruffle
- Work [sc in next row end, 2 sc in next row end] across 6 times.
- Total picked-up stitches: 18 sts over 12 row ends.
This is already quite full because row ends are a compressed space. Expect a lively edge.
Option B: measured ruffle with spread distribution
- Mark row ends into groups of 4.
- Into each group of 4 row ends, work 5 sc total, distributed as 1, 1, 1, 2.
- Repeat for all 3 groups.
- Total: 15 sc over 12 row ends.
This gives a more controlled 1.25:1 over direct row-end count.
What to observe
- If the edge gently waves, your ratio is mild.
- If it forms pronounced ripples, your differential is stronger.
- If it buckles awkwardly in just one area, your distribution was uneven.
Common count checkpoints
- Base panel side edge = 12 row ends
- Mild ruffle pickup = 15 sts
- Medium ruffle pickup = 18 sts
- Strong ruffle pickup = 24 sts (2 sc in each row end)
Step-by-step method 2: building a cupped petal with a center rail
This is one of the clearest demonstrations of internal shaping rails.
Swatch setup
- Yarn: sport or DK wool/cotton blend
- Hook: 3.75 mm
- Foundation: ch 9
Petal structure concept
- The center stitch column acts as the rail.
- Each side grows more quickly than the center.
- Stitch height also increases toward the middle rows to encourage cupping.
Row instructions
- Row 1: Sc in 2nd ch from hook and across. 8 sc.
- Row 2: Ch 1, turn. Sc 2, hdc 2, place marker in next st, hdc 2, sc 1. 8 sts.
- Row 3: Ch 1, turn. Sc 1, hdc 2, dc 1, rail stitch: sc tightly into marked center st, dc 1, hdc 2, sc 1. 8 sts.
- Row 4: Ch 1, turn. Sc 1, hdc 1, 2 dc in next st, rail stitch in next st, 2 dc in next st, hdc 1, sc 1. 10 sts.
- Row 5: Ch 1, turn. Sc 1, hdc 1, dc 2, tr 1, rail stitch in next st, tr 1, dc 2, hdc 1, sc 1. 10 sts.
- Row 6: Ch 1, turn. Sc 1, hdc 1, 2 dc in next st, dc 2, rail stitch, dc 2, 2 dc in next st, hdc 1, sc 1. 12 sts.
- Row 7: Ch 1, turn. Work even in pattern, keeping rail stitch firm and edge stitches shorter. 12 sts.
- Row 8: Ch 1, turn. Decrease symmetrically back to 10 sts.
- Row 9: Ch 1, turn. Decrease symmetrically back to 8 sts.
Why this works
- The center rail is relatively stable and tight.
- The neighboring stitches become taller and then more numerous.
- The sides are effectively fed more fabric than the center spine.
- The petal cups and lifts instead of lying flat.
Important handling note
Do not flatten it aggressively while working. Let the shape tell you what it wants to do.
Step-by-step method 3: creating a saddle form through systematic increase frequency
This technique is fantastic for coral-like forms, hyperbolic sculptures, and dramatic collars.
Swatch setup
- Yarn: worsted wool or cotton
- Hook: 4.5 mm
- Work in rounds or joined rows
- Stitch: single crochet for strongest structural clarity
Foundation
- Ch 21.
- Row 1: Sc in 2nd ch from hook and across. 20 sc.
- Continue in rows for 4 rows total, 20 sc each row.
Begin distributed differential growth
From Row 5 onward, work increases at regular frequency:
- Row 5: Sc 4, 2 sc in next st across. 24 sts.
- Row 6: Work even. 24 sts.
- Row 7: Sc 5, 2 sc in next st across. 28 sts.
- Row 8: Work even. 28 sts.
- Row 9: Sc 6, 2 sc in next st across. 32 sts.
- Rows 10–14: Repeat this idea, alternating increase rows and even rows.
Shape behavior
At first it just looks wider. Then the fabric begins to undulate because the added width is not balanced by equivalent vertical growth and because crochet’s inherent structure resists lying smoothly with that much excess.
For stronger saddle behavior, increase more often:
- Every row: Sc 3, inc across for dramatic hyperbolic curl.
For gentler architectural curvature:
- Every other row: Sc 7, inc across.
Count planning example
Starting width: 20 sts
After five increase rows adding 4 sts each:
- 20 → 24 → 28 → 32 → 36 → 40 sts
That is a 2:1 width growth over the original count if sustained, enough to produce significant non-flat behavior.
Internal rails in garment shaping
One of the most practical uses of differential feed shaping is in wearables where you need contour without obvious dart lines.
Bust shaping concept
Instead of relying exclusively on short rows, create a fullness zone with a rail.
Example framework for one bust cup panel:
- Underbust base: 24 sc
- Mark center 4 stitches as apex zone
- Work 10–14 rows, increasing more frequently in the 8 stitches around the center than in the outer thirds
Sample increase distribution:
- Outer 8 sts each side: work even most rows
- Center 8 sts: increase 2 sts every other row for 6 rows
Count progression:
- Row 1: 24 sts
- Row 3: 26 sts
- Row 5: 28 sts
- Row 7: 30 sts
- Row 9: 32 sts
- Row 11: 34 sts
Because the center zone gains more fabric, the panel starts to cup rather than simply widen. A firm center marker or post-stitch column can function as a rail if you want the apex controlled rather than pointy.
Collar shaping concept
For a collar that stands and flares:
- Neck edge attachment span: 60 sts
- Collar outer edge target after 6 rows: 75–90 sts depending on desired drama
Method:
- Rows 1–2: work even off neckline to establish base
- Rows 3–6: place increases in outer half of collar sections or at regular intervals away from neckline rail
This keeps the inner edge relatively constrained while the outer edge grows longer, making the collar curve around the neck and flare outward.
Stitch choice as a shaping tool
Different stitches create different effective feed rates even when counts match.
Single crochet
- Dense, sturdy, excellent for rails and hyperbolic forms
- Best for crisp sculptural work
- Easy to count and control
Half double crochet
- Good middle ground
- Curves more softly than sc
- Useful for cups and wearable shaping
Double crochet
- Adds height quickly
- Can create flare fast
- Better for fluid ruffles than rigid architecture
Treble and taller stitches
- Excellent for petal edges and dramatic flare
- Can collapse under heavy yarn weight
- Best paired with stabilizing rails or borders
Front post/back post stitches
- Great for visible internal rails
- Add local thickness and stiffness
- Excellent in sculptural collars and corsetry-inspired panels
Troubleshooting: common mistakes and how to fix them
Problem: the ruffle is tighter or frillier than planned
Cause: too high a pickup ratio, especially along row ends.
Fix:
- Recalculate your baseline pickup ratio from your swatch.
- Reduce from, say, 2 sts per row end to 3 sts per 4 row ends.
- Try a larger hook only for the ruffle round if you want softer bloom rather than tight gathering.
Problem: the edge pulls instead of flaring
Cause: underfeeding the edge, or stitches are too short/tight.
Fix:
- Add 10–20% more stitches along the edge.
- Switch from sc to hdc or dc in the overfed zone.
- Block aggressively to test whether the issue is structural or just tension-related.
Problem: the cup forms a point instead of a smooth curve
Cause: increases clustered too narrowly around a single center point.
Fix:
- Spread increases over a broader apex zone.
- Alternate increase rows with plain rows.
- Use hdc/dc transitions to smooth the contour.
- Add a firm rail stitch column so the shape bends rather than spikes.
Problem: the fabric twists unpredictably
Cause: unequal distribution, inconsistent turning, or asymmetrical rail tension.
Fix:
- Mark repeats with stitch markers.
- Count each section separately.
- Check whether your left and right sides mirror exactly.
- If working joined rounds, ensure your seam area is not absorbing or adding hidden stitches.
Problem: the saddle form collapses into a tube or bowl
Cause: differential concentrated too much in one direction rather than distributed over the plane.
Fix:
- Spread increases more evenly.
- Use denser stitch patterns like sc.
- Reduce yarn drape or choose a firmer fiber such as cotton or wool.
Problem: blocking removes the shape entirely
Cause: fiber too relaxed, shaping too subtle, or structure not stabilized.
Fix:
- Increase differential ratio slightly.
- Add edging, rail reinforcement, or a final tighter round.
- Choose a more memory-rich fiber next time.
- Steam-shape acrylic cautiously if appropriate, but know that “killing” acrylic can permanently alter drape.
Blocking behavior and finishing strategies
Blocking is not just cosmetic here. It is part of the engineering.
Wet blocking
Best for:
- Wool
- Wool blends
- Some cottons
Use it to:
- Open and set ruffles
- Encourage cups to deepen smoothly
- Pin saddle forms into stable drying shapes
Steam blocking
Best for:
- Some cottons
- Some acrylics with great caution
Use it to:
- Refine collars
- Smooth transitions around rails
- Set petal edges
Spray blocking
Best for:
- Light reshaping
- Delicate dimensional motifs
Finishing reinforcements
To preserve sculptural form, consider:
- Crab stitch edging for a firmer perimeter
- Slip stitch reinforcement along a rail
- Surface crochet line to anchor a fold or spine
- Hidden cord or fine millinery wire in collars and petals
- Sew-in grosgrain or twill tape on garment rails or neckline anchors
- Lining selected sections for bust cups or structured accessories
A flounce may need no reinforcement at all. A standing collar often benefits from at least one stabilizing strategy.
Variation recipes you can use immediately
Here are several practical ratio recipes.
Soft ruffle border
- Base edge: 40 sts
- Border round: increase to 48 sts
- Ratio: 1.2:1
- Suggested stitch: hdc
- Result: gentle wave
Classic frill
- Base edge: 40 sts
- Border round: increase to 60 sts
- Ratio: 1.5:1
- Suggested stitch: dc
- Result: visible ruffle
Dramatic flounce
- Base edge: 40 sts
- Border round 1: increase to 60 sts
- Border round 2: increase to 80 sts
- Effective ratio from base: 2:1
- Suggested stitch: dc or tr
- Result: layered flounce
Shallow cup
- Base panel: 24 sts
- Add 2 sts in center third every other row for 4 rows
- Final count: 28 sts
- Suggested stitch: hdc
- Result: modest shaping for bust or shoulder contour
Deep cup
- Base panel: 24 sts
- Add 2–4 sts around apex zone every other row for 6 rows
- Final count: 36 sts
- Suggested stitch: hdc/dc mix with rail
- Result: strong projection
Hyperbolic saddle swatch
- Starting row: 30 sc
- Every row: sc 4, inc across
- Row increase count: +6 sts per row
- After 5 increase rows: 60 sts
- Result: pronounced curling, ruffling, saddle tendencies depending on handling
How to design your own differential shaping plan
When drafting a project, I like to work through these questions in order:
-
What final shape do I want?
- Rippled edge?
- Cupped center?
- Opposing curvature?
-
Where is the stable zone?
- Inner edge?
- Center rail?
- Outer frame?
-
Which zone needs more fabric?
- By width?
- By height?
- By both?
-
How much more?
- 10%?
- 25%?
- 50%?
- 100%?
-
How will I distribute that growth?
- Continuous small increases?
- Larger increases spaced farther apart?
- Taller stitches?
- Extra rows?
-
What fiber supports the goal?
- Crisp cotton for architectural collars?
- Wool for blossom-like petals?
- Drapey rayon blend for cascading flounce?
-
How will I stabilize the final form?
- Edging?
- Rail reinforcement?
- Blocking?
- Lining?
That planning process turns “I hope this curves” into “I know which zone is overfed and why.”
A note on combining differential feed with traditional shaping
This technique is powerful on its own, but it becomes exceptional when combined thoughtfully with other methods.
Try pairing it with:
- Short rows for localized projection without changing edge counts too dramatically
- Decreases to taper a ruffle back into a flat section
- Post-stitch ribs to create rails with directional stiffness
- Join-as-you-go motifs where one motif edge is deliberately overfed into another
- Foundation stitches for cleaner starting rails with easier count control
For example, a beautifully fitted bust cup may use:
- A center rail for stability
- Differential increase around the apex zone for depth
- A few short rows to refine upper-edge coverage
- A reinforced edging to hold the neckline shape
That is not cheating. That is excellent design.
Practice swatches worth making
If you want this technique to become intuitive, make a small library of shaping swatches. Label them with yarn, hook, stitch, and ratio.
I recommend at least these five:
-
Edge ruffle sampler
- 1.1:1, 1.25:1, 1.5:1, and 2:1 pickups on identical bases
-
Center cup sampler
- Same base panel, different apex increase frequencies
-
Rail comparison swatch
- One with a sc rail, one with a post-stitch rail, one with a slip stitch rail
-
Fiber comparison
- Same shaping recipe in cotton, wool, and acrylic
-
Blocking comparison
- One unblocked, one wet-blocked, one steam-shaped
Those swatches teach faster than any diagram because you begin to feel how much extra fabric creates which response.
Common design intuition to develop
Over time, you start to recognize a few very reliable truths:
- If your shaping isn’t visible, you probably need either more differential or a firmer yarn.
- If your shaping is chaotic, your distribution is probably uneven.
- If your rail disappears, it likely needs tighter stitches, a smaller hook, or a more visible structure.
- If a ruffle looks heavy and sad, the yarn may be too dense for the amount of extra edge length.
- If a cup feels pointy, broaden the increase field and soften the stitch transition.
- If a saddle won’t hold, use shorter stitches and more regular increase placement.
These are the same kinds of lessons garment sewists learn when easing one edge to another, or knitters learn when balancing row gauge and shaping. Crochet gives us a uniquely tactile way to do it because each stitch is both structure and surface.
Takeaways
Differential feed shaping is one of the most useful advanced ways to think about crochet form. Rather than relying only on obvious increases or short-row wedges, you intentionally let adjoining zones grow at different rates. That unequal growth produces ruffles, flounces, cupped surfaces, petals, collars, bust shaping, and saddle forms.
The key tools are straightforward:
- Unequal edge ratios create flare and ripple.
- Internal rails stabilize and direct curvature.
- Stitch frequency controls how smooth or dramatic the shape becomes.
- Gauge, fiber, and hook size determine whether the form is crisp, soft, springy, or drapey.
- Blocking and reinforcement help set and preserve the sculptural result.
If you remember only one thing, let it be this: shaping is not just about adding stitches. It is about deciding where extra fabric lives, what it is anchored against, and how quickly that difference accumulates.
Once you begin designing that way, crochet stops being only flat construction with occasional increases. It becomes a remarkably sophisticated way to build volume, contour, and movement—one measured stitch ratio at a time.