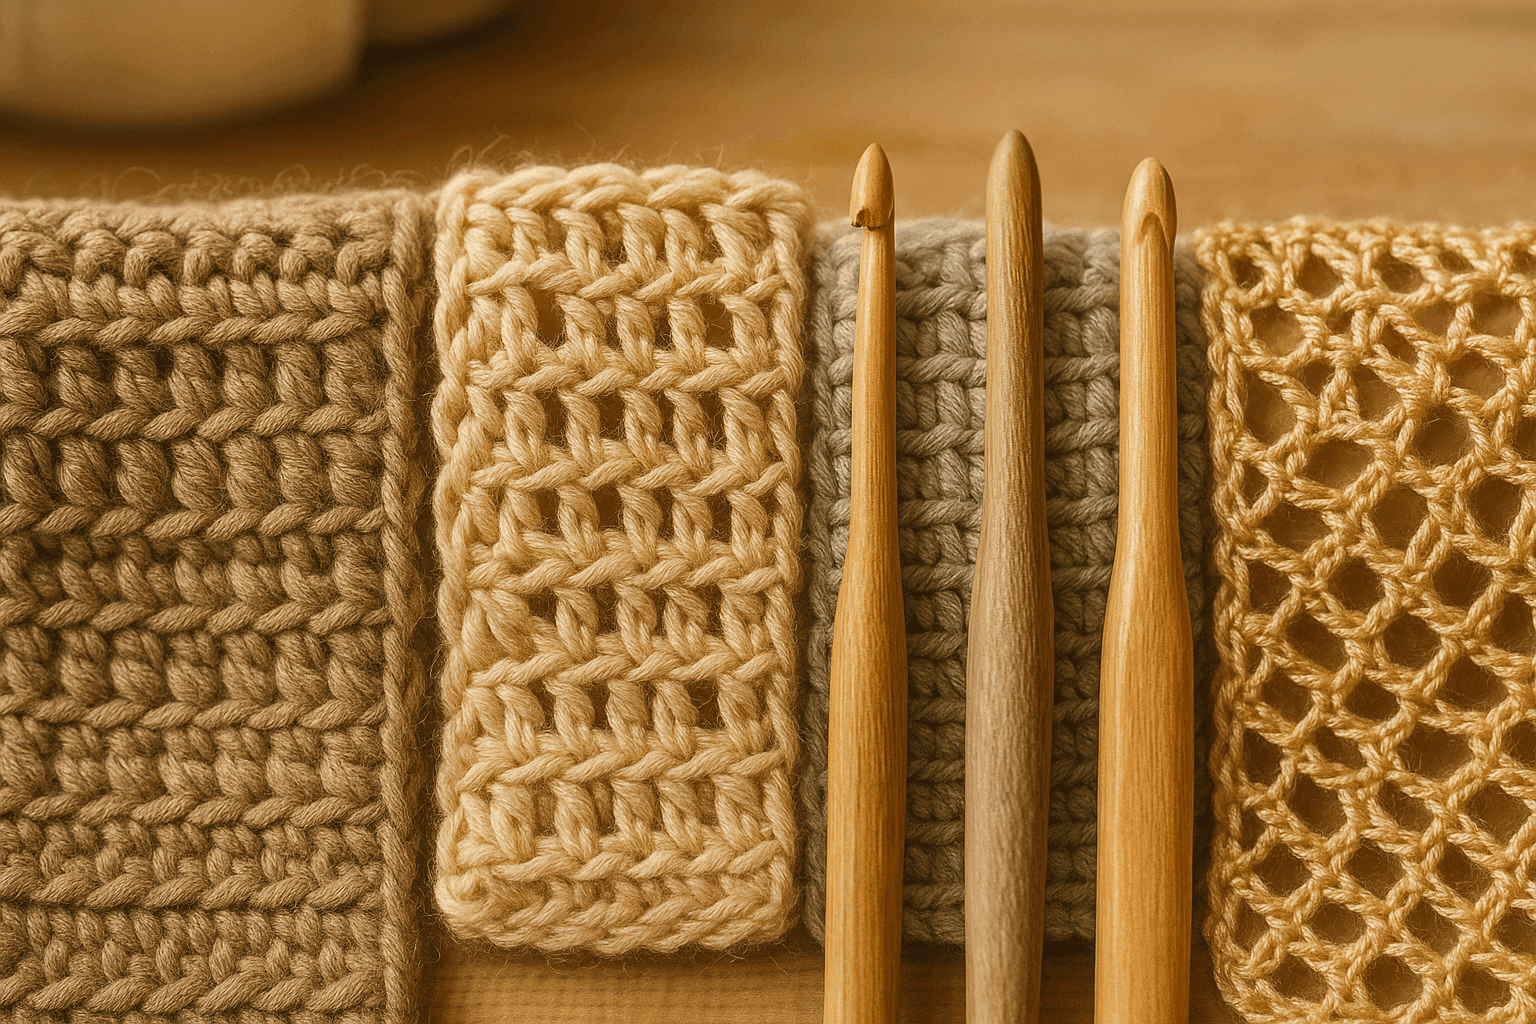
There is a particular kind of mystery that shows up when you have followed a pattern faithfully, counted every stitch twice, used the recommended yarn weight, and still ended up with fabric that looks noticeably different from the sample. Maybe your lace looks cloudier and less defined. Maybe your structured bag panel feels looser and more expandable than it should. Maybe a stitch pattern that sat perfectly upright in one swatch starts leaning or skewing in another for no obvious reason.
Most of us are taught to blame three things first: hook size, yarn choice, and tension. Those absolutely matter. But once you begin looking closely at the actual geometry of stitch formation, another layer appears. The path your hook takes into the stitch, the way the loop legs are spread or compressed during draw-up, and the shape of your hook’s head and throat all influence how each loop is born. That changes not just gauge, but openness, resilience, snag resistance, surface definition, and long-term stability.
This is one of those advanced topics that sounds theoretical until you test it with two hooks and one ball of yarn. Then it becomes obvious. A fractionally different insertion angle can widen the top of a stitch. A deeper throat can hold a larger active loop, increasing loop yield. A more tapered head can pass through dense fabric cleanly, while an inline head may form a more square, controlled loop. The yarn itself responds too: springy wool rebounds after compression, cotton preserves flattening longer, linen records stress lines, and slick synthetics slide into elongated loop shapes unless you actively manage them.
If you have ever wondered why one crocheter’s fabric looks architectural and another’s looks fluid even at the same nominal gauge, this is the conversation underneath that difference.
Context: What we mean by draft angle and loop leg geometry
When I say draft angle, I am talking about the angle at which the hook enters an existing stitch or space and the angle at which it draws the new loop back through. Think of it as the trajectory of force during stitch formation. Some crocheters insert almost straight on, with the hook shaft parallel to the fabric plane. Others angle downward or upward more noticeably. Some rotate the hook aggressively during draw-through; others barely turn it at all.
When I say loop leg geometry, I mean the shape, spacing, and tension relationship of the two sides of a loop after it is formed. Every crochet stitch is a system of loops stacked, interlocked, compressed, and released. The “legs” of a loop may sit upright, splay outward, twist, tighten at the crossing point, or flatten against adjacent strands. These micro-shapes determine whether fabric reads as crisp, airy, skewed, rope-like, or mushy.
Three mechanical factors work together here:
- Insertion path: where and how the hook enters the stitch.
- Yarn compression: how much the yarn is flattened, abraded, or compacted as it moves through hook head, throat, and working loops.
- Hook throat/head shape: how the hook captures, holds, and releases the loop.
These are not separate in practice. If you switch from a tapered hook with a narrow throat to an inline hook with a deeper throat, you often also change your insertion confidence, your rotation, and the amount of yarn dragged through the stitch. That alters loop size and the orientation of the loop legs before the yarn has a chance to recover.
The core geometry of a crochet stitch
Let’s strip stitch formation down to basics. In a simple single crochet, you:
- Insert the hook.
- Yarn over and draw up a loop.
- Yarn over and pull through both loops.
That sounds straightforward, but geometrically it creates multiple transitions:
- The existing stitch is displaced to admit the hook.
- The working yarn bends around the hook head.
- The active loop expands to fit the hook’s shaft or throat.
- The loop is compressed as it passes through another loop.
- The new top “V” is set when the stitch closes.
Each transition has a size, angle, and amount of friction. Those determine how much yarn ends up allocated to stitch height versus width, how much torque is stored in the stitch, and how strongly the stitch resists later movement.
In practical terms:
- More yarn allocated to width = more open fabric, broader stitch tops, often softer drape.
- More yarn allocated to height = taller-looking stitches, column emphasis, sometimes vertical stretch.
- More compression and friction = tighter definition, but also possible distortion or drag.
- More uniform loop formation = clearer stitch pattern and more reliable gauge.
Inline vs tapered hooks: beyond ergonomics
Crocheters often describe inline hooks as “precise” and tapered hooks as “smooth,” which is true as far as hand feel goes. But the bigger design question is what they do to the loops.
Inline hooks
An inline hook typically has:
- A head and shaft that remain more aligned in diameter
- A deeper, more angular throat
- A squarer transition from shaft to hook area
This often encourages:
- More consistently sized active loops
- A firmer “stop” point when pulling a loop onto the shaft
- Better retention of loop shape before completion
- Slightly more angular, structured stitch definition
Possible fabric effects:
- Clearer lace eyelets because the openings are not as easily collapsed during draw-through
- Denser, more architectural fabric in stitches like single crochet, waistcoat stitch, and linked stitches
- Greater stitch stability in firm-gauge pieces like baskets, bags, and amigurumi
Possible drawbacks:
- More snag potential in splitty yarns if the head angle catches fibers
- More effort pulling through dense stitches
- More tendency to over-compress cotton if you naturally crochet tightly
Tapered hooks
A tapered hook typically has:
- A gradually narrowing throat
- A more rounded head
- Smoother transitions through the working loops
This often encourages:
- Easier insertion into compact stitches
- Smoother passage during yarn-over and draw-through
- Slightly more variable active loop size if you tension loosely
- A softer, rounder loop profile
Possible fabric effects:
- More fluid drape in garments and shawls
- Less resistance when working fuzzy or sticky fibers
- Slightly more openness in some stitch patterns because the loop can narrow and extend before setting
Possible drawbacks:
- Slightly less crisp edge definition in structural fabric
- Active loops may become subtly elongated if your draw-up motion lifts high
- Slick yarns can produce uneven loop heights if throat retention is minimal
Neither hook family is universally better. The design question is always: What kind of loop do I want to make repeatedly, in this yarn, at this gauge, for this fabric purpose?
How insertion angle changes openness and stitch stability
Your hook does not simply go “into the stitch.” It approaches from a direction, and that direction changes the shape of the opening before the new loop is drawn through.
Straight insertion
With a relatively straight insertion path, the hook enters with minimal upward or downward tilt. This tends to:
- Disturb the existing stitch less laterally
- Maintain more balanced loop legs
- Reduce skew in compact fabrics
- Preserve even top V formation
Use this when you want:
- Clean stitch columns
- Predictable gauge
- Stable fabric in single crochet, half double crochet, and dense textured repeats
Downward-angled insertion
A stronger downward angle often spreads the target stitch or space at the top while compressing the lower strands. It may:
- Increase apparent openness at the stitch top
- Encourage longer drawn-up loops
- Create slight forward tilt in the resulting stitch
- Increase friction if the hook scrapes fiber bundles
Use this intentionally for:
- Lace where you want eyelets to read clearly
- Openwork motifs where you want chains and tall stitches to separate visually
- Fibers that rebound well, such as wool blends
Watch for:
- Distorted post stitches
- Enlarged top loops in cotton
- Accumulating skew across rows if you consistently angle from one side
Upward-angled insertion
An upward insertion can scoop under the stitch in a way that preserves underside strands while narrowing the visible top opening. It may:
- Produce firmer stitch closure n- Compact the stitch head
- Improve security in slippery yarns
- Reduce snagging in some dense applications
Use this for:
- Structural panels
- Dense bags or containers
- Amigurumi where tight closure matters
Watch for:
- Over-tight draw-up loops
- Reduced hook mobility in non-stretch fibers like linen
- Hand fatigue if you force the angle instead of adjusting fabric position
Yarn compression: the invisible gauge variable
Yarn is not a perfect cylinder while you crochet with it. It flattens, springs back, twists, untwists, and shifts strand alignment. Compression changes how much yarn can fit through a stitch and how the final loop occupies space.
What happens during compression
As the yarn passes:
- Under finger tension
- Around the hook head
- Through existing loops
- Against neighboring stitches
it is temporarily compressed. If it rebounds strongly, the stitch fills out after formation. If it does not, the stitch may remain flatter and wider.
This matters because two fabrics can have the same stitch count and row count but look different if one yarn rebounds into round, plump loops and the other stays ribboned or flattened.
Fiber-specific response
Wool
Wool, especially elastic non-superwash or wool-rich blends, is forgiving. It compresses, then rebounds into the stitch structure. That usually means:
- Good stitch memory
- Strong recovery after draw-through
- Clear texture when blocked lightly
- Less permanent distortion from momentary hook pressure
Design note: Wool tolerates a wider range of draft angles without immediately looking misshapen. It is excellent for testing geometric changes because it shows them without punishing every small inconsistency.
Cotton
Cotton has less elasticity and tends to preserve the shape it was given during formation. It often:
- Shows compression clearly
- Displays loop flattening and widening
- Reveals insertion inconsistency quickly
- Produces crisp stitch edges when handled evenly
Design note: Cotton is where hook throat differences become especially obvious. A deep-throat inline hook can give sharp, stable structure. A tapered hook can still be beautiful, but if your tension is loose, the stitch tops may spread more than expected.
Linen
Linen records stress. It can feel wiry, inelastic, and slightly resistant while being worked, especially before washing. It often:
- Resists being compacted smoothly
- Holds angled distortions visibly
- Produces strong stitch definition when consistent
- Softens later, but not always symmetrically
Design note: With linen, insertion path matters enormously. A scraping, downward entry can abrade fibers and create visual inconsistency. Cleaner, straighter insertion usually yields the most elegant fabric.
Slick synthetics
Acrylics, rayons, nylon blends, and other slick synthetics vary, but many have lower surface friction. They may:
- Slide toward elongated loops
- Shift loop size more readily during draw-through
- Resist staying “parked” on the shaft if tension is inconsistent
- Create shine differences where loops flatten
Design note: Tapered hooks can feel very fast with synthetics, but if your active loop size fluctuates, stitch height can wander. Inline hooks may improve consistency, though splitty synthetics sometimes prefer a rounder head.
Reading loop leg distortion in your fabric
If you want to control geometry, you need to learn to diagnose what you are seeing.
Signs of excessive width allocation
- Top V’s look stretched open
- Lace eyelets blur together rather than reading as distinct holes
- Fabric grows wider than expected in blocked measurements
- Stitches feel soft but not stable
Likely causes:
- Too much downward draft angle
- Active loops riding too high on a tapered throat
- Over-relaxed yarn tension during draw-up
- Hook too large for desired structure
Signs of excessive height allocation
- Stitch columns look tall and narrow
- Fabric has unexpected vertical stretch
- Dense stitch patterns gap under tension
- Edges ripple because row height exceeds pattern expectation
Likely causes:
- Draw-up loops pulled too long before closing
- Hook rotation lifting the loop above shaft diameter
- Slick yarn sliding into elongated active loops
Signs of torque or skew
- Fabric slants across rows even with correct counts
- Post stitches twist consistently in one direction
- Shells or fans open unevenly
- Borders refuse to sit flat despite correct stitch math
Likely causes:
- Consistent one-sided insertion angle
- Yarn overs wrapped with directional bias
- Hook head shape encouraging unilateral release
- Uneven hand positioning between right-side and wrong-side work
A practical swatch lab: test before you commit
Here is a structured way to compare geometry variables without guessing.
Materials
- 1 ball yarn in your intended fiber
- 2 hooks of the same labeled size: one inline, one tapered
- Optional third hook 0.5 mm larger or smaller
- Blocking tools
- Ruler and notebook
For worsted weight yarn, start with:
- Hook A: 5.0 mm inline
- Hook B: 5.0 mm tapered
- Optional Hook C: 4.5 mm or 5.5 mm depending on goal
Swatch 1: Dense fabric test in single crochet
- Chain 31.
- Row 1: Single crochet in 2nd chain from hook and across. 30 sc.
- Rows 2–16: Ch 1, turn, 30 sc.
Make one swatch with the inline hook and one with the tapered hook.
Observe:
- Final width before blocking
- Final height before blocking
- Stitch top clarity
- Ease of insertion by row 10+
- Snagging or splitting frequency
- Degree of edge flare or draw-in
Swatch 2: Openness test in double crochet mesh
- Chain 28.
- Row 1: Dc in 4th chain from hook, ch 1, sk 1, dc in next; repeat across. You should end with 12 dc and 11 ch-1 spaces.
- Row 2: Ch 3, turn, dc in next dc, ch 1, sk ch-1 sp, dc in next dc; repeat across.
- Repeat Row 2 for 10 rows.
Observe:
- Eyelet shape: square, narrow, slanted, rounded
- Column alignment
- Stability after gentle stretching
- Recovery after steaming or wet blocking
Swatch 3: Fiber response test
Use the same stitch count and hook pair in at least two fibers if possible:
- Wool or wool blend
- Cotton
- Linen or linen blend
- Slick synthetic
Keep notes on:
- Does the yarn flatten visibly?
- Does loop shape rebound after resting?
- Does one hook improve stitch consistency?
- Does one insertion angle reduce splitting?
You will quickly see that “same size hook” does not mean “same loop behavior.”
Step-by-step: using draft angle intentionally
Now let’s move from diagnosis to control. These are deliberate methods, not accidents.
For lace clarity
Goal: open fabric, legible eyelets, clean tall stitches without collapse.
Recommended setup:
- Yarn: wool, wool blend, mercerized cotton, or smooth plant blend
- Hook: often tapered for easier passage, though inline can improve crispness in cotton lace
- Hook size: 0.5–1.5 mm larger than dense-fabric recommendation depending on pattern
Method:
- Relax the insertion path slightly downward, especially into chain spaces and the top of tall stitches. You want openness, not distortion.
- Draw up loops to the true shaft diameter. Do not choke the loop at the throat.
- Rotate the hook minimally during pull-through so the yarn is not over-compressed.
- Keep chain stitches consistent. In lace, chains often define the architecture more than the solid stitches.
- Block aggressively enough to reveal geometry. Lace that looks average off the hook may bloom beautifully once pins set the openings.
Signs you succeeded:
- Eyelets read as distinct openings
- Tall stitches stand separately rather than fusing together
- Fabric opens under blocking without losing column integrity
Common mistake:
- Over-lengthening the draw-up loop. This creates floppy tall stitches that lean.
Fix:
- Keep the active loop at shaft diameter, not above it, and reduce upward lift during yarn-over.
For dense structural fabric
Goal: compact, durable fabric with minimal stretch and strong stitch stability.
Recommended setup:
- Yarn: cotton, cotton blend, wool blend, or sturdy acrylic
- Hook: often inline or a hook with strong loop retention
- Hook size: at or 0.5–1.0 mm below standard recommendation if hand tension permits
Method:
- Use a straighter or slightly upward insertion path to avoid over-spreading the target stitch.
- Seat the active loop fully on the shaft before completing the stitch.
- Reduce excess hook rotation that elongates loops.
- Close each stitch with deliberate, even tension rather than yanking tight.
- Check stitch count every few rows because compact fabrics hide accidental increases and missed stitches.
Sample foundation for a firm panel:
- Chain 26.
- Row 1: Sc in 2nd chain from hook and across. 25 sc.
- Rows 2–20: Ch 1, turn, 25 sc through both loops.
If the panel is for a bag and feels too floppy, first change geometry before dropping hook size further:
- Switch from tapered to inline at same size.
- Straighten insertion path.
- Shorten draw-up loop slightly.
Signs you succeeded:
- Fabric stands or folds with intention
- Minimal skew after resting
- Stitch tops remain compact under handling
Common mistake:
- Tightening the final pull-through to compensate for loose draw-up loops.
Fix:
- Control loop size earlier in the stitch; do not rely on the close to solve a geometry problem.
When changing hook geometry alters stitch yield
This is the part that surprises people. Switching hooks can change not just feel, but actual pattern behavior.
By stitch yield, I mean how much visible fabric area one stitch produces. If one hook shape consistently forms broader loops, each stitch covers more width. If another forms taller, tighter loops, row gauge changes.
What can change
- Stitch gauge: stitches per 10 cm / 4 in
- Row gauge: rows per 10 cm / 4 in
- Eyelet size in lace and mesh
- Edge straightness
- Required ease in garments
- Panel count in motifs or filet layouts
How to modify patterns when tool geometry changes yield
If stitch gauge gets wider
You may need to:
- Reduce hook size by 0.25–0.5 mm
- Decrease total starting chain or foundation stitches
- Add shaping rows less frequently if width growth affects fit
Example:
Pattern target is 18 sc x 20 rows = 4 in / 10 cm. Your swatch on a tapered hook gives 17 sc x 20 rows.
Options:
- Switch to inline same size and reswatch.
- Keep hook and reduce width math by about 6%.
- Drop hook size from 5.0 mm to 4.5 mm and reswatch.
If row gauge gets taller
You may need to:
- Reduce hook rotation and draw-up loop height
- Remove repeat rows in body sections
- Recalculate armhole depth, yoke depth, or panel height
Example:
Target row gauge in dc is 10 rows = 4 in. Your fabric gives 9 rows = 4 in.
Fixes:
- Try straightening insertion path and lowering active loop height.
- Use hook with better loop retention.
- If geometry is intentional for drape, keep it and reduce row count proportionally.
If lace opens more than charted
You may need to:
- Replace some chain spaces with fewer chains
- Anchor tall-stitch groups more often
- Add framing stitches at edges
- Block to dimensions rather than “maximum open”
Example:
A repeat of (dc, ch 2, dc) into one space may become too airy with a more open draft angle. Try (dc, ch 1, dc) or reduce hook size by 0.5 mm before rewriting the whole motif.
Common mistakes and fixes
Mistake 1: Confusing loose tension with useful openness
Loose tension makes fabric larger, but not necessarily more beautiful. Useful openness has intentional structure.
Fix:
- Keep loops consistent on the shaft.
- Open the fabric through insertion angle and stitch architecture, not uncontrolled slack.
Mistake 2: Pulling up loops too high
This often happens when trying to work quickly or when using slick yarn. The loop climbs above the shaft diameter, then gets locked into a taller stitch.
Fix:
- Pause after draw-up and settle the loop onto the shaft before completing the stitch.
Mistake 3: Over-rotating the hook to avoid snagging
A dramatic twist may help the hook pass through, but it can compress the yarn, twist loop legs, and bias the stitch direction.
Fix:
- Try a different hook head shape or a straighter insertion path before increasing wrist rotation.
Mistake 4: Testing hook styles without controlling all other variables
If you compare hooks but also change yarn feed, grip, or posture, your results are muddy.
Fix:
- Keep yarn, pattern, session length, and hand position as consistent as possible during swatching.
Mistake 5: Ignoring finishing when evaluating surface behavior
Some fabrics look rough or uneven before washing and settle beautifully later; others open too far once blocked.
Fix:
- Always evaluate after the intended finishing method.
Troubleshooting by symptom
Problem: Fabric is skewing to one side
Check:
- Are you inserting at a stronger angle on right-side rows than return rows?
- Are your yarn overs wrapping consistently?
- Is your hook head dragging more on one pass than another?
Try:
- Straightening the insertion path
- Reducing wrist twist
- Switching to a hook with smoother release in the fiber you are using
- Blocking lightly to see whether skew is structural or temporary
Problem: Dense fabric still feels unstable
Check:
- Are your loops broad even though your closing tension is firm?
- Is your hook throat allowing extra loop expansion?
- Are you using a fiber with too much slip for the structure?
Try:
- An inline hook at the same size
- A 0.5 mm smaller hook
- A straighter or slightly upward insertion path
- A yarn with more grab, such as cotton blend instead of shiny acrylic
Problem: Yarn keeps splitting
Check:
- Is the hook head too sharp for the ply structure?
- Are you entering at an angle that catches the strand bundle?
- Are you working into compressed previous-row stitches?
Try:
- A rounder tapered head
- Loosening the previous row slightly rather than the current row
- Repositioning the fabric so insertion is cleaner and more visible
Problem: Lace looks mushy instead of crisp
Check:
- Are the loop legs flattened from too much compression?
- Are chain spaces inconsistent in size?
- Is your yarn too fuzzy or too elastic for the charted detail?
Try:
- A smoother yarn or firmer twist
- An inline hook if using cotton for sharper eyelets
- More deliberate chain tension
- Blocking with pins placed to define each opening, not just the outer edge
Variations: choosing geometry for fabric purpose
Garments with drape
Favor:
- Moderate openness
- Tapered or smooth-release hooks
- Fibers with elasticity or fluidity
- Minimal loop distortion
Use on:
- Shawls
- Lightweight cardigans
- Summer tops in soft cotton blends
Bags, baskets, and containers
Favor:
- Compact loop structure
- Inline hooks or firm loop-retaining heads
- Cotton or cotton-blend yarns
- Straighter insertion path
Use on:
- Totes
- Market bags requiring shape retention
- Desktop baskets
Amigurumi
Favor:
- Tight stitch closure
- Low snag risk
- Predictable loop size
- Slight upward insertion if it helps tighten closure without strain
Typical starting point:
- Yarn: DK or worsted
- Hook: 0.5–1.0 mm smaller than label recommendation
- Goal gauge: no visible stuffing through fabric when stretched lightly
Decorative lace and heirloom-style work
Favor:
- Intentional openness
- Fiber that shows stitch edges clearly
- Stable chain spaces
- Thoughtful blocking protocol
Use on:
- Doilies
- Edgings
- Table runners
- Lace yokes
Finishing and swatching protocols that lock in designed surface behavior
If geometry matters during formation, finishing is how you decide whether that geometry remains visible.
Why finishing changes the verdict
Unfinished crochet is not the final state. Loops still redistribute tension after handling, washing, and drying. Compression marks relax. Fibers bloom or flatten further. Lace opens. Dense cotton can settle into a firmer sheet. Acrylic may respond more to steam than water.
Swatching protocol
For every serious project, especially if tool geometry is part of the plan:
- Make a swatch at least 5 x 5 in / 12.5 x 12.5 cm, preferably larger.
- Record:
- yarn name and fiber
- hook brand, style, and size
- stitch pattern
- stitch and row count before finishing
- Measure center 4 x 4 in / 10 x 10 cm.
- Finish exactly as the final project will be finished.
- Let the swatch rest fully dry and undisturbed for 12–24 hours.
- Measure again.
- Stretch gently on bias, width, and height to assess recovery.
Finishing by fiber
Wool
- Wet block or soak and pat dry
- Shape without over-stretching unless lace requires it
- Expect bloom and slight gauge shift
Cotton
- Wet block and lay flat firmly
- Avoid assuming it will rebound much after aggressive stretching
- Use measured pinning if dimensional stability matters
Linen
- Wash to soften before final judgment
- Shape carefully; early stiffness can disguise final drape
- Reassess after full drying because linen often improves significantly
Acrylic and slick synthetics
- Test steam cautiously on swatch first
- Avoid over-killing unless you intentionally want reduced elasticity
- Measure after cooling completely
Locking in surface behavior
If your design depends on lace clarity:
- Pin individual points and spaces
- Use blocking wires where edges must stay straight
- Dry completely before unpinning
If your design depends on dense structure:
- Avoid over-stretching while wet
- Shape with minimal distortion
- Let the fabric dry flat without hanging, which can lengthen rows
A useful mindset shift for advanced crocheters
Once you understand draft angle and loop leg geometry, you stop seeing hooks as just sizes and start seeing them as shaping tools. Two 5.0 mm hooks are not necessarily doing the same job. One may build broader, softer loops; another may build more compact, legible architecture. Neither is wrong. They simply produce different stitch physics.
That is especially empowering when a pattern almost works but not quite. Instead of jumping immediately to major redesign, you can ask better questions:
- Do I need more width or more height from each stitch?
- Is this yarn recovering from compression, or preserving it?
- Is my hook helping the loop sit where I want it to sit?
- Is my insertion path supporting the fabric purpose?
Those questions lead to calm, evidence-based adjustments.
Takeaways
The openness and stability of crochet fabric are shaped by more than hook size and general tension. Insertion path, loop leg distortion, yarn compression, and hook throat/head shape all affect how each stitch allocates yarn into height, width, and structural integrity.
If you want the shortest practical summary, it is this:
- Inline hooks often favor controlled, stable, crisply defined loops.
- Tapered hooks often favor smooth passage, fluidity, and softer loop shaping.
- Straight insertion usually improves balance and stability.
- Downward draft angle can increase openness and lace separation, but too much creates distortion.
- Upward or neutral insertion can help compact, structural fabrics.
- Wool forgives and rebounds.
- Cotton records your decisions clearly.
- Linen rewards consistency.
- Slick synthetics need active loop control.
Most importantly, you can use these variables intentionally.
When you want lace that opens like a drawing, adjust your draft angle and loop compression to support it. When you want a bag panel that behaves like fabric with a backbone, choose hook geometry and insertion habits that compact and stabilize. Swatch with purpose, finish the swatch as the project will be finished, and trust what the fabric tells you.
That is where crochet gets especially satisfying: not just making stitches, but designing the way those stitches occupy space.