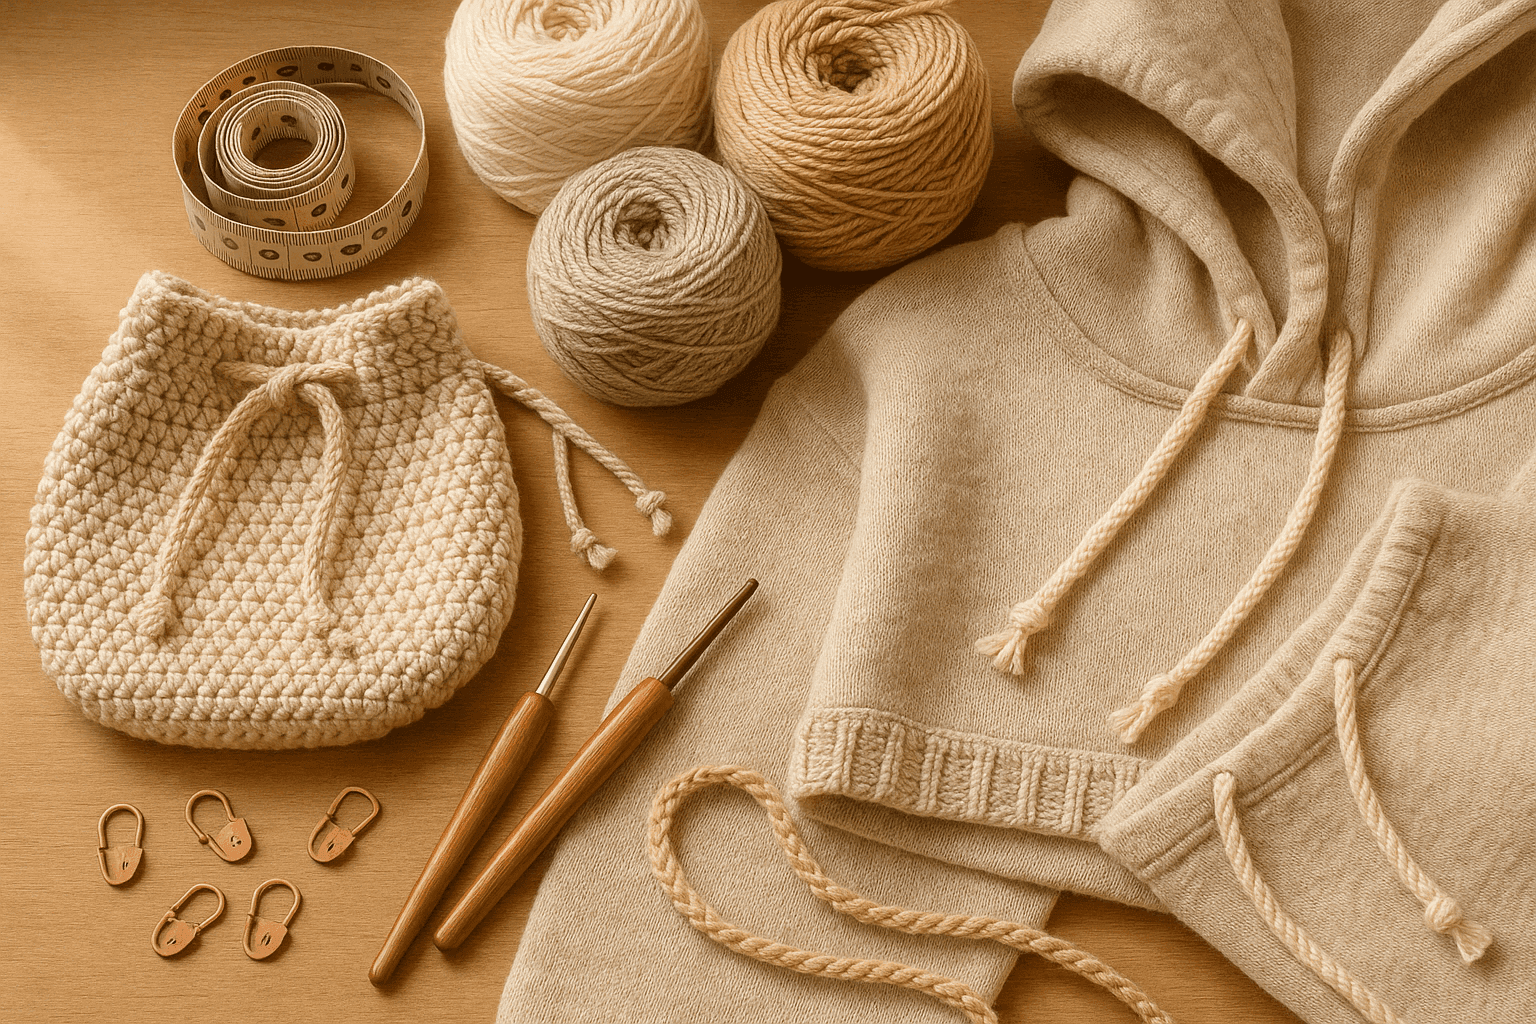
You know the moment: the bag is finished, the hood fits beautifully, or the waistline is almost perfect—and then the drawstring edge lets the whole project down. The cord catches every inch or two, the gathers bunch into awkward clumps, the opening grows wider after a few uses, or the eyelets start to look tired before the rest of the piece has even settled in. It is one of those details that seems small while we are planning, but in use it behaves like engineering. A drawstring opening is not just decorative. It is a moving structure under repeated friction, tension, and release.
The good news is that crochet gives us a lot of control here. We can decide exactly where the cord sits, how much support surrounds it, how the opening distributes stress, and how the gathers collapse when tightened. When a casing or cord channel works well, it feels almost invisible: the cord glides, the fabric gathers evenly, the edge springs back instead of sagging, and the opening stays crisp through repeated wear.
This is a technique-deep look at how to build those reliable openings for bags, waists, hoods, sleeves, and hems. We will look at stitch architecture, eyelet placement, spacing math, yarn choices, reinforcement, lining, and finishing details that make the difference between a charming idea and a hardworking feature. I am going to approach this the way I do at the worktable: not just “what looks nice,” but “what will still work after the fiftieth pull.”
Why drawstring openings fail
Before building better casings, it helps to understand what usually goes wrong.
The most common issues are:
- Too much stretch in the casing fabric so the opening grows instead of gathering.
- Eyelets that are too large or too soft and distort under tension.
- A rough interior path where the cord rubs against dense stitch transitions or catches in gaps.
- Uneven spacing so some sections gather tightly while others stay almost flat.
- No reinforcement at stress points such as exits, corners, side seams, or front opening centers.
- Cord mismatch where a fuzzy, sticky, oversized, or too-soft cord is asked to travel through a narrow or textured channel.
A successful crochet cord channel balances three things:
- Structure: enough firmness to resist stretching out.
- Clearance: enough room for the cord to move smoothly.
- Distribution: enough consistency around the opening that gathers form evenly.
When you think about a drawstring edge this way, the construction decisions become much clearer.
Choosing the right structure for the job
Not every opening needs the same type of casing. The best construction depends on whether the drawstring is mostly decorative, lightly functional, or under frequent tension.
1. Eyelets only
This is the simplest setup: a round of eyelets worked directly into the fabric, with the cord woven in and out.
Best for: light bag tops, decorative waists, infant garments, gentle gathers, and projects where you do not mind seeing the cord between openings.
Pros:
- Quick to work
- Minimal bulk
- Attractive, airy look
Cons:
- More friction because the cord repeatedly enters and exits the fabric
- Greater distortion risk at each eyelet
- Less polished for heavy-use openings
2. Internal casing
Here you create a folded or enclosed tube around the opening and thread the cord inside it.
Best for: skirts, pants waists, bag openings, hood edges, hem casings, and any project where you want the cord to travel smoothly and invisibly for most of the circumference.
Pros:
- Low-friction cord path
- Neat finish
- Better support and shape retention
Cons:
- More planning required
- Additional bulk
- Can feel stiff if worked too tightly in thick yarn
3. External channel or applied band
A separate band or channel is crocheted onto the fabric after the body is complete.
Best for: retrofitting a drawstring to a finished project, adding reinforcement, or when you want to isolate the tension-bearing structure from a stretchier body fabric.
Pros:
- Great control over firmness
- Easy to reinforce or line
- Useful rescue option
Cons:
- Additional finishing work
- Visible seam or layered look unless integrated carefully
4. Partial casing with reinforced exits
This hybrid approach is often ideal for hoods and bag tops: the cord travels inside a casing for most of the circumference but exits through reinforced openings or buttonhole-style slots.
Best for: garments and accessories where clean function matters.
Pros:
- Smooth travel through most of the channel
- Reduced wear compared with all-over eyelets
- Crisp, intentional appearance
For openings that will be pulled often, this is one of my favorite solutions.
Stitch architecture: which stitches behave best
The fabric around a drawstring channel matters as much as the channel itself. Some stitches are naturally stable. Others invite stretch and distortion.
Most stable choices
Single crochet (sc)
Single crochet makes a dense, supportive fabric with limited vertical stretch. It is an excellent choice for casings and reinforcement bands.
- Good for bag tops, waistbands, hem casings
- Creates smooth folded edges
- Works especially well with cotton, linen blends, and wool blends
Half double crochet worked in a firm gauge
Half double crochet (hdc) can work well if you size down your hook and keep the fabric compact.
- Slightly less dense than sc
- Faster to work
- Nice for medium-weight garments where you want a bit less bulk
Slip stitch or waistcoat stitch details
For reinforcement rounds or casing edges, slip stitch and waistcoat stitch can add excellent structure.
- Use sparingly to avoid excessive stiffness
- Excellent at exits and fold lines
Linked stitches
Linked double crochet or linked half double crochet reduces gaps while keeping a smoother surface.
- Helpful if you need more height without open spaces
- Good for larger bag channels or sporty garment casings
Less ideal choices for primary casing walls
Double crochet (dc) in a loose gauge
This often stretches too much and creates internal ridges and gaps that increase friction.
Lacy stitch patterns
Beautiful on the body of a garment, but not ideal where a cord will bear repeated tension.
Very elastic ribbing used alone as the channel
Front-post/back-post ribbing and highly elastic slip-stitch rib can work in adjacent bands, but a drawstring traveling through them without stabilization often distorts the opening.
My rule of thumb
If the body fabric is open or stretchy, isolate the drawstring area with 2 to 6 rounds/rows of denser stitches before building eyelets or the casing. This transition zone spreads stress and keeps the opening from inheriting every stretchy trait of the main fabric.
Fiber choices that resist distortion
Fiber is part of the engineering. Even a perfectly designed casing can fail if the yarn relaxes too much under repeated pulling.
Best fibers for crisp, resilient channels
Cotton
- Low memory compared with wool, but good firmness
- Excellent stitch definition
- Great for bags, summer garments, market totes, and home items
- Mercerized cotton is especially smooth and durable for eyelets and casings
Caution: plain cotton can grow with weight, especially in larger bags. Pair with dense stitches or reinforcement.
Cotton-linen or cotton-hemp blends
- Firm, dry hand
- Strong resistance to stretching out
- Very good for bags and structured hems
Caution: may feel stiff at first; cords travel best if the channel is not worked too tightly.
Wool or wool blends
- Good memory and bounce
- Suitable for hoods, waists, and garment hems
- Recovers shape better than plant fibers in many wearables
Caution: fuzzy yarns increase friction inside narrow channels. Consider a smooth drawstring if using a woolly body yarn.
Nylon-reinforced or sock-blend fibers
- Durable for small high-friction openings
- Good for activewear-inspired pieces
Fibers to use thoughtfully
Bamboo, silk-heavy blends, alpaca-heavy blends
These can be gorgeous, but they often drape and relax more than you want in a high-stress drawstring opening.
If you love the fabric, add reinforcement: lining, a smaller-hook casing band, or a sewn tape inside the fold.
Cord fiber matters too
The cord itself should complement the channel.
For low-friction travel, good choices include:
- I-cords
- Lucet cords
- Braided cords
- Tightly twisted ties
- Purchased shoelace-style cords
- Narrow woven tapes or twill tapes
Less ideal:
- Halo-heavy fuzzy cords
- Very soft chainette ties that flatten and snag
- Overly bulky cords in narrow channels
A good starting clearance is this: the channel interior should be about 1.5 to 2 times the cord thickness. Too snug, and it drags. Too loose, and the gathers become mushy.
The math of even gathers
Smooth gathering depends on spacing. If the drawstring path does not distribute tension evenly, the opening will not collapse evenly.
Measure the active circumference
First measure the finished circumference of the opening where the cord will sit.
Examples:
- Bag top: 80 stitches around
- Hood edge: 96 stitches around
- Waist opening: 120 stitches around
- Hem: 144 stitches around
Then decide whether the cord will:
- Travel through all points evenly in a full casing, or
- Exit at specific points through eyelets/slots.
Eyelet spacing formula
For woven eyelets, determine how many eyelets you want. Eyelets should generally be placed in an even number if the cord enters and exits symmetrically.
Formula:
total stitch count ÷ number of eyelet spaces = stitches between eyelets
Example:
- Opening = 80 stitches
- Desired eyelets = 8
- 80 ÷ 8 = 10
So place an eyelet every 10 stitches.
If your stitch count does not divide perfectly, distribute the remainder evenly.
Example:
- Opening = 94 stitches
- Desired eyelets = 8
- 94 ÷ 8 = 11 remainder 6
You could space them as:
- 12, 12, 12, 12, 12, 12, 11, 11
Spread the larger intervals evenly around the opening rather than clustering them together.
Exit placement for casings
For a full casing, the most important spacing issue is the distance between the two exits.
Common placements:
- Center front pair: hoodie cords, some waistlines
- Side seam exits: some skirts and pants
- Opposite sides: bag channels with a single cord
- Two-cord setup: bag tops for balanced closure
For garments, place exits where the pull direction makes sense in wear. For hoods, center front is usually best. For bags, opposite sides or paired front exits can both work depending on style.
Gathering ratio
Ask how much reduction you want when the drawstring is tightened.
A comfortable drawstring opening often gathers down to 55% to 75% of its open circumference.
Examples:
- 80 cm opening gathered to 56–60 cm = soft shaping
- 80 cm opening gathered to 44–50 cm = firmer closure
The more aggressive the reduction, the more support the edge needs.
Building clean eyelets that do not collapse
Eyelets are stress points, so the stitch choice around them matters.
Best eyelet styles in crochet
Chain-1 eyelet
Often made by skipping 1 stitch and chaining 1.
Use for: narrow cords, lightweight garments, decorative openings.
Pros: subtle, neat Cons: too small for thicker cords; can distort if worked loosely
Chain-2 eyelet
Usually skip 2, ch 2.
Use for: medium cords, bags, medium garment casings.
Pros: practical size Cons: can stretch open if not anchored by dense stitches above and below
Buttonhole-style slit
Worked over rows or in a band as a horizontal or vertical opening.
Use for: casing exits, hoodie fronts, bag cord exits.
Pros: cleaner and stronger than simple eyelets for repeated use Cons: requires planning and often reinforcement
Eyelet support rounds
To stabilize eyelets, sandwich them between denser rounds.
A reliable sequence is:
- Round 1: sc around
- Round 2: eyelet round
- Round 3: sc around, working firmly into chain spaces
- Optional Round 4: slip stitch or crab stitch for additional support
This creates a structured frame around the openings.
Stitch count example: eyelet round on 80 stitches
Round 1: sc evenly around, 80 sc.
Round 2: (sc in next 8 sts, ch 2, sk 2) repeat 8 times. You still have 80 stitch positions around.
Round 3: (sc in next 8 sts, 2 sc in ch-2 sp) repeat 8 times = 80 sc.
That final round is important. It restores the stitch count and secures each opening.
Common eyelet mistake
If the eyelet round increases stitch count accidentally—for example by working 3 sc into each chain space after skipping only 2 stitches—the opening will flare. Keep the replacement count equal to the skipped count unless you intentionally want more fullness.
How to crochet a folded casing
Folded casings are one of the most reliable methods for smooth cord travel.
The basic idea is simple: crochet an extended band, create a fold line, fold it to the inside, and join it down to create a tunnel.
Recommended hook sizing
For the casing section, go 0.5 mm to 1.0 mm smaller than the hook used in the main body if your fabric needs extra stability.
Examples:
- DK yarn body on 4.0 mm hook, casing on 3.5 mm
- Worsted yarn body on 5.0 mm hook, casing on 4.0 or 4.5 mm
Recommended casing depth
The folded depth depends on cord thickness.
General guide:
- Narrow cord (3–5 mm): casing depth 1.5–2 cm
- Medium cord (6–8 mm): depth 2–3 cm
- Thick cord (8–12 mm): depth 3–4 cm
In stitch terms, that usually means:
- Fingering/sport yarn: 4–8 rounds total before folding
- DK/worsted yarn: 4–6 rounds total
- Bulky yarn: 3–5 rounds total
Always test with the actual cord.
Standard folded casing method
Let us use a practical example: a bag top with 84 stitches in worsted cotton.
Materials recommendation:
- Yarn: worsted/aran cotton or cotton blend
- Hook for body: 5.0 mm
- Hook for casing: 4.5 mm
- Cord: 6 mm braided cotton cord
Step 1: Stabilize the top edge
Work 2 rounds of sc using the smaller hook.
- Round 1: sc evenly around, 84 sc
- Round 2: sc evenly around, 84 sc
These rounds calm the edge and prepare a stable base.
Step 2: Create exits
Decide where the cord exits.
For a single front-tie bag, place 2 exits centered on the front, usually 6 to 10 stitches apart depending on bag width.
Example placement on 84 stitches:
- Mark center front between stitches 42 and 43.
- Place one opening at stitch 38 and one at stitch 47.
Work Round 3 like this:
- Sc to first marker
- Ch 2, sk 2
- Sc to second marker
- Ch 2, sk 2
- Sc to end
Stitch count remains 84 positions.
Step 3: Build casing height
Work 2 to 4 more rounds in sc or linked hdc.
Example:
- Round 4: sc around, placing 2 sc in each ch-2 sp = 84 sc
- Round 5: sc around, 84 sc
- Round 6: sc around, 84 sc
Step 4: Create the fold line
Work 1 round in back loop only sc, 84 sc.
This gives a subtle hinge for a crisp fold without weakening the edge too much.
Step 5: Work inside casing wall
Work 3 more rounds of sc, 84 sc each.
Step 6: Fold and join
Fold the casing to the inside along the back-loop-only round.
Join the live stitches to the inside base round with slip stitches or sewn whipstitch, aligning stitch-for-stitch.
- 84 joins total
- Keep the join relaxed enough not to pucker
- Do not catch the front wall accidentally if you want a clean tunnel
Step 7: Thread the cord
Use a bodkin or safety pin to insert the cord through one exit, all the way around the casing, and out the second exit.
Test the travel. It should glide without snagging and gather evenly across the full circumference.
Applied casing for stretchy fabrics
If the project body is too open or elastic to trust as a casing wall, an applied casing is often the better engineering choice.
Where it shines
- Mesh or lace bag tops
- Sweaters with drapey stitch patterns
- Hoods worked in tall stitches
- Garment waists in stretchy rib or open textures
Basic method
- Work the body to the desired height.
- Add 1–3 stabilizing rounds in sc.
- Crochet a separate strip in rows, usually in sc or linked hdc.
- Length of strip = opening circumference.
- Width of strip = twice the desired finished casing depth, plus 1 row if needed for turning ease.
- Sew or slip stitch the strip on as a folded band.
Example strip math
Opening circumference: 96 stitches around in DK wool blend. Gauge in sc with smaller hook: 24 sts and 28 rows = 10 cm.
If 96 stitches around match the circumference, make the strip 96 stitches long.
If you want a finished casing depth of about 2.5 cm, and your row gauge is 28 rows per 10 cm, then:
- 2.5 cm ≈ 7 rows
- Double for fold = 14 rows
- Add 1 ease row = 15 rows total
So crochet a strip:
- Row 1: ch 97, sc in 2nd ch from hook and across = 96 sc
- Rows 2–15: ch 1, turn, sc across = 96 sc
Then seam the short ends, fold the strip, and attach it around the opening with the fold at the top.
This creates a strong, independent channel.
Low-friction cord travel: tiny details that matter
If you have ever threaded a cord through a beautiful casing only to feel it drag, you already know this section matters.
Reduce interior texture
The inside of the channel should be as smooth as possible.
Best options:
- sc at a firm but not rigid gauge
- linked stitches
- sewn lining over textured wrong side
Avoid on the interior path:
- exposed seam knots
- dramatic post stitches
- bobbles
- carried floats
- loose yarn tails
Keep joins tidy
If working in joined rounds, stack joins where they will cause the least interference—often the back or side seam.
Better yet, for casings, use continuous rounds when practical so there is no stepped join ridge inside the tunnel.
Match channel size to cord
A common mistake is building the casing before choosing the cord. Do the opposite whenever possible. The cord determines the necessary clearance.
Quick test:
- Place the intended cord against the casing depth and width.
- Fold a swatch around it.
- The cord should move when pushed with one finger, not require tugging.
Consider cord finish
A waxed cotton or very smooth braid will travel more freely than a brushed or haloed cord. If the body yarn is fuzzy, a smoother contrasting cord can improve function dramatically.
Reinforcement strategies for repeated use
This is where good crochet becomes durable crochet.
Reinforce exits
The cord exits bear concentrated stress. Strengthen them with one or more of these methods:
- Work 1 round of slip stitch around the opening after the eyelet is made
- Sew around the exit with matching sewing thread or fine yarn
- Use blanket-stitch-style edging on slit openings
- Add a tiny patch of lining fabric behind the exit before cutting a sewn buttonhole in lined work
For bag tops, I strongly recommend at least thread reinforcement if the bag will carry weight.
Add hidden tape
A narrow twill tape, stay tape, or lightweight ribbon sewn inside a folded casing can dramatically reduce stretching.
Best for:
- cotton bags
- drapey plant-fiber garments
- children’s wear with frequent pulling
- large hood openings
The tape should sit flat inside the casing wall, not inside the cord tunnel where it might twist.
Work a firmer transition zone
If the main body is flexible, use 2–4 rounds of smaller-hook sc before the casing starts. This acts like a structural yoke for the opening.
Use two cords for large circumferences
Large bag openings often gather more evenly with two cords entering from opposite exits and tying at opposite sides or the front. This reduces drag because each cord travels only half the circumference.
Example:
- Bag top circumference: 100 stitches
- Instead of one cord traveling all 100 stitches, use two 60–70 cm cords each traveling 50 stitches and exiting at both ends.
The closure feels smoother and puts less strain on each exit.
Lining options that keep openings crisp
A lining is not always necessary, but when you want long-term shape retention, it can be the difference between “pretty” and “professional-feeling.”
Full fabric lining
A woven cotton lining attached beneath the casing area stabilizes the opening beautifully.
Best for:
- handbags
- project bags
- baskets with drawstring tops
You can either:
- line the full item, or
- line just the top 5–10 cm including the casing zone.
Partial facing
A facing is a narrow internal band of fabric sewn just behind the casing or eyelet zone.
Best for:
- hoods
- waistbands
- hems on garments where full lining would be too much
Crochet lining or facing
A second crocheted layer in sc can serve as a soft lining.
Best when you want all-yarn construction but more support.
Lining attachment tips
- Prewash lining fabric if the finished item will be washed.
- Match grain direction to the least-stretch direction needed.
- Attach lining after blocking the crochet.
- Keep lining slightly smaller than the crochet circumference if you want it to help hold shape, but not so tight that it causes puckering.
Step-by-step mini blueprints for common uses
Here are four practical setups you can adapt.
1. Bag top casing
Recommended yarn: worsted cotton, cotton-linen, or sturdy wool blend
Hook: 0.5 mm smaller than body hook for casing rounds
Cord: braided cotton or twisted cord, 5–8 mm
Structure:
- 2 rounds sc to stabilize
- 1 exit round with 2 buttonhole-style or ch-2 exits
- 3 rounds sc
- 1 BLO fold round
- 3 rounds sc
- Fold and join
Stitch count example: 72 sts around
- Rounds 1–2: 72 sc
- Round 3: create two exits, keep total at 72 positions
- Rounds 4–7: 72 sc
- Round 8: BLO sc, 72
- Rounds 9–11: 72 sc
- Join to inner base, 72 joins
2. Elastic-free waistband casing
Recommended yarn: DK or worsted wool blend, cotton blend, or smooth acrylic blend with recovery
Hook: same as body or 0.5 mm smaller
Cord: soft braid or I-cord, 4–6 mm
For comfort, make the casing smooth and shallow enough not to feel bulky.
Structure:
- Transition from body stitch to 3 rounds sc or firm hdc
- Work casing with front exits or hidden side exits
- Add a soft lining strip if the body yarn is scratchy or lofty
Sample count: 120 sts around
- R1–R3: 120 sc
- R4: sc 58, ch 2, sk 2, sc 58, ch 2, sk 2 = 120 positions
- R5–R7: 120 sc
- R8: BLO sc, 120
- R9–R11: 120 sc
- Fold and join
3. Hood channel with front exits
Recommended yarn: smooth wool blend or acrylic-wool blend in DK/aran
Hook: 0.5 mm smaller for channel
Cord: knitted I-cord, crochet I-cord, or purchased hoodie cord
Hood channels need recovery more than bag tops do, so fiber memory is especially helpful.
Structure:
- 2 rounds sc around hood opening
- Work reinforced slit exits at center front, spaced 4–8 stitches apart
- Build 2–3 cm channel
- Line with twill tape or narrow fabric facing if using a drapey yarn
4. Hem casing for tunics or sleeves
Recommended yarn: same as garment but with firmer hook size
Cord: slender tie, 3–5 mm
Hem casings should shape gently. Too much bulk at the lower edge can make the garment flip or collapse oddly.
Structure:
- 2 rounds sc
- Eyelet round or hidden slit exits
- 2 rounds sc
- Folded casing or applied facing
Troubleshooting common problems
Problem: The cord catches inside the channel
Likely causes:
- Casing too tight for cord
- Interior seam ridge
- Fuzzy cord against textured yarn
- Loose tails inside tunnel
Fixes:
- Re-thread with a smoother, narrower cord
- Open a small section and trim or bury tails
- Replace with applied casing if interior texture is severe
- Steam or block lightly to relax an overly rigid channel
Problem: The opening stretches out after a few uses
Likely causes:
- Loose gauge
- Stretch-prone fiber
- No reinforcement
- Eyelets too large
Fixes:
- Add sewn stay tape inside casing
- Reinforce exits with stitching
- Rework top rounds using smaller hook and denser stitches
- Convert simple eyelets to a folded casing with controlled exits
Problem: Gathers are uneven
Likely causes:
- Uneven eyelet spacing
- Exits placed poorly
- One section of channel narrower than others
- Cord too grippy
Fixes:
- Recalculate spacing and remark placement before reworking
- Use two shorter cords instead of one long one
- Check that fold-and-join alignment is even stitch-for-stitch
- Change to a braided or smoother cord
Problem: Eyelets gape open
Likely causes:
- Chain spaces too large
- Not enough support rounds
- Soft yarn with little resilience
Fixes:
- Switch from ch-2 eyelets to ch-1 or slit exits
- Add sc rounds above and below
- Sew around eyelet with matching thread
- Downsize hook for the eyelet round
Problem: The casing edge feels bulky and stiff
Likely causes:
- Yarn too thick for folded depth
- Too many casing rounds
- Hook too small
Fixes:
- Reduce casing height
- Use hdc or linked stitches instead of all sc in chunky yarn
- Switch to an applied casing in lighter yarn
- Reserve folded casings for finer yarns when working garments
Finishing details that elevate the result
The finish is what makes a drawstring feature feel deliberate rather than improvised.
Neat exits
Frame exits symmetrically. For visible front openings, count carefully from center. Even being off by one stitch can show.
Cord ends
Finish cord ends so they resist fraying and add a bit of weight for easier threading.
Options:
- Knots with tassels
- Wrapped ends
- Metal aglets
- Beads secured firmly
- Sewn fabric tabs
For children’s items, avoid unsafe detachable embellishments.
Top edge finishing
A final edging around the top of a bag or hood can sharpen the look.
Good choices:
- reverse single crochet for a corded edge
- slip stitch round for minimal firmness
- plain sc for understated structure
Blocking
Block before threading the final cord if the project needs size correction or stitch evening.
- Steam block plant fibers cautiously
- Wet block wool blends for relaxed alignment
- Let the casing dry completely before inserting the cord
Label and care note
If gifting or selling, mention that the drawstring should be tightened smoothly and not yanked abruptly. Functional crochet lasts longer when users know how it was meant to behave.
Smart variations to try
Once you have the engineering down, there is plenty of room for design play.
Contrast casing band
Work the casing in a firmer contrasting yarn while keeping the body in a softer one. This is a beautiful and practical option for bags and hoods.
Hidden internal drawstring
Use an internal casing with tiny slit exits so almost none of the cord path shows. Clean, modern, and excellent for garments.
Decorative woven eyelet band
For lighter-use projects, alternate eyelets with textured stitches for a pretty waistband or baby bonnet edge. Just be honest about intended stress.
Double-channel design
Create two parallel casings: one for a functional drawstring and one for a decorative tie or ribbon.
Cord-and-elastic hybrid
In waists and hems, a cord can be paired with soft elastic inside the same or adjacent casing. The elastic maintains baseline fit, and the cord fine-tunes it.
A few practical design rules I return to again and again
If you like having a checklist before you commit to a construction, these are the rules I trust most:
- Choose the cord first. Build the channel for the tie, not the other way around.
- Stabilize before opening. Add dense rounds between stretchy body fabric and eyelets/casing.
- Keep counts consistent. Replace skipped stitches exactly unless you intentionally want shaping.
- Reinforce stress points. Especially exits, corners, and bag fronts.
- Reduce friction. Smooth interior paths make all the difference.
- Use smaller hooks strategically. Often the simplest fix for stretch and sag.
- Test with actual use. Pull, release, and re-pull the cord several times before calling it finished.
Takeaways
Crochet drawstring casings and cord channels work best when we treat them as structural features rather than decorative afterthoughts. Smooth gathering comes from stable stitch architecture, sensible fiber choices, clear spacing math, and enough reinforcement at the places that take wear.
If you want the simplest path to success, remember this combination: a denser transition zone, a folded casing in single crochet, thoughtfully placed reinforced exits, and a smooth cord sized appropriately for the tunnel. That formula works across bag tops, waists, hoods, and hems more often than not.
And if your project body is soft, open, or drapey, do not be afraid to separate beauty from function a little. An applied casing, hidden tape, or partial lining can preserve the look you love while giving the opening the backbone it needs.
The lovely thing about mastering this detail is that it improves so many projects at once. Once you know how to engineer a clean, durable channel, your bags close better, your hoods sit better, your waistlines adjust more gracefully, and your hems hold their shape. It is one of those finishing techniques that quietly upgrades everything around it.
So the next time you reach the top edge of a project and think, “I’ll just add a quick drawstring,” pause long enough to plan the path, the tension, and the reinforcement. A little engineering there gives you the kind of result fellow makers always notice: the drawstring that slides beautifully, gathers evenly, and still looks crisp after real life has had a good chance to use it.