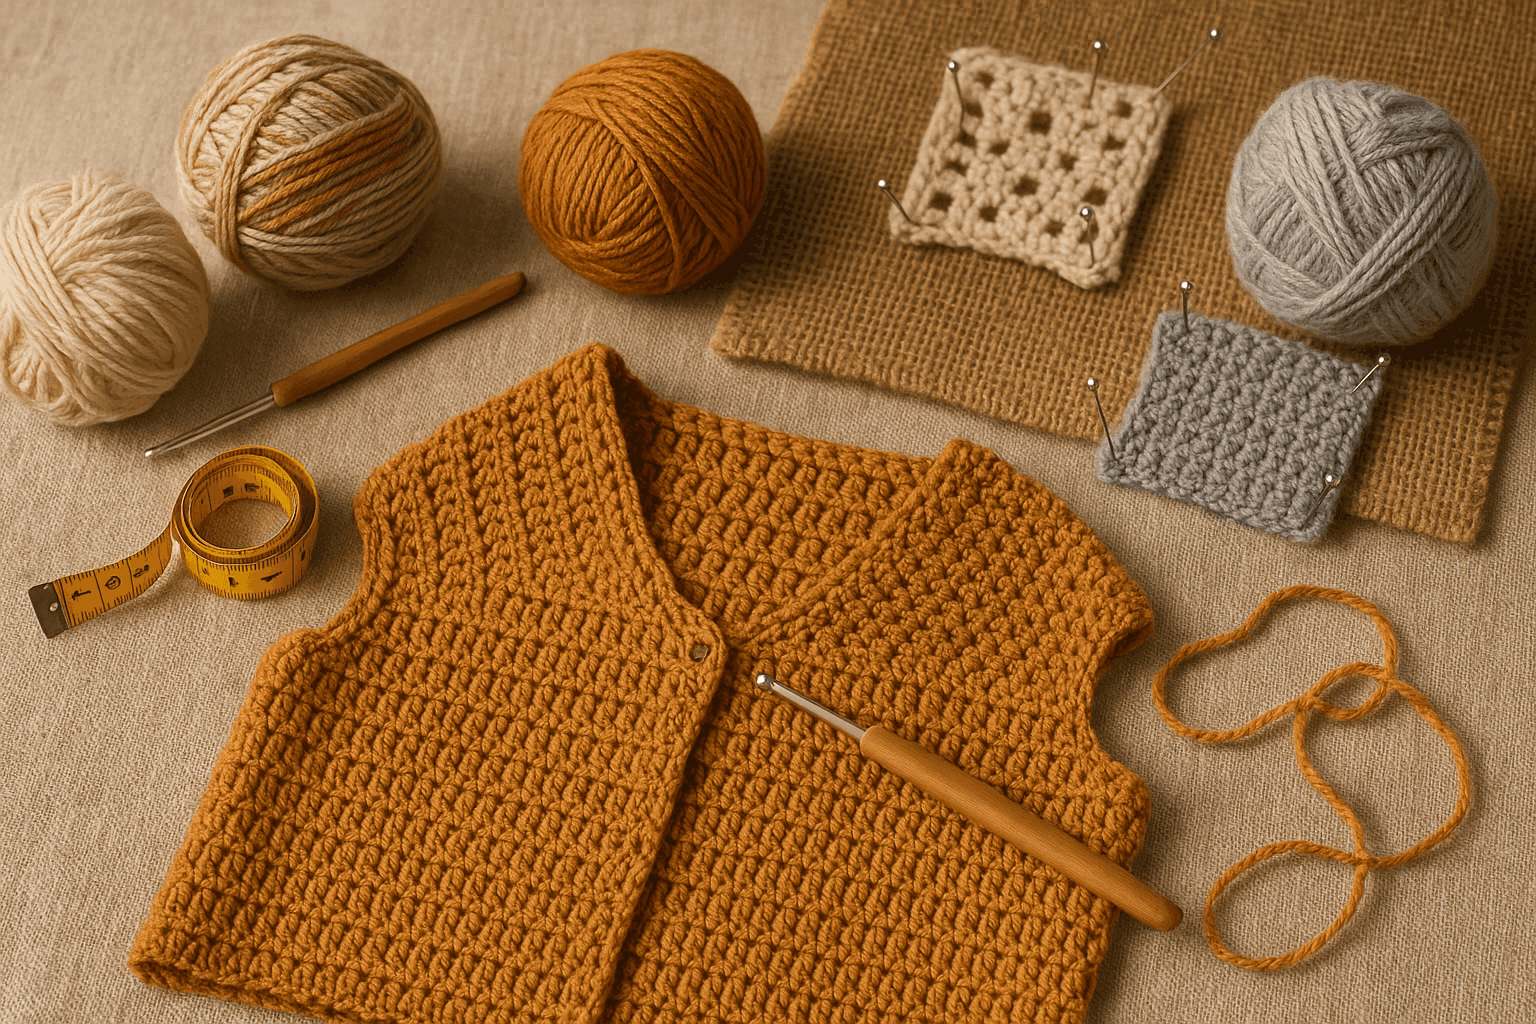
Crochet Ease, Negative Ease, and Fabric Recovery: How Fiber Elasticity and Stitch Architecture Determine Real Garment Fit
There is a particular kind of disappointment most garment crocheters know well: you finish a sweater or top, try it on, and for a glorious ten seconds it looks exactly right. Then you sit down, stand up, lift your arms, walk across the room, and suddenly the hem has dropped two inches, the bust is pulling, the neckline is drifting backward, or the whole piece has gone from "tailored" to "tired." The measurements on paper were correct. Your gauge swatch matched. And yet the fit in motion is wrong.
That gap between flat measurement and lived wear is where ease, elasticity, recovery, and stitch architecture matter most.
If you have ever wondered why one crochet tee needs 2–4 in / 5–10 cm of positive ease to feel graceful while another looks best at 0 in or even slight negative ease, the answer is rarely just "because the pattern says so." Real garment fit comes from the interaction of three things:
- Body measurements and intended ease
- Fiber behavior under load
- Stitch structure and fabric architecture
When you understand how those three work together, you stop guessing. You can look at a yarn, a stitch pattern, and a body area—bust, waist, upper arm, hip—and make informed decisions about whether the garment needs breathing room, controlled stretch, or deliberate compression.
This article is a deep dive into engineering crochet garments that actually fit in motion. We will cover positive and negative ease, compare wool, cotton, acrylic, and blends for stretch and recovery, explore how stitch families behave vertically and horizontally, and walk through practical swatching methods that test not just gauge, but hang and bounce-back. Then we will look at modifying patterns for bust, waist, and hip ease and finishing choices that either stabilize a garment or preserve elasticity where you need it.
If you already crochet garments, think of this as the conversation we have after making enough sweaters to know that dimensions are only half the story.
Context: Fit Is Not a Number, It Is a Behavior
When sewists discuss fit, they often think in terms of structure, seam placement, and drape. In crochet, those matter too, but the fabric itself is doing far more mechanical work. Crochet fabric can stretch, sag, spring back, bias, relax with heat, grow with wear, and tighten after washing. Sometimes all in the same garment.
That is because crochet stitches are built from interlocking loops that can deform under tension. Unlike woven cloth, where yarns cross at right angles in a comparatively stable grid, crochet creates a looped architecture with varying amounts of openness, height, and directional give. Add in the elasticity of the fiber—wool versus cotton is the classic comparison—and the result is a fabric that may behave very differently on the body than it does laid flat.
This is why two garments with the same chest measurement can fit completely differently:
- A cotton double crochet summer tank at exact bust measurement may feel heavy and pull downward.
- A wool blend ribbed sweater with 2 in / 5 cm negative ease may skim beautifully and still allow movement.
- An acrylic cardigan in filet mesh may look polished on day one and lengthen significantly after a few wears.
So before we talk numbers, we need a working vocabulary.
Core definitions
- Positive ease: The garment is larger than the body measurement at that point.
- Example: Bust is 40 in / 101.5 cm, garment bust is 44 in / 112 cm = 4 in / 10 cm positive ease.
- Zero ease: Garment and body measurement are approximately the same.
- Negative ease: The garment is smaller than the body measurement and relies on stretch to fit.
- Example: Bust is 40 in / 101.5 cm, garment bust is 38 in / 96.5 cm = 2 in / 5 cm negative ease.
- Elasticity: How much the fabric can stretch.
- Recovery: How well the fabric returns to its original dimensions after stretching.
- Drape: How the fabric hangs under its own weight.
- Memory: Informal but useful term for how well a fiber or fabric “remembers” its shape.
A garment that fits well in motion uses the right ease for the body area, combined with the right elasticity and recovery for the stitch and fiber.
Ease Explained: Positive, Zero, and Negative Ease in Crochet Garments
Ease is often treated as a style choice—oversized versus fitted—but technically it is also a structural decision.
Positive ease
Positive ease gives space between body and garment. In crochet, it is often the safest choice for fabrics with:
- low recovery
- significant weight
- open stitch patterns
- plant fibers that can lengthen with wear
Common positive ease ranges:
- Boxy tops and summer tees: 2–6 in / 5–15 cm at bust
- Relaxed pullovers: 4–8 in / 10–20 cm at bust
- Cardigans and jackets: 2–6 in / 5–15 cm depending on layering
- Woven-look or dense structured garments: 1–4 in / 2.5–10 cm
Positive ease is especially useful at the full bust, upper arm, and high hip/hip if the fabric has limited stretch. It also reduces strain on stitch columns, which helps preserve shape over time.
Zero ease
Zero ease can work beautifully when the fabric has moderate drape, moderate recovery, and a clean silhouette. This is common in:
- crochet tees in finer yarn
- garments with waist shaping but relaxed bust
- patterns using stitches with some horizontal give but not full rib elasticity
Zero ease is less forgiving if your yarn grows with wear. Cotton and bamboo blends, for example, may measure well at first and then settle into more positive ease after gravity gets involved.
Negative ease
Negative ease is not just for knit-look garments or body-hugging tops. It can be very effective in crochet when the fabric is resilient and the stitch pattern is capable of repeated stretch and recovery.
Typical negative ease ranges:
- Ribbed or slip-stitch fabrics: 1–4 in / 2.5–10 cm negative ease at bust or waist
- Stretchy yoke, cuffs, hem bands: 10–25% negative ease depending on fiber and comfort
- Close-fitting tanks or fitted tees: 0.5–2 in / 1–5 cm if fabric recovers well
Negative ease works best when:
- the stitch pattern behaves like ribs, corrugation, or elastic columns
- the fiber has natural spring or includes elastic synthetic content
- the garment is not so heavy that gravity defeats the recovery
A key caution: negative ease in circumference does not fix vertical growth. A top can fit snugly around the bust and still lengthen badly from shoulder to hem. Always consider width and length separately.
Fiber Elasticity and Recovery: What the Yarn Contributes
Yarn is not neutral. Before the stitch pattern even enters the picture, the fiber decides whether your garment is springy, crisp, floppy, supportive, or prone to bagging.
Wool
Wool is generally the gold standard for elasticity and recovery in garment crochet.
What wool does well
- stretches comfortably
- bounces back well after wear
- supports negative ease better than most fibers
- tends to hold shaping and rib structures
- blocks nicely but usually retains resilience
Best uses
- fitted pullovers
- ribbed hems, cuffs, and necklines
- waist shaping
- garments where movement recovery matters
Watch for
- superwash wool may have less memory and more drape than non-superwash
- looser plied wool yarns can bloom and relax after washing
- heavier wool garments can still grow vertically if stitches are tall/open
Ease guidance
- Fitted garments: 0 to 3 in / 0 to 7.5 cm negative ease, depending on stitch
- Relaxed garments: 2–6 in / 5–15 cm positive ease
Cotton
Cotton is beloved for warm-weather wear, stitch definition, and clean structure, but it has limited elasticity and moderate to poor recovery compared with wool.
What cotton does well
- gives crisp stitch definition
- creates breathable summer garments
- works for structured silhouettes
- resists excessive rebound, which can be useful in tailored shapes
Watch for
- stretches under weight rather than expanding and bouncing back
- can grow longer with wear, especially in tall stitches
- may sag at straps, armholes, and necklines
- negative ease often feels restrictive rather than supportive
Ease guidance
- Bust/hip in non-ribbed fabrics: usually 1–4 in / 2.5–10 cm positive ease
- Dense, shaped garments: 0–2 in / 0–5 cm positive ease if stitch architecture is stable
- Ribbed cotton fabrics can use limited negative ease, but swatch aggressively first
Acrylic
Acrylic is highly variable. Some acrylic yarns are springy and resilient; others are limp or relax permanently, especially after laundering or steam.
What acrylic does well
- can be lightweight and soft
- often affordable for full garments
- some premium acrylics have decent resilience
- can produce easy-care everyday garments
Watch for
- recovery varies enormously by brand and yarn structure
- steam can dramatically alter shape and stitch definition
- open fabrics may stretch and stay stretched
- lower-quality acrylic can “grow” or become tired-looking with friction and wear
Ease guidance
- Do not assume acrylic behaves like wool
- Swatch for recovery before choosing negative ease
- For classic acrylic in standard stitches, 1–4 in / 2.5–10 cm positive ease is often safer
- For resilient acrylic blends or knit-look ribs, slight negative ease may be appropriate
Blends
Blends are often where crochet garments become easiest to engineer.
Wool/cotton blends
- balance structure with some elasticity
- better recovery than pure cotton
- less bounce than pure wool
- excellent for transitional garments
Cotton/acrylic blends
- can reduce cotton’s heaviness and improve comfort
- recovery still depends on yarn construction
- often good for tees and cardigans with modest positive ease
Wool/acrylic blends
- often provide useful elasticity with easier care
- can support gentle negative ease in suitable stitch patterns
Fibers with drape: bamboo, rayon, viscose, silk, alpaca
These deserve mention because they strongly affect fit.
- Bamboo/rayon/viscose: soft, fluid, often low recovery; beautiful drape but can lengthen substantially
- Silk: elegant drape, variable elasticity depending on blend and construction
- Alpaca: warm and soft, but often less springy than wool and more prone to growth
With these fibers, think carefully before planning negative ease outside of ribbed sections.
Stitch Architecture: How Crochet Structure Changes Stretch
Fiber gives potential. Stitch architecture decides how that potential appears in the fabric.
A useful way to think about crochet garment fabric is by directional behavior under load:
- Horizontal load: stretch around the body, like bust, waist, hip, upper arm
- Vertical load: stretch from shoulder to hem or from shoulder to bust under gravity
Some stitches expand sideways beautifully but drop downward over time. Others are stable in width but heavy in length. Some recover because the loops are compact and compressed; others deform permanently because the structure is open and tall.
Stitch family 1: Slip stitch, waistcoat stitch, and knit-look constructions
These create compact, often dense fabrics with strong directional personality.
Behavior
- can have excellent horizontal stretch when worked in rows through back loop or specific loops
- often good recovery, especially in wool
- tend to be more stable vertically than tall stitch fabrics
- can feel dense or stiff if hook size is too small
Good uses
- fitted garments
- hems, cuffs, neckbands
- waist-shaping panels
- garments designed with negative ease
Recommendations
- Yarn: wool, wool blend, resilient acrylic blend
- Hook: often 0.5–1.5 mm larger than you’d instinctively choose for comfort and drape
- Ease: 5–20% negative ease in ribbed sections depending on fabric stretch
Stitch family 2: Single crochet and half double crochet
These are workhorse garment stitches. They create denser fabrics than tall stitches but are generally more flexible than slip stitch.
Behavior
- moderate stretch, moderate stability
- half double crochet often has more drape and slight horizontal give than single crochet
- both are more stable than double crochet under vertical load
- recovery depends heavily on fiber
Good uses
- tees, pullovers, cardigans
- shaped garments needing predictable structure
- areas where you want fabric coverage and reasonable control
Recommendations
- Yarn: almost any, though fiber choice will strongly change feel
- Hook: use the size that gives a fabric you would want to wear, not merely “meeting gauge” at all costs
- Ease: 0–4 in / 0–10 cm depending on fit and fiber
Stitch family 3: Double crochet and taller stitches
Tall stitches are airy, fast, and drapey. They can also be the source of a lot of garment disappointment when treated as structurally equivalent to denser stitches.
Behavior
- more drape, more openness, often more vertical growth
- can widen or lengthen under weight depending on orientation and fiber
- lower resistance to gravity in heavy fibers like cotton
- usually less suitable for strong negative ease unless combined with ribbed sections or shaping support
Good uses
- layering pieces n- open summer garments
- garments designed with positive ease and movement
- lace panels where drape is the point
Recommendations
- Yarn: lighter weights are often more successful than heavier ones
- Hook: avoid oversizing if stability matters
- Ease: generally 2–6 in / 5–15 cm positive ease for all-over tall stitch garments
Stitch family 4: Mesh, filet, lace, and openwork
Openwork introduces a different kind of behavior. The spaces between stitches can distort, and the fabric can stretch significantly under load.
Behavior
- highly variable stretch depending on motif structure
- often dramatic drape and low dimensional stability
- can widen at bust/hip and drop in length under wear
- edges may flare or ripple without stabilization
Good uses
- overlays, beachwear, layering tops, decorative panels
- garments intended to be oversized or fluid
Recommendations
- Swatch larger than usual because small swatches lie about openwork behavior
- Positive ease is often safer unless openwork is paired with stabilizing seams or bands
- Consider reinforcing shoulders and necklines
Stitch family 5: Front-post/back-post ribs and relief textures
These mimic knitted ribs more than many other crochet methods.
Behavior
- strong horizontal elasticity in the rib direction
- good visual shaping
- can recover well with wool or resilient blends
- may lose snap in cotton-heavy yarns
Good uses
- waist shaping n- cuffs, hems, turtlenecks
- fitted body panels
Recommendations
- Test stretch percentage in the swatch
- Negative ease is often appropriate in these sections
- Be mindful that relief ribs can still be heavy if worked in worsted or bulky yarn
Swatching for Real Fit: Gauge, Hang, and Bounce-Back
A standard 4 in / 10 cm gauge swatch is necessary, but for garments it is often not enough.
You need to know:
- stitch gauge and row gauge
- how the fabric behaves under its own weight
- whether it recovers after stretching
- whether it changes after washing and drying
Step 1: Make a meaningful swatch
For garments, I recommend a swatch at least 6 x 6 in / 15 x 15 cm, and preferably 8 x 8 in / 20 x 20 cm for openwork or drapey yarns.
Include enough stitches that the center 4 in / 10 cm is unaffected by edges.
Examples by yarn weight:
- Fingering or sport: aim for 30–40 stitches across swatch
- DK: 24–32 stitches
- Worsted: 20–28 stitches
- Aran/bulky: 16–24 stitches
Use the hook size you think you want, then make a second swatch if needed.
Typical starting hook sizes:
- Fingering: 2.75–4 mm
- Sport: 3.25–4.5 mm
- DK: 3.5–5 mm
- Worsted: 4.5–6 mm
- Aran: 5–6.5 mm
These are starting ranges only. Garment comfort matters more than the label.
Step 2: Measure dry, unblocked gauge
Count stitches and rows over the center 4 in / 10 cm.
For example:
- 18 stitches and 11 rows = 4 in / 10 cm in half double crochet
- That means each stitch is about 0.22 in / 0.56 cm wide
This is your conversion tool when modifying circumference.
Step 3: Wash and dry exactly as the garment will be treated
This is non-negotiable.
Measure again after laundering.
Possible outcomes:
- wool blooms and slightly relaxes
- cotton may soften and lengthen
- acrylic may change dramatically if heat was used
- blends may settle into their true drape only after washing
Record both pre- and post-wash measurements.
Step 4: Test stretch percentage
Lay the swatch flat and measure its natural width in the center.
Then gently stretch it to the maximum comfortable extension you would tolerate in a garment—not “as hard as possible.” Measure again.
Example:
- Natural width across marked section: 4 in / 10 cm
- Comfortably stretched width: 4.75 in / 12 cm
- Stretch percentage = (4.75 - 4) / 4 = 18.75%
If the swatch comfortably stretches 15–20% and returns well, it may support modest negative ease.
If it stretches 20% but returns poorly, it is not truly suitable for sustained negative ease.
Step 5: Test recovery
After stretching, let the swatch rest for several minutes. Measure again.
- Returns to 4.1 in / 10.4 cm: good recovery
- Stays at 4.4 in / 11.2 cm: weak recovery, likely to bag out
Repeat 3–5 times. Repeated cycles tell you more than a single pull.
Step 6: Hang test for vertical growth
Clip the top of the swatch and hang it with a small weight at the bottom for several hours or overnight.
A practical home method:
- mark a 4 in / 10 cm vertical section in the center
- attach clothespins or small binder clips at bottom, or a weight similar to the yarn mass the garment will exert
- measure before and after hanging
Example:
- original marked height: 4 in / 10 cm
- after hang test: 4.4 in / 11.2 cm
- vertical growth: 10%
Ten percent growth in a swatch can translate into serious extra body length or dropped armholes in a full garment.
Step 7: Drape and fold test
Hold the swatch against the body or a dress form.
Ask:
- does it skim or stick out?
- does it collapse nicely at the side bust or stand away?
- does the lower edge curl, flare, or stretch?
- when folded over your hand, does it bounce back or stay elongated?
These observations help you decide whether the fabric wants positive ease or can tolerate a closer fit.
Calculating Ease for Bust, Waist, and Hip
Now let’s turn all that information into garment decisions.
Bust ease
The full bust is usually the most important fit point in crochet tops.
Choosing bust ease
- Stable cotton or tall-stitch fabric: 2–4 in / 5–10 cm positive ease
- Moderately stable HDC/SC fabric: 0–2 in / 0–5 cm positive ease
- Ribbed wool blend fabric: 0–2 in / 0–5 cm negative ease possible
Example calculation
Body full bust: 40 in / 101.5 cm Desired ease: 2 in / 5 cm positive Target garment bust: 42 in / 106.5 cm Gauge: 16 stitches = 4 in / 10 cm That is 4 stitches per inch.
Required stitch count around bust:
- 42 in x 4 sts/in = 168 stitches
If working in joined rounds, aim for a stitch count compatible with the pattern repeat.
Example repeat multiple of 8:
- nearest options might be 168 or 176
- 168 works exactly, so use 168 sts
Waist ease
Waist ease depends on silhouette and how much stretch the fabric has.
For an hourglass or shaped garment, the waist often benefits from less ease than the bust and hip.
Typical waist choices
- Relaxed tee: same ease as bust or slightly less
- Fitted pullover in stretchy fabric: 0–2 in / 0–5 cm negative ease
- Cotton garment: zero or slight positive ease often feels better than negative ease
Example calculation
Natural waist: 32 in / 81 cm Desired ease: 0 in Gauge: 4 sts/in Target waist circumference: 32 in Required stitches: 128 sts
If bust is 168 sts and waist is 128 sts, you need to remove 40 stitches total between bust and waist.
If garment is worked in the round with 4 shaping lines:
- 40 ÷ 4 = 10 stitches removed at each shaping line overall
- if each decrease round removes 1 stitch at each shaping line = 4 stitches removed per decrease round
- 40 ÷ 4 = 10 decrease rounds needed
Space those decrease rounds over the length from bust to waist.
Hip ease
Hips need room not just for standing still, but for sitting and walking.
Typical hip choices
- Close-fitting ribbed sweater: 0–2 in / 0–5 cm negative ease may work
- Standard pullover or tee: 1–4 in / 2.5–10 cm positive ease
- Cotton or drapey fiber: err on the side of more room
Example calculation
Full hip: 44 in / 112 cm Desired ease: 2 in / 5 cm positive Target hip: 46 in / 117 cm Gauge: 4 sts/in Required stitches: 184 sts
If waist is 128 sts and hip is 184 sts, you need to add 56 stitches total.
With 4 shaping lines:
- each increase round adds 4 sts total
- 56 ÷ 4 = 14 increase rounds
If the distance from waist to hip is short, you may prefer to begin with a more moderate waist reduction rather than forcing too many increase rounds too quickly.
Step-by-Step Method for Engineering Real Fit
Here is the practical workflow I recommend whenever you are making or modifying a crochet garment.
Step 1: Identify the role of the garment
Ask what the garment is supposed to do.
- skim lightly over the body?
- hug and recover like a fitted knit?
- float away from the body with drape?
- layer over another garment?
This tells you the likely ease range.
Step 2: Measure the body honestly
Take at least these measurements:
- high bust
- full bust
- natural waist
- high hip if relevant
- full hip
- upper arm
- shoulder to bust
- shoulder to waist
- waist to hip
- desired garment length
For fitted garments, also note where you prefer fabric contact and where you need freedom.
Step 3: Choose yarn with behavior in mind
Do not choose only by color and softness.
Ask:
- Is this yarn springy?
- Is it heavy for its meterage?
- Does it contain fibers known for drape or growth?
- Will I need positive ease to compensate?
Step 4: Choose a stitch pattern appropriate to the yarn
Examples:
- cotton + double crochet all over = likely needs positive ease and stabilization
- wool blend + back-loop slip stitch = can support negative ease
- bamboo blend + mesh = oversized or draped design is wiser than fitted tank
Step 5: Swatch for gauge, stretch, and vertical growth
Do all the tests above. Write down:
- dry gauge
- washed gauge
- horizontal stretch percentage
- vertical growth percentage
- recovery notes
Step 6: Assign ease by body zone
This is the part many patterns simplify too much. You do not need the same ease everywhere.
A very wearable garment might have:
- bust: +2 in / +5 cm
- waist: 0 in
- hip: +3 in / +7.5 cm
- sleeve bicep: +1.5 in / +4 cm
- hem ribbing: slight negative ease for neatness
A fitted ribbed pullover might have:
- bust: -1 in / -2.5 cm
- waist: -2 in / -5 cm
- hip: 0 in
- cuffs: -20%
- neckband: -15%
Step 7: Convert measurements to stitches and rows
Always use post-wash gauge unless you have a strong reason not to.
Keep stitch repeat multiples in mind.
Step 8: Add shaping where it matters most
The classic areas are:
- bust darts or short-row bust shaping
- waist decreases/increases
- hip shaping
- sleeve tapering
- armhole depth adjustments
If the fabric has low recovery, shaping becomes even more important because the fabric itself will not “help out” much.
Step 9: Stabilize stress points selectively
Use finishing that supports the garment without removing necessary movement.
We will cover this below.
Step 10: Re-measure during construction
Do not wait until seaming to discover length growth.
Measure after major sections are complete, and if possible let panels hang before final joining.
Troubleshooting Common Fit Problems
Problem: The garment fits flat but grows during wear
Likely causes
- cotton, bamboo, alpaca, or drapey blend
- tall stitches or openwork
- inadequate shoulder or neckline stabilization
- too much garment weight for the stitch structure
Fixes
- reduce vertical length before finishing
- switch to shorter stitches in high-load areas
- add shoulder seams or reinforcement
- use smaller hook for upper bodice/strap sections
- choose more positive ease instead of relying on close fit
Problem: Negative ease feels restrictive instead of supportive
Likely causes
- fiber has low elasticity
- stitch structure is dense but not springy
- armhole or neckline shaping is insufficient
- garment is too small in a non-stretch direction
Fixes
- reduce negative ease, especially in cotton
- insert side panels or additional circumference
- use a ribbed section only where closeness is needed
- reevaluate upper bust and bicep ease separately
Problem: Bust pulls while waist fits nicely
Likely causes
- no bust shaping
- relying on whole-garment stretch instead of actual shaping
- positive ease assigned too evenly
Fixes
- add bust darts, short rows, or front-only width
- size for bust, then shape waist back in
- check cross-back and armhole depth so bust fabric is not being stolen from upper body fit
Problem: Hem flares or waves
Likely causes
- too many increase stitches
- stitch pattern naturally spreads at lower edge
- lack of ribbed or stabilized finish
- blocking exaggerated openness
Fixes
- remove increases
- add a smaller-hook edging
- finish with ribbing or a firmer hem band
- avoid overblocking lower edge
Problem: Neckline grows and slips backward
Likely causes
- low recovery fiber
- unsupported neckline edge
- front/back balance issue
- shoulder seam stretch
Fixes
- add slip-stitch, single crochet, or sewn reinforcement at neckline
- work a neckband with 10–15% negative ease if appropriate
- stabilize shoulders with mattress seam, crochet join, or woven tape
Problem: Sleeves stretch at the elbow or bicep
Likely causes
- too little positive ease in a non-recovering fabric
- too much weight in long sleeve
- loose gauge in tall stitches
Fixes
- increase bicep ease by 1–2 in / 2.5–5 cm
- taper sleeves more intentionally
- use denser stitch at cuff and lower sleeve
- choose lighter yarn weight
Finishing Choices: Stabilize or Preserve Elasticity?
Finishing can dramatically change how a crochet garment behaves.
When to stabilize
Stabilize areas that carry weight or are prone to distortion:
- shoulder seams
- neckline edges
- button bands
- armholes in sleeveless garments
- pocket openings
- upper back in drapey garments
Stabilizing methods
- slip-stitch edging
- single crochet edging with smaller hook
- sewn ribbon or twill tape behind button bands/shoulders
- mattress seaming rather than loose joining
- surface crochet reinforcement
These methods reduce growth and preserve shape.
When to preserve elasticity
Keep stretch in areas that need to move with the body:
- cuffs
- hem ribs
- turtlenecks/mock necks
- fitted waist ribs
- pull-on neck openings
Elastic-friendly finishes
- back-loop ribbing
- front-post/back-post bands
- sewn bind-offs with stretch in mind
- looser slip-stitch edging only if tested
Practical percentages for bands
As a general guideline:
- Neckbands: often 10–20% shorter than neckline measurement, depending on stretch
- Cuffs: 10–25% negative ease
- Hem bands: 0–15% negative ease depending on silhouette
Always swatch band behavior too. Cotton cuffs with 25% negative ease may simply feel tight and stay stretched out.
Blocking choices matter
Blocking is not merely cosmetic.
- Wet blocking wool can even stitches while preserving memory.
- Aggressive wet blocking cotton can encourage lengthening.
- Steam blocking acrylic can kill elasticity if overdone.
- Lace blocking opens patterning but may permanently increase dimensions.
If your garment relies on recovery, block to finished dimensions conservatively.
Variations: How to Apply This to Different Garment Types
Fitted ribbed pullover
Best candidates:
- wool or wool blend
- slip stitch, BLO half double crochet, or post-stitch ribs
- 0 to 2 in / 0 to 5 cm negative ease at bust
- 1 to 3 in / 2.5 to 7.5 cm negative ease at waist if comfortable
Tips:
- stabilize shoulders
- check row gauge carefully because ribbed fabrics can lengthen in wear
- use smaller needle-like precision in seaming to keep shape clean
Summer cotton tee
Best candidates:
- cotton or cotton blend
- single crochet, half double crochet, or refined mesh with structure
- 2 to 4 in / 5 to 10 cm positive ease at bust
- 1 to 3 in / 2.5 to 7.5 cm positive ease at hip
Tips:
- avoid very heavy all-over double crochet unless oversized look is intended
- stabilize neckline and shoulders
- shorten body slightly if swatch shows vertical growth
Boxy drapey cardigan
Best candidates:
- acrylic blend, bamboo blend, cotton blend, wool blend
- openwork or double crochet fabrics
- 4 to 8 in / 10 to 20 cm positive ease
Tips:
- embrace movement rather than fighting it
- use seams or bands to control edges
- let drape be part of the design language
Close-fit tank or shell
Best candidates:
- resilient blend with some recovery
- dense but flexible stitch pattern
- 0 to 1 in / 0 to 2.5 cm positive ease or slight negative ease if tested
Tips:
- pay close attention to strap and neckline stabilization
- test opacity at full stretch
- use bust shaping instead of counting on generic stretch
Key Takeaways
If you remember only a few things from this article, let them be these:
- Garment fit is dynamic, not flat. A crochet garment must fit in motion, under gravity, and after repeated wear.
- Ease is inseparable from fabric behavior. Positive, zero, and negative ease only make sense in relation to fiber elasticity and stitch structure.
- Wool usually offers the best stretch and recovery. Cotton generally needs more positive ease; acrylic and blends must be tested individually.
- Tall and open stitches often grow more under vertical load. Dense or ribbed stitches usually provide better control.
- Swatch beyond gauge. Test wash response, stretch percentage, recovery, and hang.
- Assign ease by body zone. Bust, waist, hip, sleeve, cuff, and neckline do not all need the same amount of ease.
- Use shaping instead of hoping stretch will solve everything. Bust darts, waist shaping, and strategic increases/decreases matter.
- Finishing can save or sabotage fit. Stabilize stress points and preserve elasticity only where needed.
The real skill in crochet garment making is not simply following dimensions. It is learning to predict behavior.
When you know that a cotton double crochet fabric will likely drop, that a wool rib can carry negative ease gracefully, that a neckline needs reinforcement, and that your swatch must be tested like a miniature garment, your projects become more consistent and far more wearable.
And that is the goal, really: not just making garments that fit when you pull them on, but garments that keep fitting while you live in them.
Because the best crochet clothing should move with you, recover with you, and feel like it was engineered—not merely hoped—into shape.