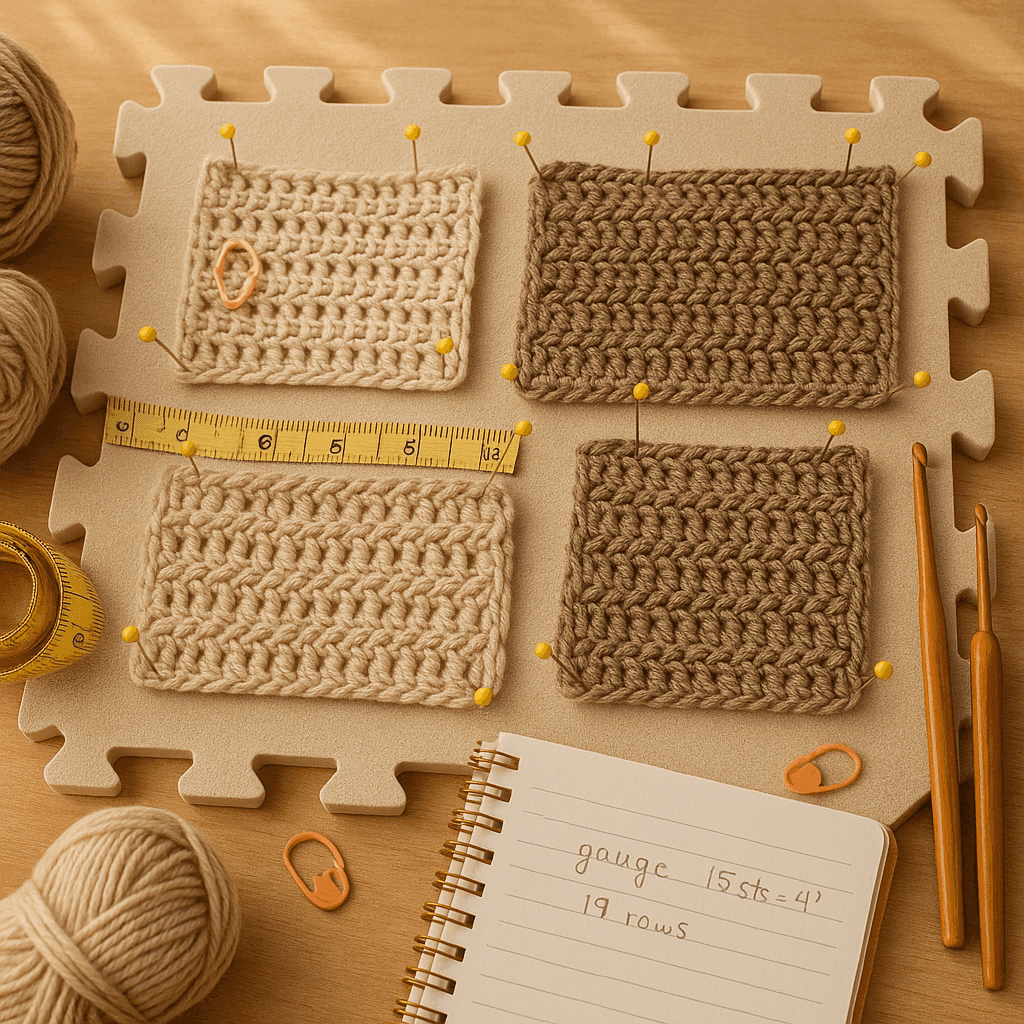
There is a very specific kind of crochet disappointment that tends to show up only after you think you are finished. The sleeve looked perfect on the table. The ribbed hem matched the schematic. The body panel blocked to exactly the width you calculated. Then the garment went onto an actual body, gravity joined the conversation, the fabric lengthened a little under its own weight, and suddenly the width you were counting on seemed to disappear. A cuff pulls in harder than expected, a tank body narrows over the bust, a mesh top grows longer while the side seams creep inward, or a yoke panel that fit beautifully flat becomes lean and strained in wear.
Most crocheters have seen this happen even if they have never named it. In fabric mechanics, the broad idea is familiar from the concept of Poisson ratio: when a material is stretched in one direction, it often contracts in the perpendicular direction. Crochet is not a perfectly uniform engineering material, so it does not behave with one neat universal number. But the underlying principle absolutely matters. As length grows, width may shrink. In some stitch patterns the opposite can happen, or the change can be very small. What matters to us as makers is that crochet deformation is real, directional, and predictable enough to plan around if we test for it on purpose.
This is one of those under-discussed technical topics that separates “it fits on the blocking board” from “it keeps fitting after three hours of wear.” If you understand how stitch architecture, yarn fiber, finishing, and panel orientation interact, you can make much better decisions before you commit to 1,800 yards of sweater. You can choose rib directions intelligently, add stabilization only where it helps, build negative ease where draw-in demands it, and modify panel math so the garment you designed remains the garment you actually wear.
Let’s dig into what lateral draw-in is, why crochet fabrics do it, which stitch families are most prone to it, and how to measure and design around it with practical swatching rather than guesswork.
What lateral draw-in means in crochet
When crochet fabric is pulled lengthwise, the loops and posts that make up the fabric reorient under tension. Depending on the stitch structure, some of that extra length comes from loops opening, some from stitches rotating, some from chains straightening, and some from compressed texture releasing. Because the fabric is made of interconnected loops rather than rigid bars, this change in one direction often redistributes available yarn in the other direction.
In practical crochet language:
- Lengthwise stretch means the fabric gets taller.
- Lateral draw-in means the fabric gets narrower as it gets taller.
- Width gain can also happen in some structures, especially where opening the stitch network pushes neighboring loops apart.
- Recovery is how well the fabric returns to its original dimensions when tension is removed.
- In-wear deformation includes both immediate stretch and longer-term growth from gravity, moisture, body heat, and repeated movement.
For garment makers, the important question is not “Does crochet have a Poisson ratio?” but rather “When this exact fabric is worn in this orientation, how much width do I lose when length increases by a realistic amount?”
That question is measurable.
Why crochet behaves this way: stitch architecture first
Crochet fabrics vary wildly because stitch architecture varies wildly. A dense single crochet panel and an airy filet mesh are both crochet, but mechanically they are almost unrelated.
Here are the main architectural reasons you see lateral draw-in.
1. Loop rotation and alignment
Each stitch contains loops that can tilt and tighten under load. When pulled vertically, the top loops and side loops may rotate into a more elongated shape, borrowing yarn from the width of the stitch.
This is common in:
- single crochet
- half double crochet
- dense linen/moss stitch
- tight textured fabrics
These structures often show modest to moderate narrowing when stretched lengthwise.
2. Post flex and compression release
Tall stitches such as double crochet and treble crochet have longer vertical components. Under tension, those posts straighten. If the stitch was previously somewhat compressed or leaning, the fabric can gain height quickly. Whether it narrows a lot depends on how much adjacent spacing is available and whether chains are part of the structure.
This is common in:
- double crochet panels
- shell fabrics
- clustered lace
- V-stitches
3. Chain spaces opening or collapsing
Mesh and lace often behave less like a solid fabric and more like a net. When pulled lengthwise, chain spaces may narrow sideways, causing clear draw-in, or they may open diagonally in a way that redistributes width outward. This is why one mesh tunic collapses into a slim column while another unexpectedly broadens and sags.
Common in:
- filet crochet
- chain-space mesh
- granny-style openwork
- Solomon’s knot and elongated-loop structures
4. Rib architecture
Crochet ribbing, especially front-post/back-post rib and back-loop-only rib worked in rows, is a category of its own. Ribs are designed to compress and expand. They can stretch dramatically in one direction while drawing in strongly in the other, and the amount depends hugely on whether the rib columns run vertically or horizontally on the body.
This is why a hem can look tiny off the body and then relax beautifully in wear—or why it can overstretch and fail to recover.
5. Texture stack height
Popcorns, cables, raised posts, and heavily layered textures often contain “stored” yarn length in the surface relief. Under vertical load, some texture compresses flatter, allowing extra length and often narrowing the panel beneath.
That can make an Aran-style crochet sweater behave differently after a few wears than your flat blocked measurements suggested.
Fiber content and yarn construction matter just as much
Two swatches in the same stitch pattern can deform very differently if the yarn changes.
Wool and wool blends
Wool generally has good elasticity and better recovery than cotton or linen. A wool crochet panel may stretch in wear but often returns closer to its original width after resting. High-wool yarns are forgiving for ribs and fitted garments.
Typical behavior:
- moderate stretch
- moderate lateral draw-in depending on stitch
- good rebound
- steam and wet finishing can settle the fabric nicely without destroying resilience
Cotton
Cotton is a classic growth fiber in crochet garments. It has lovely stitch definition and drape, but under gravity it can lengthen significantly, especially in taller stitches or openwork. As length grows, width loss may become noticeable and persistent.
Typical behavior:
- lower elastic recovery
- more in-wear growth
- pronounced draw-in in some dense fabrics and ribs
- excellent for structured pieces only when tested carefully
Linen and plant blends
Linen tends to soften and relax with wear. It can begin crisp and become more fluid, which changes both gauge and deformation after use.
Typical behavior:
- low bounce-back initially
- more pronounced long-term relaxation
- draw-in may increase after the first few wears if the fabric lengthens permanently
Acrylic
Acrylic varies a lot. Some premium acrylics rebound well; some relax and bag out. Heat finishing also changes behavior dramatically, so a swatch must be finished exactly as the garment will be.
Typical behavior:
- can appear stable before laundering and then change after wash/dry
- recovery depends on yarn construction
- “killing” acrylic removes spring and can increase permanent deformation
Silk, bamboo, rayon, alpaca, and drapey blends
These fibers are beautiful but often heavy and fluid. Heavy drape plus limited recovery is a recipe for vertical growth and corresponding width change.
Typical behavior:
- significant hang weight
- greater body-length growth
- likely narrowing in long garments or sleeves
- best used when intentionally designing for drape and growth
Yarn construction
Beyond fiber, construction matters:
- Tightly plied yarns often hold stitch definition and resist distortion better.
- Loosely spun yarns can flatten and relax more.
- Chainette yarns may behave differently from plied yarns of similar fiber content.
- Heavier yarn weights increase gravitational loading in long garments.
Stitch families and their usual deformation tendencies
These are broad tendencies, not laws. Always swatch.
Single crochet and dense compact fabrics
Usual tendency: moderate length stretch, moderate width loss, fairly structured overall.
Single crochet worked at a sensible gauge often forms a firm grid. It does not usually grow dramatically, but when it does stretch lengthwise, the width often draws in perceptibly because there is not much open space to redistribute.
Good for:
- bags, structured tops, firm cardigans
- hems that need control
Watch for:
- stiffness if hook is too small
- edge flare or tilt from uneven tension
- creeping width loss in long body panels made with heavy cotton
Half double crochet
Usual tendency: more vertical give than single crochet, often noticeable width loss under lengthwise tension.
Half double crochet has enough height to relax in wear but still enough density that widening is limited. It is a common “looks perfect at first” stitch in garments because it seems balanced flat.
Good for:
- sweaters and tops needing moderate drape
Watch for:
- sleeve length growth
- body narrowing after hanging
Double crochet and taller stitches
Usual tendency: larger length change potential; width may contract moderately, but open spacing can complicate this.
Double crochet panels often seem airy and flexible. Under load, the posts straighten and spaces regularize. In a plain dc fabric, you may see meaningful narrowing; in a looser dc fabric with room between stitches, deformation may distribute more evenly.
Good for:
- classic garments with drape
- mesh-adjacent solids
Watch for:
- cotton and bamboo growth
- armholes that deepen in wear
- hems that ripple if unsupported
Moss stitch / linen stitch
Usual tendency: moderate stability, sometimes surprisingly good width retention.
Because the chains and single crochets alternate, the fabric can redistribute tension across many small openings. It often drapes well without collapsing as much as a simple mesh. Still, some draw-in occurs under load.
Good for:
- scarves, garments, transitional fabrics
Watch for:
- directional bias if tension is inconsistent
- length growth in slippery fibers
Meshes and filet
Usual tendency: highly variable; often dramatic narrowing under vertical load, especially if chain spaces collapse inward.
A square filet swatch on the table can become a rectangle in wear. Open squares may elongate into taller, narrower windows.
Good for:
- layering garments
- summer tops
- decorative panels
Watch for:
- bust-width loss in tanks and tees
- side-seam collapse
- necklines dropping lower than planned
Granny-style cluster fabrics
Usual tendency: can widen or narrow depending on motif arrangement, join method, and blocking.
Cluster fabrics have multiple internal hinges. Joined motifs behave differently from one-piece fabrics. Seamed grannies may stabilize better than join-as-you-go networks.
Good for:
- motif garments
- cardigans and layering pieces
Watch for:
- diagonal distortion
- uneven growth at joins
- motif openings enlarging in wear
Front-post/back-post ribbing
Usual tendency: strong compression and expansion; potentially dramatic width change.
Post ribs are springy but not all equally recoverable. Fiber choice matters enormously.
Good for:
- cuffs, hems, neckbands
Watch for:
- overexpansion in cotton
- flare after blocking
- mismatch between rib gauge and body gauge
Back-loop-only rib worked in rows
Usual tendency: very stretchy across row direction, strong draw-in when relaxed.
This is the classic crochet rib used for waistbands and cuffs. It can be excellent, but it must be measured in both relaxed and extended states.
Good for:
- fitted edges
- hats, cuffs, waistbands
Watch for:
- joining too tightly, reducing recovery
- underestimating extension needed to pass over hand, foot, or hip
A practical swatching protocol for measuring lateral draw-in
If you only swatch for standard flat gauge, you are missing the key information. You need at least three measurement states:
- Relaxed after finishing
- Supported vertical hang
- Moderate in-wear stretch
Here is a reliable protocol.
Swatch size
Make a swatch at least 8 x 8 in / 20 x 20 cm, larger for openwork or ribs.
Recommended starting stitch counts by fabric type:
- dense fabric: 30–40 sts x enough rows for 8 in
- dc fabric: 24–30 sts x enough rows for 8 in
- mesh/filet: at least 4 full pattern repeats wider and taller
- ribbing: at least 6 in / 15 cm wide and 8 in / 20 cm tall in the same orientation as garment use
Use the actual yarn and hook intended for the project. Typical hook pairings:
- fingering weight: 3.25–4.0 mm
- sport: 3.5–4.5 mm
- DK: 4.0–5.0 mm
- worsted: 5.0–6.0 mm
- aran: 5.5–6.5 mm
These are starting points only. Fabric behavior matters more than label suggestion.
Finish the swatch exactly like the garment
That means:
- wash the same way
- block the same way
- steam only if you will steam the garment
- dry flat or hang exactly as intended
Then let the swatch rest 24 hours.
Measurement state 1: relaxed finished gauge
Lay the swatch flat without stretching. Measure the center 4 in / 10 cm.
Record:
- stitches per 4 in
- rows per 4 in
- total width and height
Example:
- 16 hdc = 4 in
- 12 rows = 4 in
- swatch total = 8.5 in wide x 8.25 in tall
Measurement state 2: vertical hang test
Clip the top edge evenly and let the swatch hang with a small weight at the bottom. For garment simulation, the weight should be gentle, not extreme.
A practical guideline:
- lightweight fabrics: 20–30 g
- medium fabrics: 30–50 g
- heavier fabrics: 50–75 g
Let it hang for 30 minutes, then measure width and height at the center.
Example:
- original: 8.5 in wide x 8.25 in tall
- hung: 8.1 in wide x 8.6 in tall
So the swatch gained 0.35 in length and lost 0.4 in width.
Measurement state 3: moderate in-wear stretch test
This simulates being on the body rather than simply hanging. Pin the swatch to reach a realistic length extension—often 5–12% for everyday wear, depending on fiber and stitch.
Then measure resulting width.
Example:
Pin height from 8.25 in to 8.9 in. Measure width now: 7.95 in.
That means:
- height increase: 0.65 in = about 7.9%
- width decrease: 0.55 in = about 6.5%
This is highly actionable information.
Simple design record sheet
For every garment swatch, note:
- stitch pattern
- yarn/fiber/weight
- hook size
- finished relaxed gauge
- hang gauge
- moderate stretch gauge
- rebound after resting 12 hours
- visual notes: edge curl, collapse, skew, texture flattening
Once you start keeping these notes, you will see strong patterns in your own making style.
How to use the math in garment planning
The key is to stop designing only from relaxed gauge if the garment will spend its life under vertical load.
Step 1: determine likely wear state
Ask:
- Is this fitted or oversized?
- Is the fabric dense or drapey?
- Is the panel long and heavy?
- Will it hang from shoulders, waistband, or both?
- Will a sleeve be loaded from the cap downward?
A cropped wool sweater in single crochet may stay close to relaxed gauge. A long cotton mesh tunic will not.
Step 2: choose a working width value
Use one of these:
- relaxed width for structured garments with minimal growth
- midpoint between relaxed and hang width for moderate drape pieces
- hang or moderate-stretch width for long, drapey, body-skimming pieces
Step 3: calculate target stitch count
Example:
You need a body panel to measure 20 in in wear. Your moderate-stretch swatch shows 15 sts = 4 in.
Stitches needed:
15 ÷ 4 = 3.75 sts per inch 20 x 3.75 = 75 sts
If your relaxed gauge was 16 sts = 4 in, using relaxed gauge would have given:
16 ÷ 4 = 4 sts per inch 20 x 4 = 80 sts
That 5-stitch difference could be the reason a fitted top ends up too narrow in wear.
Step 4: account for pattern repeat
Suppose the stitch repeat is multiple of 4 + 2. Nearest workable counts to 75 might be 74 or 78 depending on setup. Now evaluate whether you want slightly more or less ease based on recovery.
Step 5: plan vertical growth simultaneously
Do not fix width and forget length. If the same swatch grows in height by 8%, your armhole depth, body length, and sleeve length need compensation.
If target finished body length in wear is 22 in, and the fabric grows 8%, then relaxed blocked length should be about:
22 ÷ 1.08 = 20.37 in
That is a big difference.
Panel-specific design strategies
Different garment parts experience different loads.
Body panels
Body panels hang continuously, especially in dresses, tunics, and long cardigans. Bust and hip circumference can also force the panel into additional lengthwise tension, increasing width loss.
Strategies:
- Use in-wear width gauge, not just relaxed gauge.
- Add side shaping rather than depending on uniform stretch.
- Consider seams for stabilization.
- For plant fibers, keep very long panels lighter in stitch density or support them structurally.
Sleeves
Sleeves are notorious for becoming longer and narrower because they hang from the shoulder and move constantly.
Strategies:
- Swatch sleeve fabric separately if orientation differs from body.
- Make sleeves 0.5–1.5 in shorter if testing shows growth.
- Build slightly more upper-arm circumference if vertical stretch causes narrowing.
- Stabilize cuffs if they must keep shape.
Hems and waistbands
Hems often combine a stable body with a highly elastic rib. If the body grows downward, it can stretch the hem differently than planned.
Strategies:
- Measure ribbing in relaxed, comfortably stretched, and maximum needed extension states.
- Use a smaller hook for ribbing only if recovery remains adequate.
- Join hem to body without forcing one to match the other unnaturally.
Necklines
Neck openings drop and spread in wear, especially with mesh or tall stitches.
Strategies:
- Add edge rounds in denser stitches.
- Use slip stitch, single crochet, or corded finishing for control.
- Consider shoulder seam stabilization.
Rib behavior: the special case
Ribs deserve their own planning method because their visible width and functional width are not the same.
Back-loop-only rib in rows
Imagine a cuff worked in rows, 12 rows around, each row 7 sc tall using a 4.0 mm hook in DK wool.
Measure three states:
- relaxed circumference equivalent: 6 in
- comfortable stretch: 8 in
- maximum stretch: 9 in
If the wearer’s hand circumference at the widest point is 8.25 in, this cuff may feel annoying even though the wrist is only 6.5 in. You need passage ease, not just resting ease.
Common mistake:
- Designing the cuff only to the wrist measurement, forgetting that it must pass over the hand.
Fix:
- Ensure comfortable stretch exceeds passage measurement by at least 0.25–0.5 in.
Post-stitch ribbing
Post ribbing is often less elastic than BLO rib but more integrated with the body fabric.
Common mistake:
- Assuming FP/BP rib will behave like knitted rib.
Fix:
- Swatch it honestly. Many post ribs look compressible but recover less, especially in cotton.
Rib attached to a growing body
If a body panel lengthens and narrows, the hem attached at the bottom may be asked to do extra work holding circumference. This can cause flare above the rib, or a too-tight lower torso fit.
Fixes:
- Increase body width slightly above rib.
- Add a stabilization round before attaching rib.
- Use a firmer yarn or smaller hook in the hem section.
Mesh behavior and openwork planning
Openwork is where draw-in surprises many crocheters because open stitches seem “stretchy everywhere.” In reality, they often stretch directionally.
Why mesh narrows
Chain spaces act like little bridges. Under vertical tension, those bridges tilt and straighten, often reducing horizontal span. The larger the chain spaces, the more dramatic the shape shift can be.
Practical mesh swatching rule
For any garment whose fit depends on mesh width, make a swatch at least 6 pattern repeats wide x 8 repeats tall. Smaller swatches lie.
Common mistakes with mesh garments
- Using blocked flat width for bust calculations
- Ignoring the weight of the full garment
- Adding heavy edgings that drag the mesh longer and narrower
Fixes
- Use narrower chain spaces if width retention matters.
- Alternate mesh sections with solid stabilizing bands.
- Add side seams instead of working fully in the round when shape control matters.
- Support shoulder areas with denser stitches.
Edge stabilization methods
Sometimes the right answer is not changing the whole fabric, but controlling where deformation happens.
Stabilizing edges with denser crochet
A round of single crochet or slip stitch can reduce spreading and distortion.
Best for:
- necklines
- armholes
- front bands
- hem edges on lace
Tip:
Work evenly. Too many stitches in the edging will create flare; too few will cause puckering. A good starting point is to pick up approximately:
- 1 stitch per row along sc/hdc edges
- 2–3 stitches per 3 rows along dc edges
Adjust by eye and swatch if the edge is critical.
Corded or reinforced edges
You can crochet over a fine cord, elastic thread, or stable yarn in selected edges.
Best for:
- necklines that droop
- shoulder seams
- waistlines needing recovery
Use with care:
Too much reinforcement makes crochet feel rigid and can create visible cinching.
Seams as structure
Seams are underrated stabilization. A sweater with side seams often keeps proportion better than a seamless tube, especially in drapey fibers.
Best for:
- long cardigans
- fitted tops
- dresses
- mesh garments
Stabilizing with hook-size transitions
A subtle reduction of 0.5 mm at cuffs, hems, or neckline bands can help edges keep shape without changing yarn.
Common mistake:
Going down too far and creating a hard, buckled edge.
Fix:
Swatch the transition. If the edge cups, increase hook or stitch count slightly.
Negative ease planning with draw-in in mind
Negative ease is not just “make it smaller.” It must be matched to the actual stretch and recovery of the fabric.
A smart negative ease framework
For a fitted garment, separate these three ideas:
- resting ease: how the garment measures unworn
- wear ease: how it measures while on the body
- recovery behavior: whether it springs back after removal
Example:
Bust measurement: 38 in Fabric moderate-stretch width behavior suggests the garment panel narrows 5% when worn lengthwise. Desired fit is 1 in negative ease in wear, so target circumference in wear is 37 in.
But if the panel narrows by 5%, then relaxed circumference should be:
37 ÷ 0.95 = 38.95 in
That sounds backwards until you remember the narrowing happens during wear. If you made it 37 in relaxed, it might wear more like 35.15 in and feel too tight.
This is exactly why standard ease advice can fail in crochet if deformation is ignored.
Pattern modification strategies
If you are working from an existing pattern, you usually do not need to redesign the whole garment. You need strategic adjustments.
Modify width counts using in-wear gauge
If your swatch narrows more than the pattern likely assumes, add width where needed.
How:
- Recalculate stitch counts at bust, hip, upper arm, or cuff using your tested gauge.
- Preserve stitch repeat multiples.
- Keep increase/decrease points balanced relative to pattern shaping.
Shorten lengths preemptively
If sleeves or body grow in wear, work fewer rows than schematic length suggests.
How:
- Determine percent growth from swatch.
- Multiply target length by reciprocal of growth factor.
- Round to nearest full shaping row.
Reorient the fabric
Sometimes the best fix is changing the direction of crochet.
Examples:
- A ribbed body panel may perform better worked side to side so the stretch goes around the body, not down it.
- A mesh sleeve may hold width better if the stitch columns orient differently.
- Vertical strip construction can distribute weight more predictably than top-down seamless rounds.
Insert stabilizing sections
Add bands of denser fabric at strategic intervals.
Examples:
- a solid waist panel beneath an openwork bodice
- firmer shoulder straps on a lace tank
- single crochet side panels in an otherwise drapey body
Break up long unsupported spans
Long cardigans and dresses gain weight as they gain length. If the full body hangs from the shoulder line in a fluid yarn, expect growth.
Fixes:
- belt or waist shaping
- seam support
- underbust band
- lighter stitch pattern below the waist
Common mistakes and how to fix them
Mistake 1: Swatching too small
A 4-inch mesh swatch tells you very little.
Fix: Swatch large enough for repeats to settle and for real hang behavior to appear.
Mistake 2: Measuring only flat after blocking
This is the biggest one.
Fix: Measure relaxed, hanging, and moderately stretched states.
Mistake 3: Ignoring garment weight
A 30-inch tunic does not behave like an 8-inch swatch unless you simulate load.
Fix: Hang test the swatch and consider yarn heaviness in long garments.
Mistake 4: Assuming all stretch is good stretch
A fabric that stretches may not recover.
Fix: Include rebound testing after resting.
Mistake 5: Treating crochet rib like knit rib
Crochet rib can be excellent, but its spring profile is different.
Fix: Measure relaxed width, comfortable extension, and recovery separately.
Mistake 6: Over-blocking drapey fibers
Aggressive blocking can make growth worse.
Fix: Finish as gently as you intend to maintain the garment.
Mistake 7: Stabilizing every edge indiscriminately
Too much control kills drape and can distort nearby fabric.
Fix: Stabilize only the edges under stress or where fit precision matters.
A sample garment planning example
Let’s say you are designing a summer pullover in sport-weight cotton using a simple dc mesh. Your target finished bust circumference in wear is 40 in, body length in wear 21 in, sleeve length in wear 17 in.
You swatch with a 4.0 mm hook.
Relaxed after wash/block:
- 18 sts = 4 in
- 10 rows = 4 in
Moderate vertical stretch state:
- width equivalent becomes 17 sts = 4 in
- row gauge becomes 9.2 rows = 4 in
Interpretation:
- The fabric becomes narrower per stitch count in wear.
- The rows become taller, so fewer rows are needed for the same worn length.
Body panel math
Need 20 in front width for half bust.
Using wear gauge:
17 ÷ 4 = 4.25 sts/in 20 x 4.25 = 85 sts
If stitch repeat is multiple of 4 + 1, nearest counts are 85 or 89 depending on selvedge setup. Choose 85 sts if aiming for closer fit.
Body length math
Need 21 in in wear.
Wear row gauge:
9.2 ÷ 4 = 2.3 rows/in 21 x 2.3 = 48.3 rows
Relaxed row gauge would suggest 52.5 rows. That difference of about 4 rows is enough to alter hip placement and armhole depth.
Sleeve math
Suppose upper sleeve target in wear is 7 in laid flat.
7 x 4.25 = 29.75 sts, round to 29 or 33 depending on repeat. You might choose 33 sts for mobility if cotton recovery is poor.
If sleeve length grows similarly, work it initially shorter by about 7–8% based on your swatch.
Stabilization choices
Because cotton mesh is growth-prone:
- work shoulder sections in denser dc or hdc
- add a single crochet neckline edging
- seam the sides instead of full-round construction
- consider a firmer hem band with a 3.5 mm hook
That is design around deformation rather than design in spite of it.
Variations and design approaches worth exploring
Once you understand draw-in, you can use it creatively.
Use draw-in intentionally for shaping
Some fabrics naturally taper when loaded. That can help in:
- sleeve cuffs
- empire shaping
- softly cocooned silhouettes
The key is intentionality. Swatch and map the effect rather than being surprised by it.
Combine stable and dynamic fabrics
Pair a stable stitch for fit-critical zones with a fluid stitch for drape zones.
Examples:
- hdc side panels with mesh center front/back
- firm shoulder yoke with lace lower body
- BLO rib hem attached to a more stable body fabric
Change hook size across the garment
This is a subtle but useful pattern modification strategy.
Examples:
- same stitch, 0.5 mm smaller hook at hem and cuffs
- same hook in body, larger hook only in decorative lace insert
Always keep stitch counts and drape transitions in mind.
Choose yarn to support the silhouette
If the design needs crisp proportion retention, choose wool blend, high-twist cotton blend, or a more elastic construction. If the design celebrates lengthening and narrowing drape, choose bamboo or linen blend on purpose.
Final takeaways
Crochet fabric does not simply “stretch.” It deforms according to loop structure, fiber, finishing, and load. One of the most useful ways to think about this is through lateral draw-in: when the fabric gains length, it may lose width. That is not a flaw. It is mechanics.
For us as crocheters, the practical lesson is clear:
- swatch larger than usual
- finish exactly as the garment will be finished
- measure relaxed, hanging, and moderate-stretch states
- use in-wear gauge for fit-critical panel math
- plan for sleeve and body growth together with width contraction
- treat ribbing and mesh as special cases
- stabilize only where needed
- modify patterns strategically instead of hoping blocking will solve everything
If you have ever wondered why a beautiful flat panel turned into a narrower, longer garment once it met gravity and movement, now you know. More importantly, you know what to do about it.
The best crochet garments are not the ones that look perfect only on the blocking mats. They are the ones whose proportions survive real life: shoulders moving, hems hanging, sleeves bending, fiber relaxing, and hours of wear revealing whether the maker understood the fabric from the beginning. When you learn to measure deformation and design with it, your hems stay intentional, your sleeves stay believable, and your body panels keep acting like the dimensions you meant them to have.