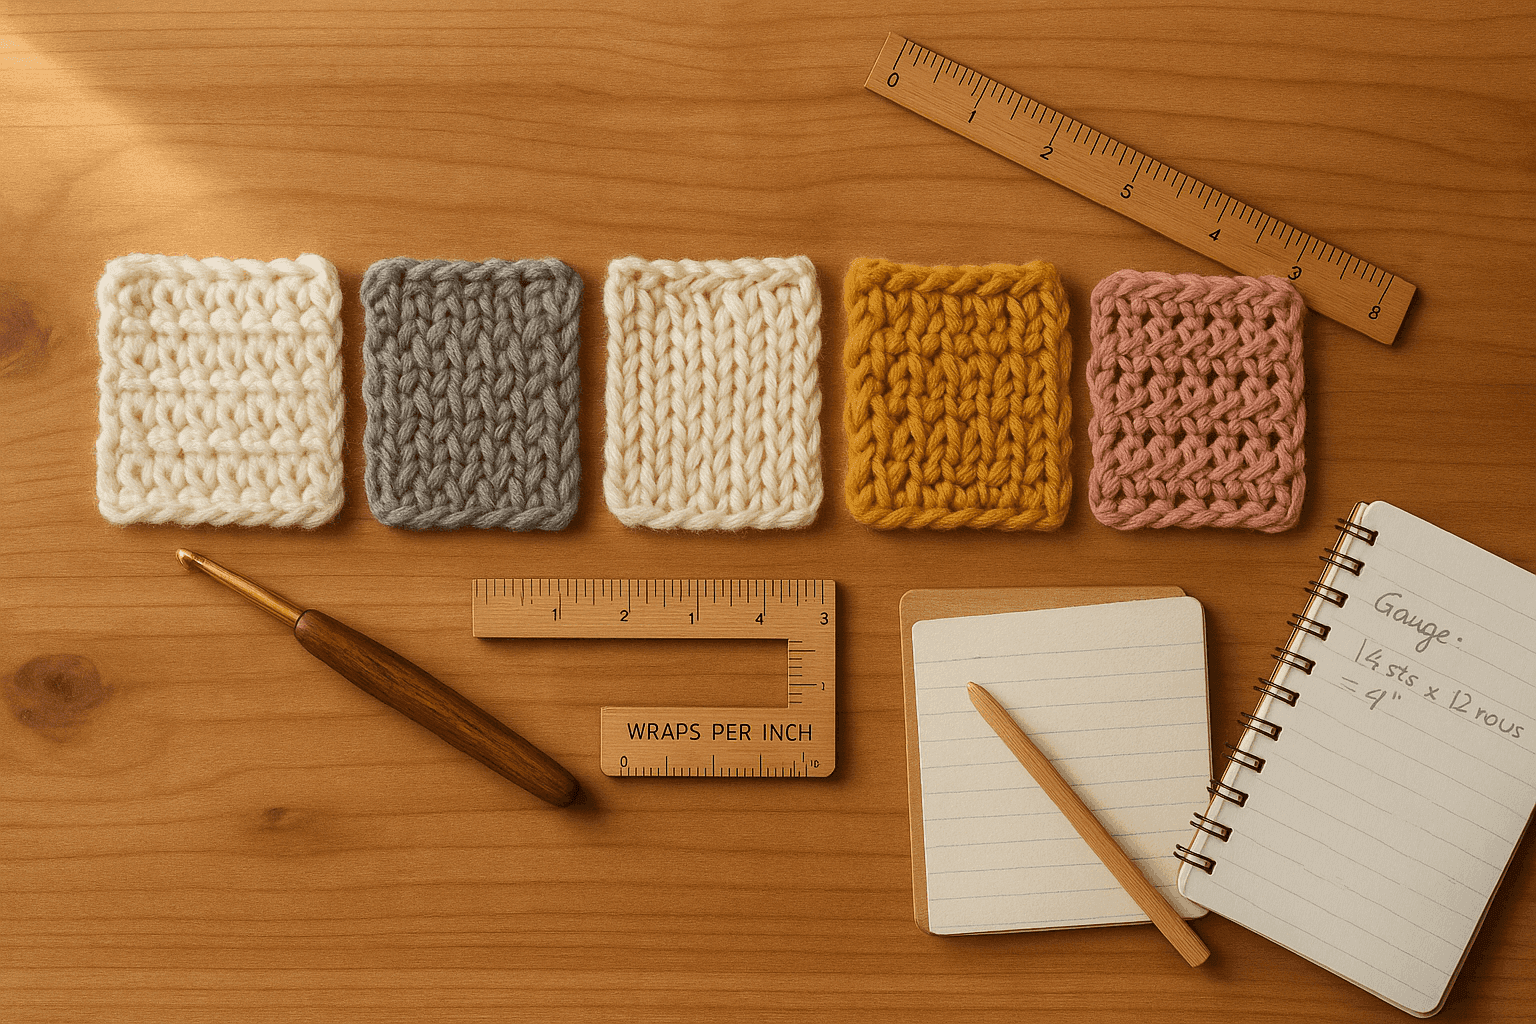
You know the moment: you swatch with the yarn called for in a pattern, or with what seems like a perfectly reasonable substitute, and everything should work. The ball band says worsted. The pattern says worsted. The meterage looks close enough. You grab the recommended hook, work a neat little square, and somehow the fabric tells a completely different story. One yarn makes a springy, opaque fabric that stands up almost on its own. Another, also labeled worsted, turns into a looser, flatter swatch with gaps where you expected coverage. A third blooms after blocking, swallowing stitch definition and changing the whole personality of the piece.
Most crocheters eventually learn that yarn weight labels are helpful but blunt tools. “DK,” “worsted,” “aran,” and “bulky” do not tell us everything we need to know about how a yarn will behave once it is looped, tensioned, compressed by stitches, and asked to become fabric. The deeper explanation lives in grist, diameter, wraps per inch, ply structure, spin style, and the way fibers compress under the hook.
If you understand those relationships, yarn substitution stops being a guessing game. You can begin predicting why two equal-weight yarns produce different gauge, different stitch coverage, and different fabric density. You can also redesign with more confidence when lofty woolen-spun, dense worsted-spun, blown, chainette, or ribbon yarns simply refuse to behave alike.
This article is a technique-deep guide to the variables that matter most in crochet. We’ll look at the practical meaning of grist, how yarn diameter and compression affect hook choice, why crochet amplifies yarn differences so strongly, and how to translate all of that into swatch math, substitution choices, and pattern adjustments.
Context: Why crochet notices yarn differences so dramatically
Knitters and crocheters both deal with yarn variation, but crochet often exposes those differences faster and more dramatically. That is because crochet stitches are structurally taller, more self-contained, and more dependent on how much yarn fills each looped unit. In crochet, each stitch wraps and stacks yarn around itself in ways that magnify thickness, surface friction, loft, elasticity, and ply behavior.
If one yarn is airy and compressible while another is dense and firm, they may weigh the same per 100 grams and still fill space very differently inside a crochet stitch. Since crochet fabric relies on those loops to occupy volume, cover area, and maintain structure, yarn construction becomes visible almost immediately.
That is why two yarns both labeled “worsted” can produce:
- different stitches per 4 in/10 cm
- different rows per 4 in/10 cm
- different opacity at the same gauge
- different drape and stand
- different width growth after blocking
- different behavior in textured stitches and colorwork
The label gives you a category. The fabric gives you the truth.
Technique explanation: The four ideas that matter most
To predict behavior, it helps to separate four related but different concepts:
- Grist: how much length you get for a given weight
- Yarn diameter: how thick the yarn is in space, often approximated by wraps per inch
- Compression and loft: how much the yarn squashes, blooms, or springs back
- Construction: how fibers and plies are arranged, which changes the shape and stability of the yarn
When you combine these, you get a more accurate picture of crochet performance than the weight label alone can offer.
Grist: the length-to-weight relationship
Grist is the amount of length per unit of weight. Depending on your region, you may see it expressed as yards per pound, meters per gram, or yards per 100 grams. In everyday crochet terms, grist answers the question: for this weight of yarn, how much actual yarn do I get?
A yarn with high grist gives more length for the same weight. It is often lighter, loftier, or more aerated for its apparent thickness.
A yarn with low grist gives less length for the same weight. It is often denser, more tightly spun, more heavily plied, or made from fibers that pack closely together.
Two yarns can both be sold as worsted weight, yet one may have 220 m per 100 g and another 170 m per 100 g. That is not a tiny difference. It means one yarn is significantly more compact per meter than the other.
As a quick comparison:
- Yarn A: 220 m per 100 g = 2.2 m per g
- Yarn B: 170 m per 100 g = 1.7 m per g
Yarn B uses more mass to create each meter. Even if the visible diameter looks similar in the skein, it is likely to behave more solidly, with more substance packed into each crochet stitch.
Yarn diameter: what actually fills the stitch
Diameter is the space the yarn occupies across its thickness. One practical home measurement is wraps per inch (WPI): wrap the yarn around a ruler without stretching or crowding it, then count how many wraps fit in 1 inch.
- More wraps per inch = finer yarn diameter
- Fewer wraps per inch = thicker yarn diameter
WPI is not perfect, because soft and flattenable yarns can give fuzzy or inconsistent readings, but it is extremely useful as a comparison tool.
In crochet, diameter strongly influences:
- stitch width
- stitch height
- gap size between stitches
- surface coverage
- how “full” textured stitches appear
Two yarns with equal grist can still have different effective diameters if one is round and springy while another is flat or ribbon-like.
Compression and loft: thickness under tension is not the same as thickness at rest
This is where many substitutions go sideways. A yarn’s visible thickness in the hank or ball is not the same as its thickness when pulled through loops and compressed into stitches.
A woolen-spun yarn may look fat because it traps air. Under the hook, it compresses. Then after washing or use, it may bloom and refill space.
A worsted-spun yarn may look slightly slimmer at rest, but because it is denser and less compressible, it can hold a firm, round profile in the fabric.
A blown yarn may appear bulky due to its fuzzy halo and tube construction, yet contain relatively little fiber mass in the core. It can crochet up warmer and lighter, but not necessarily denser.
A ribbon yarn may flatten dramatically, increasing surface coverage while reducing roundness and changing stitch geometry.
So the real question is not only “How thick is this yarn?” but “How thick is it while being crocheted, and how much space does it reclaim after the stitch is complete?”
Construction: the hidden architecture
Construction changes everything.
Woolen-spun
Fibers are more randomly oriented, trapping air. These yarns are often lofty, warm, and bloom-friendly. They can appear thick for their weight and produce cohesive fabrics with gentle halos. In crochet they may compress under stitch tension and then fill gaps later.
Worsted-spun
Fibers are aligned more parallel. The yarn is smoother, denser, and often more precise in stitch definition. It may feel “smaller” in the hand than a lofty woolen-spun yarn of the same label, but it often behaves more consistently under tension.
High-ply round yarns
Multiple plies create a stable, rope-like structure. These yarns often excel in crochet texture because they hold shape and pop in post stitches, cables, and amigurumi-like firm fabrics.
Single-ply or softly twisted yarns
These can create beautiful soft fabrics, but may flatten, bias, fuzz, or lose crisp definition more readily. They may also produce broader visual coverage with less structural firmness.
Chainette
A knitted or woven tube-like construction. Chainette yarns are often light for their size, resilient, and warm. They may trap air like woolen-spun yarns but have a distinct spring and sometimes surprising stitch spread.
Blown yarn
Fibers are blown into a mesh tube. These yarns are often lofty and lightweight with soft halos. Their apparent bulk can exceed their actual density, which matters a great deal when trying to match a pattern designed for a solid-plied yarn.
Ribbon or tape yarn
Flat rather than round. Coverage can be broad, drape can be fluid or papery depending on fiber, and standard gauge assumptions often fail because stitch width increases differently from stitch height.
Why equal weight yarns behave differently in gauge
Gauge is the result of an interaction, not a property of yarn alone. In crochet, it depends on:
- yarn diameter under tension
- hook diameter
- your personal tension
- stitch type
- yarn elasticity and recovery
- yarn friction and drag
- whether the yarn compresses or rebounds after stitching
The hook-to-diameter ratio
One very useful way to think about crochet fabric is the ratio between hook size and yarn diameter.
If the hook is large relative to the yarn diameter, you get:
- more open fabric
- more drape
- lower stitch density
- less coverage
- often better lace or fluid garment fabric
If the hook is small relative to the yarn diameter, you get:
- denser fabric
- more stand and structure
- greater opacity
- more stitch crowding
- often better bags, baskets, and amigurumi-type firmness
This sounds obvious, but the important part is that effective yarn diameter changes with construction. So the same 5 mm hook used on two “worsted” yarns can produce very different hook-to-diameter ratios in practice.
A dense, round worsted-spun yarn may behave as a firm 5 mm pairing. A lofty chainette may compress enough that the same hook acts relatively large during stitch formation, giving a looser gauge. Then after washing, the chainette may rebound, reducing openness somewhat. This is why a pre-wash swatch can lie to you.
A practical approximation for comparing substitutions
If you want a usable comparison method, gather three measurements:
- meters per 100 g or yards per 100 g
- WPI
- swatch gauge in the actual stitch pattern
Then compare candidate yarns like this:
- Match grist closely if total yardage use matters and you want similar mass and drape.
- Match WPI closely if you want similar stitch size and coverage.
- Prioritize swatch gauge in the actual pattern stitch when the final dimensions matter most.
- Assess fabric hand before declaring success, because matching stitch count alone does not guarantee matching density.
If you can only match one physical property before swatching, WPI is often more predictive of crochet gauge than the label category. If you can match two, use both WPI and grist.
Step-by-step: How to evaluate two same-label yarns before you substitute
Here is a practical process you can use every time.
Step 1: Record the yarn facts
Make a small comparison table.
For each yarn, note:
- fiber content
- labeled yarn weight category
- total meters/yards per 100 g
- recommended hook size on ball band
- construction type
- WPI
- number of plies, if visible
- whether it feels lofty, dense, flat, slick, sticky, springy, or limp
Example:
- Yarn A: 100% wool, worsted label, 200 m/100 g, 10 WPI, woolen-spun, lofty, springy
- Yarn B: 100% wool, worsted label, 180 m/100 g, 10 WPI, worsted-spun 4-ply, dense, smooth
Same label. Same WPI. Different grist and construction. Expect same general stitch size but not identical fabric density or drape.
Step 2: Make wraps-per-inch measurements correctly
Wrap the yarn around a ruler for 1 inch.
- Do not pull tight.
- Do not leave visible gaps.
- Do not squash wraps together.
- Measure at least twice.
If the yarn is fuzzy or ribbon-like, take several readings and average them. Record the range, such as 9.5 to 10.5 WPI.
Step 3: Swatch in the actual stitch pattern
A plain double crochet swatch is better than nothing, but it is not enough for a technical substitution when pattern behavior matters.
Work at least a 6 in/15 cm square, ideally larger, in the actual stitch pattern used most in the project.
A reliable swatch setup:
- foundation chain for about 30 to 40 stitches depending on yarn size
- work until the swatch is at least 6 in/15 cm tall
- measure the center 4 in/10 cm
For single crochet-based fabric, a swatch might start with:
- Ch 31
- Row 1: Sc in 2nd ch from hook and each ch across, 30 sc
- Continue in sc for 24 to 28 rows
For double crochet-based fabric:
- Ch 25
- Row 1: Dc in 4th ch from hook and across, 23 dc
- Continue in dc for 14 to 18 rows
Stitch counts are only sample setups; adjust upward if the yarn is finer.
Measure:
- stitches per 4 in/10 cm
- rows per 4 in/10 cm
- swatch weight if you want extra precision
- drape, bounce, and coverage held up to light
Then wash and dry exactly as the finished item will be treated, and measure again.
Step 4: Compare not just gauge, but coverage
This is the step many crocheters skip.
Take both swatches and ask:
- Can I see through one more than the other at the same stitch gauge?
- Does one spread wider between stitches?
- Does one row stack more firmly?
- Does one hold texture better?
- Does one feel harder, floppier, puffier, or heavier?
If two swatches both hit 16 dc and 9 rows over 4 in, but one is gauzy and the other is substantial, they are not equal substitutes for every project.
Step 5: Check hook-to-diameter balance
Now adjust hook size intentionally, not reflexively.
Suppose Yarn A and Yarn B both produce 14 sc per 4 in on a 5 mm hook, but Yarn A is too stiff while Yarn B is too open.
Try:
- Yarn A with a 5.5 mm hook
- Yarn B with a 4.5 mm hook
Then compare coverage and hand again.
A half-millimeter hook change can radically improve a near match. In dense crochet fabrics, even 0.25 mm can matter.
Step 6: Calculate stitch substitution when gauge refuses to match exactly
Sometimes the right fabric comes from a different gauge than the pattern gauge. Then you redesign.
Use this formula:
target width in inches × your stitches per inch = starting stitch count
Example:
Pattern gauge: 16 sc per 4 in = 4 sc per inch Pattern bust panel width: 20 in Original stitch count: 20 × 4 = 80 stitches
Your yarn produces a fabric you like at 18 sc per 4 in = 4.5 sc per inch To keep the panel at 20 in:
20 × 4.5 = 90 stitches
So you would begin with 90 stitches instead of 80, then adjust any repeats to fit the stitch multiple.
For row counts:
target height in inches × your rows per inch = required rows
If the pattern requires 10 in of height at 12 rows per 4 in = 3 rows/in, that is 30 rows.
If your yarn gives 13.5 rows per 4 in = 3.375 rows/in:
10 × 3.375 = 33.75 rows
Round to 34 rows, then account for shaping placement.
Step 7: Respect pattern multiples and shaping
If the stitch pattern uses a repeat, like multiples of 6 + 2, you cannot simply cast on 90 if that breaks the repeat.
Find the nearest compatible count.
Example:
Needed count: 90 Pattern multiple: 6 + 2 Possible counts: 86, 92, 98, etc.
Since 92 = 15 × 6 + 2, use 92 and recheck finished width:
92 ÷ 4.5 = 20.44 in
That may be acceptable, or you may adjust hook size slightly to bring width back in line.
Step 8: Recalculate yarn quantity using grist
When swapping a lofty yarn for a dense one, meterage and weight needs may shift dramatically.
A simple estimate:
required total length = original pattern total length × (your stitch count area factor if dimensions changed)
If dimensions stay the same and fabric density is similar, start with total meterage rather than total skein count.
Example:
Original pattern uses 1,000 m of Yarn A. You substitute Yarn B. If the finished dimensions stay the same, buy at least 1,000 m of Yarn B, then add a safety margin.
Suggested safety margins:
- 10% extra for smooth straightforward substitutions
- 15% extra for texture, cables, bobbles, or uncertain bloom
- 20% extra for colorwork, stripes, or yarns with major structure differences
If your yarn is much denser and you intentionally create a firmer fabric, total weight used may rise even if total meterage stays close.
Why equal weight yarns behave differently in coverage and opacity
Coverage is about how efficiently a yarn masks the surface beneath the fabric. This is not identical to gauge.
A flattened ribbon yarn can cover a lot of visual area with relatively few stitches. A compact round yarn can create stronger structure but leave more pinpoint gaps in certain stitch patterns. A haloed blown yarn may visually soften gaps, making fabric appear more filled even when stitch count is unchanged.
This matters especially in:
- garments worn over contrasting layers
- bags and pouches
- blankets where warmth matters
- tapestry crochet and stranded colorwork
- lace that must stay open rather than collapse
Coverage factors in crochet
Coverage increases with:
- larger effective yarn surface area
- flatter yarn profile
- bloom or halo
- tighter hook-to-diameter ratio
- stitches that stack and overlap more densely, like sc
Coverage decreases with:
- stiff round yarns at open gauge
- slippery fibers that spread loops apart
- taller stitches with little overlap
- flattened yarns used in patterns that twist them edgewise
This is why two yarns can match gauge but not modesty, warmth, or color saturation.
Drape versus stand: why some fabrics collapse and others hold shape
Crochet fabric exists on a spectrum from fluid drape to architectural stand.
Drape is encouraged by:
- higher grist yarns
- smoother constructions
- more open hook-to-diameter ratios
- fibers with fluid movement, like silk, bamboo, alpaca blends
- flatter or softer yarn structures
Stand is encouraged by:
- lower grist, denser yarns
- round multi-ply constructions
- wool elasticity and recovery
- tighter hook-to-diameter ratios
- shorter stitches and dense stitch patterns
If a pattern was written for a bag in a tightly plied cotton, a blown alpaca blend of the same label may hit width gauge and still slump. If a garment was designed around a lofty woolen-spun yarn with bloom, a compact mercerized cotton may feel armor-like at the same stitch count.
Gauge can match while performance fails.
Colorwork packing: why yarn construction changes motif clarity
Colorwork in crochet depends on how yarn packs into each stitch.
In tapestry or stranded crochet, dense round yarns often produce:
- cleaner edges
- more consistent stitch size
- stronger motif geometry
- less fuzzy color blending
Lofty or haloed yarns often produce:
- softer motif edges
- better gap filling
- less crisp pixel-like detail
- more visual blending between colors
Ribbon yarn can distort colorwork because the flat profile changes stitch face proportions. Chainette can spring and spread, altering the apparent width of color blocks.
If redesigning for colorwork, always swatch motifs, not just plain fabric.
A useful mini test:
- Ch 25
- Work 20 sc per row for 12 rows in a 2-color geometric motif
- Measure overall gauge
- Evaluate edge crispness and float bulk if carrying yarn
The yarn that makes the prettier plain swatch may not make the clearest chart.
Troubleshooting common substitution problems
Problem: I matched the yarn label and still got the wrong gauge
Likely cause: The yarns differ in WPI, compression, or surface drag.
Fix:
- Compare WPI directly.
- Swatch with at least two hook sizes.
- Wash swatches before deciding.
- Prioritize actual fabric behavior over label category.
Problem: I hit stitch gauge but row gauge is very different
Likely cause: The yarn changes stitch height differently than stitch width, common with flat, slick, or very elastic constructions.
Fix:
- Recalculate row counts for all length-based sections.
- Move shaping markers according to inches/cm, not row numbers alone.
- Consider changing stitch type if redesigning from scratch.
Problem: The substitute fabric is too holey
Likely cause: Hook-to-diameter ratio is too open, or the yarn compresses too much while crocheting.
Fix:
- Drop hook size by 0.5 mm.
- Try a denser stitch pattern such as sc instead of dc in critical areas.
- Choose a yarn with lower WPI or more bloom.
Problem: The fabric is too stiff and heavy
Likely cause: Dense yarn, low grist, and too-small hook.
Fix:
- Increase hook size by 0.5 mm to 1 mm.
- Check whether the pattern depends on stand; if not, allow more openness.
- Consider substituting a higher-grist yarn with similar WPI.
Problem: Texture disappears
Likely cause: Yarn is too fuzzy, too flat, or too softly spun.
Fix:
- Choose a rounder high-ply yarn.
- Tighten gauge slightly.
- Increase relief in post stitches or cable depth if redesigning.
Problem: My colorwork looks muddy
Likely cause: Haloed or lofty yarn blurs edges, or flat yarn distorts stitch faces.
Fix:
- Switch to smoother plied yarn.
- Increase contrast between colors.
- Use a slightly smaller hook for tighter packing.
Problem: Finished size is right, but the garment hangs wrong
Likely cause: Drape and density mismatch despite gauge match.
Fix:
- Compare swatch weight and bend.
- Reassess whether the original design relied on bloom, spring, or fluidity.
- Redesign ease, length, or seam support accordingly.
Variations: How different yarn structures usually behave in crochet
These are not rigid laws, but reliable tendencies.
Lofty woolen-spun yarn
Usually gives:
- apparent thickness for weight
- softer, warmer fabric
- bloom after washing
- less hard-edged stitch definition
- better gap filling than expected
Best uses:
- sweaters
- cozy hats
- blankets
- rustic textured pieces
Watch for:
- pre-wash swatches that seem too open
- growth or bloom changing fit
- reduced crispness in detailed motifs
Dense worsted-spun plied yarn
Usually gives:
- strong stitch definition
- reliable geometry
- denser hand
- less bloom
- more structure and stand
Best uses:
- cables and texture
- bags
- home décor
- garments needing crisp lines
Watch for:
- excess stiffness at recommended hook sizes
- heavier finished projects
- less visual coverage if used too openly
Blown yarn
Usually gives:
- high loft, low weight
- soft halo
- warmth without heaviness
- less dense internal structure
Best uses:
- cold-weather garments
- accessories where softness matters
- lightweight bulky-looking projects
Watch for:
- weak stitch definition
- misleading apparent bulk
- fabric that lacks the stand of solid plied yarn
Chainette yarn
Usually gives:
- airy warmth
- elasticity and rebound
- balanced drape and loft
- often larger-looking yarn for its weight
Best uses:
- sweaters
- textured garments
- quick but not overly heavy accessories
Watch for:
- changing gauge after washing
- stitch spread in taller crochet stitches
- differences between width and row gauge
Ribbon or tape yarn
Usually gives:
- broad surface coverage
- distinctive drape
- flattened stitch appearance
- strong visual texture
Best uses:
- summer tops
- bags with intentional look
- openwork and statement textures
Watch for:
- twisted, uneven stitches
- row gauge surprises
- substitutions failing in round-yarn patterns
Redesigning patterns when the yarn refuses to act “correctly”
Sometimes the best move is to stop forcing equivalence and redesign on purpose.
For garments
Base your changes on finished measurements, not original stitch counts.
- Determine target finished bust, hem, sleeve, and length.
- Measure your washed swatch in pattern stitch.
- Convert all major widths to stitches using your gauge.
- Convert all lengths to rows using your gauge.
- Rework shaping placement to match inches, not rows.
- Account for drape: a limper fabric may need less positive ease or better shoulder stabilization.
For bags and baskets
Decide whether structure or size matters more.
If structure matters:
- keep or increase density
- use smaller hook-to-diameter ratio
- choose rounder, firmer yarns
- consider adding lining if substituting softer yarn
If size matters:
- recalculate base stitch counts from your gauge
- maintain stitch pattern geometry
- test loaded stretch with a weighted swatch or sample base
For blankets
Coverage and hand often matter more than exact gauge.
You can substitute more freely if you:
- swatch for warmth and drape
- estimate total meterage generously
- recalculate finished size from repeat count
- accept modest dimensional change when the fabric improves
For amigurumi or sculptural crochet
Diameter and compression dominate.
Choose yarns that are:
- round
- stable
- not overly splitty
- suitable at tight gauge
Even same-label substitutions can change stuffing show-through, shaping, and firmness dramatically. For amigurumi, WPI and compressibility are usually more useful than yarn label category.
A simple decision framework you can actually use
When comparing two yarns of the same labeled weight, ask these questions in order:
- What is the grist?
- Similar meters per 100 g suggests similar mass distribution.
- What is the WPI?
- Similar WPI suggests similar stitch scale.
- What is the construction?
- Round, blown, chainette, woolen-spun, ribbon, soft single, firm multi-ply.
- How does it compress under crochet tension?
- Does it flatten, narrow, spring, or bloom?
- What fabric does it make in the actual stitch pattern after washing?
- This is the final authority.
If all five line up reasonably well, substitution is usually straightforward. If only one or two line up, expect to redesign.
Takeaways
The reason equal weight yarns behave differently is that “weight” on a yarn label is a category, not a full engineering description. Crochet cares about how much space the yarn occupies, how that space changes under tension, and how the resulting loops stack into fabric.
The most useful predictive tools are:
- grist for length-to-weight efficiency
- WPI for approximate diameter
- construction for shape, stability, and loft
- swatching in the real stitch pattern for truth
Remember these practical rules:
- Matching label weight is not enough.
- Matching meterage alone is not enough.
- Matching gauge alone is not always enough.
- Fabric hand, coverage, and performance matter just as much as stitch counts.
If you want more reliable substitutions, compare yarns by grist and WPI first, then test them in the intended stitch pattern with at least two hook sizes. Measure before and after washing. Check coverage against light. Bend the swatch. Squeeze it. Hang it. Ask whether it behaves like the fabric your project needs, not whether it merely obeys the ball band.
And if a blown alpaca, crisp cotton tape, lofty woolen-spun, and dense plied wool all insist on becoming different fabrics, believe them. Crochet rewards us when we stop asking yarns to fit categories and start learning their actual architecture.
That shift—from label-based substitution to structure-based prediction—is where your swatches become more informative, your pattern edits more successful, and your finished crochet far more intentional.