There is a particular kind of optimism that comes with pulling a ball of mohair, suri alpaca, or brushed merino from the project basket. You imagine a cloud-light shawl, a sweater that feels almost weightless, or a cowl with that lovely soft haze around the stitches. Then you begin crocheting and reality arrives: the stitches seem to disappear under the halo, your usual gauge behaves differently, counting rows becomes suspiciously difficult, and the neat architectural texture you planned suddenly looks as though it has been viewed through soft-focus glass.
If you have ever held a halo-heavy yarn up to the light and thought, “This is gorgeous, but how exactly am I supposed to design with it?” you are in excellent company. These yarns reward a different approach. They are not failed versions of smoother wool or cotton; they are their own category, with their own structural behavior. Once you understand how the fiber bloom affects stitch visibility, insulation, drape, seams, and finishing, you can make intentional design decisions rather than fighting the yarn all the way through the project.
This is the heart of halo control in crochet: choosing stitch architecture that survives fuzz, swatching for what the fabric will become rather than what it looks like in the first twenty minutes, and modifying patterns so the final piece takes advantage of softness without collapsing into visual mush. Mohair, suri alpaca, brushed merino, and blown yarns can produce some of the most beautiful crochet fabrics you will ever make, but they ask for precision in a few non-obvious places.
Understanding what “halo” changes in crochet fabric
When crocheters talk about halo, we usually mean the soft cloud of fibers that lifts away from the yarn core and diffuses the edges of the stitches. That effect can come from several constructions:
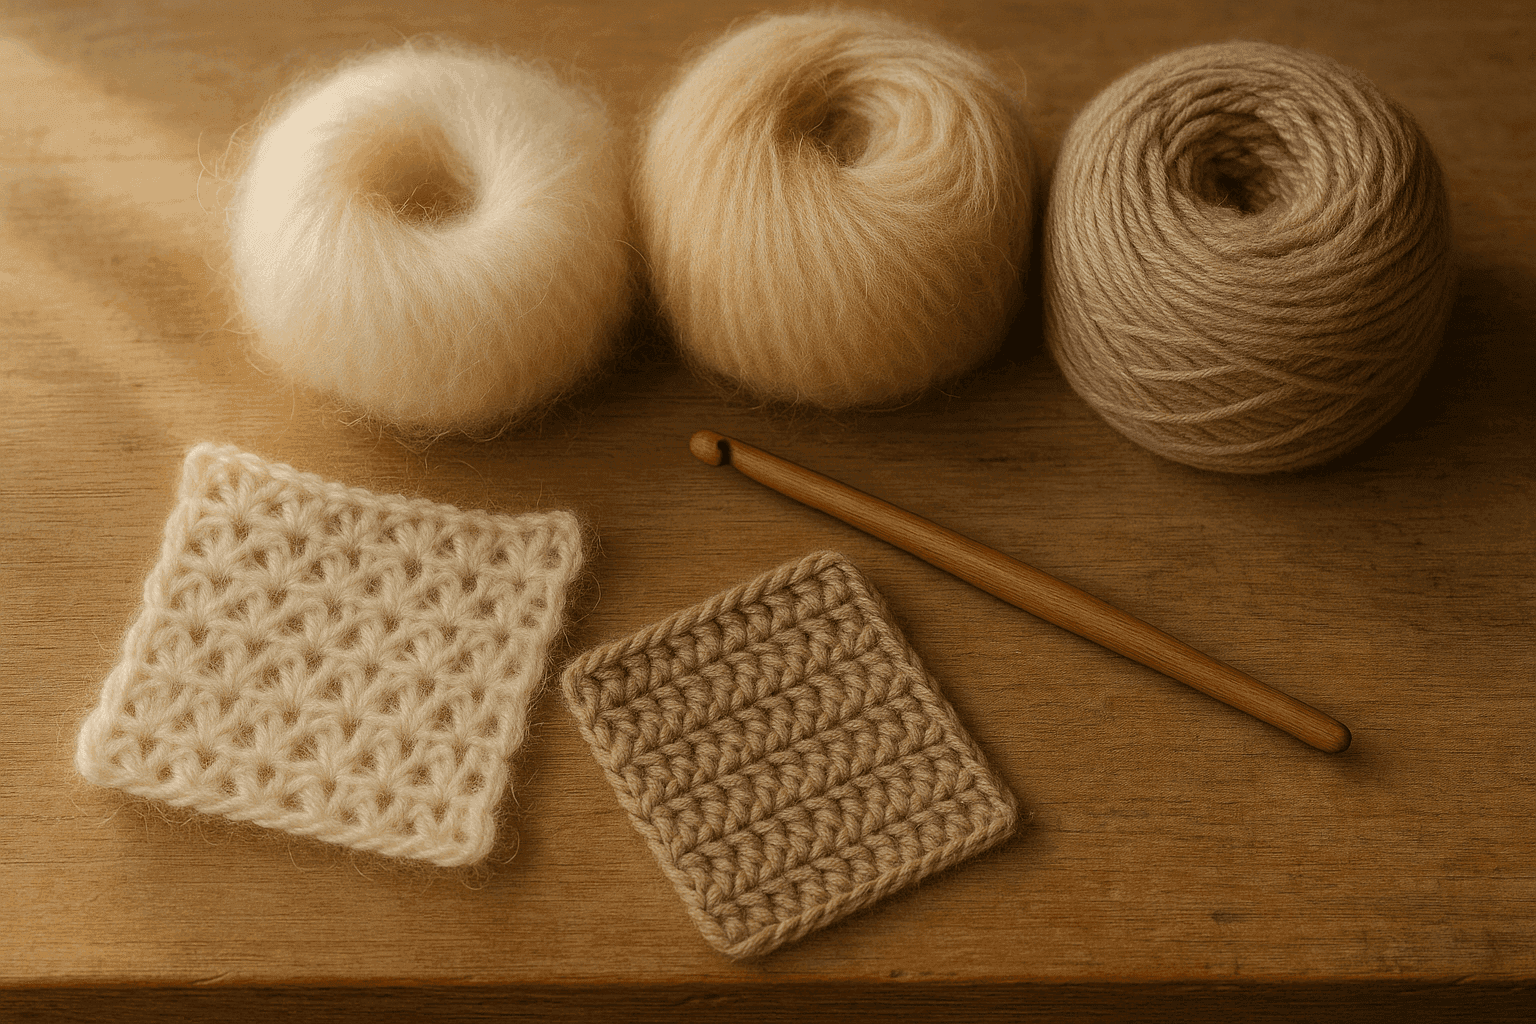
- Mohair with silk core: often lace weight, strong core, dramatic halo, excellent warmth for weight.
- Suri alpaca blends: silky, drapier halo than many mohair yarns, often a little sleeker and more fluid.
- Brushed merino or brushed alpaca: fibers are raised from the strand surface, creating loft and softness with less visual crispness.
- Blown yarns: fibers are blown into a mesh tube, producing an airy strand with volume and bloom but often less stitch edge definition.
All of these constructions affect crochet differently than smooth plied yarns because crochet builds height and texture by wrapping yarn over itself repeatedly. The halo softens the outlines of those wraps. This changes five major design factors:
- Gauge
- Visibility while working
- Drape and density
- Warmth relative to weight
- Seam and finishing behavior
Gauge with halo is not just width and height
With smooth yarn, we often treat gauge as a straightforward count of stitches and rows over 4 inches/10 cm. With halo yarn, gauge is still that—but it is also about bloom, the way the fabric relaxes and fills in after handling, washing, or wear.
A mohair fabric may initially seem open and slightly uneven, then bloom into a more cohesive surface. A blown yarn might flatten less than expected but widen after steaming. A suri blend may lengthen under its own weight because of drape. If you only measure the swatch straight off the hook, you are designing for the yarn’s unfinished state.
Visibility while crocheting
Halo obscures insertion points, especially in dark colors, novelty shades, or stitch patterns with multiple wraps. The more textured the stitch, the more likely the halo will hide exactly where you need to place the hook. This makes some stitch families more practical than others.
Drape and density
Halo-heavy yarns often create a larger-looking fabric for their actual mass. That can be wonderful for garments, but it means your usual instinct—"I need enough stitches to make this feel substantial"—can backfire. Too many stitches in too small a hook size and the result becomes a warm, stiff felt-adjacent panel rather than an airy luxury fabric.
Warmth relative to weight
A common mistake is to compare halo yarn to a smooth yarn of the same nominal weight category and expect similar end use. A lace mohair held alone or with another yarn can produce exceptional warmth because the lifted fibers trap air. This matters in pattern modification: a cardigan designed in smooth DK may become dramatically warmer if recreated in a brushed alpaca blend, even if the fabric looks similarly thin.
Seam behavior
Seams in halo yarn can either disappear beautifully or bulk up unexpectedly. The halo can hide a join line, but if the seam allowance is dense or the join method compresses the fibers, you may end up with a ridge. Blocking and finishing must be gentler than you might use on a robust wool with strong stitch memory.
Choosing stitch architecture that survives fuzz
This is the biggest design question: which stitches still read clearly once wrapped in haze?
The short answer is that large-scale structure survives halo better than fine-grained texture.
Best-performing stitches in halo-heavy yarns
These stitches tend to remain legible and attractive:
- Single crochet (sc) when used for a dense, simple fabric
- Half double crochet (hdc) for a balanced, smooth surface with moderate drape
- Double crochet (dc) for open, fluid fabric
- Extended single crochet or extended half double crochet for elegant drape without busy texture
- Chain spaces and mesh where the openness itself creates the pattern
- Filet-style motifs if the open/closed contrast is large enough
- V-stitches with generous spacing
- Shells with strong negative space around them
- Simple post-stitch columns used sparingly at larger scale
Stitches that often disappear under halo
These are not impossible, but they require caution:
- Tiny front loop/back loop texture changes
- Dense popcorns, bobbles, and puffs in small gauge
- Intricate cables with narrow crossings
- Fine ribbing that depends on crisp line definition
- Complicated lace with many close-together openings
- Deeply textured stitch dictionaries that rely on precise relief
In plain terms, if a stitch pattern needs a close-up photo and a diagram to be appreciated in smooth wool, it will probably blur in mohair.
Rule of thumb for stitch scale
Ask yourself: Can I still recognize the pattern from two or three feet away? If not, the halo will likely soften it beyond usefulness.
A good design strategy is to emphasize one of three things:
- Silhouette: shape matters more than stitch pattern
- Surface glow: the beauty is in the fiber and color blending
- Open structure: the pattern is created by spaces, not stitch ridges
Yarn and hook pairing: practical starting points
Because halo yarns vary wildly by construction, there is no single perfect formula. But practical starting points help.
Lace mohair or suri silk used alone
- Recommended hook: 3.5 mm to 5 mm
- Best for: airy scarves, lightweight cowls, open sweaters, overlays
- Typical gauge range: 18–26 sts and 10–16 rows in dc over 4 in/10 cm, depending on hook and openness
If you go too small with the hook, the fabric can become wiry and overly warm. If you go too large, it can lose coherence and snag easily.
Lace halo yarn held with another yarn
- Recommended hook: use the base yarn recommendation, then test 0.5 mm larger and 0.5 mm smaller
- Best for: sweaters, hats, refined accessories, color blending
- Typical effect: fuller fabric, softer stitch edges, slightly reduced row visibility
Holding mohair with a woolen-spun fingering or DK yarn often preserves enough stitch architecture while adding bloom and warmth.
Brushed DK or aran yarns
- Recommended hook: 5 mm to 7 mm
- Best for: cozy garments, oversized accessories, plush outer layers
- Typical gauge range: 10–16 sts over 4 in/10 cm in dc or hdc-based fabrics
These yarns can look larger than they are. Swatch generously before deciding size ease.
Blown yarn constructions
- Recommended hook: often 0.5 mm smaller than you expect if the fabric looks too loose, or true to label for drape
- Best for: lightweight warm sweaters, hats, textured-but-simple fabrics
- Watch for: stitch splitting into the mesh tube, loss of seam crispness, compressed areas at joins
Swatching for bloom over time
A halo yarn swatch is not a formality. It is the project in miniature. For these fibers, I strongly recommend a larger swatch than usual.
Ideal swatch size
Make at least 6 x 6 inches / 15 x 15 cm, preferably 8 x 8 inches / 20 x 20 cm for garments.
Why larger? Because halo swatches near the edges can lie to you. The center of a larger swatch shows the true fabric behavior once the stitches settle into each other.
Swatch in pattern, not just in stock stitches-equivalent crochet
If your garment uses hdc in the round, swatch hdc in the round. If it uses mesh panels and sc borders, include both. Halo exaggerates differences between structures.
Measure three times
- Immediately after crocheting
- After washing/blocking
- After a day of hanging or handling
Record all three measurements.
For example, your swatch may begin as:
- 20 dc x 12 rows = 4 in / 10 cm
After washing and drying flat, it may become:
- 19 dc x 11 rows = 4 in / 10 cm
After hanging overnight with a few clothespins clipped along the lower edge to simulate garment weight, it may become:
- 19 dc x 10.5 rows = 4 in / 10 cm
That last measurement may be the most relevant for a sweater body.
Check bloom and opacity
Hold the swatch over a contrasting background and then over your hand or clothing. Halo can visually fill holes, but under tension or bright light the openness may be more pronounced than expected. This is especially important for garments.
Rub test
Gently rub the swatch surface with your palm for 15–20 seconds. This simulates wear. Some halo yarns become prettier and fuller; others mat slightly and obscure the stitch pattern further. Better to learn that now.
Step-by-step design process for halo control
If you are designing from scratch or modifying a pattern, this sequence keeps the yarn’s behavior at the center of your decisions.
Step 1: Decide what the yarn is meant to contribute
Before choosing a stitch pattern, answer this clearly:
- Is the halo there for softness?
- For warmth without weight?
- For color diffusion?
- For luxury texture?
- For visual softness over a structural yarn?
If softness matters more than stitch crispness, then the design should stop trying to showcase minute texture.
Step 2: Choose the structural role of the fabric
Pick one of these broad fabric categories:
- Open and airy: dc mesh, chain spaces, filet-inspired geometry
- Smooth and cozy: sc, hdc, extended hdc
- Drapey and fluid: dc, extended stitches, looser hook
- Lightly sculpted: larger shells, broad ribs, spaced post stitches
Step 3: Make three swatches with different hook sizes
For halo yarns, one swatch is rarely enough. Make the same stitch pattern with:
- Label hook size
- 0.5 mm smaller
- 0.5 mm larger
Example with lace mohair held with fingering wool:
- Swatch A: 4 mm hook
- Swatch B: 4.5 mm hook
- Swatch C: 5 mm hook
Then compare:
- Which has enough stitch visibility?
- Which blooms best?
- Which drapes appropriately?
- Which would you want against your neck or over your shoulders for hours?
Step 4: Count stitches in a marked center square
Use locking stitch markers to mark a 4 x 4 inch / 10 x 10 cm center square. Ignore edge distortion. Count carefully under bright light.
If the halo hides the loops, slide a thin tapestry needle or removable marker through each counted stitch as you go.
Step 5: Build a correction strategy before the full project
Because ripping halo yarn is harder, decide now:
- How often will you place lifelines or progress markers?
- Will you count rows every row or every 2 rows?
- Will you use contrast thread markers every pattern repeat?
A very practical method is to place a removable marker every 20 stitches across long foundation rows and every 5th or 10th row vertically.
Step 6: Modify pattern numbers based on fabric behavior
Suppose a smooth-yarn sweater pattern calls for:
- Gauge: 16 hdc x 12 rows = 4 in / 10 cm
- Bust target: 40 in / 101.5 cm finished
- Body circumference stitches needed: 160 hdc
If your halo swatch gives:
- 14 hdc x 11 rows = 4 in / 10 cm
Then the same 160 stitches would produce about:
- 160 ÷ 14 = 11.43 repeats of 4 inches
- 11.43 x 4 = 45.7 inches / 116 cm
So you would need fewer stitches for the same finished size:
- 40 ÷ 4 = 10
- 10 x 14 = 140 stitches
This sounds basic, but halo yarn tempts many crocheters to think, “It’ll probably settle in.” Sometimes it will—but that is not a substitute for math.
Step 7: Reassess ease and thermal comfort
Because halo adds warmth, you may want more positive ease in outerwear and less layering ease in indoor garments. A soft suri pullover at 6 inches of positive ease may be glorious; a brushed alpaca vest at the same ease might feel too hot indoors.
Stitch counts and fabric planning for common project types
Here are useful planning ranges rather than rigid rules.
Cowls and scarves
For lace mohair used alone:
- Width for scarf: 8–12 in / 20–30 cm
- Width for cowl circumference worked flat then seamed: 22–28 in / 56–71 cm around
- Starting chain for dc mesh on 4.5 mm hook at about 4 dc clusters per 4 in may vary widely; swatch first
For hdc cowl in brushed DK on 6 mm hook:
- Typical gauge: 12–14 hdc over 4 in / 10 cm
- For 24 in circumference: approximately 72–84 stitches
- Height: 10–14 in / 25–35.5 cm, depending on scrunch and warmth desired
Hats
Halo can obscure crown shaping lines, which is often a benefit.
Typical adult hat in brushed worsted/aran:
- Gauge: 10–12 hdc over 4 in / 10 cm on 5.5–6 mm hook
- Crown target circumference before body: around 20–22 in / 51–56 cm depending on stretch
- Approximate body stitch count: 50–66 stitches in hdc or dc, depending on gauge
Because halo yarn can be very warm, consider reducing hat depth by 0.5–1 in / 1.25–2.5 cm if your wearer overheats easily.
Sweaters and cardigans
For halo garments, shoulder and armhole shaping matter more than surface texture. Keep shaping clear and fabric forgiving.
Practical recommendations:
- Prefer simple stitch repeats over highly counted motifs
- Use fewer seams if the yarn is sticky or difficult to rip
- If seamed, avoid overly thick selvedges
- Consider a drop shoulder or modified drop shoulder for first halo garment projects
A sample body planning equation:
If your gauge in hdc is 13 sts x 10 rows = 4 in / 10 cm and you want a 44 in / 112 cm finished bust:
- 44 ÷ 4 = 11 gauge units
- 11 x 13 = 143 stitches
Round to your stitch pattern multiple, perhaps 144 stitches.
If working front and back flat, that might become:
- Back: 72 stitches
- Front: 72 stitches
Then shape the neck and shoulders with the understanding that the halo will soften sharp line transitions.
Color layering with low-definition fibers
One of the great joys of mohair and brushed yarns is the way color diffuses. The halo acts almost like a soft filter over whatever color sits beneath or beside it.
Best color strategies for halo yarns
- Tone-on-tone layering: a cream mohair with oatmeal wool, charcoal suri over black merino, blush over rose
- Value contrast with restraint: dark base yarn plus lighter halo for depth without striping every stitch edge
- Heathering through held doubles: one smooth strand, one halo strand for painterly blending
- Simple stripes in broad bands rather than narrow, highly counted stripes
What often gets lost
- Tiny colorwork motifs
- One-row stripe sequences
- Highly detailed intarsia-style ideas
- Delicate textured motifs in close color values
If you want the color changes to show, make them bigger. Think blocks, gradients, marl, haze, glow.
Useful pairing principle
When holding a halo yarn with a smooth yarn, decide which one does the visual work:
- Smooth yarn leads if stitch pattern matters
- Halo yarn leads if atmosphere matters
For example, a camel wool with an ivory mohair held together will usually preserve enough of the camel stitch shape while adding light. A saturated purple suri held with gray merino may shift the overall color cloud toward muted plum, reducing edge definition further.
Ripping back and correction strategies
This is where halo yarn humbles all of us. Rip too fast and the fibers cling to each other. Tug too hard and you roughen the halo or break the core. The good news is that careful correction is possible.
Best practices before mistakes happen
- Work in bright light
- Use lighter-colored hooks against dark yarns when possible
- Place frequent markers
- Count at the end of every row or round
- Add a lifeline every pattern repeat or every 4–8 rows in complex sections
A lifeline in crochet can be a length of smooth contrasting thread woven through all stitches in a completed row with a blunt needle. If you need to rip back, you stop at the lifeline instead of guessing where the live loops belong.
How to rip halo yarn safely
- Lay the work flat.
- Pull back only one stitch at a time.
- If it catches, stop immediately.
- Gently tease apart trapped fibers with a tapestry needle, fine crochet hook, or even a wooden toothpick.
- Roll the loosened strand lightly between fingers to smooth it before reworking.
Freeze trick? Use caution
Some makers chill sticky mohair briefly to reduce cling. It can help a little, but moisture and temperature shifts are not magic. The real solution is slowness and good light.
When not to rip
If the mistake is minor and truly invisible in the halo—one missed increase inside a broad body panel, for example—it may be better to compensate later than to damage the yarn surface. Halo can hide tiny imperfections exceptionally well.
Smart correction methods
- Missed stitch in previous row: duplicate the structural effect with a discreet surface correction if possible
- One extra stitch: decrease subtly over the next row if the pattern allows
- One missing increase in garment shaping: add the increase in the next appropriate row and check symmetry over exact row-for-row perfection
- Mis-crossed decorative stitch: if it vanishes under halo, leave it alone unless it affects fit
Finishing without crushing or felting the halo
Finishing halo yarn well is as important as crocheting it well.
Seaming
Good choices include:
- Mattress-style seaming for flatter joins in pieces worked flat
- Slip stitch seam with relaxed tension if you want a soft visible join
- Whip stitch through edge structure only for very airy fabrics
Avoid pulling seams too tight. Compressed halo can create a hard line that feels out of place in a soft fabric.
Picking up edges
For necklines, button bands, and cuffs, use a hook size 0.5 mm smaller than the body hook if the edge looks floppy. But do not over-tighten. A firm edge is useful; a strangled edge will felt and draw in.
Example:
- Body worked on 5 mm hook
- Neck edging worked on 4.5 mm hook
- Pick-up ratio on straight edges: start testing around 3 stitches per 4 row-ends in hdc fabric, then adjust based on actual edge behavior
Halo hides uneven pick-up nicely, but it also hides the early warning signs of too many edge stitches until the band ripples. Count deliberately.
Blocking and washing
Always check the fiber blend, but generally:
- Wash gently in cool to lukewarm water
- Use minimal agitation
- Support the fabric fully when lifting
- Press out water in towels rather than wringing
- Dry flat unless you intentionally need slight lengthening and the yarn can tolerate it
Steam and brushing
Use steam with restraint. Hover rather than press. Too much heat or direct pressure can collapse loft or encourage matting.
Do not aggressively brush finished halo crochet unless the yarn specifically benefits from it and you have tested a swatch. Many beautiful surfaces are ruined by trying to make them even fluffier.
Pattern modification methods for garments and accessories
Many crocheters want to adapt a favorite smooth-yarn pattern into a halo yarn version. This can work very well if you modify with intention.
Modification method 1: Keep shape, simplify texture
If the original pattern uses:
- dense cables
- bobbles
- intricate rib panels
replace them with:
- plain hdc or dc panels
- chain-space motifs
- broad vertical columns of post stitches
Preserve the silhouette and shaping while allowing the yarn to supply the luxury texture.
Modification method 2: Combine a structural yarn with halo yarn
This is one of the most reliable strategies.
Use:
- a smooth wool, merino, or wool blend for stitch architecture
- a lace mohair or suri strand held alongside for bloom
Benefits:
- easier counting
- stronger seams
- better stitch recovery
- improved durability
- richer color depth
This is especially effective in garments where fit matters more than ethereal openness.
Modification method 3: Change ease to suit thermal performance
If substituting halo-heavy yarn into a garment pattern, ask whether the original ease still makes sense. A slim office cardigan in cotton can become a too-warm indoor layer in brushed alpaca if worked at the same density.
Practical adjustment ideas:
- reduce body length slightly if the fabric grows
- lower armhole bulk with simpler shaping
- choose bracelet or three-quarter sleeves for warmer fibers
- reduce cowl depth, hood volume, or scarf width if the yarn is especially insulating
Modification method 4: Use halo selectively
You do not have to make the whole project fuzzy.
Excellent placements include:
- yokes
- cuffs and collars
- stripe sections
- overlays
- facings
- held-double edging
For example, a smooth merino body with a mohair held double in the collar and cuffs gives softness where it is felt most while preserving overall stitch definition.
Common mistakes and how to fix them
Mistake 1: Choosing a stitch pattern that is too detailed
What happens: all the texture blurs together.
Fix: switch to larger-scale structure: hdc, dc mesh, open shells, broad ribs.
Mistake 2: Using too small a hook for security
What happens: the fabric becomes stiff, overly warm, and visually matted.
Fix: swatch 0.5–1 mm larger. Let the halo fill space rather than forcing density.
Mistake 3: Trusting unblocked gauge
What happens: the garment grows or blooms into a different fabric than planned.
Fix: wash and dry swatches, then remeasure after resting.
Mistake 4: Ripping quickly
What happens: snagging, roughened halo, broken cores, frustration.
Fix: rip one stitch at a time with a blunt needle nearby. Use lifelines in advance.
Mistake 5: Overworking seams and edges
What happens: hard ridges and compressed fuzzy patches.
Fix: use gentler joins, lighter tension, and smaller edge hooks only when necessary.
Mistake 6: Expecting halo yarn to behave like smooth wool of the same weight
What happens: wrong ease, wrong drape, unexpectedly hot garment.
Fix: evaluate warmth, loft, and bloom as design variables, not just yarn weight.
Project variations worth trying
Once you understand halo control, these are especially satisfying.
1. Smooth-plus-halo everyday sweater
- Base yarn: fingering or sport merino
- Halo yarn: lace mohair or suri silk
- Hook: start with 4–5 mm depending on combined gauge
- Stitch: hdc or extended hdc
- Why it works: the smooth yarn carries structure; the halo adds atmosphere
2. Airy mohair evening wrap
- Yarn: mohair silk lace alone
- Hook: 4.5–5.5 mm
- Stitch: dc mesh or filet-inspired open repeat
- Why it works: openness remains visible, halo softens the whole fabric beautifully
3. Brushed alpaca cocoon cardigan
- Yarn: brushed alpaca blend DK or worsted
- Hook: 6–7 mm
- Stitch: simple dc or hdc fabric
- Construction: rectangles or minimal shaping
- Why it works: silhouette and drape matter more than stitch detail
4. Halo-accent accessories
- Base yarn: smooth wool DK
- Contrast: brushed yarn for cuffs, brim, collar, or stripe bands
- Hook: base recommendation, adjusted after swatch
- Why it works: softness is concentrated where the skin feels it most
5. Low-definition color gradient cowl
- Yarn: one neutral smooth strand plus shifting halo colors
- Stitch: dc, v-stitch, or mesh
- Why it works: the color cloud changes gradually without demanding crisp stitch edges
Final takeaways for designing successfully with fuzz
The main shift with mohair, alpaca, suri, brushed yarns, and blown constructions is this: stop asking them to be crisp. Ask them to be soft, warm, atmospheric, light, fluid, and flattering. If stitch definition survives, wonderful. If it does not, that does not mean the design has failed. It means the design goal should be carried by scale, silhouette, drape, and color.
When you work with halo-heavy yarns, keep these principles close:
- Swatch larger than usual and measure after bloom.
- Choose stitch patterns with clear, large-scale architecture.
- Let negative space and silhouette do visual work.
- Use hook size to balance drape and visibility, not just firmness.
- Count carefully because the yarn will not make counting easy for you.
- Place markers and lifelines before you think you need them.
- Finish gently so the halo stays lofty instead of compressed.
- Modify patterns for warmth, ease, and growth—not just gauge.
And perhaps most importantly, trust what the yarn wants to become. Some fibers are meant to showcase every ridge and line. Halo yarns are meant to glow. If you design with that in mind, you can absolutely keep enough stitch definition to make the fabric functional and beautiful, while letting the softness remain the star of the piece.