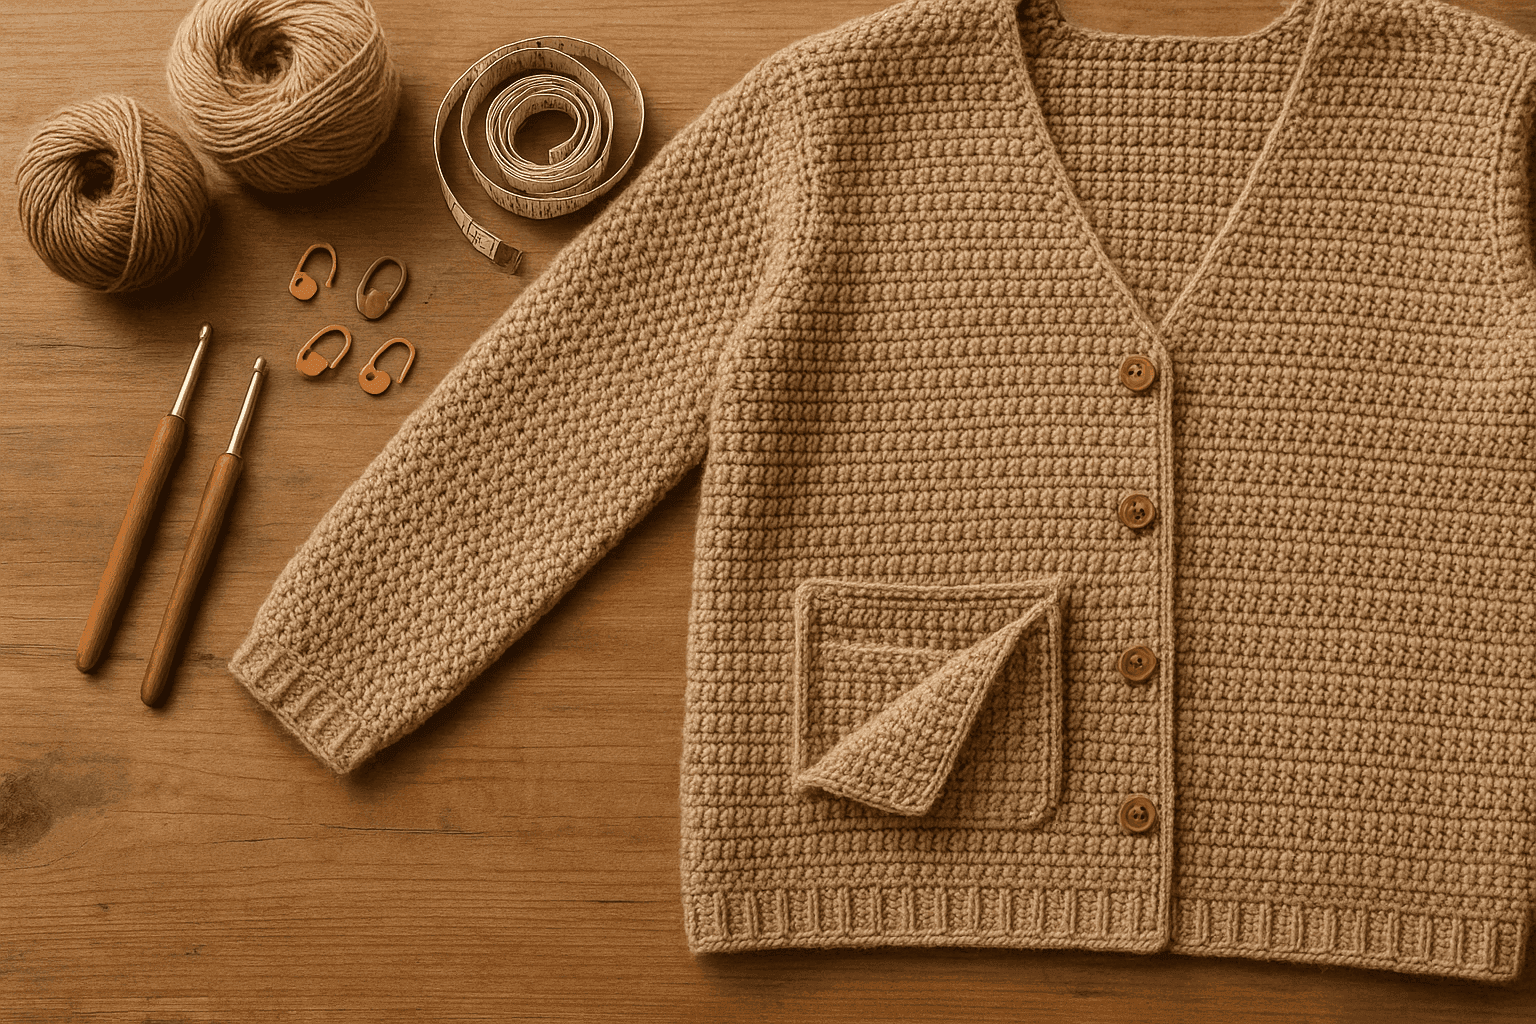
There is a very specific kind of disappointment that happens when a crocheted garment looks beautiful on the blocking mats, hangs nicely on the body for the first try-on, and then develops tired-looking pockets after a few wears. You slide your hands into them, maybe tuck in a phone or keys for a moment, and suddenly the opening begins to grin, the lower front starts to drag, and the hemline tells the truth even if the rest of the sweater is trying to be polite. Crochet can absolutely support useful pockets, but inset pockets ask us to think like both a maker and an engineer. They are not just decorative slits with bags hanging behind them. They are interruptions in a fabric system, and every interruption creates new stress points, new directions of pull, and new opportunities for distortion.
If you have ever made a cardigan, coatigan, tunic, robe, or long vest and wondered whether to add patch pockets, side-seam pockets, or true inset pockets, the good news is that crochet gives you several workable options. The challenge is that the same structural qualities we love in crochet—its flexibility, loft, and openness—can also make pockets droop if we do not control how the weight is transferred. A pocket that does not sag is really a pocket with a clear load path: the opening is stabilized, the pocket bag is sized sensibly, the stress at the corners is reinforced, and the weight of whatever goes into the pocket is directed into sturdier parts of the garment instead of being allowed to stretch a decorative area out of shape.
This article is a deep dive into that structural logic. We will look at when to choose patch, side-seam, or true inset pockets; how different crochet stitch structures behave at the opening edge; how to build stable welts and facings; how to shape pocket bags that fit hands without adding belly-bulk; how fiber elasticity affects sag; and how to anchor the whole system into seams, ribs, waist shaping lines, or internal support bands. We will also cover practical stitch counts, pickup ratios, reinforcement options, and how to retrofit pockets into an existing sweater pattern without ruining the drape you liked in the first place.
First, choose the right pocket type for the garment
Before engineering an inset pocket, it helps to ask whether an inset pocket is truly the best answer. Many pocket failures happen because the construction type does not match the garment structure.
Patch pockets
Patch pockets are applied to the surface of the garment. They are often the easiest to add and the least disruptive to the garment fabric because they do not require cutting or interrupting the front panel structure.
Best for:
- Casual cardigans
- Textured garments where a visible pocket is welcome
- Midweight to heavy fabrics
- Garments where a little extra front weight is acceptable
Advantages:
- Simple to plan
- No slit or opening distortion to manage
- Easy to reinforce invisibly from the wrong side
- Easy to place higher so they do not pull on the hem
Disadvantages:
- Visible from the outside
- Can stretch downward if too large
- Can become bulky on drapey garments
If you need utility but not a sleek look, patch pockets are often more reliable than inset pockets in crochet.
Side-seam pockets
Side-seam pockets are built into a seam. In sewn garments, they are a standard trick for hiding functionality. In crochet, they work best when there is an actual structural side seam or a join line sturdy enough to behave like one.
Best for:
- Coats, robe jackets, seamed cardigans, and tunics
- Garments with substantial vertical seams
- Fabrics that can tolerate the slight flare from inserting a bag at the side
Advantages:
- Hidden look
- Weight transfers into a seam rather than the front body fabric alone
- Less visual distortion at center front
Disadvantages:
- Can push hip line outward if bag is too large
- Less suitable for very openwork fabrics
- Can swing and twist if not anchored at the bag base
For many crochet garments, a side-seam pocket is structurally safer than a front inset pocket because the seam already provides a load-bearing channel.
True inset pockets
A true inset pocket has an opening worked into the garment front, usually horizontal or slightly slanted, with a pocket bag attached behind it.
Best for:
- Clean tailored cardigans and coatigans
- Fronts worked in stable stitch patterns
- Garments with enough front depth to hide a bag smoothly
- Makers willing to plan reinforcements carefully
Advantages:
- Polished, integrated appearance
- Can be positioned for natural hand placement
- Feels high-end when done well
Disadvantages:
- Highest risk of stretching and grinning
- Interrupts fabric continuity
- Requires corner reinforcement and support planning
- Can distort drape if bag is oversized or badly anchored
If you want a true inset pocket, the rest of this article will help you build it so it behaves.
The structural problem: openings distort crochet grain
Any pocket opening cuts across the normal flow of forces in a crochet fabric. Unlike woven cloth, crochet is made from interlocked loops with meaningful directional stretch. Even in a dense stitch, the fabric usually has:
- more give in one direction than the other,
- different behavior under vertical vs horizontal load,
- and edge instability if stitches are interrupted without support.
When you create an opening, two things happen:
- You remove continuity. The stitches that would have shared stress across the garment front are now divided into upper and lower lips.
- You create stress concentrations at the corners. The top and bottom corners of the slit take far more strain than the center of the opening.
That is why pockets fail at the corners first, or start to grin in the center while the corners curl or flare. Inset pockets are not only about making a neat slit. They are about restoring enough continuity around that slit that the garment still behaves as a whole.
Selecting stitch structures for the opening edge
The opening edge is the most critical visible part of the pocket. Its job is to resist stretching, recover after use, and stay attractive.
Here is how common crochet stitch structures compare.
Single crochet opening edge
Behavior: Firm, compact, relatively low stretch.
Use when: You want a stable basic welt or facing; the garment stitch pattern is dense; the style is casual or understated.
Pros:
- Excellent stability
- Easy to reinforce
- Low grin risk
Cons:
- Can look heavy if the garment fabric is drapey
- May pull slightly if worked too tightly
Slip stitch or yarn-under single crochet edge
Behavior: Very firm, very low stretch.
Use when: You need maximum control at the opening, especially in soft yarns or long garments.
Pros:
- Strong anti-stretch performance
- Crisp visual line
Cons:
- Can become rigid
- Tension mismatch may cause puckering
- Harder on hands to work
Half double crochet edge
Behavior: Moderate stability, more elasticity than single crochet.
Use when: The garment is midweight and you want the opening to blend visually.
Pros:
- Smoother integration in many sweater gauges
- Faster to work
Cons:
- More prone to stretching than single crochet
- Needs reinforcement sooner in soft fibers
Waistcoat stitch / center single crochet edge
Behavior: Dense and knit-like, with good firmness.
Use when: You want a tailored look and have even tension.
Pros:
- Excellent appearance for welt styles
- Fairly strong edge
Cons:
- Less forgiving tension-wise
- Can skew if your natural tension is uneven
Post-stitch ribbing edge
Behavior: Stretchy unless anchored and lined.
Use when: You want a ribbed visible welt and understand that the ribbing is decorative, not the only support.
Pros:
- Attractive, coordinated with hem/bands
- Comfortable hand entry
Cons:
- Not sufficient alone for anti-sag construction
- Can flare or wave
Tunisian simple stitch edge
Behavior: Stable and woven-like, though curl must be managed.
Use when: You are mixing techniques or want an especially crisp welt.
Pros:
- Excellent structure
- Great for pocket facings
Cons:
- Different gauge from standard crochet
- Needs planning for integration
For most garments, the safest opening treatment is a single crochet, slip stitch, or very firm half double crochet facing reinforced by an internal anchor rather than relying on the visible edge alone.
Pocket opening design: welt, facing, or simple slit?
Simple slit opening
This is the least engineered option: you leave an opening in the fabric and work the bag behind it.
When it works:
- Small handwarmer pockets in firm gauge
- Short garments with low expected load
- Rustic sweaters where slight movement is acceptable
When it fails:
- Soft yarns
- Long cardigans
- Open stitch fabrics
- Heavy everyday use
A simple slit is rarely my first recommendation if you want longevity.
Faced opening
A facing is an inward-turned strip that finishes and strengthens the opening.
Benefits:
- Doubles the fabric at the stress zone
- Gives a clean edge
- Hides reinforcement thread, ribbon, or tape
- Reduces rolling and flare
A crochet facing can be 3 to 6 rows deep depending on yarn weight and garment scale.
Typical facing depth by yarn weight:
- DK: 0.75 to 1 in / 2 to 2.5 cm
- Worsted: 1 to 1.25 in / 2.5 to 3 cm
- Bulky: 1.25 to 1.5 in / 3 to 4 cm
Welt opening
A welt is a visible band or lip framing the opening, much like welt pockets in tailoring.
Benefits:
- Polished appearance
- Stronger edge than a bare slit
- Can mimic button band or hem ribbing
Caution: The welt is not magic. If it is stretchy ribbing without internal support, it can still sag. A welt is best treated as the visible shell of a more substantial structure.
Sizing the opening so hands fit without collapsing the front
Pocket openings often fail because they are too big. We tend to size them for the object we imagine carrying instead of the actual entry needed for a hand.
A practical finished opening width for adult garments is usually:
- 5 to 5.5 in / 12.5 to 14 cm for smaller hands or cropped cardigans
- 5.5 to 6.5 in / 14 to 16.5 cm for average adult handwarmer pockets
- 6.5 to 7 in / 16.5 to 18 cm only for oversized garments or bulky winter coats
Anything wider than about 7 in in crochet should trigger a structural review, because long openings are much more likely to grin.
Converting opening width to stitch counts
Use your blocked garment gauge in the stitch pattern at pocket level.
For example:
- Gauge = 16 sts and 12 rows over 4 in / 10 cm
- Stitch gauge = 4 sts per inch
- Desired opening = 6 in
- Stitch count = 24 sts
For a denser gauge:
- Gauge = 20 sts over 4 in
- 5 sts per inch
- Desired opening = 5.5 in
- Stitch count = 27 or 28 sts
Aim for an opening that begins and ends at a logical point in the fabric, such as between shaping lines or centered in a repeat. Avoid forcing a pocket to interrupt critical shaping decreases or decorative motifs if possible.
Engineering the pocket bag
The bag should be large enough for comfort and function, but not so big that it forms a hammock behind the front panel.
Basic pocket bag dimensions
A good starting point for an adult handwarmer pocket bag is:
- Width: opening width plus 0.5 to 1 in / 1.25 to 2.5 cm ease
- Depth: 6.5 to 8.5 in / 16.5 to 21.5 cm depending on garment length and hand size
Example:
- Opening = 24 sts at 6 in
- Bag width target = 26 to 28 sts equivalent
- Bag depth target = 7.5 in
- At 3 rows per inch, work about 22 to 23 rows deep before shaping or joining
Straight bag vs shaped bag
Straight rectangular bag
- Simplest
- Best in coats and roomy cardigans
- Can bunch at the lower corners if the front is fitted
Tapered bag
- Narrows toward the base
- Reduces bulk over abdomen or hip
- Better for tunics and closer-fitting fronts
Curved or rounded base bag
- Softer drape
- Less corner poke-through on drapey yarns
- Slightly more fiddly to seam neatly
My default for garments intended for regular wear is a shallow taper: begin with the opening width, then decrease 1 stitch at each side every 4th or 5th row 2 to 4 times, depending on scale. This keeps the upper entry generous while reducing weight and bunching below.
Stitch pattern for the bag
The pocket bag should usually be worked in a thinner, denser, less stretchy fabric than the garment front if the yarn and design allow it.
Recommended bag fabrics:
- Single crochet for most standard crochet garments
- Half double crochet for a softer bag in bulky yarn
- Linen stitch only if worked firmly and not carrying weight
- Tunisian simple stitch for very structured coats
Avoid highly elastic ribbing, mesh, or open lace for pocket bags unless they are fully supported by an internal lining.
Hook size for the bag
A highly useful trick: work the bag 0.5 to 1.0 mm smaller hook than the garment if the yarn tolerates it.
Examples:
- Garment on 5.0 mm hook, bag on 4.5 mm or 4.0 mm
- Garment on 6.0 mm hook, bag on 5.5 mm
This creates a denser pocket bag that stretches less under load. Always swatch if the difference is substantial.
Step-by-step: a reliable horizontal inset pocket system
This method assumes a front panel worked bottom-up in rows, but the same logic applies to top-down garments with row planning adjusted.
Materials and planning
You will need:
- Main garment yarn
- Optional lighter but firm matching yarn for pocket bags
- Main hook plus optional smaller hook for facings/bag
- Stitch markers
- Tapestry needle
- Optional reinforcement material: smooth cotton tape, twill tape, ribbon, narrow woven stay tape, or strong matching sewing thread/elastomeric support thread
Step 1: Place the pocket
Mark the opening on the front panel.
A useful vertical placement for handwarmer pockets is:
- 2 to 4 in / 5 to 10 cm below waist level on longer garments
- 1 to 2 in / 2.5 to 5 cm above hem ribbing on short casual cardigans
- At natural hand rest level when arms are relaxed, usually somewhere between lower waist and upper hip
Do not place pockets so low that they become hem weights. In long cardigans, low pockets almost always exaggerate front drop.
Step 2: Determine opening count
Example setup:
- Garment front width at pocket level = 52 sts
- Desired opening = center 24 sts
- Remaining front fabric = 14 sts on each side
Mark:
- Left front segment: 14 sts
- Pocket opening: 24 sts
- Right front segment: 14 sts
Step 3: Work the lower lip and reserve opening stitches
On the pocket placement row, work to first marker. For the opening span, either:
- chain the number of opening stitches and skip the same number below on a later row, or
- place the opening stitches on waste yarn and work the upper front separately.
For crochet garments, I prefer a cleaner engineering method:
Method: split and bridge with provisional chain
- Work to opening start.
- Chain 24 loosely.
- Skip 24 sts of the previous row.
- Continue across.
On the next row, work into the chain with a stable stitch count, usually one stitch into each chain back bump or one fewer if your chain runs loose.
This creates the upper edge of the lower lip and preserves continuity, but it is only the start. The chain span should later be reinforced or faced.
Step 4: Build the upper front and opening facing
Work 2 to 4 rows above the opening in the garment pattern, then return to finish the opening edges.
For a firm facing:
- Join yarn to the lower opening edge and work 1 row sc evenly across.
- Work 2 more rows sc or slip stitch depending on desired firmness.
- Fold this strip to the wrong side and sew down neatly.
Repeat for the upper opening edge if your construction creates a second raw-looking edge or if you want a symmetrical welt.
Stitch count rule: keep the facing stitch count equal to the opening count unless the edge is flaring. If it flares, reduce by 1 stitch for every 8 to 10 stitches across.
For a 24-st opening, examples:
- Stable edge: 24 sc across each facing row
- Loose edge: 22 or 23 sc across to prevent waviness
Step 5: Pick up for the pocket bag
From the wrong side, pick up stitches along one lip of the opening, usually the lower lip if the bag will hang downward.
Pickup ratios
This matters a lot.
Across row ends or horizontal edges:
- Start with 3 stitches for every 4 row ends in dense fabrics
- Or 2 stitches for every 3 row ends in taller stitches
Across chain spaces or skipped stitches:
- Usually 1 stitch in each chain/stitch works
- If the chain edge is loose, pick up 1 fewer stitch every 8 to 12 stitches
Across vertical sides of a slanted opening:
- Usually 1 stitch per row end is too many
- Try 3 stitches per 4 rows as a starting point
The goal is a bag edge that lies smooth without ruffling or drawing up.
Example:
- Opening edge equivalent to 24 stitches
- Pick up 24 sc if working directly into preserved opening stitches
- If picking up along row ends across a 32-row equivalent edge, start with 24 sts using a 3:4 ratio
Step 6: Work the bag
For a rectangular bag:
- Row 1: 24 sc picked up
- Rows 2–6: sc 24
- Row 7: dec at each end = 22 sts
- Rows 8–11: sc 22
- Row 12: dec at each end = 20 sts
- Rows 13–18: sc 20
- Final depth should reach about 7 to 8 in depending on gauge
For a rounded bag:
- Work even for 4 to 6 rows
- Then decrease 1 stitch at each side every other row until desired width remains
- Finish with 2 to 4 rows even
When bag depth is reached, either:
- seam to a separately made facing piece attached behind the upper lip, or
- fold the bag upward and seam the sides to a second bag layer.
My preferred method is a separate full bag panel joined to both opening lips, because it distributes strain better than a folded flap.
Step 7: Anchor the bag into the garment
This is the step that prevents sag.
Possible anchor points:
- Side seam
- Front band join line
- Waist shaping line
- Hem rib join line
- Interior support band
At minimum, the top corners of the pocket bag should be sewn firmly into the garment fabric beyond the opening itself. Better still, the bag should be tacked at one or two lower points to prevent swinging.
Good anchor strategy for a cardigan front
- Sew bag top edge securely to both opening lips/facings.
- Reinforce top corners with bar-tack style hand stitches over 0.25 to 0.5 in / 6 to 12 mm.
- Tack lower outer corner to side seam or nearest stable fabric column.
- If the pocket sits near a vertical front band, tack lower inner corner toward that band or an interior stay.
This transforms the bag from a hanging hammock into a supported component with multiple load routes.
Step 8: Add anti-sag reinforcement if needed
For soft yarns, long garments, or pockets intended to carry more than hands, insert reinforcement.
Options include:
- Narrow twill tape inside the facing
- Crochet chain cord sewn into facing fold
- Matching sewing thread worked with whipstitch along opening edge
- Fine elastic support thread for subtle recovery
- Grosgrain or woven ribbon stay on wrong side
If using non-stretch tape, pre-measure carefully. It should match the opening length exactly when the garment is lying flat and relaxed, not stretched.
Understanding load paths: where the weight really goes
If you put a phone in a pocket, the weight does not simply pull straight down from the opening. It creates a set of forces:
- downward pull at the bag base,
- outward torque at the lower front,
- stress concentration at the upper corners,
- and often diagonal drag lines radiating toward the side seam and hem.
To control this, give the pocket a deliberate load path.
Load path option 1: Into the side seam
Best for seamed garments.
Anchor the bag outer side and lower outer corner into the side seam. The seam acts like a structural beam, carrying some weight vertically.
Load path option 2: Into the front band
Best for robe cardigans and open-front coats.
An inner support strip running behind the front band can catch the inner edge of the pocket bag so the front body fabric does not carry all the stress.
Load path option 3: Into waist ribbing or shaping zone
Best for long cardigans.
If the pocket sits just above a firm ribbed section or a waist shaping line, use that area as an anchor. The ribbing can help distribute strain, especially if reinforced at the wrong side.
Load path option 4: Into an interior stay band
Best for soft or drapey fabrics without strong seams.
Work or sew an interior stay band—often a narrow strip of firm crochet or woven tape—from side seam toward front band, then attach the pocket bag to it. This is especially effective in garments made in soft superwash wool, alpaca blends, bamboo blends, or other fibers prone to growth.
Fiber elasticity and sag under load
Even though fiber behavior is not our main topic here, it matters because pocket engineering has to match the yarn.
High-resilience fibers
Examples: non-superwash wool, wool-rich blends with spring.
These recover better after temporary loading. You may get away with lighter reinforcement, though openings still need stable corners.
Growth-prone fibers
Examples: alpaca, bamboo, silk-heavy blends, rayon blends, some superwash wools.
These can look beautiful and fluid, but pockets in them need aggressive planning:
- smaller hook for bag and facing,
- shorter openings,
- shallower bags,
- stronger anchoring,
- and often an interior stay tape.
Cotton and linen
These can be stable but heavy. A cotton cardigan with inset pockets may not stretch much elastically, but the garment can still drag under accumulated weight. Dense openings are helpful, and bag size should be conservative.
Acrylic
Behavior varies widely. Some acrylics recover surprisingly well; others cold-flow and bag out. Swatching a loaded pocket sample is worth the time if the garment will see daily wear.
Troubleshooting common pocket problems
Problem: The opening grins when empty
Causes:
- Opening too long
- Edge too stretchy
- Pickup ratio too loose
- No facing or reinforcement
Fixes:
- Shorten opening by 0.5 to 1 in on future versions
- Rework edge in sc or slip stitch
- Add internal tape or cord reinforcement
- Remove and repick up fewer stitches along the lip if it is ruffling
Problem: The opening flares upward or ripples
Causes:
- Too many stitches in facing or welt
- Ribbed welt unsupported
- Chains too loose across opening
Fixes:
- Reduce facing stitch count by 1 per 8 to 10 stitches
- Use smaller hook for facing rows
- Stabilize with hidden sewn tape
Problem: The front panel droops below the pocket
Causes:
- Bag too deep or heavy
- Pocket placed too low
- Weight not anchored into seams/supports
- Yarn lacks recovery
Fixes:
- Shorten bag depth
- Taper or curve bag base
- Add lower bag tacks to side seam/front band
- Add interior stay band above or alongside pocket
Problem: The corners split or look strained
Causes:
- No stress reinforcement
- Abrupt transition from body fabric to opening
- Heavy use
Fixes:
- Add bar tacks at both upper corners
- Duplicate stitch or overcast corners with strong thread
- Build a deeper facing to spread stress
Problem: The pocket bag shows through on the right side
Causes:
- Bag too large
- Bag worked in too bulky a stitch
- Garment front too fitted over the pocket zone
Fixes:
- Switch to smaller hook and sc bag
- Taper sides inward
- Raise pocket position slightly
- Use lighter but firm yarn for bag only
Problem: Hem drop appears after wear
Causes:
- Pocket load pulling front length downward
- Pockets placed close to hem
- Long garment with no support routing
Fixes:
- Place pockets higher next time
- Anchor lower bag corners laterally, not just vertically
- Reinforce opening and add interior support band
- Consider side-seam or patch pockets instead of true inset
Reinforcing high-stress corners
If you do only one extra engineering step, reinforce the corners.
Good methods:
- Bar tack with sewing thread: 5 to 10 dense stitches over 0.25 in / 6 mm at each upper corner
- Yarn overcast reinforcement: whipstitch tightly around the corner loops
- Duplicate-stitch style reinforcement: embroider through the crochet legs around the corner to distribute load
- Tiny fabric patch on wrong side: useful in heavily worn coats
Try to catch not just the edge loops, but the neighboring full stitch structures around the corner. You want the force to spread into surrounding fabric, not remain concentrated on one loop.
Modifying an existing sweater pattern to add inset pockets
This is where caution pays off. A pocket added after the fact can ruin drape or fit if it interrupts shaping or adds weight where the original designer did not plan for it.
Step 1: Evaluate the fabric
Ask:
- Is the front panel dense enough to support an opening?
- Is there a seam, band, or structural line to anchor into?
- Is the garment already long or heavy?
- Does the yarn grow in wear?
If the answers are unfavorable, consider patch or side-seam pockets instead.
Step 2: Check placement against shaping
Do not place an inset pocket across:
- bust shaping lines,
- waist decreases/increases,
- strong vertical texture columns essential to fit,
- or lace/openwork motifs that will collapse when interrupted.
Pocket openings belong in relatively calm fabric zones.
Step 3: Mark and swatch the opening separately
Make a test swatch in the garment stitch pattern with a 5.5 to 6 in opening and your intended facing. Hang a small weight in the bag for a few hours. You do not need elaborate lab testing; even a phone or small pouch of coins will tell you plenty.
Step 4: Remove and rebuild a section if retrofitting
For a finished garment, the safest retrofit is often:
- Open a horizontal line of stitches carefully where the pocket will sit.
- Create a neat upper and lower opening edge.
- Add facings.
- Build and attach a separate bag.
- Reinforce corners and add anchors.
This is more controlled than slicing into fabric blindly or trying to force a bag onto a weak area.
Step 5: Preserve drape by reducing bag bulk
In retrofits, always err toward:
- narrower opening,
- shallower bag,
- smaller hook,
- denser bag stitch,
- and more anchoring.
You are asking the existing fabric to accept a new structural task. Be kind to it.
Practical comparison: patch vs side-seam vs inset for real garments
Short everyday cardigan in worsted wool
- Best pocket choice: patch or inset
- If inset: 5.5 to 6 in opening, sc facing, tapered bag, corner bar tacks
- Anchors: front band and side area as available
Long duster cardigan in superwash merino blend
- Best pocket choice: patch placed high or side-seam
- Inset only with strong internal stay tape and short opening
- Avoid deep bags and low placement
Heavy crochet coat in dense stitch pattern
- Best pocket choice: true inset or side-seam
- Use firm welt, dense bag, lower corner anchors, and possibly woven stay tape
- Opening can be slightly larger because coat structure is stronger
Belted robe-style garment
- Best pocket choice: inset if tied into front facings/interior support band
- Let the belt zone help control load path
- Place opening near natural hand rest but not below hip crest
Recommended starting numbers by yarn weight
These are not rigid rules, but useful starting points.
DK weight garments
- Hook: garment 4.0 to 4.5 mm, bag 3.5 to 4.0 mm
- Opening: 5 to 5.75 in / 12.5 to 14.5 cm
- Facing depth: 0.75 to 1 in / 2 to 2.5 cm
- Bag depth: 6.5 to 7.5 in / 16.5 to 19 cm
Worsted/aran garments
- Hook: garment 5.0 to 6.0 mm, bag 4.5 to 5.5 mm
- Opening: 5.5 to 6.25 in / 14 to 16 cm
- Facing depth: 1 to 1.25 in / 2.5 to 3 cm
- Bag depth: 7 to 8 in / 18 to 20 cm
Bulky garments
- Hook: garment 6.5 to 8.0 mm, bag 6.0 to 7.0 mm
- Opening: 5.5 to 6.5 in / 14 to 16.5 cm
- Facing depth: 1.25 to 1.5 in / 3 to 4 cm
- Bag depth: 6.5 to 7.5 in / 16.5 to 19 cm
With bulky yarn, openings do not need to be huge. The hand fits through a surprisingly modest slit because the fabric itself is thick.
A note on what pockets should carry
A pocket that comfortably warms hands is a different structural challenge from a pocket expected to carry a large phone, wallet, keys, and lip balm. Crochet garment pockets can be beautifully functional, but every added ounce affects drape.
If a garment is soft, long, or drapey, design the inset pockets as handwarmer pockets first and treat object-carrying as occasional, not constant. If the wearer truly needs storage, patch or side-seam pockets with stronger load routing may outperform a sleek inset.
Best-practice takeaways
If you want crocheted inset pockets that do not sag, keep these principles in view:
- Choose the right pocket type. Inset pockets are not always the best answer. Patch and side-seam pockets may be structurally smarter.
- Keep openings modest. Most adult handwarmer pockets need only 5 to 6.5 inches of opening.
- Use a stable edge. Single crochet, slip stitch, or a firm facing beats a stretchy untreated slit.
- Engineer the bag, not just the opening. A slightly tapered, dense pocket bag creates less drag than a large rectangle.
- Work the bag on a smaller hook when possible. Denser fabric stretches less and prints through less.
- Reinforce the corners. This is where failure starts.
- Create a load path. Anchor the pocket bag into seams, bands, shaping lines, or interior stays so the front panel does not carry everything alone.
- Match the engineering to the fiber and garment length. Soft, growing yarns and long cardigans need more support, not less.
- Test before committing. A swatch with an opening and a weighted bag can save an entire garment.
- Respect drape. The best pocket is one that serves the garment rather than fighting it.
A well-made inset pocket in crochet feels almost invisible in use. Your hands find it naturally, the opening stays neat, the front hangs true, and the hem does not tattletale after a day of wear. That is the real goal: not just a pocket that exists, but a pocket that belongs to the garment structurally as much as aesthetically. Once you start thinking in terms of openings, bags, stress points, and load paths, you can add that kind of functionality with confidence—and your finished pieces will look and wear like the thoughtfully engineered garments they are.