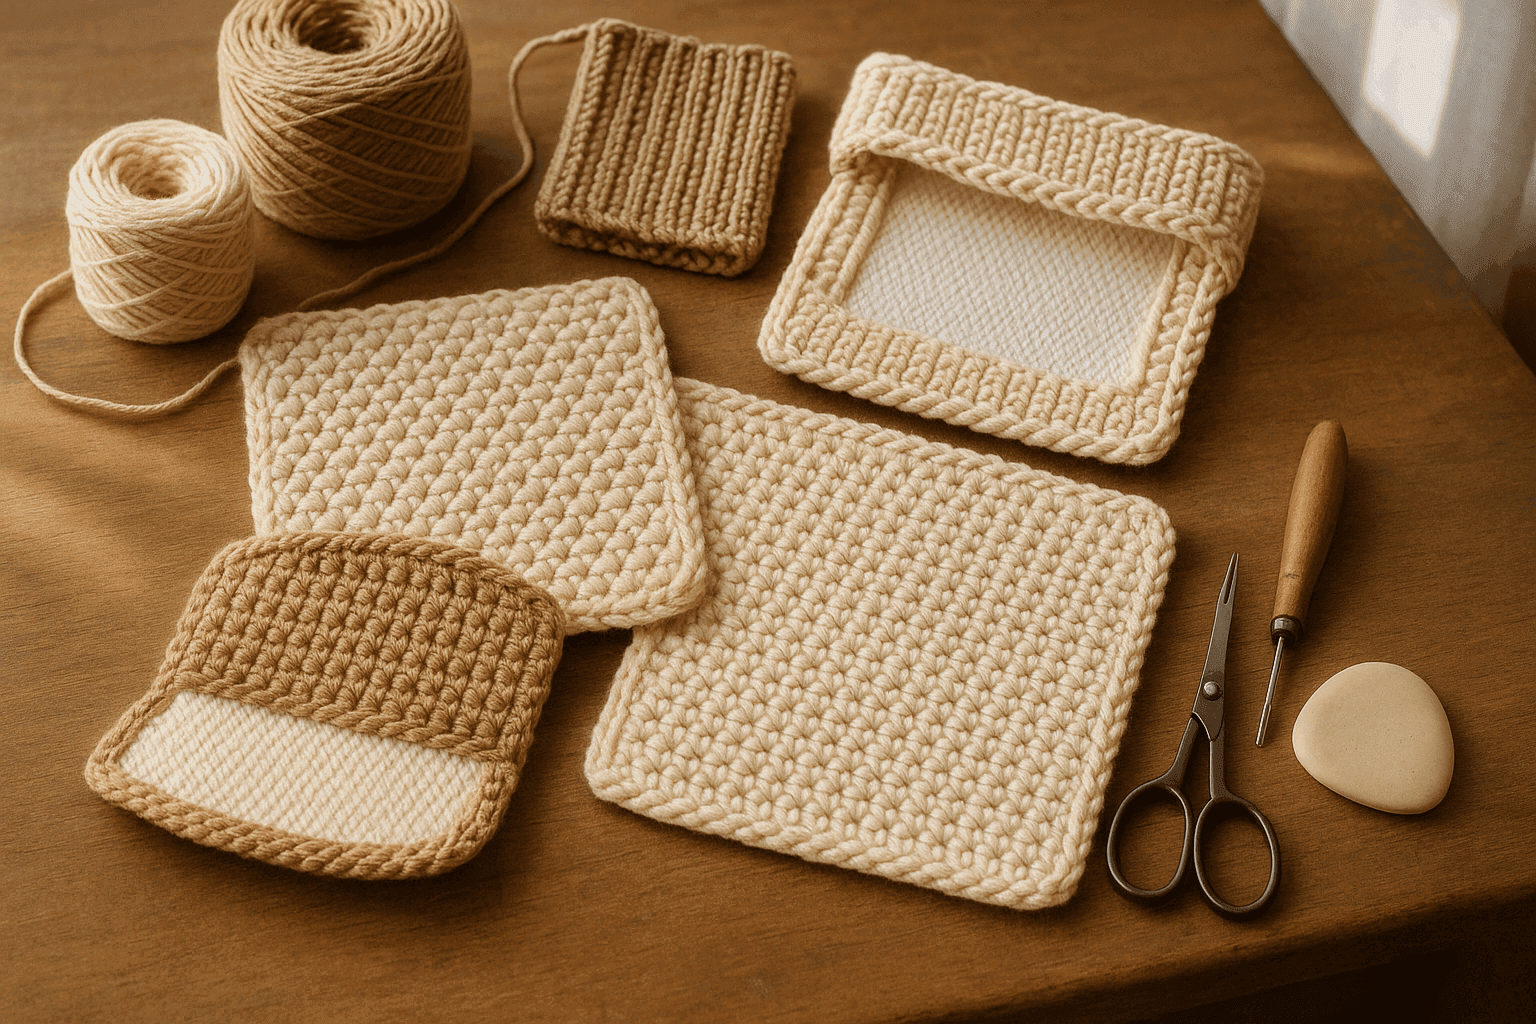
There is a particular disappointment most crocheters know well: you finish a beautiful brim, collar, cuff, belt, or bag flap, steam it carefully, put it on the form or on your body, and within an hour gravity wins. The edge that looked crisp on the blocking board turns soft and wavy. The statement collar collapses into a shrug. The sculptural panel that gave the garment its whole point suddenly reads more “drapey rectangle” than “intentional architecture.”
At that moment, many makers assume the yarn was wrong, the stitch pattern was wrong, or crochet itself simply cannot hold certain shapes without becoming thick, heavy, or awkward. In reality, crochet can absolutely support structured design—but it often needs help from the same hidden engineering that sewists and milliners have used for generations: interfacing, internal supports, strategic layering, and transitions in stiffness rather than one abrupt hard edge.
That last idea matters most. If you want support without a cardboard feel, the goal is almost never to make the entire crocheted piece rigid. The real goal is to create a stiffness gradient: enough support where the shape must hold, less support where the fabric needs to bend, and a smooth transition between them so the hand remains pleasant and the structure feels intentional rather than forced.
This article is a deep dive into how to add hidden structure to crochet using sew-in, fusible, knitted, woven, and nonwoven interfacings; how fiber content changes the result; how to anchor supports so they do not shift; how to plan wash compatibility; and how to build clean transitions for brims, collars, belts, bags, and sculptural garment sections. I will also include practical stitch and construction advice so you can adapt these methods whether you are making accessories or garments.
Why crochet often needs a different approach than sewing
Interfacing is standard language in sewing, but crochet behaves differently from woven fabric in several important ways:
- Crochet stretches in multiple directions, especially if worked loosely.
- Many crochet fabrics have visible holes or channels, even at firm gauges.
- Crochet has greater thickness and surface texture than most garment fabrics.
- Stitch structure can distort if a support layer is attached too tightly.
- Steam, heat, and washing can alter both the yarn and the support layer in different ways.
Because of that, you usually cannot treat crochet as if it were plain woven cotton. A fusible meant for quilting cotton may bond unevenly, show through the stitch valleys, or create sharp ridges. A sew-in interfacing may shift inside an openwork panel unless it is anchored in a way that respects the crochet’s elasticity. A beautiful wool crochet may full slightly with wear while the interfacing remains unchanged, creating buckling.
The best results come when you think like both a crocheter and a soft-structure engineer:
- Choose the crochet fabric intentionally. Structure begins with stitch, gauge, and fiber.
- Match interfacing to the use case. The right support for a hat brim is not always right for a collar stand.
- Create a gradient, not a cliff. Transition from firm to flexible in zones.
- Anchor selectively. Prevent shifting without crushing the hand.
- Respect care requirements. The item is only successful if it survives how it will actually be used.
Start with the crochet fabric: structure before interfacing
Before adding any hidden support, make the crochet itself do as much work as possible.
Helpful stitch patterns for structured areas
For brims, cuffs, collars, belts, panels, and bag components, dense stitches generally outperform open textures.
Good choices include:
- Single crochet (sc): dense, stable, especially in smaller hook sizes
- Waistcoat stitch / center single crochet: firmer and more knit-like; excellent for bands
- Half double crochet worked in third loop: adds body and directional ridges
- Slip stitch crochet: very firm, low stretch, ideal for edges and narrow supports
- Linked double crochet: fills gaps better than standard dc
- Tunisian simple stitch or knit stitch: if mixed techniques are allowed, naturally excellent for structured panels
Less ideal as the primary fabric for unsupported structure:
- Standard double crochet at a relaxed gauge
- Open lace
- Mesh-based stitches
- Very drapey broomstick or oversized-hook textures
Hook size and gauge recommendations
For structured crochet sections, most makers benefit from going down 0.5 to 1.5 mm from the hook they might use for a relaxed drape.
General starting points:
- DK yarn (3/light): 3.5–4.0 mm hook for firm fabric
- Worsted yarn (4/medium): 4.0–5.0 mm hook for firm fabric
- Aran yarn: 4.5–5.5 mm hook for firm fabric
- Cotton crochet thread or sport yarn: 2.5–3.5 mm hook for crisp accessories
A useful benchmark: if you can easily insert a fingertip through the stitch gaps in the finished fabric, many interfacings will show or telegraph unless fully enclosed.
Stitch count planning for common structured bands
A few practical dimensions help when planning pieces that may later receive interfacing.
- Hat brim band: often 2–4 in / 5–10 cm deep
- Shirt-style cuff: 2–2.75 in / 5–7 cm finished depth
- Wide belt section: 2.5–4 in / 6.5–10 cm
- Bag flap reinforcement zone: usually whole flap, minus 0.25–0.5 in / 6–12 mm seam turn area
- Architectural panel: reinforce only the region that must project or remain flat
Example with worsted yarn in firm single crochet using a 4.5 mm hook:
- Gauge: 16 sc x 18 rows = 4 in / 10 cm
- A 3 in brim depth needs about 12–13 rows if worked side to side, or 12 stitches if worked top to bottom.
Example with DK cotton in waistcoat stitch using a 3.75 mm hook:
- Gauge: 20 sts x 20 rounds = 4 in / 10 cm
- A 2.5 in cuff depth needs about 12–13 rounds or rows.
These counts matter because interfacing behaves best when the crochet dimensions are stable and measured, not guessed.
Understanding interfacing types for crochet
Not all support materials are created equal. For crochet, the main categories each behave differently.
1. Sew-in woven interfacing
This is one of the safest and most controllable options.
Best uses
- Collars and cuffs
- Belts
- Bag flaps
- Brims with fabric lining
- Panels in garments where you want a tailored hand
Why it works
Woven sew-in interfacing has a grain, drape, and fiber structure that can feel more natural inside crochet than paper-like fusibles. It can be layered, cut on grain or bias for different behaviors, and attached without heat.
Pros
- Good hand and flexibility
- No risk of glue failure from washing or steam
- Easy to combine in layers for gradients
- Available in cotton, polyester, silk blends, and tailoring weights
Cons
- Requires sewing or hand tacking
- Can shift if not anchored well
- Needs full enclosure or stable edge finishing in open crochet
Fiber interaction notes
- Cotton crochet + cotton woven interfacing: very compatible, especially for washable accessories
- Wool crochet + lightweight woven wool or cotton batiste support: excellent hand, but test shrinkage
- Acrylic crochet + woven interfacing: works, but avoid relying on aggressive steam shaping because acrylic can flatten or “kill” under heat
2. Fusible woven or fusible tricot interfacing
Fusibles can work beautifully in crochet, but they require testing.
Best uses
- Areas backed by lining fabric n- Dense crochet with minimal holes
- Belts, cuffs, or brims where you want support spread evenly across a layer
Why it works
The adhesive holds the interfacing in place across the surface rather than at a few tack points. Fusible tricot, in particular, can provide a smoother, less boardy support than some crisp paper-like fusibles.
Pros
- Fast application
- Even support distribution
- Less shifting over time
Cons
n- Heat risk for yarn fibers
- Glue can show through stitch gaps
- Bond can fail if fused to highly textured or very lofty crochet
- Some fusibles become unpleasantly papery after repeated laundering
Key rule for crochet
Do not fuse directly to most crochet unless:
- the stitch fabric is dense,
- the yarn tolerates the required heat,
- and you have tested whether adhesive telegraphs to the public side.
More often, the better method is to fuse the interfacing to a separate lining or underlayer first, then attach that supported layer to the crochet.
3. Nonwoven interfacing
This is the common craft-store option many people reach for first. Sometimes it is useful. Sometimes it is exactly why a project feels cheap.
Best uses
- Prototyping support levels
- Small accessories
- Structured bag elements hidden between outer and lining layers
- Areas where a little body is needed but elegance is less critical
Pros
- Inexpensive
- Easy to cut
- Available in many stiffnesses
- Good for testing patterns
Cons
- Can pill, crease, or break down with laundering
- Less graceful drape transition
- Often produces the “cardboard” feeling if overused
- No grain, so behavior can be less refined
If you use nonwoven interfacing in crochet, choose the softest grade that achieves the shape. Two soft layers with staggered edges usually feel better than one overly stiff layer.
4. Knitted interfacing or tricot support
Knitted interfacings are underrated for crochet.
Best uses
- Garment areas that need controlled flexibility
- Curved collars
- Cuffs requiring movement
- Sculptural but wearable panels
Why it works
A knit support can move with crochet rather than fighting it. It is ideal when you need shape retention but still want bend and comfort.
Pros
- Better compatibility with stretch
- Smooth transitions
- Comfortable in wear
Cons
- Less rigid than woven options
- May not be sufficient alone for strong brims or bag bases
5. Specialty supports: buckram, horsehair canvas, plastic canvas, felt, foam
These are not classic interfacings in the garment sense, but they belong in the conversation.
Best uses
- Millinery brims
- Sculptural collars or panels
- Costume work
- Bags and baskets
Caution
These supports are easy to overdo. If the user goal is “support without cardboard feel,” use them in narrow zones, laminated with softer layers, or only in the core of the structure. Horsehair canvas can be particularly elegant because it has spring rather than dead rigidity.
What “stiffness gradient” means in practice
A stiffness gradient is a controlled transition from firm to soft across a piece.
Think of these zones:
- Zone A: Structural core — the area that must hold shape
- Zone B: Transition zone — moderate support
- Zone C: Soft body — unsupported or lightly supported crochet
Instead of cutting one interfacing piece exactly to the full shape and ending it abruptly, you might:
- layer two supports only in the center,
- use one support extending farther out,
- trim seam allowances or edges progressively,
- switch from woven to knit support at the transition,
- reduce anchoring density as you move outward.
Example: structured hat brim
For a 3 in / 7.5 cm brim depth:
- Outer 1 in / 2.5 cm near edge: medium support
- Middle 1 in / 2.5 cm: medium + light support layered
- Inner 1 in / 2.5 cm near crown join: light support only
This keeps the edge crisp while letting the brim join curve comfortably around the head.
Example: architectural cardigan front panel
For a 4 in / 10 cm front extension meant to stand away slightly:
- Front edge 1.5 in / 4 cm: firm knit or woven support
- Next 1.5 in / 4 cm: only soft tricot support
- Last 1 in / 2.5 cm at body join: unsupported or only stabilized with slip-stitch facing
The result feels integrated instead of like a placemat stitched to a sweater.
Anchoring methods: how to keep support from shifting
A hidden support layer is only useful if it stays where you put it. Here are the most effective methods.
Method 1: Full sandwich construction
This is often the cleanest choice.
Structure
- Crochet outer layer
- Interfacing/support layer
- Lining or facing layer
Best for
- Bags
- Belts
- Brims
- Collar stands
- Cuffs
How to do it
- Crochet the outer piece to final blocked dimensions.
- Cut support layer 1/8–1/4 in (3–6 mm) smaller than final edges if you want softer seam turns.
- Cut lining/facing to match outer piece or seam pattern.
- Baste support to lining.
- Place wrong sides together with crochet and lining sandwiching the support.
- Join around edges using hand slip stitch, sewn binding, or a crochet edging that catches both layers.
This method prevents direct abrasion between interfacing and yarn and reduces telegraphing.
Method 2: Quilted tack anchoring
Used when you cannot fully line the piece.
Best for
- Flat sculptural panels
- Bag fronts
- Decorative cuffs
- Narrow facings
How to do it
Use tiny hand tacks through inconspicuous stitch valleys at intervals.
Recommended tack spacing:
- Firm, small accessory panel: every 1–1.5 in / 2.5–4 cm
- Garment panel requiring flexibility: every 2–3 in / 5–7.5 cm
Use fine matching thread or split yarn. Do not cinch tightly. The tack should hold layers together while preserving loft.
Method 3: Perimeter anchoring only
This works if the support fits snugly and the piece does not receive high stress.
Best for
- Collar leaves
- Decorative brims
- Flat front facings
Risk
With crochet, perimeter-only anchoring can allow internal bubbling if the outer layer stretches and the support does not. Test by flexing the sample repeatedly.
Method 4: Channel insertion
Crochet a double layer or folded casing and slide support inside.
Best for
- Hat brims
- Belts
- Bag handles
- Stand collars
How to do it
Work the piece as a foldover band or two mirrored layers. Leave an insertion gap. Insert the support after blocking. Close the gap with mattress stitch, whipstitch, or slip stitch.
This is excellent when you want the support removable for washing or replacement.
Wash compatibility and care planning
This is where many beautifully engineered crochet pieces fail.
Ask these questions before you choose support:
- Will the item be machine washed, hand washed, or spot cleaned only?
- Will it be steamed or pressed during construction?
- Is the yarn likely to shrink, felt, relax, or stretch?
- Does the support layer tolerate the same treatment?
Fiber-specific guidance
Cotton yarn
- Usually works well with cotton, polyester, or blended supports
- Can soften significantly with wear and washing, so support may be especially useful
- Preshrink woven supports before use if they may shrink
Wool yarn
- Lovely with sew-in supports and tailoring canvases
- Be cautious with fusibles: heat and moisture can affect both wool and adhesive
- Test for differential shrinkage or light fulling
Acrylic yarn
- Avoid high-heat fusibles unless the yarn label explicitly allows it and your swatch confirms safety
- Acrylic can deform under heat before adhesive properly bonds
- Sew-in and removable supports are often safer
Linen yarn
- Excellent for crisp structure but can crease
- Pairs well with woven supports and light tailoring interfacings
- Prewash both components because linen relaxes noticeably
Bamboo/rayon/viscose yarn
- Usually drapey and heavy, making support more necessary
- Can stretch with weight; support must be anchored carefully
- Knit support often integrates better than stiff nonwovens
If care methods do not match
If the yarn is washable but the support is not, consider:
- removable channel supports,
- detachable structured inserts,
- spot-clean-only design for that section,
- or selecting a different support.
A beautifully structured brim that disintegrates after one wash is not a success.
Step-by-step project planning framework
Here is the process I use when engineering structured crochet.
Step 1: Define the structural job
Be specific. “Needs more support” is too vague.
Instead ask:
- Does the piece need to stay flat?
- Stand up vertically?
- Curve but not collapse?
- Resist rolling at the edge?
- Support weight from hardware or contents?
Examples:
- Brim: hold horizontal extension with slight downward curve
- Cuff: stay folded or stand cleanly without wrinkling
- Bag panel: resist sag under load
- Collar: frame neckline and maintain shape through wear
Step 2: Swatch the crochet at final firmness
Make at least a 6 x 6 in / 15 x 15 cm swatch.
Include:
- exact yarn
- exact hook
- exact stitch
- exact finishing method
Measure gauge after blocking.
Example swatch record:
- Yarn: worsted mercerized cotton
- Hook: 4.0 mm
- Stitch: waistcoat stitch
- Gauge after wet block: 18 sts x 20 rows = 4 in / 10 cm
Step 3: Test 2–4 support options on mini samples
Cut support samples about 3 x 5 in / 7.5 x 12.5 cm.
Test:
- support alone behind crochet
- support with lining layer
- one layer vs two layers
- abrupt cut edge vs graduated cut edge
Flex, fold, wear, and if relevant, wash the sample.
Step 4: Map the stiffness zones
Draw the piece and label:
- strongest zone
- medium zone
- soft zone
- anchor points
- fold lines
- seam turns
This is especially useful for collars, belts, and asymmetrical garment panels.
Step 5: Cut support with edge strategy in mind
You usually do not want full-thickness support in the seam turn or very edge finish.
Options:
- Cut support 1/4 in / 6 mm short of outer edge so the crochet edge can roll softly.
- Grade layered supports so each inner layer is narrower than the outer layer.
- Round internal corners slightly to avoid pressure points telegraphing through crochet.
Step 6: Baste and assess before final attachment
Never skip this. Baste and hold the piece on the body, form, or intended use orientation.
A brim hanging from a hat reads differently than a flat table sample.
Step 7: Attach using the least force that secures the structure
Over-anchoring is one of the fastest ways to kill hand. Use enough stitching to stabilize, not enough to laminate the crochet into submission.
Practical recipes for common structured crochet elements
Structured brim recipe
Materials
- Worsted cotton or cotton blend yarn
- Hook 4.0–4.5 mm
- Dense stitch pattern such as sc or waistcoat stitch
- Medium sew-in woven interfacing or light horsehair canvas plus soft lining
Crochet fabric target
Gauge: about 16–18 sts and 18–20 rows = 4 in / 10 cm in firm fabric.
Construction
- Crochet brim as a separate band or an extension from crown.
- Block to exact shape.
- Cut support for outer two-thirds of brim depth.
- Cut lighter support for full brim depth minus seam turn.
- Baste both supports to lining, staggering edges.
- Sandwich into brim facing or underside.
- Edge-finish with crab stitch, slip stitch, or sewn invisible hem.
Common mistake
Using one very stiff insert all the way to the crown join. Result: the brim kinks where it meets the hat.
Fix
Remove full-depth stiff layer near the join; replace with lighter tricot or no support in the inner zone.
Crisp cuff recipe
Materials
- DK or sport cotton, wool, or wool blend
- Hook 3.5–4.0 mm for DK, 3.0–3.5 mm for sport
- Stitch: slip stitch rib, waistcoat stitch, or sc
- Knit interfacing or lightweight woven sew-in
Stitch count example
For a wrist opening of 8 in / 20 cm with slight ease, at 20 sts = 4 in / 10 cm, work about 40 sts around.
Cuff depth for a tailored look: 2.5 in / 6.5 cm, about 12–13 rows/rounds depending on row gauge.
Construction
- Crochet cuff slightly smaller than hand opening if stretch is available.
- Block lightly.
- Interface only the outer half to two-thirds if you want fold-back behavior.
- If making a stand cuff, interface full depth but use knit support at body join.
- Tack at side seams and every 2 in / 5 cm if needed.
Common mistake
Heavy woven support inside a cuff intended to bend repeatedly.
Fix
Switch to tricot or knit support, or reduce support width away from the edge.
Structured belt recipe
Materials
- Mercerized cotton, linen, or wool blend yarn
- Hook 0.5–1.0 mm smaller than usual for dense fabric
- Support: woven sew-in, grosgrain core, or layered interfacing with lining
Stitch count example
At 18 sc = 4 in / 10 cm, a 3 in / 7.5 cm wide belt needs about 13–14 stitches across.
Construction
- Crochet belt outer.
- Back with firm woven support or grosgrain ribbon core.
- Add a soft backing fabric or crochet facing to cover support.
- Anchor especially well near buckle points and holes.
Common mistake
Reinforcing only the center and not the buckle end. The belt stretches where stress is highest.
Fix
nAdd extra internal strip support in the buckle zone and around closure areas.
Bag panel recipe
Materials
- Cotton, raffia, jute blend, wool felted crochet, or sturdy acrylic blend
- Hook chosen for dense fabric
- Support: nonwoven, woven, foam stabilizer, or layered system depending on bag style
Construction
- Crochet panel and block square.
- If the bag carries weight, reinforce not only front and back but also base and handle anchor points.
- Use full sandwich construction with lining.
- Quilt-tack broad areas if panel is large.
- Grade seams so bag edges remain neat.
Common mistake
Stiff front and back with unsupported base. Bag still sags.
Fix
Think structurally: support load paths, not just visible walls.
Architectural garment panel recipe
Materials
- Wool, cotton, linen, or blended yarn with decent recovery
- Hook sized for compact fabric
- Support: knit interfacing, light woven sew-in, organza, or horsehair canvas in narrow zones
Construction
- Crochet panel separately if shape is complex.
- Determine where the body needs softness and where silhouette needs projection.
- Add support as an internal facing rather than across the entire garment section.
- Use graduated support widths.
- Hand tack sparsely and test movement on the body.
Common mistake
Trying to make a soft yarn behave like felted armor across a large area.
Fix
Use support only where visually necessary and let the rest drape.
Troubleshooting: common problems and fixes
Problem: The interfacing shows through the crochet holes
Causes
- Stitch gauge too open
- Support color too contrasting
- Support surface too smooth or shiny
- Fusible adhesive telegraphing
Fixes
- Crochet denser fabric with smaller hook
- Match support color closely
- Add an intermediate lining layer
- Use matte woven or knit support instead of shiny nonwoven
- Shift support farther from visible edge
Problem: The piece feels stiff and lifeless
Causes
- Support too heavy
- Too many anchor stitches
- Abrupt support edge
- Crochet fabric itself already very dense and thick
Fixes
- Replace one heavy layer with two lighter graded layers
- Remove some internal tacks
- Round and stagger support edges
- Restrict support to the actual structural zone
Problem: Bubbling or rippling between crochet and support
Causes
- Differential stretch
- Perimeter-only anchoring on a flexible piece
- Support cut without regard to grain or shape
Fixes
- Add discreet interior tacks
- Use knit support for curved/stretch zones
- Recut woven support on the appropriate grain or slight bias where needed
- Reblock crochet before attachment
Problem: Edges look bulky
Causes
- Support extends fully into seam turn
- Too many layers stacked at edge
- Crochet edging too heavy for thickness beneath
Fixes
- Trim support back 1/4 in / 6 mm from edge
- Grade layers
- Use finer yarn or simpler edge finish at perimeter
Problem: Brim or panel still droops
Causes
- Yarn weight too heavy for support choice
- Structural zone too narrow
- Support selected for drape, not spring
- Piece under load beyond intended use
Fixes
- Increase support width, not just thickness
- Switch to a springier material such as horsehair canvas for specific zones
- Reduce panel size or yarn weight
- Add secondary support path, such as facing, wire, or grosgrain in edge casing if appropriate
Problem: Washing distorted the piece
Causes
- Yarn and support shrank differently
- Fusible adhesive softened or detached
- Support absorbed water weight and dried misshapen
Fixes
- Preshrink support materials where possible
- Use removable inserts for washable items
- Reblock with internal template
- For next version, prioritize sew-in supports over fusibles
Design variations and advanced strategies
Once you understand the basic mechanics, you can get more sophisticated.
Layered fiber strategy
Pair the support fiber to the crochet fiber for hand, then use a second hidden fiber for function.
Example:
- Crochet outer in wool
- Soft wool or cotton underlayer for tactile compatibility
- Narrow horsehair canvas only at edge for spring
This creates support that feels natural rather than foreign.
Bias-cut support for curves
A collar or rounded cuff can benefit from woven support cut on the bias or partial bias. This gives enough conformity to the curve while retaining more body than a knit interfacing.
Organza as invisible stabilizer
Silk organza or polyester organza can be useful in fine crochet when you need crispness without bulk. It is especially nice in lightweight collars or garment edges. Use with caution in open stitches because translucency can still be visible if colors mismatch.
Facings as structure
Instead of thinking “add interfacing to crochet,” think “build an internal facing system.” A crochet outer paired with a sewn facing gives you:
- hidden seam finishes,
- support placement control,
- cleaner edge turns,
- and easier replacement or repair later.
This is one of the most elegant approaches for collars, front bands, and cuffs.
Removable inserts
For hats, belts, and some bags, a removable insert is practical and underrated.
Options include:
- thin plastic canvas cut smooth and enclosed,
- washable foam inserts,
- shaped felt,
- buckram templates,
- layered interfacing packets.
If the insert can come out before washing, you dramatically widen your yarn and support options.
Combining crochet density gradients with interfacing gradients
You do not have to rely on the support layer alone. You can also change the crochet itself.
For example, in a brim:
- Outer edge: slip stitch or waistcoat stitch for maximum firmness
- Middle zone: single crochet
- Inner zone: half double crochet in third loop for softer bend
Then pair that with graded support underneath. This is often more elegant than brute-force stiffening.
Edge transitions that look polished
A support system succeeds or fails at the edge.
Good edge strategies
- Turned fabric facing hidden under crochet edge
- Slip-stitched crochet facing enclosing support
- Reverse single crochet (crab stitch) to firm edge without bulk
- I-cord style applied edge if thickness is acceptable
- Narrow sewn binding in matching fabric for belts and bag flaps
Avoid
- letting raw nonwoven edges float loose inside open crochet,
- thick support cut right to a curved edge,
- bulky crochet borders over already thick seam allowances.
A note on swatching for real life, not fantasy
For structured crochet, one decorative swatch is not enough. Make ugly engineering swatches. Bend them, crush them in a bag, pin them to a dress form, wear them around the house, and if the final item will be washed, wash them exactly that way.
I recommend labeling mini samples with:
- yarn fiber
- hook size
- stitch
- support type
- support layers
- anchoring method
- wash result
You will learn faster from four disciplined test swatches than from one whole failed brim.
Takeaways: how to get support without cardboard feel
The heart of successful crochet interfacing is not maximum stiffness. It is targeted structure with graceful transitions.
If you remember only a few principles, keep these:
- Start with a crochet fabric that is already fairly stable.
- Match support type to the job: woven for tailored body, knit for controlled flexibility, specialty supports for spring or sculptural needs.
- Build stiffness gradients rather than one hard, abrupt insert.
- Anchor enough to prevent shifting, but not so much that the crochet loses loft and hand.
- Plan care compatibility before you cut anything.
- Support load paths and stress zones, not just visible edges.
- Swatch with the actual yarn, actual hook, actual support, and actual washing method.
When done well, interfacing in crochet is almost invisible in the finished object. The brim simply holds. The cuff stays crisp. The collar frames the face. The panel projects exactly enough. The bag looks substantial rather than floppy. And perhaps most satisfying of all, the structure feels like it belongs to the crochet instead of fighting it.
That is the real aim: not turning crochet into cardboard, but giving soft fabric a hidden skeleton refined enough to hold form while still feeling handmade, touchable, and alive.