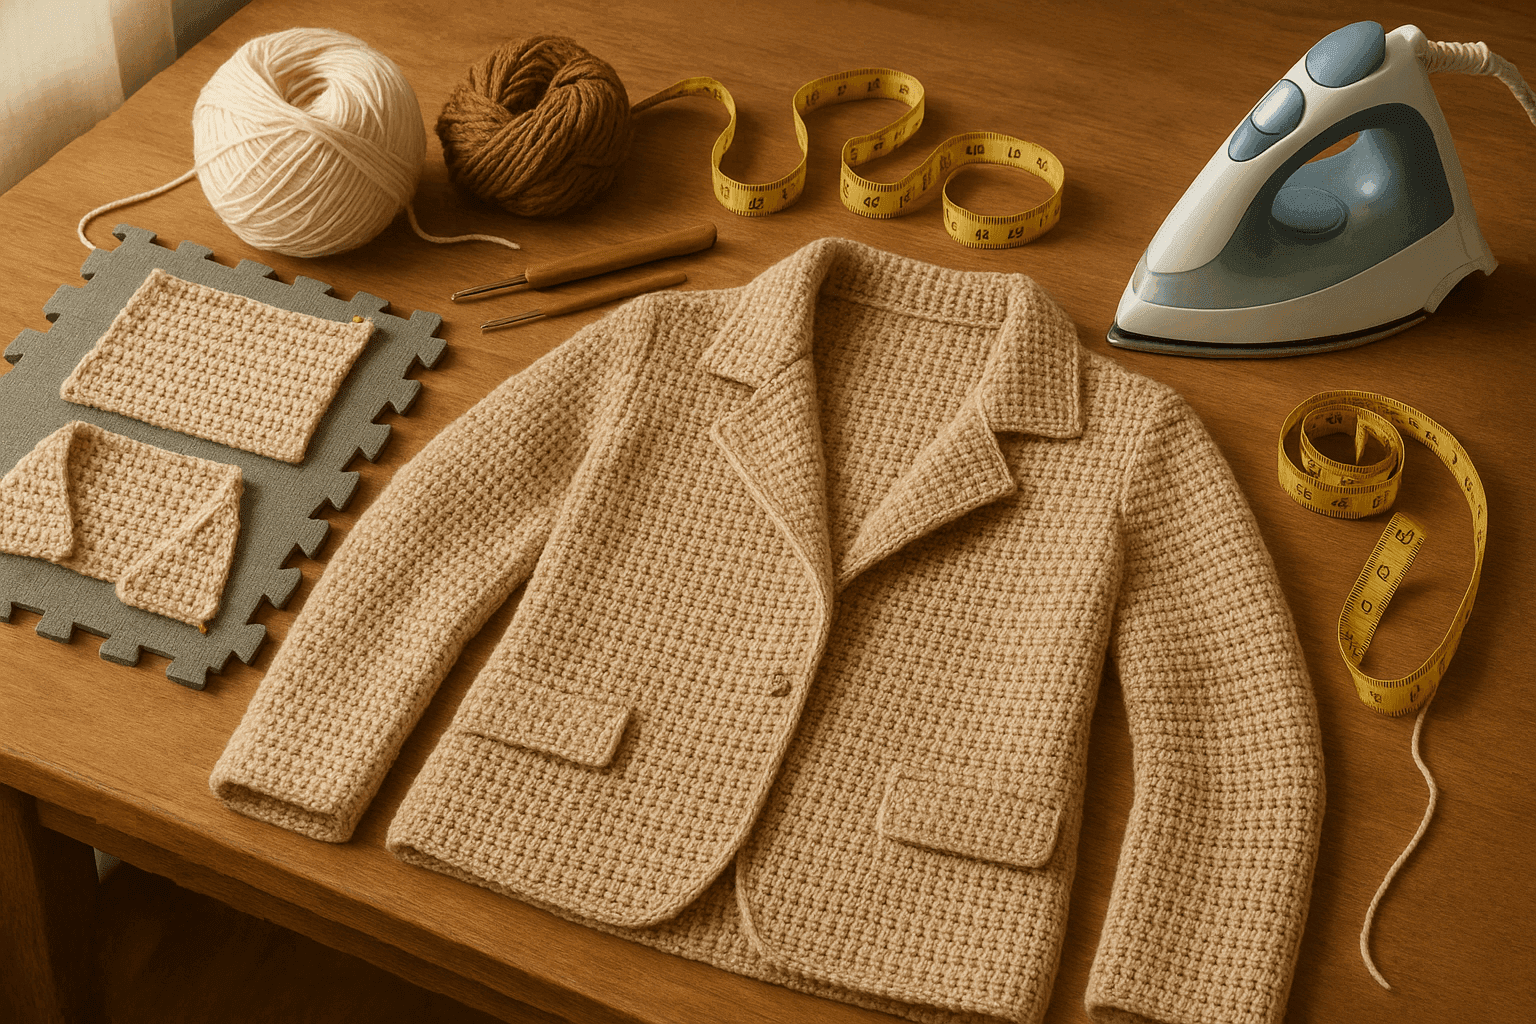
There’s a particular moment in garment crochet that almost every ambitious maker reaches eventually: the body of the piece is working beautifully, the shaping is flattering, the stitch pattern is behaving, and then you reach the collar or front opening and think, now how do I make this look intentional instead of floppy? You fold back a lapel and it springs outward. You add a collar and it buckles at the neckline. You crochet a facing and it either rolls to the outside or hangs away from the body. What looked elegant in your sketch suddenly behaves like fabric that has forgotten it was supposed to be tailored.
That moment is not a sign that crochet “can’t do” crisp garment details. It is simply the point where we stop thinking only in terms of rows, rounds, and stitch counts, and start thinking like both a crocheter and a cloth engineer. Collars, lapels, facings, and notch areas depend on turn-cloth control: the amount of material required to fold neatly around an edge without collapsing, straining, flaring, or fighting the wearer.
In sewing, turn of cloth is often managed through pattern trimming, undercollar reduction, interfacing, clipping, grading seams, and choosing fabrics with appropriate body. In crochet, we usually do not have a woven seam allowance doing that work for us. Instead, we must build the behavior directly into the crochet fabric through stitch structure, fiber choice, density, edge reinforcement, strategic shaping, and finishing methods.
That is the good news: once you understand what makes crochet fold cleanly, you can draft tailored details without relying on a knit pattern or a sewing pattern as a crutch. You can create shawl collars that sit against the neck, notched lapels with a visible break line, front facings that support button bands, and fold-under edges that read as polished rather than improvised.
This article is a deep dive into that process. We’ll look at what turn-cloth means in crochet, how stitch compression affects folds, how to plan notch and lapel geometry, what fibers hold memory, when to use interfacing or hidden support, and how to finish edges so they keep their shape in wear. I’ll also walk you through a practical method for drafting a sample tailored front with a collar, lapel, and facing—complete with hook sizes, yarn recommendations, stitch counts, checkpoints, and fixes.
The context: why tailored crochet is harder than it looks
Crochet fabric behaves differently from woven cloth and differently from knitted fabric. It tends to be:
- thicker for its gauge
- more directionally textured
- more elastic in some stitch patterns than others
- more prone to edge distortion
- less naturally eager to crease into a sharp fold
That thickness is exactly what causes trouble at a collar roll line or lapel break. When fabric folds over on itself, the outer layer must travel a longer distance than the inner layer. In sewing, a tailor accounts for that by making one layer slightly smaller, shaping the underlayer, or compressing seam allowances. In crochet, if both sides of a folded section are worked with identical stitch counts, identical gauge, and identical density, the fold often has nowhere to go. The inside compresses awkwardly, the outside strains, and the whole piece either flares or flips.
The solution is not just “go down a hook size” or “block harder,” though both may play a role. The real solution is to engineer three things:
- A fold line with controlled flexibility
- A visible side and an under side with slightly different behavior
- Edges that remember where they belong
Once you see crochet tailoring in those terms, many design decisions become easier.
Understanding turn-cloth in crochet terms
Let’s define turn-cloth in practical maker language.
When a crochet lapel folds back, the fabric on the outside of the fold needs:
- enough length to wrap smoothly
- enough body to look crisp
- not so much bulk that it creates a ridge
The fabric on the inside of the fold needs:
- slight compression
- less visual dominance
- support so it does not push the fold back open
If you work a collar or facing as a completely symmetrical piece and simply expect it to fold because you tell it to, you’re asking the yarn to invent geometry it has not been given.
In crochet, turn-cloth control usually comes from a combination of:
- smaller stitches on the underlayer
- tighter gauge along the inside of the fold
- short-row shaping to add outer length or remove inner length
- slip-stitch or single-crochet fold lines for memory
- joined facings that subtly anchor the front edge
- blocking and steam-setting appropriate to fiber
- optional hidden support, such as ribbon, twill tape, lightweight fusible support applied to a sewn-in fabric facing, or hand-stitched organza/lining pieces
Notice that I said support can be optional. Crochet can absolutely stand on its own, but there is no virtue in refusing a discreet finishing aid when your design calls for a genuinely tailored effect.
Choosing the right yarn and hook before you draft anything
If you want a crisp collar or lapel, the yarn decision matters as much as the shaping.
Best fiber behaviors for tailored crochet
Wool or wool blends
- Excellent memory
- Steam- and block-responsive
- Ideal for structured jackets, blazers, coatigans, and shawl collars
- Best choice for sharp fold lines with some spring
Cotton or cotton blends
- Crisp stitch definition
- Less elastic than wool
- Good for summer jackets and shirt-style collars
- Can sag if worked too openly or too heavily
Linen blends
- Beautiful structure after washing and wear
- Initially stiff, then relaxes
- Great for architectural facings and bands
- Best when paired with a dense stitch and careful swatching
Acrylic
- Can work, but memory varies widely
- Often benefits from denser gauges and reinforcement
- Steam must be used carefully to avoid over-killing texture
Silk, bamboo, alpaca-heavy blends, drapey superwash blends
- Usually poor candidates for crisp tailored lapels unless heavily structured
- Better for soft waterfall fronts than sharp notches
Yarn weight recommendations
For most crisp garment details, these are the most manageable weights:
- DK (light 3): refined, less bulky folds, ideal for precise shaping
- Worsted/aran (4): easier to handle, but bulk must be managed carefully
- Sport (2): elegant and tailoring-friendly, especially for fine-gauge garments
Bulky yarn can create dramatic collars, but true notched lapels become physically thick very quickly. If your goal is “tailored,” not “cozy oversized,” stay between sport and worsted.
Hook size recommendations
For a polished, tailored fabric, choose a hook 0.5 mm to 1.5 mm smaller than what you might choose for a relaxed drapey garment in the same yarn.
General starting points:
- Sport yarn: 3.0–3.5 mm hook
- DK yarn: 3.5–4.5 mm hook
- Worsted yarn: 4.0–5.0 mm hook
For undercollars, facings, or fold lines, it is often useful to drop another 0.25–0.5 mm in selected sections.
Example:
- Main body in DK wool: 4.0 mm
- Facing and undercollar sections: 3.5 mm
- Fold-control slip-stitch row: 3.25–3.5 mm if your hands can comfortably manage it
Stitch structure: which stitches make crisp details possible?
Not all crochet stitches fold equally well.
Most useful stitches for tailored sections
Single crochet (sc)
- Dense
- Stable
- Good for facings, undercollars, and reinforcing edges
- Can feel bulky if used exclusively in heavier yarns
Half double crochet (hdc)
- Useful middle ground
- Slightly softer than sc
- Works well for body panels when paired with denser edging structures
Linked crochet stitches
- Excellent for reducing gaps and improving cloth-like behavior
- Linked dc or linked hdc can create a very handsome tailored surface
Slip stitch fabric / waistcoat stitch / center single crochet
- Very stable and refined
- Ideal in selective areas
- Time-intensive and can become too stiff if overused
Tunisian simple stitch or knit stitch hybrids
- Not standard crochet in everyone’s definition, but very effective for facings and collars
- Worth considering if you like structured surfaces
Stitches to use carefully in tailored details
Double crochet (dc)
- Great for garment bodies, but often too tall and springy for crisp fold lines unless worked densely
Lace, mesh, and openwork
- Beautiful, but difficult to force into a sharp tailored fold without support
Very textured post-stitch fabrics
- Can fight fold direction and add bulk at lapels
A good rule: the more important the fold or edge, the shorter and denser the stitch should become.
Edge memory: the hidden ingredient
If a collar or lapel refuses to stay where you want it, the issue is often not the shape but the lack of edge memory.
Edge memory means that a line in your crochet fabric has been built to behave consistently as:
- a fold
- a roll line
- a front edge
- an underturned edge
You can create edge memory with:
- back-loop-only or front-loop-only rows placed strategically
- a row of slip stitches to compress a fold area
- working one side at a smaller gauge
- surface crochet chain reinforcement
- sewn-in tape or ribbon on the wrong side
- blocking a crease into protein fibers
Think of the fold line as a hinge. If there is no hinge, the piece will improvise one, usually badly.
Designing collars, lapels, and facings without a sewing pattern
Here is the mindset shift: rather than copying a sewing pattern piece, begin with the finished lines on the body.
You need to decide:
- Where the front opening sits
- Where the lapel begins to break or fold back
- Whether the collar is grown-on, separately worked, or built from the neckline upward
- Whether the facing is integral or applied
- How much depth the facing needs to stabilize the front
Core measurements to take
For a cardigan, jacket, or tailored crochet coat front, measure:
- Center front neck to desired hem
- Shoulder to bust level
- Bust to waist and waist to hip if fitted
- Front neck drop
- Width of desired lapel at widest point
- Distance from neckline to break point
- Back neck width
- Total neckline length after shoulders are joined
Recommended facing depth
A crochet facing generally needs more substance than a sewn woven facing because the fabric is thicker and more mobile.
Good starting depths:
- Lightweight sport or DK garment: 1.5 to 2.5 in / 4 to 6.5 cm
- Worsted tailored garment: 2 to 3 in / 5 to 7.5 cm
Narrower than this, the facing may flip outward. Much wider than this, it can become bulky unless reduced in gauge.
A practical build: sample tailored crochet front with lapel, notch suggestion, and facing
Let’s draft a practice swatch that teaches the engineering before you commit to a full garment.
We’ll make a right front panel sample with:
- lower body section
- front opening edge
- lapel break line
- shallow notch area
- collar extension
- attached facing
Materials
- DK wool or wool-blend yarn: approximately 100–150 g for sampling
- Main hook: 4.0 mm
- Smaller hook: 3.5 mm
- Tapestry needle
- Stitch markers
- Steam iron or steamer
- Measuring tape
- Optional: 1/4 in to 3/8 in (6–10 mm) cotton twill tape or petersham ribbon
Target gauge
Using 4.0 mm hook in linked hdc or firm hdc fabric:
- 18 sts x 14 rows = 4 in / 10 cm
Using 3.5 mm hook in sc for facing/undercollar sections:
- 20 sts x 18 rows = 4 in / 10 cm
These are sample gauges, not universal truths. Swatch your own fabric and write down both stitch and row gauge.
Why two gauges?
Because the body needs enough suppleness to wear comfortably, while the facing and fold-control areas need more compression. This difference is one of the cleanest ways to engineer turn-cloth in crochet.
Step-by-step method
Step 1: Crochet the body panel foundation
With 4.0 mm hook, chain 41.
Row 1: Starting in 2nd chain from hook, work 1 hdc in each ch across, 40 sts.
Rows 2–24: Ch 1, turn, hdc blo across, 40 sts.
This gives you a stable but slightly flexible body panel about 8.75–9 in / 22–23 cm wide, depending on your gauge.
Why hdc blo? It creates a subtle horizontal grain and encourages cleaner vertical hanging than ordinary loose hdc. It also gives enough flexibility to shape the lapel area later.
Step 2: Establish the front opening edge reinforcement
At the end of Row 24, do not fasten off.
Rotate work 90 degrees and crochet evenly up the front opening edge.
Using 4.0 mm hook:
- Work approximately 1 sc per row edge, placing 24 sc evenly up the edge.
- At top corner, work 2 sc into the corner.
- Fasten off.
Now switch to 3.5 mm hook.
Join yarn at lower front edge.
Reinforcement Row 1: Slip stitch loosely but evenly in back loop only of each sc up the front edge, 24 sts, 2 sts at corner if needed.
This slip-stitch line compresses the edge and begins creating memory. Do not yank; a strangled slip-stitch row will pucker.
Step 3: Mark the break point and lapel line
Lay the panel flat vertically.
Place markers:
- Marker A: 6 rows down from top edge = approximate neckline zone
- Marker B: 14 rows down from top edge = suggested lapel break point
Between the top edge and Marker B is where your lapel/collar shaping will matter most.
Step 4: Build a grown-on extension for lapel and facing
With right side facing, using 4.0 mm hook, join yarn at lower front edge.
Row 1 (extension row): Ch 1, work 24 sc evenly along reinforced front edge, then chain 10 for extension. Turn. Total working width for next row = 34 sts.
The first 24 stitches align with the garment edge. The extra 10 stitches form the initial lapel/facing extension.
Rows 2–8: Ch 1, sc across all 34 sts.
This creates a band attached to the body edge. Because sc is denser than the body, it already behaves more like a facing.
Step 5: Define the fold line
Now we create a hinge between garment front and facing/lapel extension.
Row 9: Ch 1, work 24 sc through both loops across the section attached to the garment edge, then work 10 sc blo across the extension only.
This change of loop placement subtly tells the extension where to fold. Another option is the reverse—working the extension through front loops only on one row and both loops thereafter. Test both in swatch form.
Rows 10–12: Ch 1, 34 sc across.
After Row 12, finger-press a fold line between stitch 24 and stitch 25. You should begin to see the extension wanting to fold inward or outward predictably instead of collapsing randomly.
Step 6: Shape the lapel so the outer edge has more travel than the inner edge
This is the heart of turn-cloth control.
If the entire extension remains a rectangle, it may fold, but it won’t necessarily roll elegantly. We want a little extra length on the outer lapel edge compared with the edge nearest the garment body.
We can do that with short rows.
Short-row set A
Row 13: Ch 1, sc in first 24 sts, hdc in next 10 sts. Turn.
Row 14: Ch 1, hdc in first 8 sts of extension only, turn. (Leave 2 sts unworked at outer edge.)
Row 15: Ch 1, hdc across 8 sts, then sc across 24 body-edge sts, total 32 worked sts. Turn.
Row 16: Ch 1, sc across 24 sts, hdc across 10 sts. Turn.
What happened here? We gave the outer lapel edge a slight shaping opportunity without thick obvious wedges. The hdc in the extension adds row height compared with the sc near the body edge.
Short-row set B
Repeat a gentler version once more.
Row 17: Ch 1, sc 24, hdc 10. Turn.
Row 18: Ch 1, hdc 6 in extension only, turn. (Leave 4 sts unworked.)
Row 19: Ch 1, hdc 6, then hdc/sc transition as needed across remaining 28 sts. Turn.
Row 20: Ch 1, sc 24, hdc 10.
The exact stitch transitions are less important than the principle: the visible outer lapel edge gets slightly more length and softness, while the inner fold zone remains controlled.
Step 7: Create a collar rise at the top
A collar that sits against the back neck usually needs more depth near the neckline than the lapel edge alone provides.
At the top of your extension, work additional rows only across the upper section.
With right side facing and top at neckline area:
Join yarn at top corner.
Collar Row 1: Work 12 sc across top edge of extension. Turn.
Collar Rows 2–6: Ch 1, sc across 12 sts.
Collar Row 7: Ch 1, 2 sc in first st, sc across to last st, 2 sc in last st, 14 sts.
Collar Rows 8–10: Ch 1, sc across 14 sts.
This small top extension mimics the rise needed for a collar to hug the neckline instead of flattening away from it.
Step 8: Build the underfacing in a smaller gauge
Now we stabilize the inside.
Using 3.5 mm hook, work a separate facing strip to match the front extension from hem to break point and up into collar if desired.
Foundation: Chain 9.
Facing Row 1: Sc in 2nd ch from hook and across, 8 sts.
Rows 2–20: Ch 1, turn, sc across 8 sts.
Check the strip against the inside fold section. It should be slightly shorter than the corresponding lapel/facing area by about:
- 2–4% in length, or
- roughly 1/4 to 3/8 in / 0.6 to 1 cm over 10 in / 25 cm
This subtle reduction is the crochet equivalent of undercollar/facing control. If it is much shorter, the front will pull. If it is identical, you lose the turn-cloth advantage.
Whip stitch or mattress stitch this facing to the wrong side along the inner edge and fold line, easing the outer crocheted extension over it.
Stitch-count checkpoints
When tailoring crochet, counts matter, but so do measurements. Use both.
Key checkpoints in the sample:
- Body width: 40 sts
- Reinforced front edge: 24 sc up the edge
- Extension width: 10 sts added, total extension row = 34 sts
- Collar mini-extension: 12 sts, later 14 sts
- Separate underfacing strip: 8 sts wide
If your gauge differs, do not cling to these exact numbers. Preserve the ratios:
- Facing width = about 20–30% of front panel width in the upper section
- Underfacing slightly smaller than outer facing/lapel layer
- Collar rise built with added depth at top back/neck area
Engineering a notch without a sewing template
A true classic notched lapel in crochet is possible, but for many garments a suggested notch or soft notch gives a cleaner result than trying to recreate every angle of a woven blazer.
Why? Because crochet thickness makes sharp inward corners bulky.
The easiest crochet notch strategy
Use a change in fold direction plus a stepped or tapered edge rather than an aggressively clipped angle.
For example:
- Work the front edge straight up to the break point.
- Begin lapel widening above that point using row-end increases.
- Build collar extension from the neckline zone.
- Allow the visual notch to appear where collar and lapel meet rather than forcing a deep V cut.
If you want a more defined notch
Use short rows and edge decreases.
Sample approach:
At break point row:
- Work to 3 sts before outer edge, turn.
- Next row, decrease 1 st at outer edge.
- Repeat over 3–4 rows.
Then at collar section:
- Add 1 st at neckline-side edge every other row 2–3 times.
This gives the impression of a notch angle while avoiding a severe hard corner.
Interfacing choices for crochet: yes, sometimes you should
There is a strange myth in yarn circles that adding support materials somehow makes a project less legitimate. I disagree entirely. Tailoring has always used internal structure.
Good support options
Twill tape
- Excellent along front openings and fold lines
- Prevents vertical stretching
- Best hand-sewn to wrong side with tiny catch stitches
Petersham ribbon or grosgrain
- Helpful for roll lines and neckline edges
- Choose soft, flexible ribbon that can curve if needed
Silk organza strips
- Superb hidden support for fine garments
- Lightweight, stable, and almost invisible
Fabric facing backed with lightweight fusible interfacing
- Very effective in mixed-media crochet garments
- Best when you are comfortable hand-sewing a fabric facing behind the crochet edge
When to add support
Add support when:
- the yarn is soft or drapey
- the front opening is long
- buttons add stress
- the collar/lapel should sit sharply for actual wear, not just photos
- the garment is larger and therefore heavier
When not to overdo it
Avoid over-structuring when:
- the garment is meant to remain soft and relaxed
- the yarn already has strong memory
- the crochet fabric is thick enough that extra support creates a board-like edge
Blocking and finishing: where tailored results are won or lost
If you skip finishing, you haven’t really evaluated the design yet.
Blocking protein fibers
For wool and wool blends:
- Wet block or steam block lightly
- Shape lapel fold and collar roll by hand
- Let fully dry in position
You can finger-press the fold first, then hover steam, then cool it in place.
Blocking cotton and linen
- Wet block firmly
- Smooth with hands into exact geometry
- Pin fold lines lightly rather than sharply creasing unless the design requires a hard fold
Acrylic caution
Steam can permanently alter acrylic. Test first. You want to relax and set, not flatten all life out of the stitch structure.
Finishing sequence I recommend
- Join shoulders
- Measure actual neckline after joining
- Add collar/facing pieces
- Reinforce edges if needed
- Block entire front assembly
- After drying, hand-tack fold lines invisibly in 2–4 strategic places if necessary
Those tiny tack points near the break line or collar stand can transform a fussy crochet lapel into a reliable one.
Common mistakes and how to fix them
1. The lapel flips outward instead of rolling back cleanly
Cause: facing too wide or too loose; no fold memory; underlayer not controlled.
Fix:
- Rework facing in smaller hook size
- Add slip-stitch reinforcement along fold line
- Sew in twill tape at inner fold edge
- Reduce underfacing length slightly
2. The collar stands away from the neck
Cause: insufficient collar rise; neckline edge too stretched; collar attached at equal length to neck when it actually needed shaping.
Fix:
- Add 2–4 short rows at back-neck section
- Remove and reattach with slight easing
- Reinforce neckline seam with tape or surface slip stitch
3. The front edge waves or flares
Cause: too many edge stitches picked up; extension worked too loosely; yarn too drapey for the structure.
Fix:
- Pick up fewer stitches: try 3 sts for every 4 rows instead of 1 per row in taller row gauges
- Drop hook by 0.5 mm for edging
- Add a firm sc or slip-stitch pass to compress the edge
4. The fold feels bulky and lumpy
Cause: yarn too heavy; both layers same density; too many stitches at the turn.
Fix:
- Use a narrower facing
- Work underfacing in finer gauge
- Substitute sc for hdc/dc in fold-critical zones
- Consider sport or DK instead of worsted for future versions
5. The notch area collapses
Cause: trying to create too sharp an inside angle in thick crochet.
Fix:
- Redesign as a soft notch or implied notch
- Reinforce angle with hidden stitches on wrong side
- Use short rows rather than abrupt corner shaping
6. The button band pulls the lapel off line
Cause: button placement ignored the roll line; front edge stretched under load.
Fix:
- Place first button below break point
- Reinforce button band with ribbon or tape
- Work buttonholes in dense sc rows rather than open chain spaces alone
Drafting variations for different garment styles
Once you understand the engineering, you can apply it across styles.
Shirt-style crochet collar
Best for cotton, linen blends, or crisp wool.
Use:
- Dense sc or linked hdc body near neckline
- Separate undercollar worked 5–10% smaller
- Firm edge reinforcement
- Moderate points rather than very long collar tips
Shawl collar
Most forgiving style in crochet.
Use:
- Gradual increases along front band
- Short rows at back neck for lift
- Smaller-gauge facing underneath if extra control is needed
Soft notch lapel cardigan
Excellent entry point for tailored effects.
Use:
- Front band extension worked in sc
- Break point marker
- Outer-edge short rows for lapel turn
- Collar extension from neckline only
Double-breasted coatigan lapel
Requires significant structure.
Use:
- Wool yarn with memory
- Sport or DK rather than heavy worsted if possible
- Hidden tape support along both front edges
- Underfacing and undercollar worked smaller
- Thorough steam shaping
A note on swatching like a garment designer
For tailored crochet, do not make only a flat 4-inch square and call it done. Make a behavioral swatch.
Your swatch should include:
- body fabric
- edge pickup section
- facing layer
- one fold line
- one short-row area
- blocked and unblocked comparison
Then ask:
- Does it fold where I want?
- Does the edge grow?
- Does the underlayer push back?
- Does steam help or hurt?
- Can this fiber remember a lapel break after handling?
That swatch will tell you more than pages of pattern notes.
Translating this into a full garment plan
If I were drafting a crochet jacket with crisp front tailoring from scratch, my order would be:
- Choose fiber with memory
- Swatch body fabric and facing fabric separately
- Draft front and back body shapes in simple geometry first
- Crochet fronts to shoulder and neckline
- Join shoulders
- Measure actual neckline and front opening lengths
- Mark break point on body, not on paper fantasy
- Build or attach lapel/collar extension
- Add underfacing at smaller gauge
- Reinforce edges where needed
- Block before judging the final silhouette
That order matters. Many problems come from trying to pre-decide a collar piece before the front opening and neckline have shown you their true measurements in crochet.
Precision guidelines to keep near your workbasket
Here are the practical numbers I return to again and again:
- Use a hook 0.5–1.5 mm smaller than drape-oriented gauge for tailored fabrics
- Make facings about 1.5–3 in / 4–7.5 cm deep depending on garment scale
- Work underfacings 2–4% smaller in length than the outer layer
- Pick up edge stitches conservatively; for many row gauges, 3 stitches per 4 row ends is a better start than 1:1
- Add collar lift with 2–6 short rows or a small expanded back-neck section
- Reinforce folds and front edges before declaring a design failure
The bigger takeaway: crisp crochet comes from engineering, not wishful thinking
The most satisfying thing about learning turn-cloth control in crochet is that it changes how you see the craft. You stop hoping a collar will behave because it “looks about right,” and you start giving the fabric the information it needs.
A lapel sits cleanly because the outer layer has enough travel. A facing stays hidden because the inner layer is controlled. A collar hugs the neck because the back section has rise and memory. A front edge hangs straight because you managed stretch before it happened.
That is tailored crochet.
And once you grasp it, you are no longer limited to soft cardigans with simple bands. You can create garments with poise: jackets with soft notches, shirt collars with intention, facings that support closures, lapels that frame the face instead of collapsing into rumples.
If you remember nothing else, remember this: crochet can absolutely make crisp folded details, but the fold must be designed, not merely suggested. Control the gauge. Control the underlayer. Control the edge. Then finish like you mean it.
That is how a handmade crochet garment moves from “clever construction” into “true tailoring.”