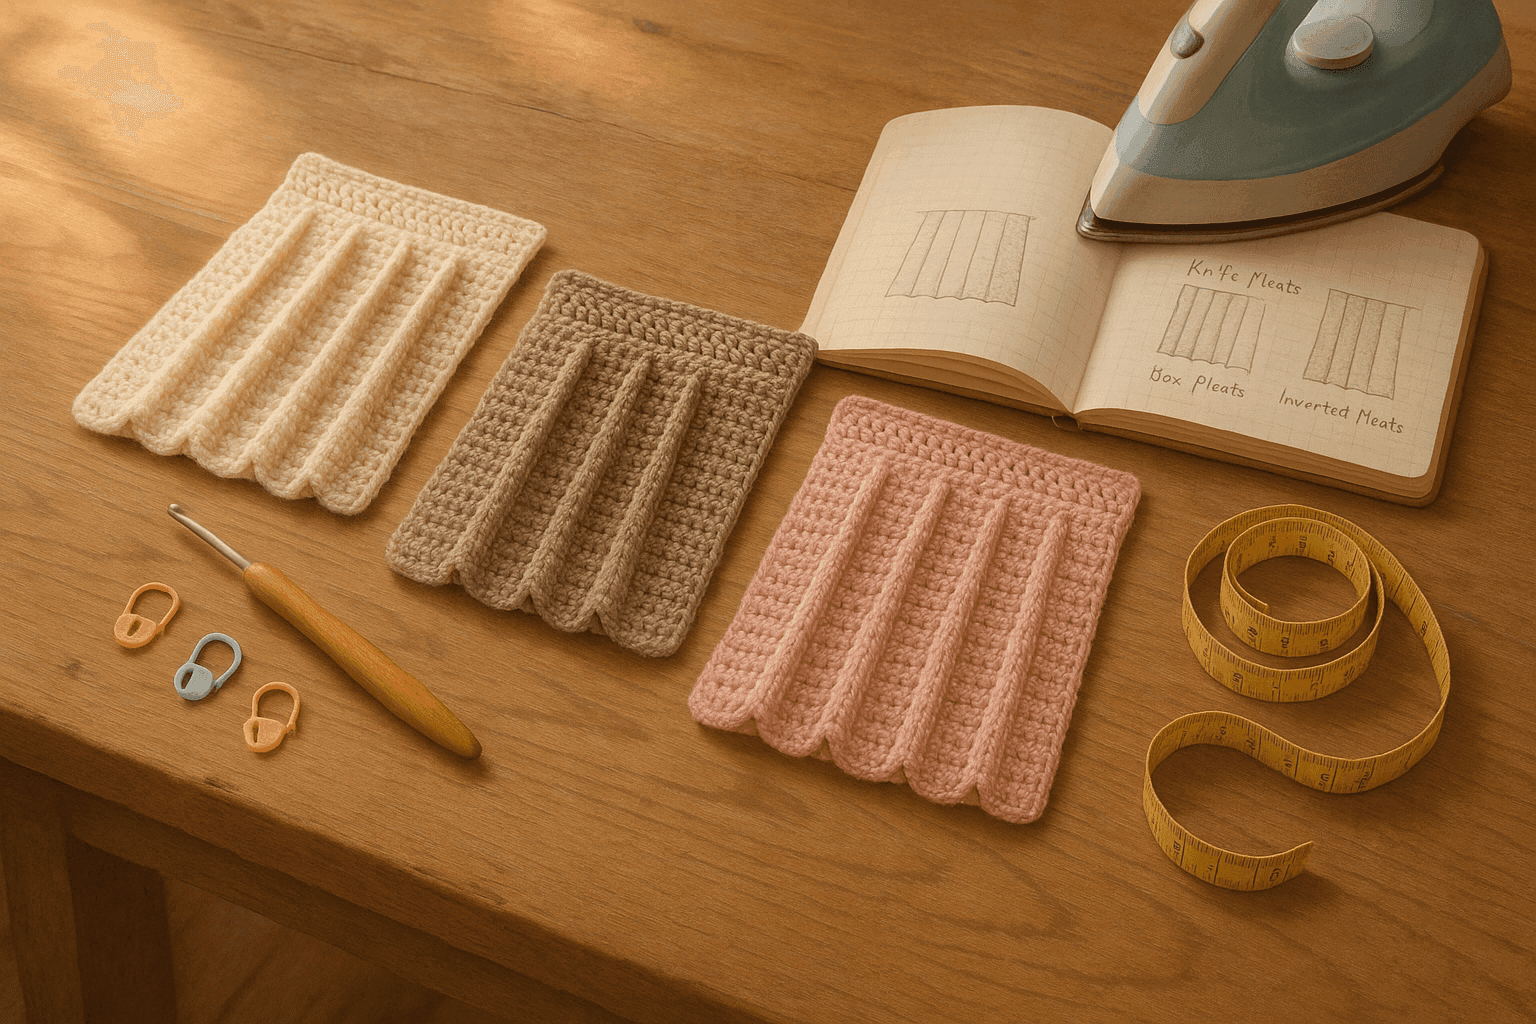
There is a particular moment in garment making when crochet stops behaving like a line drawing and starts behaving like architecture. You fold a swatch in your hands, pinch two ridges together, let the extra fabric fall behind, and suddenly you are not just making stitches anymore—you are managing volume, directing light, controlling movement, and asking yarn to remember a shape it did not naturally choose. That is the moment pleats become fascinating.
Many crocheters first approach pleats as decoration: a gathered ruffle, a cinched section, a tuck caught down with a seam. Those techniques have their place, and they can be beautiful. But true pleat engineering is something deeper. It treats the crocheted fabric as a structural textile with planned fold lines, hidden excess, calibrated density, and intended behavior in motion. A successful pleat is not simply extra fabric bunched and persuaded. It is a repeatable geometric system.
If you have ever made a skirt that looked crisp on the hanger but relaxed into a soft tube after an hour of wear, or a cuff that flared beautifully until blocking erased the fold lines, you already know the challenge. Crochet is thicker than woven cloth, more elastic in some fibers, more friction-prone in others, and its stitch topology creates its own ideas about drape. Pleats in crochet therefore require decisions at every level: stitch choice, gauge, row direction, fold anchors, fiber content, finishing method, and end use.
This guide is about designing pleats as true fabric engineering. We will look at knife pleats, box pleats, and inverted pleats; how to build them through stitch mapping, row or round orientation, short-row wedges, and post-stitch hinges; how wool, cotton, linen, silk, and synthetics differ in fold memory; and how gauge, steam, lining, topstitching, and weighted hems change whether a pleat springs open, collapses softly, or holds a graphic edge. Along the way I will give practical stitch counts, swatching formulas, and the common failure points that matter most in skirts, sleeves, cuffs, bags, and sculptural garments.
Thinking Like an Engineer: Pleats as Stored Width
At the simplest level, a pleat is stored width. You crochet more fabric than is visible from the front, then direct that hidden width to the back or to alternating sides using fold lines. The visible panel stays narrower than the actual worked stitch count. The extra width becomes depth, swing, structure, and release.
This leads to the first design principle:
The front-facing width of a pleated section is only part of the total stitch count.
When designing, separate these measurements:
- Finished visible width: what you want to see across the front surface
- Pleat depth: how much fabric folds away
- Total worked width: visible width plus all hidden underlayers
- Return width: the segment that folds back to create the underlayer
For a classic knife pleat, one repeat often consists of:
- 1 visible face section
- 1 underfold section that disappears behind it
For a box pleat, one repeat often consists of:
- left return
- visible center
- right return
For an inverted pleat, one repeat often consists of:
- visible left panel
- hidden center depth opening underneath
- visible right panel meeting at center front fold
The exact ratio depends on the look you want. In crochet, unlike in woven fabric, bulk matters. Deep pleats in chunky yarn become heavy and rounded; shallow pleats in fine yarn can look beautifully tailored.
A useful starting ratio for many wearable crochet pleats is:
- Knife pleat repeat: visible face 8 sts, return/depth 8 sts = 16 sts total per pleat
- Box pleat repeat: return 6 sts, visible center 8 sts, return 6 sts = 20 sts total per pleat
- Inverted pleat repeat: visible left 6 sts, hidden depth 8 sts, visible right 6 sts = 20 sts total per pleat
These are not magic numbers. They are practical medium-depth proportions for DK or sport yarn worked in a relatively firm fabric.
The Big Variables That Decide Whether a Pleat Works
Before we get into the pleat types, we need the variables that control behavior.
1. Gauge and fabric density
Pleats need enough body to maintain fold lines, but enough flexibility to fold cleanly. If the gauge is too loose, folds blur and slump. If it is too tight, pleats become thick and resistant, especially in cotton.
As a general guideline:
- Lace/light fingering pleats: ideal for soft release and elegant drape, less ideal for permanent crispness without support
- Sport/DK pleats: often the sweet spot for wearable structure
- Worsted pleats: useful for outerwear, bags, bold cuffs, sculptural sleeves
- Bulky pleats: more architectural than tailored; excellent for statement work, rarely subtle
For dense pleat fabrics, aim for a hook 0.5 to 1.5 mm smaller than the yarn label’s drape-oriented recommendation.
Examples:
- Sport yarn often labeled for 3.5–4 mm hook: try 3 mm for pleat swatches
- DK yarn labeled for 4–4.5 mm: try 3.5 mm
- Worsted yarn labeled for 5–5.5 mm: try 4–4.5 mm
Swatch target for garment pleats in single crochet or linked stitches:
- Single crochet in rows: about 20–24 sts and 22–28 rows over 4 in/10 cm in sport or DK
- Half double crochet or linked hdc: about 16–20 sts and 14–20 rows over 4 in/10 cm depending on yarn and hook
You are not chasing a universal gauge. You are chasing a fabric that folds with resistance and recovers after opening.
2. Stitch topology
Not all crochet stitches fold equally.
Best choices for crisp pleat engineering:
- Single crochet (sc)
- Linked single or linked half double crochet
- Waistcoat stitch for dense vertical structure
- Tunisian simple stitch if you are crossing into hybrid territory
- Front/back post stitches used selectively as hinge lines
Better for soft pleats and released folds:
- Half double crochet (hdc)
- Double crochet (dc) in fine yarns
- Mesh or filet structures supported by top fold control
For highly architectural pleats, plain dense stitches outperform lacy ones almost every time.
3. Row or round direction
Pleats can run:
- Vertically: ideal for skirts, peplums, bag bodies
- Horizontally: ideal for cuffs, sleeve heads, collars, lampshade-like forms
- Spiraled or radial: ideal for sculptural work
The orientation of rows relative to the fold line matters. Crochet stretches differently across row width than along row height. If you want pleats to open and close along stable vertical channels, often it helps to work the fabric so the fold lines run parallel to rows of stitches, not across them. But there are exceptions.
A practical rule:
- For skirt pleats, working side-to-side rows often gives precise control over pleat depth because each row travels across the entire pleat repeat and the width is counted directly.
- For cuffs and hems, working top-down or bottom-up vertical stitch columns can make fold lines read more cleanly.
4. Fiber memory
This may be the most important variable after stitch mapping. Some fibers spring back into a fold after wear. Some soften and forget. Some can be steamed into obedience; others rebel.
We will compare fibers in depth below.
5. Finishing support
Pleats in crochet often need one or more of the following:
- steam or wet blocking
- topstitching at the upper section
- internal tack-down points
- lining or underlining
- waistband stabilization
- weighted hem
If woven pleats depend on pressing and stitching to set a shape, crochet pleats deserve the same seriousness.
Pleat Type 1: Knife Pleats
Knife pleats all fold in the same direction. They are rhythmic, directional, and excellent when you want clean movement and controlled flare.
In crochet, knife pleats work especially well for:
- skirts n- peplums
- lampshade sleeves
- bag gussets
- decorative lower borders
Basic stitch map for knife pleats
Let us build a repeat in single crochet using sport or DK yarn.
Sample repeat:
- Visible face: 8 sts
- Hidden return/depth: 8 sts
- Total per pleat: 16 sts
For 6 knife pleats, chain a foundation for:
- 6 × 16 sts = 96 sts
- plus edge stitches if desired: +2 sts
- Total foundation: 98 sts
If you prefer no dedicated edge stitches, simply use 96 sts.
Method A: Flat panel with fold-set lines
- Foundation row: Work 96 sc across.
- Rows 2–10: Work sc across all 96 sts.
- Place markers every 16 sts to identify each repeat.
- Inside each repeat, place a second marker after the first 8 sts. This separates visible face from hidden return.
- Fold each repeat so the second set of 8 sts tucks behind the first 8 sts, all in the same direction.
- Steam lightly or wet block under clips to train the fold.
- At the waistband or upper edge, tack the top 1–2 in / 2.5–5 cm of each fold in place.
This is the simplest structural knife pleat: plain panel first, folds imposed second. It works best in fibers with decent memory or with lining support.
Method B: Built-in hinge using post stitches or back-loop ridges
To make the fold line more obedient, create a hinge where the pleat turns.
Try this repeat:
- 7 sc
- 1 back-loop-only sc ridge stitch
- 7 sc
- 1 front-post sc or another ridge marker stitch
Now the repeat is still 16 sts, but 2 stitches behave as fold cues.
Why this works:
- A back-loop-only ridge creates a flexible groove
- A post-stitch ridge can create a raised spine that prompts turning
- Alternating grooves and spines lets you designate mountain and valley folds
For a knife pleat, each repeat needs one dominant fold line. You can reserve one stitch as the mountain fold and let the fabric naturally collapse behind it.
Method C: Join-as-you-go knife pleats
For permanent directionality, you can fold as you crochet.
Example in sc:
- Work your base panel to the point where pleats begin.
- Mark every 16 sts.
- In the setup row, physically fold each 8-st hidden section behind the visible 8-st section.
- Work through corresponding stitches of front and folded-back layer for the upper anchoring row.
This means one anchoring row may reduce visible width while preserving hidden depth below.
For example:
- Total stitches in section: 96
- Visible width after anchoring top edge: 48 sts
This method is excellent for pleats stitched down only at the top, such as school-skirt style sections or cuff pleats.
Common knife pleat ratios
For subtle pleats:
- visible 10 sts, depth 6 sts = 16 sts total
For medium pleats:
- visible 8 sts, depth 8 sts = 16 sts total
For deep dramatic pleats:
- visible 6 sts, depth 10–12 sts = 16–18 sts total
Deeper than that, bulk often becomes the issue unless you are using fine yarn.
Pleat Type 2: Box Pleats
A box pleat is formed when two knife pleats face away from each other, creating a central visible panel and fold returns behind it on both sides. The front reads balanced and architectural.
Box pleats are wonderful for:
- centered skirt fronts
- sleeve cuffs
- bag fronts
- yokes with controlled volume
- decorative panels on coats or tunics
Basic stitch map for box pleats
Sample repeat:
- Left return: 6 sts
- Center visible panel: 8 sts
- Right return: 6 sts
- Total: 20 sts
For 5 pleats:
- 5 × 20 = 100 sts
- Add edge stitches if desired
Method A: Flat rectangle folded into box pleats
- Chain for 100 sts.
- Work 12–20 rows sc, linked hdc, or waistcoat stitch depending on depth desired.
- Mark every 20 sts.
- Within each repeat, mark after stitch 6 and after stitch 14.
- Fold the first 6 sts behind the center 8 sts from the left side.
- Fold the last 6 sts behind the center 8 sts from the right side.
- The center 8 sts stay visible; both returns disappear behind.
Visible width per pleat becomes 8 sts, even though you worked 20 sts.
Method B: Box pleats with stitched-down upper section
This is the most stable skirt method.
Suppose your waistband opening needs 40 visible sts, and you want 5 box pleats with visible fronts of 8 sts each. You work:
- 5 visible panels × 8 sts = 40 visible sts
- 5 left returns × 6 sts = 30 hidden sts
- 5 right returns × 6 sts = 30 hidden sts
- Total section = 100 sts
After folding, the upper edge can be worked through layers so the waistband itself only carries the 40 visible sts. This dramatically reduces upper-bulk spread and keeps pleats permanently organized.
To anchor:
- Align the folded repeat
- Insert hook through one stitch on front visible layer and corresponding stitch on one folded return edge as instructed by your design
- Work slip stitch or sc joins across the top 6–10 rows if you want stitched-down pleats
For partially released pleats, stitch down only the top 2–4 in / 5–10 cm.
Method C: Round-based box pleats
For hems or bags worked in the round, you can create box pleats by increasing the actual stitch count in selected zones, then folding and tacking those zones into mirrored returns.
Example:
- Bag circumference target visible width: 80 sts
- You want 4 box pleats adding structure
- Add 12 hidden sts to each pleat zone
- New total circumference: 80 + (4 × 12) = 128 sts
Distribute each 12-st hidden allocation as 6 sts folded from each side behind a visible center section. This is especially effective when reinforced with lining.
Pleat Type 3: Inverted Pleats
An inverted pleat is visually the opposite of a box pleat: two visible panels meet at the center front fold line, with hidden depth opening behind. It feels controlled when closed and generous when moving.
This is one of my favorite pleats for crochet because it can disguise bulk elegantly.
Best uses:
- center front or center back skirt release
- sleeve backs
- coat vents
- tunic hems
- handbag pockets and expandable panels
Basic stitch map for inverted pleats
Sample repeat:
- Visible left panel: 6 sts
- Hidden depth center: 8 sts
- Visible right panel: 6 sts
- Total: 20 sts
Building the fold
- Mark each 20-st repeat.
- Within the repeat, mark after stitch 6 and after stitch 14.
- Bring the two outer fold lines inward so the visible left and right panels meet at center front.
- The middle 8 sts become the hidden underlay depth behind the meeting fold.
What appears from the front is often a center fold line or seam-like closure. What hides behind it is expansion.
This structure works especially well in fibers that are too soft for sharply open box pleats but can hold a collapsed center line.
Short-Row Wedges for Controlled Volume
Pleats do not always need to be uniform rectangular folds. If you want a pleat to open more at the hem than at the waist, or more at the cuff edge than at the arm join, short rows are your friend.
Short-row wedges create graduated extra length or width within a pleat zone. Instead of storing equal fabric from top to bottom, you store increasing fabric toward one edge.
Why short rows matter
Without short rows, a pleat made from a rectangle tends to be the same depth throughout unless stitched down. That is perfect for tailored pleats. But some crochet applications need:
- less upper bulk
- more hem swing
- shaped peplums
- bell cuffs with disciplined fold channels
- sculptural volume that blooms gradually
Sample short-row wedge for one pleat
Let us say you are working side-to-side rows for a skirt panel. One pleat repeat is 16 sts visible/depth combined.
You want the pleat depth to increase toward the hem.
Try this over one wedge section:
- Row 1: sc across all 16 sts
- Row 2: sc across 12 sts, turn
- Row 3: sc back across 12 sts
- Row 4: sc across 14 sts, turn
- Row 5: sc back across 14 sts
- Row 6: sc across 16 sts
Repeat the wedge sequence every 4–6 rows depending on how much flare you want.
Those partial rows add length to selected segments, which encourages the lower edge to spread while the upper edge remains compact.
Turning strategy
For cleaner short-row pleat fabric:
- Use stacked sc or a very tight chain-1 turn
- Keep turning points aligned on intended fold lines whenever possible
- Place markers at turn points immediately
- Consider linked stitches to reduce little holes at the wedge edge
Common short-row counts
For a 20-st pleat repeat:
- mild shaping: partial rows over 14, then 16, then full 20
- stronger shaping: partial rows over 10, 12, 14, 16, 18, then full 20
The more steps you use, the smoother the flare.
Post-Stitch Hinges and Deliberate Fold Memory
One of the smartest tricks in crochet pleat design is to stop relying on blocking alone and build a hinge line directly into the fabric.
A hinge is a stitch column engineered to bend more readily than the adjacent fabric or to form a recognizable ridge/groove for folding.
Hinge options
- Back-loop-only rows: create horizontal ridges, ideal for folds running across the fabric
- Front-loop-only plus return row: creates a recessed channel
- Front-post/back-post columns: excellent in taller stitches for vertical hinge lines
- Spike stitch channels: can compress one area visually and physically
- Slip-stitch columns: denser, narrower channels that tend to fold crisply
Example: Vertical hinge line in hdc fabric
Repeat over 18 sts:
- 8 hdc
- 1 front-post hdc around previous row post
- 8 hdc
- 1 back-post hdc around previous row post
Over several rows, the post-stitch columns create one ridge and one groove tendency. You can designate:
- front-post column = mountain fold
- back-post column = valley fold
This method is excellent for sleeves and bags where the fabric needs both flexibility and structure.
Example: Single crochet fabric with slip-stitch hinge
Repeat over 17 sts:
- 8 sc
- 1 sl st
- 8 sc
The slip-stitch column compacts the fabric and often acts like a natural fold seam. This is especially useful in cotton and mercerized fibers where broad stitches can otherwise resist neat collapsing.
Fiber-by-Fiber: Which Yarns Remember Pleats?
Pleat memory is the ability of a fold to reassert itself after handling, movement, blocking, or wear. In crochet, memory is a blend of elasticity, resilience, friction, and response to heat/moisture.
Wool
If your goal is the highest chance of naturally cooperative pleats, wool is usually first pick.
Why it works:
- natural elasticity helps folds spring back
- scales and crimp contribute to resilience
- steam and wet blocking can strongly encourage shape
- dense wool crochet can feel almost lightly tailored
Best for:
- skirts
- cuffs
- sculptural sleeves
- coat details
- pleated accessories
Watch for:
- too-soft superwash wool may lose some crispness compared with non-superwash
- fuzzy wool can obscure precise fold edges
- heavy wool pleats can stretch vertically if unsupported
Recommendation:
- Use sport to DK non-superwash or wool-rich blends for the most cooperative wearable pleats
- Add a waist stay or stabilized waistband for skirts longer than hip length
Cotton
Cotton gives beautiful stitch definition and can produce striking pleat geometry, but it has less spring memory than wool.
Why it is tricky:
- lower elasticity means folds do not rebound as eagerly
- gravity affects cotton strongly, especially in long garments
- steam may flatten beautifully in the short term but wear can soften edges
Why it still shines:
- crisp visual lines
- excellent for bags and home items
- mercerized cotton can look polished and architectural
Best for:
- bags
- cuffs
- short peplums
- decorative pleated panels
- lined skirts or garments with stitched-down pleats
Watch for:
- lower edge droop in long box pleats
- thick fold buildup if gauge is too tight in worsted cotton
Recommendation:
- Work at a firm gauge
- Use shallow to medium pleat depth
- Consider lining, topstitching, or weighted hem balancing depending on project
Linen
Linen is famous for relaxed elegance, not eager obedience. It softens with use and tends to hold a crease more as a pressed memory than an elastic one.
What that means for crochet pleats:
- initial folds can be crisp after steaming/pressing
- over time pleats may relax into soft channels rather than sharp edges
- excellent for intentional collapse and drape
Best for:
- soft inverted pleats
- relaxed summer tunics
- vents and released pleat details
- garments where movement matters more than permanency
Watch for:
- stiff hand when first crocheted at a tight gauge
- eventual broadening of fold edges with wear
Recommendation:
- Use fine linen or linen blends
- Design for controlled drape, not military-sharp pleats
- Pair with short-row shaping rather than very deep rectangular folds
Silk
Silk varies enormously. Mulberry silk, silk noil, and silk blends all behave differently, but the general story is shine, drape, and fluidity more than crisp memory.
What silk does well:
- luxurious collapse
- beautiful light play on fold surfaces
- elegant released pleats and sculptural soft forms
What silk does less well by itself:
- permanent springy pleat recovery
- resisting stretch when pleat weight accumulates
Best for:
- eveningwear details
- soft box pleats with under-support
- pleated yokes or overlays
- sculptural accessories
Recommendation:
- Blend with wool or use with lining/top edge stabilization
- Keep pleats shallow unless the fabric is very fine
Synthetics
This category is broad: acrylic, nylon, polyester, blends. Their behavior depends heavily on structure and finish.
Potential advantages:
- some synthetics can be heat-set carefully
- they can be lightweight for their volume
- machine wash practicality
Potential drawbacks:
- some acrylics are too bouncy and plush for crisp folds
- others become limp and lose edge definition
- heat must be handled extremely cautiously to avoid damage or “killing” the fabric
Best for:
- bags
- costume or sculptural garments
- experimental heat-set pleats on swatches first only
Recommendation:
- Swatch aggressively
- Use dense stitches and built-in hinge lines
- Test steam from a distance; never assume fiber tolerance
Gauge, Drape, and the Pleat Behavior Triangle
Every pleated crochet fabric sits somewhere between three forces:
- spring: the pleat wants to close back into shape
- collapse: the pleat opens or softens under gravity and handling
- drape: the pleat moves fluidly instead of standing rigidly
You can shift the balance with gauge and density.
If pleats are too springy
Symptoms:
- skirt sticks outward too much
- cuff resembles a fan rather than a tailored fold
- box pleats do not release gracefully
Fixes:
- go up 0.5 mm hook size
- switch from sc to hdc or linked hdc
- reduce pleat depth by 2 sts per return
- choose a softer fiber blend
- add weighted hem for downward pull
If pleats collapse completely
Symptoms:
- fold lines disappear after wear
- hidden depth bulges irregularly
- garment looks gathered rather than pleated
Fixes:
- go down 0.5–1 mm hook size
- use denser stitch such as sc or waistcoat stitch
- add hinge columns
- steam-set folds and cool fully before moving
- tack down upper fold sections or line the piece
If pleats feel bulky rather than elegant
Symptoms:
- waistband thickens too much
- box pleats stack awkwardly
- movement looks heavy and clumsy
Fixes:
- reduce depth from 8 sts to 4–6 sts per return
- use finer yarn
- switch from box pleats to inverted pleats
- stitch down the upper section to distribute thickness
Steam, Blocking, and Setting the Fold
Blocking is not an afterthought in pleat engineering. It is part of the structural process.
Wet blocking
Best for:
- wool
- wool blends
- some cottons
- linen blends needing soft training
Method:
- Soak swatch or finished piece appropriately.
- Remove excess moisture without wringing.
- Fold pleats exactly into position.
- Clip or pin along fold edges and upper anchoring points.
- Let dry completely.
Important: do not unfold early. The fabric must fully dry in the pleated state.
Steam blocking
Best for:
- cotton
- linen
- wool blends
- some synthetics with caution
Method:
- Arrange folds precisely.
- Hover steam above fabric; do not crush texture unless intended.
- Pat or finger-press into fold alignment.
- Allow to cool completely before moving.
For synthetics, test first. Some yarns distort permanently with too much heat.
Pressing cloth support
For smoother fibers, a pressing cloth and indirect steam can help encourage stronger fold lines while protecting stitch texture.
Structural Reinforcements: Lining, Topstitching, and Weighted Hems
These are the quiet heroes of lasting pleats.
Lining
A lining can:
- reduce friction between legs and skirt pleats
- support fold channels
- prevent sagging from repeated wear
- hide tack stitches and stabilizers
Best uses:
- cotton or silk pleated skirts
- bags with repeated opening stress
- sculptural garments that need interior control
You do not always need a full lining. Sometimes a partial underlining in the upper pleated section is enough.
Topstitching
In crochet, topstitching may be done by:
- surface slip stitch
- whipstitch through inner fold only
- sewing thread catch stitches through lining and fold layers
Topstitching can:
- preserve fold location
- control pleat release point
- flatten upper bulk
- define a sharp visible edge
Typical stitched-down distances:
- cuffs: 1–2 in / 2.5–5 cm
- skirts: 3–6 in / 7.5–15 cm depending on silhouette
- bags: often full height or strategic zones only
Weighted hems
A weighted hem changes the entire life of a pleat. A little downward force can turn noisy, springy folds into elegant hanging lines.
Ways to add weight:
- finer chain sewn inside hem tape
- narrow lead-free drapery weights in sewn casing
- an extra folded hem facing worked in denser yarn
- hidden cord or stabilizer if appropriate
Best for:
- skirts
- long sleeve pleats
- theatrical or sculptural garments
Not best for:
- already heavy cotton pleats
- areas that will stretch out under added mass
Project-Specific Notes
Skirts
Most successful formulas:
- sport or DK wool, wool blend, or lined mercerized cotton
- side-to-side construction for exact pleat repeat control
- stitched-down top section plus weighted hem if needed
Starting sample:
- 8 knife pleats × 16 sts each = 128 sts total worked width
- visible waist width after folding = 64 sts
- hook: 3.25–3.5 mm in DK wool for dense sc fabric
Sleeves
Use pleats where they will not fight elbow flex constantly unless release is intended.
Best approaches:
- short pleated cuffs
- upper sleeve sculptural pleats with stitched anchor
- post-stitch hinges to maintain channels
Cuffs
Excellent beginner-to-intermediate pleat laboratory because the scale is manageable.
Sample cuff:
- 4 box pleats
- each repeat 20 sts = 80 sts total
- visible circumference after folding about 32 sts if center fronts are 8 sts each
- join to cuff band once folds are organized
Bags
Bags are ideal for cotton pleat engineering because lining can do so much structural work.
Recommendations:
- use mercerized cotton or cotton/nylon blend
- dense sc or waistcoat stitch
- line firmly
- topstitch fold edges discreetly
Sculptural garments
This is where deep pleats, unusual fibers, and heat/steam experiments get exciting. Work large swatches first. Photograph each swatch:
- fresh off hook
- after blocking
- after 24 hours hanging
- after being crushed in a bag for 10 minutes
That tells you more than a beautiful first impression ever will.
Troubleshooting: Common Mistakes and Fixes
Mistake 1: Pleat repeats drift off-count
Symptoms:
- folds do not align
- one pleat is fatter than the next
- visible panels vary in width
Fix:
- mark every repeat from row 1
- recount every setup row
- use a written repeat such as [8 visible, 8 return] x 6 rather than crocheting by eye
Mistake 2: Fold lines feel mushy
Symptoms:
- no clear mountain/valley distinction
- pleats blur after blocking
Fix:
- insert hinge columns
- tighten gauge
- use a denser stitch
- topstitch upper fold lines after blocking
Mistake 3: Upper edge too bulky to join neatly
Fix:
- reduce hidden return depth by 2 sts each side
- stitch down top section before joining waistband/band
- switch from box pleats to inverted pleats
- use finer yarn in the pleated section only if your design allows
Mistake 4: Hem fans out too aggressively
Fix:
- shorten pleat depth n- add fewer repeats
- reduce short-row wedge intensity
- add hem weight only if the fiber can support it without stretching
Mistake 5: Pleats flatten permanently after sitting or washing
Fix:
- reevaluate fiber choice first
- add partial lining or upper tacks
- steam reset after laundering
- choose wool-rich yarn next time for better resilience
Variations Worth Exploring
Once you understand the core engineering, pleats become a design language.
Graduated pleats
Start with repeats of 12 sts near the waist and increase to 16 or 20 sts toward the hem through hidden wedge additions.
Mixed pleat fields
Alternate knife pleats and flat panels for a quieter rhythm.
Example:
- 8 sts flat panel
- 16 sts knife pleat repeat
- 8 sts flat panel
- 16 sts knife pleat repeat
Asymmetric pleating
All knife pleats slant one direction on one side of a garment, then reverse on the other side for dynamic motion.
Release-point pleats
Stitch pleats down for the top third, then let them open. This is especially elegant in tunics and sleeve cuffs.
Pleat-and-rib combinations
Pair crochet ribbing at waistband or cuff edge with denser pleat fabric below so the transition area stabilizes the fold field.
Practical Swatching Protocol
If you only remember one technical habit from this article, make it this: swatch pleats as pleats, not just as flat fabric.
Work a swatch with at least 3 full pleat repeats.
For example:
- knife pleat swatch: 3 × 16 sts = 48 sts
- work 20–30 rows
- steam or wet block into folds
- hang for 24 hours
- open and refold several times
Record:
- yarn fiber content
- hook size
- stitch used
- flat gauge
- folded visible width
- whether folds recover after handling
- whether edges sharpen or blur after blocking
This is real pleat engineering data. It is how you stop guessing.
Takeaways
Pleats in crochet are not a lucky accident of extra fabric. They are planned structure. The more you think in terms of stored width, fold lines, hidden depth, and fiber memory, the more predictable and beautiful your results become.
If you want crisp, resilient pleats, start with dense stitches, firm gauge, and wool or wool-rich yarn. If you want soft controlled collapse, linen and silk become more interesting. Cotton can be stunning, but usually benefits from support such as lining, top anchoring, or strategic topstitching. Synthetics can surprise you in both directions, so swatching is mandatory.
Knife pleats give directional rhythm. Box pleats offer symmetry and graphic clarity. Inverted pleats hide expansion elegantly. Short-row wedges let volume bloom exactly where you want it. Post-stitch and loop-based hinges can turn a merely folded fabric into one that actually wants to keep its shape.
And perhaps most importantly, treat finishing as part of the design. Steam, blocking, stitched-down sections, weighted hems, and linings are not cheats. They are the same tools every serious textile maker uses to turn cloth into form.
Crochet has a reputation for softness and flexibility, which is true. But with deliberate planning, it can also hold a fold, direct volume, and behave with surprising sophistication. Once you start seeing pleats as engineered fabric architecture, whole new garment possibilities open up.