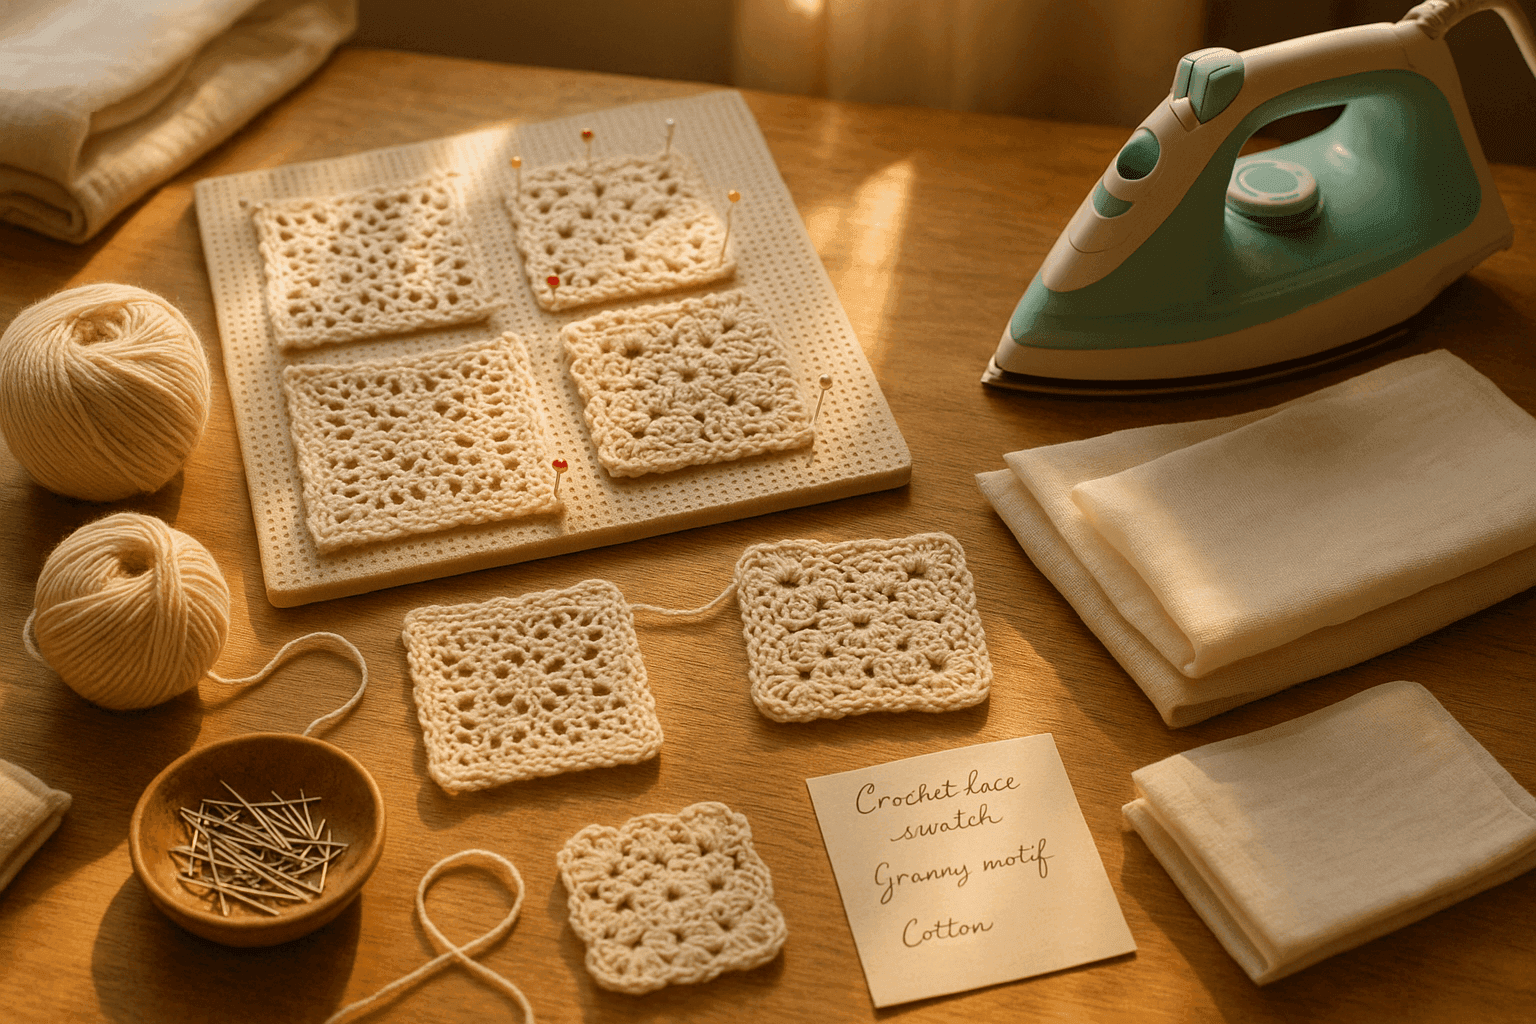
There is a particular kind of heartbreak that only happens at the finishing stage: the shawl is exquisite, the lace is balanced, the edges are pinned beautifully—and then one pass of too-hot steam leaves a cotton motif slightly glossy, a rayon panel limp, or a once-crisp post-stitch border mysteriously flattened. Most of us learn blocking through broad advice: “just steam it,” “never touch the iron,” or “pin it and let it dry.” Those rules are useful until they are not. The moment you work with silk blends, dense relief texture, mercerized cotton, plant fibers with memory issues, or projects that combine multiple yarn types, generic blocking advice stops being enough.
Precision blocking is what turns a good crochet finish into a polished one. It is less about a single blocking method and more about managing variables: the material of the pressing cloth, the amount and distribution of moisture, the distance from heat, the duration of exposure, and the thermal sensitivity of the fiber itself. If you understand how those variables interact, you can open lace without killing stitch definition, smooth stocky seams without glazing the surface, and coax mixed-fiber projects into cooperation without scorching one section while under-blocking another.
This is especially important in crochet because our stitch architecture is dimensional. Front-post ribbing, puff stitches, cables, popcorns, bullion accents, filet spaces, and open lace all react differently to heat and moisture. The very things that make crochet beautiful—its sculptural quality, its texture, its high-relief surfaces—also make it vulnerable. Press too directly and you crush the peaks. Add too much water and rayon grows heavy and ropey. Let wool sit under prolonged damp warmth and you risk felting. Treat linen as if it were acrylic and nothing much happens at all, except frustration.
So let’s talk about blocking the way experienced makers actually need to talk about it: in gradients, not absolutes.
Why precision blocking matters more than generic steam advice
Blocking changes three main things in crochet:
- Dimension — length, width, edge alignment, point definition, motif shape.
- Surface — shine, bloom, smoothness, texture retention, drape.
- Structure — openness of lace, stability of seams, relaxation of tension inconsistencies, and the set of the finished fabric.
When people say “steam block,” they often mean several different actions bundled together:
- introducing moisture,
- introducing heat,
- relaxing the yarn,
- allowing stitches to settle,
- and sometimes physically pressing the fabric flatter.
But those are not the same thing. Moisture alone can soften fibers. Heat alone can alter surface sheen. Pressure alone can flatten texture. Heat plus moisture plus time can permanently change a fabric in either wonderful or terrible ways.
That is why thinking in terms of moisture curves and heat gradients is useful.
- A moisture curve is how dampness moves from dry to humidified to lightly damp to fully saturated, and how long the fiber remains at each stage.
- A heat gradient is how much thermal energy reaches the fabric, which depends not only on iron setting but also on distance, pressing cloth thickness, steam output, and dwell time.
In practical terms, precision blocking means you stop asking, “Should I steam this?” and start asking:
- How much moisture does this fiber need?
- How much heat can it tolerate before the surface changes?
- Is the goal expansion, smoothing, reshaping, or setting?
- Do I need loft preserved, lace opened, or relief protected?
- Can I test this exact yarn behavior on a swatch first?
If you adopt that framework, your finishing becomes much more reliable.
The five variables you are really controlling
Before getting fiber-specific, let’s define the variables you can control every time.
1. Pressing cloth material
A pressing cloth is not just a barrier. It modifies heat delivery, moisture retention, and pressure distribution.
Common choices:
- Plain cotton pressing cloth: absorbent, accessible, moderate heat buffer. Good general choice for cotton, linen, wool, and many blends.
- Muslin: lighter than dense cotton; allows more steam through; useful when you want visibility plus a mild buffer.
- Silk organza: excellent because it tolerates heat, is semi-transparent, and transmits steam in a controlled way. Very useful for precision work.
- Lightweight linen cloth: firm, breathable, good for plant fibers, but can transmit heat briskly.
- Pressing mesh: helpful when you need visibility and airflow, but offers less moisture buffering and less protection from shine.
- Terry cloth towel layer: not a classic pressing cloth, but useful under textured crochet to protect dimensional stitches from being crushed while blocking from above.
What cloth choice changes:
- thicker cloth = softer heat, less surface contact, more buffering
- smoother cloth = fewer pressure marks
- absorbent cloth = can hold and redistribute moisture
- sheer cloth = better visibility, especially for motifs and edge points
For crochet, I use three categories:
- Sheer precision cloth for lace and motifs where I need to see placement.
- Standard cotton cloth for general steaming and surface protection.
- Lofty support layer underneath textured work to preserve relief.
2. Moisture level
Think of moisture in stages rather than yes/no.
- Dry heat exposure: generally risky and not especially useful for crochet except for extremely cautious smoothing through layers.
- Humidified surface: steam passes over or through without making the fabric wet.
- Lightly damp: fabric cool to the touch, pliable, but not heavy.
- Moderately damp: enough moisture for reshaping and pinning; common in wet blocking.
- Saturated: fully soaked; useful for some natural fibers but can overload rayon, distort heavy lace, or stress seams.
The right point on the curve depends on the fiber and the project goal. Lace opening usually needs more moisture than merely lifting slight curl from an edging. Dense cotton often benefits from moderate moisture plus firm pinning. Silk often prefers lighter moisture and careful support. Wool can respond beautifully to humidification without being soaked.
3. Distance from heat
Distance matters as much as temperature setting.
Approximate working distances for steam hovering:
- 0–0.5 in / direct contact through cloth: highest transfer, greatest risk of flattening and shine.
- 0.5–1 in: strong steam effect, useful for stubborn plant fibers through a cloth.
- 1–2 in: safer general steaming range for many crochet fabrics.
- 2–3 in: gentle humidification, good for wool texture and mixed-fiber caution passes.
The closer the iron or steamer, the more concentrated the heat and moisture. For open lace you may need a closer hover; for puff stitches and cables you usually want more distance.
4. Dwell time
Dwell time means how long heat and steam are applied to one area. Even a safe distance becomes unsafe if you linger too long.
As a practical guide:
- 1–2 seconds: light humidification, low risk
- 3–5 seconds: moderate relaxation
- 5–8 seconds: strong effect; monitor carefully
- 8+ seconds: usually too long for delicate or textured crochet unless heavily buffered and tested
Short repeated passes are generally safer than one prolonged blast.
5. Pressure
Even if you “never touch the iron,” pressure still enters the equation if a cloth collapses onto the fabric or if your hand smooths aggressively while damp.
Pressure is what causes:
- flattened relief stitches
- crushed halo on soft wool
- glazed shine on some cellulose fibers and silk
- deadened surface texture
For crochet, think support, don’t squash. Shape with pins, wires, and fingertips at the edges rather than pressing down on the body of the work.
Fiber-specific thermal behavior: what is at risk
Here is the real heart of precision blocking: different fibers fail in different ways.
Cotton
Cotton is often considered easy because it is sturdy and accepts moisture well. That is true, but cotton can also glaze or develop unwanted shine, especially mercerized cotton or tightly spun thread. Direct high heat can flatten stitch texture and make raised areas look polished rather than crisp.
Best uses of blocking for cotton:
- opening lace doilies, collars, and filet panels
- straightening garment seams and borders
- setting table linens and home décor pieces
Main risks:
- glossy spots from direct heat
- crushed relief on cables/post stitches
- over-flattening that removes bounce
Recommended approach:
- hook sizes commonly used: 2.25–4 mm for thread/fine cotton, 4–5.5 mm for DK/worsted cotton
- moisture: light to moderate dampness, or steam with a cloth
- heat: medium, sometimes medium-high for stubborn plain-weave areas, but test first
- distance: 0.5–1.5 in when hovering; contact only through cloth if absolutely needed
- dwell: 2–4 seconds per area, repeated as needed
Silk
Silk responds beautifully to careful blocking, gaining elegance and drape, but it is vulnerable to water spotting, flattening, and luster changes. Too much direct heat can leave areas looking pressed rather than alive.
Best uses of blocking for silk:
- evening shawls
- lace accessories
- blended garments needing graceful drape
Main risks:
- water marks if unevenly dampened
- surface sheen change
- flattening of delicate texture
- weakness when overly wet
Recommended approach:
- hook sizes commonly used: 2.75–4.5 mm depending on yarn weight
- moisture: light, even humidification or very light damp blocking
- heat: low to medium
- distance: 1–2 in minimum for steam; use sheer organza cloth if close work is needed
- dwell: 1–3 seconds, moving constantly
Rayon / viscose / bamboo-derived regenerated cellulose
Rayon can look glorious after blocking because it drapes so well, but it can also become heavy, overstretched, and limp if over-wetted. Heat can increase the sense of collapse if you chase drape too aggressively.
Best uses of blocking for rayon:
- smoothing garment panels
- evening out lace that needs flow, not stiffness
- settling mixed-fiber blends with cotton or silk
Main risks:
- stretching out of shape when wet
- weakened fabric during handling
- limpness and loss of resilience
- shine changes under pressure
Recommended approach:
- hook sizes commonly used: 3.5–5 mm for most garment yarns
- moisture: light to moderate only; avoid full saturation unless swatched and supported
- heat: low to medium-low
- distance: 1.5–2.5 in preferred
- dwell: 1–3 seconds, then let relax before repeating
Wool
Wool is wonderfully responsive to blocking because moisture and heat relax the fibers efficiently. However, wool also carries the obvious risk: felting with excessive heat, moisture, and agitation. It can additionally lose stitch loft if pressed flat.
Best uses of blocking for wool:
- lace opening with strong memory reset
- seam smoothing
- evening stranded or textured surfaces
- shaping garments
Main risks:
- felting under heat + friction + pressure
- flattened halo or bloom
- stretched lace if pinned too hard while wet
Recommended approach:
- hook sizes commonly used: 3.5–6 mm depending on yarn weight and fabric style
- moisture: humidified to moderately damp; full wet blocking often excellent
- heat: low to medium steam, rarely high
- distance: 1–3 in depending on texture
- dwell: 2–4 seconds max per pass
Linen
Linen can be stubborn at first and often improves dramatically with moisture and repeated handling over time. It likes a firmer block than silk or wool, but direct heavy pressing can still flatten crochet architecture.
Best uses of blocking for linen:
- summer tops
- table runners
- heirloom lace with crisp definition
Main risks:
- resistance leading you to overheat it
- hard creases if folded while damp
- flattening if aggressively pressed
Recommended approach:
- hook sizes commonly used: 3–5 mm for garments and accessories
- moisture: moderate dampness often works better than light steaming alone
- heat: medium
- distance: 0.5–1.5 in with cloth, or damp block and air dry pinned
- dwell: 3–5 seconds in targeted areas if steaming
Blends
Blends should be blocked according to their most vulnerable component, not the one that seems most convenient. A cotton-silk blend cannot be treated like plain cotton. A wool-rayon blend cannot be blocked as if the rayon stretch risk does not exist.
A practical rule:
- if one fiber is vulnerable to shine, reduce pressure
- if one fiber is vulnerable to stretch, reduce saturation
- if one fiber is vulnerable to felting, reduce agitation and heat
- if one fiber is heat-resistant but another is not, lower heat and increase time gradually instead
Choosing the right blocking setup for the fabric structure
The yarn fiber is only half the story. Stitch architecture matters just as much.
For lace and openwork
Goal: open spaces, sharpen points, equalize repeats.
Best method:
- pin or wire first
- apply moisture evenly
- use steam as a finishing set, not the only shaping force
Good candidates for stronger opening:
- cotton thread lace
- wool lace shawls
- linen motifs
Use caution with:
- rayon lace, which can stretch beyond intended dimensions
- silk lace, which can flatten if overhandled
For relief stitches and texture
Goal: preserve height while settling overall shape.
Best method:
- block from the wrong side when possible
- place a towel or foam support under textured areas
- hover steam rather than pressing
- use fingers to shape edges, not palms to flatten surfaces
Especially important for:
- front-post/back-post ribbing
- cables
- popcorn, bobble, puff stitches
- overlay crochet n
For garments and seamed pieces
Goal: align measurements, smooth transitions, encourage drape without distortion.
Best method:
- measure schematic before and after
- pin key points first: shoulders, side seams, armholes, hem, neckline
- use zone-based moisture rather than soaking the whole garment if fibers differ
For motif joins and composite projects
Goal: unify disparate sections.
Best method:
- pre-block motifs before joining when possible
- after joining, apply lighter whole-project block
- if border fiber differs from body fiber, block border and body as separate thermal zones
A swatch-based blocking protocol that saves projects
If you take only one advanced habit from this article, let it be this: make a blocking swatch whenever the fiber or texture is unfamiliar, expensive, blended, or intended for a gift or publication-worthy finish.
Swatch size
Make at least a 6 x 6 in / 15 x 15 cm swatch, larger if the project has both lace and texture sections.
Include:
- a plain fabric area
- an open/lacy area
- one textured section if relevant
- edge treatment if your project has picots, scallops, or points
Suggested stitch counts by yarn weight:
- fingering: 28–36 sts wide
- sport/DK: 24–30 sts wide
- worsted: 20–26 sts wide
- bulky: 16–22 sts wide
The exact stitch pattern matters more than the number. You want the swatch to mimic the real project behavior.
What to record
Create a quick blocking note card:
- yarn name and fiber content
- hook size used
- unblocked dimensions
- target dimensions
- moisture method
- heat setting
- pressing cloth type
- steam distance
- dwell time per pass
- final result and any changes in sheen or texture
Three-pass testing method
Test progressively on different sections of the swatch.
Pass 1: minimum intervention
- light steam at 2 in distance
- 1–2 second passes
- no contact, no pressure
Pass 2: moderate intervention
- cloth added
- 1 in distance
- 2–3 second passes
- light pinning or shaping
Pass 3: stronger intervention
- slightly more moisture or damp blocking
- close hover or cloth-mediated contact only if needed
- compare for shine, drape, texture retention, and dimensional stability
Once you see the best result, stop there. The ideal protocol is the gentlest one that achieves the needed shape.
Step-by-step precision blocking workflow
Here is a practical workflow you can use on most crochet projects.
Materials
- blocking mats or a thick towel-covered surface
- rustproof T-pins or fine lace pins
- blocking wires for long straight edges or shawl points
- spray bottle with clean water
- steam iron or garment steamer
- 2–3 pressing cloth options: cotton, muslin, silk organza if available
- measuring tape or ruler
- clean white towel for rolling out extra moisture
- swatch notes
Step 1: Assess the project before adding moisture
Lay the piece flat and identify the actual issue.
Ask:
- Does it need more openness or just smoother edges?
- Are there curled borders?
- Is stitch definition a design feature I need to protect?
- Which areas are most heat-sensitive?
- Are there mixed fibers or trims?
Mark key measurements. For a sweater panel, note bust width, body length, shoulder width, armhole depth. For a shawl, note span, depth, and point spacing.
Step 2: Match the method to the fiber and structure
A few examples:
- Cotton lace runner: moderate damp block, pin firmly, finish with light steam through cloth if needed.
- Wool lace shawl: wet or moderate damp block, wire aggressively if desired, little to no direct pressing.
- Rayon-blend summer top: light mist, careful horizontal support, minimal steaming from distance.
- Textured wool cowl: hover steam from wrong side with towel support underneath.
Step 3: Pre-shape dry or nearly dry
Before you steam, arrange the item to approximate final dimensions. Heat should assist shaping, not perform miracles on a crumpled heap.
Use pins or wires to establish:
- corners
- points
- center line
- straight edges
- motif alignment
For lace shawls, pin center top, both wings, then the lower point, then fill in scallops. For garments, pin shoulder points and hem first, then side seams, then neckline/armhole smoothing.
Step 4: Introduce moisture gradually
Do not jump straight to saturation unless the fiber and swatch results support it.
Options:
- Mist blocking: spray lightly and evenly until pliable.
- Steam humidifying: hover over the area and let fibers relax before touching shape.
- Damp cloth transfer: lay a barely damp pressing cloth over the piece and steam the cloth, allowing moisture to diffuse more gently.
For cotton and linen lace, moderate dampness often gives best control. For silk and rayon, stay on the lighter side and build slowly.
Step 5: Apply heat in zones, not all at once
Think of the project as containing microclimates.
Example for a mixed-fiber cardigan with cotton body and silk-blend trim:
- body panels: medium steam through cotton cloth at 1 in
- trim: low steam through organza at 2 in
- textured cuffs: hover from wrong side with towel underneath
You are not obligated to use one uniform treatment everywhere.
Step 6: Respect dwell time
Keep the iron or steamer moving.
A reliable rhythm:
- hover 2–3 seconds
- pause and observe
- reshape lightly if needed
- repeat once or twice
If nothing is happening, change one variable at a time:
- slightly more moisture
- slightly closer distance
- slightly thicker or thinner cloth
- slightly longer rest between passes
Avoid changing everything together, which makes it impossible to learn what caused the result.
Step 7: Cool and dry in position
Fibers set while cooling and drying. Moving the project too soon can undo your work.
Leave pinned until:
- surface feels room-temperature again after steam
- dampness is fully gone, or nearly so depending on fiber
- measurements remain stable after unpinning a test section
For heavier cotton, linen, and rayon pieces, allow extra drying time because internal moisture lingers.
Step 8: Evaluate surface and dimensions
Once dry, check:
- final measurements
- edge smoothness
- lace openness
- relief retention
- any unwanted shine or flattening
If needed, do a second, gentler corrective block rather than one forceful rescue attempt.
How to preserve texture while opening lace
Many crochet designs combine airy sections with dimensional stitches, and they should not be blocked identically.
Strategy 1: Block from the wrong side
This is one of the simplest ways to protect raised stitch tops. Steam enters the fabric, but the visible surface avoids direct pressure.
Strategy 2: Use a contouring support layer
Place a thick towel under bobbles, cables, or post stitches. The towel lets raised areas sink in rather than get crushed. Then steam from above through a cloth.
Strategy 3: Target only the lace panels
If a yoke has puff-stitch clusters and mesh in alternating sections, direct your strongest opening treatment to the mesh only. Mist or lightly steam the puff sections separately.
Strategy 4: Use wires on edges instead of pressing the fabric body
Blocking wires can create dramatic lace opening along edges without flattening the center field.
Calibrating heat gradients across mixed-fiber projects
Mixed-fiber crochet is where advanced blocking really earns its keep.
Imagine these scenarios:
- cotton body with rayon drape panels
- wool motif blanket joined with silk-blend border
- linen-cotton top with mercerized edging
A single all-over steam pass is rarely optimal.
Zone mapping method
Divide the piece into zones:
- Zone A: sturdy, higher-moisture-tolerant sections
- Zone B: moderate-risk sections
- Zone C: high-risk sections like silk trim, rayon inserts, textured borders
Apply treatment in that order or separately. Use towels to isolate if needed.
For example:
- Zone A cotton motifs: moderate steam, 1 in, cotton cloth, 3-second passes
- Zone B wool joins: gentler steam, 1.5–2 in, 2-second passes
- Zone C silk border: low steam, organza, 2 in, 1-second passes
Let each zone cool before deciding whether more is needed.
Why gradients matter visually
Even when fibers survive the heat, inconsistent treatment can leave the project looking disjointed.
You might see:
- one section too matte, another too lustrous
- one motif spread wide while neighboring motifs remain compact
- a border flatter than the body
The goal is not identical behavior across fibers—that is impossible. The goal is a harmonized finish where drape, openness, and sheen look intentional together.
Troubleshooting common mistakes and how to fix them
Problem: Shiny patch on cotton or silk
Cause:
- heat too high
- pressure too direct
- cloth too thin or absent
Fix:
- lightly redampen the area
- allow fibers to relax and dry naturally
- on some natural fibers, a gentle wash and reblock can reduce the look
- next time use thicker cloth, lower heat, shorter dwell
Problem: Relief stitches flattened
Cause:
- pressing rather than steaming
- no support layer underneath
- too much moisture plus hand smoothing
Fix:
- rehumidify lightly from wrong side
- reshape stitches individually with fingers or blunt tool
- dry over towel support
Problem: Wool feels slightly matted
Cause:
- too much heat/moisture/agitation
- excessive handling while wet
Fix:
- stop immediately
- let fully dry
- gently tease surface with fingertips
- for future projects, reduce pressure and avoid repeated passes
Problem: Rayon garment grew several inches
Cause:
- oversaturation
- hanging or unsupported drying
- too much stretching while wet
Fix:
- lay flat, support fully, and ease back toward target dimensions while damp
- if still oversized, wash and dry flat again with minimal handling
- next time use mist/steam instead of soaking
Problem: Linen still looks rumpled after steaming
Cause:
- not enough moisture
- trying to force the result with heat alone
Fix:
- reblock with moderate dampness
- pin more firmly
- allow full dry time
Problem: Lace points won’t stay sharp
Cause:
- insufficient pinning or wires
- project unpinned before fully dry
- fiber lacks memory and needs a stronger set method
Fix:
- repin with more precise spacing
- use blocking wires where possible
- increase moisture slightly rather than increasing heat first
Common beginner-to-intermediate blocking misconceptions
“If steam works, more steam works better.”
Not necessarily. Past a certain point you are not improving shape; you are just increasing risk.
“Never let the iron touch crochet.”
As a broad safety rule, this is sensible. But with the right cloth, tested swatch, low pressure, and suitable fiber, very brief cloth-mediated contact can sometimes be appropriate. The point is not dogma; it is controlled risk.
“Natural fibers can always take heat.”
They can often take more than synthetics, but “more” is not the same as “any amount.” Silk and wool especially still demand care.
“Blocking is only about shape.”
It is also about surface finish, drape, stitch clarity, and professional-looking consistency.
Variations: fiber-specific protocols you can use as starting points
These are starting protocols, not universal prescriptions. Always swatch first.
Protocol A: Cotton lace doily
- yarn: size 10 crochet cotton
- hook: 1.75–2 mm
- swatch/project motif count varies
- pin dry or lightly damp to final diameter
- cover with muslin or organza
- steam at medium from 0.5–1 in
- 2-second passes around each motif repeat
- cool fully pinned
Best for opening lace cleanly while minimizing gloss.
Protocol B: Wool shawl with picot edging
- yarn: fingering wool
- hook: 3.5–4 mm
- example swatch: 32 sts equivalent pattern width
- wet block or damp block first
- use wires along top edge, pins at picots
- steam only if needed, low setting, 2 in away
- no pressing
Best for maximum memory reset and crisp edging without flattening bloom.
Protocol C: Silk-blend evening wrap
- yarn: lace or fingering silk blend
- hook: 3–3.75 mm
- mist lightly rather than soak
- shape on padded surface
- place organza pressing cloth if using iron steam
- low heat at 1.5–2 in
- 1-second passes, moving constantly
Best for elegant drape with preserved luster.
Protocol D: Linen-cotton summer top
- yarn: DK linen-cotton blend
- hook: 4–4.5 mm
- panel stitch count varies; verify bust/hem width before block
- mist to moderate dampness
- pin garment schematic dimensions carefully
- medium steam through cotton cloth at 1 in where needed
- extra attention to hems and side seams
Best for encouraging smooth lines in fibers that need persuasion.
Protocol E: Textured wool-cotton cowl
- yarn: aran blend
- hook: 5 mm
- sample circumference section: 24 sts pattern repeat
- roll in towel after light mist if needed
- place wrong side up over thick towel
- steam at 2 in with brief 2-second passes
- avoid any downward pressure
Best for keeping post-stitch texture lively.
Building your own blocking decision tree
Over time, you can create a personal system. Mine looks something like this:
- Identify fiber risk: scorch, glaze, stretch, felt, flatten.
- Identify fabric goal: open, smooth, shape, preserve loft.
- Choose moisture level: mist, steam, damp, wet.
- Choose cloth: organza, muslin, cotton, or none.
- Choose heat distance: far, medium, close.
- Choose support: mats, towel, wires, wrong-side-up.
- Test on swatch.
- Apply in zones.
- Cool fully before judging.
That sounds technical, but after a few projects it becomes second nature.
The polished-finish mindset
The crocheters whose work always looks quietly professional are not necessarily making fancier stitches. Often, they are simply finishing with more intention. They know that a thread cotton snowflake and a wool lace triangle do not want the same treatment. They know that steam is not one thing. They know that preserving a cable’s shadow line matters just as much as evening out the hem.
Precision blocking is really the craft of restraint. It asks you to use exactly enough moisture, exactly enough heat, exactly enough distance, exactly enough time. It asks you to treat crochet fabric like the sculptural textile it is.
And the reward is substantial: lace that opens without looking ironed flat, silk that glows instead of glaring, cotton that lies smooth without becoming glossy, wool that settles without felting, and mixed-fiber projects that look cohesive rather than negotiated.
If you remember nothing else, remember these takeaways.
Key takeaways
- Blocking is not a single action; it is the management of moisture, heat, distance, time, and pressure.
- Pressing cloths change outcomes significantly. Keep at least a sheer cloth and a standard cotton cloth on hand.
- The same iron setting behaves differently depending on distance, steam output, cloth thickness, and dwell time.
- Cotton may glaze, silk may spot or flatten, rayon may stretch, wool may felt, linen may resist—each fiber has its own failure mode.
- Textured crochet should be blocked with support and minimal pressure, often from the wrong side.
- Mixed-fiber projects benefit from zone-based heat gradients rather than one all-over treatment.
- A blocking swatch is not overkill. It is the fastest route to a polished finish and the cheapest insurance against damage.
- Short repeated passes are safer than long exposure.
- Let projects cool and dry fully before evaluating results.
- The gentlest method that achieves the goal is the correct one.
When finishing becomes this intentional, blocking stops feeling like the dangerous last step and starts feeling like part of the design process itself. That is when your crochet truly begins to look complete.