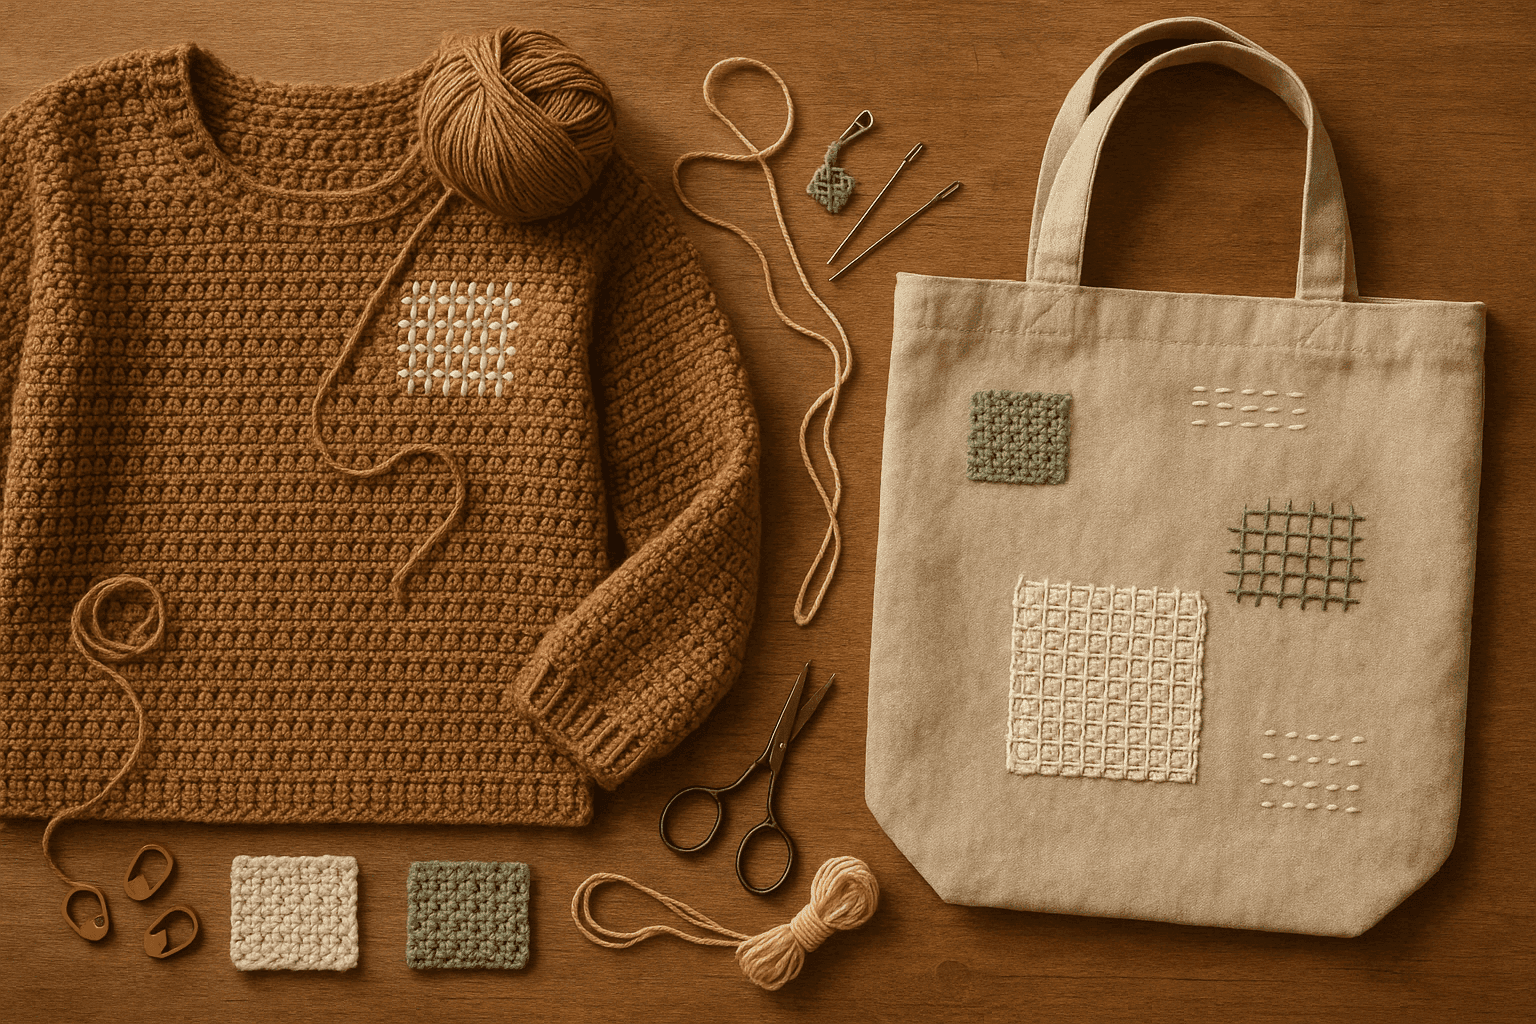
There is a particular kind of heartbreak that only makers understand: you pull on a favorite crocheted cardigan, slide your arm into the sleeve, and feel your thumb catch on a softened underarm seam. Or you lift your everyday crochet tote and notice the handle base stretching into a thin, tired line. Or maybe it is the elbow of a sweater, the corner of a pocket, or the seat of a long tunic that has begun to fuzz, flatten, and finally open into a weak spot.
The instinct is often to either patch it bluntly and hope for the best, or avoid touching it at all for fear of making the fabric stiff, puckered, or obviously “repaired.” But crochet is remarkably forgiving when you understand what is actually failing. Most stress-point damage is not random. It follows load paths, abrasion lines, and the architecture of the stitch itself. Once you can read those clues, you can rebuild strength without ruining drape, and sometimes make the repair more beautiful than the original wear.
That is where sashiko-inspired repair, visible reinforcement, duplicate crochet, woven darning, and carefully chosen backing patches come in. Although sashiko developed in woven cloth traditions, its logic transfers beautifully to crochet when used thoughtfully: small, distributed stitches can stabilize weakness across a broader area rather than concentrating strain in one hard line. In crochet, that matters because drape and elasticity rely on loops being able to move. Reinforcement must support the fabric, not choke it.
This guide is for the crocheter who wants repair decisions to feel deliberate rather than improvised. We will look at elbows, underarms, pocket corners, bag handles, and seat stress points; how yarn twist and fiber content change your repair choices; when to reinforce from the wrong side and when to let the mend become part of the design; and how to keep a garment wearable, flexible, and balanced after strengthening it.
Why crochet fails where it fails
Before choosing a repair method, it helps to identify why the area gave out.
Crochet fabric is made from interlocking loops, but unlike knitting, many crochet stitches are built around taller vertical structures and more distinct tops, posts, and side loops. Stress tends to collect where:
- the fabric bends repeatedly, such as elbows and underarms
- weight hangs from a narrow anchor point, such as bag handles or pocket corners
- friction abrades the surface, such as seats, hips, and underarms
- shaping changes direction abruptly, such as gussets, armhole joins, or edge transitions
- dense stitches meet open stitches, creating a hard-to-soft shift in load distribution
A bag handle attached over 8 stitches, for example, may carry the full weight of the bag contents through those 8 stitch heads and the row beneath them. A pocket corner may have only 3 to 5 stitches taking all the downward drag of a hand tucked into the pocket. An elbow in a sleeve may show no broken stitches at first, but the fibers flatten, halo, and thin because the same few rows are repeatedly bent and rubbed.
The repair method has to answer the failure mode:
- Broken loops or split stitch tops need structural reconstruction.
- Thinned but intact fabric needs distributed reinforcement.
- Edge distortion or stretching needs stabilization and reshaping.
- Holes from abrasion often need both backing support and surface rebuilding.
- Load-bearing joins need reinforcement that transfers strain to surrounding stitches.
If you skip that diagnosis, repairs often become too stiff, too localized, or too weak.
Read the fabric before you mend
Take five minutes to study the damaged area before threading a needle.
1. Identify the stitch architecture
Ask yourself:
- Is this single crochet, half double, double crochet, linen stitch, mesh, post-stitch fabric, or a textured pattern?
- Are the stress lines running vertically, horizontally, or diagonally?
- Is there a seam, join, or turning chain nearby?
- Is this a dense fabric carrying weight, or a drapey garment fabric that needs movement?
A dense single crochet bag panel can handle more visible reinforcement than a fluid treble-based cardigan. A repair that works in a structured market tote may feel boardy in a sweater underarm.
2. Check yarn weight and gauge
You do not need exact original gauge, but you do need proportionality.
Typical pairings:
- Lace/fingering garments: repair with sewing thread, fine mending yarn, or split plies of matching yarn
- Sport/DK garments: use matching sock yarn, mending wool, or one/two plies of original yarn
- Worsted bags and sweaters: use original yarn, a smoother companion yarn, or sturdy perle cotton for decorative sashiko-style work
- Bulky accessories: often benefit from duplicate crochet with a slightly finer reinforcement yarn to avoid bulk
If you use a repair yarn that is too thick, it can create ridges and torque. Too fine, and it may saw through the surrounding stitches or fail before the fabric does.
3. Assess fiber content
Fiber determines friction, recovery, and feltability.
- Wool: springy, often forgiving, can lightly full and grip itself; excellent for duplicate stitch and soft reinforcement
- Superwash wool: less grab, smoother surface, may need longer woven paths for security
- Cotton: strong but inelastic; repairs must not over-tighten or the area will pucker
- Linen/hemp: durable but firm; best reinforced with distributed stitches rather than concentrated bars
- Acrylic: abrasion-resistant in some cases but can become slick and stretched; secure tails well because fibers do not felt
- Alpaca/silk/bamboo: drapey, less elastic, often prone to sagging under weight; choose soft reinforcement that supports without adding heavy drag
- Blends: balance the dominant behavior rather than the label alone
4. Look at yarn twist and abrasion pattern
High-twist yarns hold stitch definition and often tolerate duplicate paths well. Low-twist or singles yarns may bloom or shred under repeated abrasion, so woven darning with a backing layer may outperform surface-only stitching.
Abrasion clues matter:
- Flat, fuzzy sheen = friction wear before breakage
- Snapped strand at one edge = concentrated pull or catching
- Stretched holes with intact yarn = load distortion rather than abrasion
- Diagonal strain lines = weight transfer across fabric, common near handle bases or pocket corners
Choosing the right repair method
Here is the practical decision guide.
Use sashiko-inspired visible stitching when:
- the fabric is thinned but mostly intact
- you want to spread stress across a wider area
- the area is broad, such as elbows, seat panels, or around a pocket
- the fabric is dense enough to support running stitches
- you want the mend to be decorative or intentionally visible
This is especially good for single crochet, half double crochet, tightly worked textured fabrics, and tapestry crochet areas.
Use duplicate crochet when:
- stitch outlines are still readable
- you need to rebuild specific loops or reinforce exact stitch paths
- you want the front to look integrated with the original fabric
- the area is too small or directional for broad running stitches
Excellent for sweater elbows, sleeve seams, handle anchors, and worn ridges in textured patterns.
Use woven darning when:
- there is an actual hole or missing yarn
- the surrounding area is still stable enough to anchor a weave
- you need to bridge abrasion damage without creating a hard patch edge
- the fabric texture can visually tolerate a woven insert
Especially useful in seat wear, underarms, and soft garment bodies.
Use a backing patch when:
- the fabric is open, lacy, or too weak to support surface-only repair
- the wrong side can hide stabilization
- the stress point will continue carrying load
- the hole is larger than about 1 to 1.5 cm in a garment, or any size in a heavily loaded bag handle base
Backing patches can be crochet, woven cloth, knit tricot, lightweight felted wool, or even a strip of stable ribbon in bag handles. The best patch is the lightest one that adequately spreads load.
Use fiber-matched reinforcement when:
- drape and hand matter as much as strength
- the original yarn has a distinctive elasticity or halo
- color blending is important
- you want longevity without visual interruption
Sometimes the best reinforcement is simply a finer version of the original fiber laid into the stitch path rather than a contrasting decorative thread.
Tools and materials
You do not need a large kit, but the right tools help.
- Blunt tapestry needles in multiple sizes
- Sharp crewel or sashiko-style needle for running stitches through dense fabric
- Repair yarns: original yarn if available, close fiber-match alternatives, sock yarn, mending wool, perle cotton, strong sewing thread
- Small crochet hook, usually 0.5 to 1.5 mm smaller than the original hook for controlled rebuilds
- Stitch markers
- Fine scissors
- Steam source or blocking tools
- Lightweight backing materials: matching crochet swatch, cotton lawn, linen scrap, silk organza, wool flannel, twill tape, grosgrain ribbon depending on project
Hook size guidance for repair crochet
If the original piece was made with:
- Fingering yarn on 3.25 to 3.75 mm hook: try 2.5 to 3 mm for repair loops
- DK on 4 to 4.5 mm hook: try 3.25 to 3.75 mm
- Worsted on 5 to 5.5 mm hook: try 4 to 4.5 mm
A slightly smaller hook gives control and keeps rebuilt stitches from bagging out.
The core principle: reinforce beyond the damage zone
Whatever method you choose, extend the repair past the visibly worn area.
A good rule:
- For small stress points, reinforce at least 2 to 4 stitches/rows beyond the damaged zone on all sides.
- For broad wear, carry reinforcement 1.5 to 3 cm beyond the thinned area.
- For bag handles and pocket corners, anchor into a surrounding field at least 6 to 12 stitches wide if possible, not only the edge stitches.
This avoids creating a hard boundary where the next failure will occur.
Method 1: Sashiko-inspired reinforcement on crochet
This is the method to use when the fabric is wearing thin but has not completely failed.
Best areas
- elbows
- seat panels
- pocket surroundings
- bag body stress areas
- underarm panels in dense stitches
Best fabric types
- single crochet
- half double crochet
- dense moss/linen stitch
- linked stitches
- firm textured crochet
Thread choice
For garments, start lighter than you think.
- Fingering/DK garment: fine wool mending yarn, embroidery wool, or split plies of matching yarn
- Worsted sweater: one strand of fingering wool or smooth sport-weight yarn
- Cotton tote: perle cotton #8 or #12, mercerized cotton, or matching crochet cotton
Avoid very hard, non-giving thread on elastic wool garments unless used very sparsely.
Stitch pattern logic
Unlike traditional sashiko on woven fabric, crochet already has built-in holes and ridges. Your running stitches should travel through stable points without cinching the loops shut.
Good paths include:
- under top loops of single crochet rows
- through side bars of dense stitches
- across the backs of stitch posts on the wrong side
- in offset grids rather than stacked rigid lines
Step-by-step: elbow reinforcement
Let’s say you have a worsted-weight cardigan sleeve in half double crochet, worked on a 5 mm hook, with a 5 cm x 7 cm thinned elbow area.
- Map the zone. Mark a rectangle about 8 cm x 10 cm, extending roughly 1.5 cm beyond the visible wear on each side.
- Support the fabric. Lay the sleeve flat in its natural relaxed state. Do not stretch it.
- Thread the needle. Use a repair yarn about 45 to 60 cm long to avoid fraying.
- Start from the wrong side. Anchor with 3 to 4 tiny split catches in existing stitch backs, not a bulky knot.
- Work running stitches in rows. Make stitches approximately 3 to 5 mm long with 3 to 5 mm gaps, following the fabric grain. In half double crochet, this often means moving horizontally across rows first.
- Keep tension relaxed. After every 4 to 6 stitches, smooth the fabric with your fingers to make sure nothing is drawing in.
- Add a second offset pass. On the return rows, place stitches in the gaps of the previous row. This creates support without a rigid bar effect.
- Optional cross pass. For heavy wear, add a second direction vertically or diagonally, but keep the spacing wider than the first layer.
- Check elasticity. Gently bend the elbow area. It should flex freely. If it feels hinged or tight, remove every second row of stitches.
- Finish invisibly. Weave tails through the wrong side over at least 5 to 7 cm in a meandering path.
Spacing guide
- Dense fabric: rows of running stitch spaced about every 0.5 to 1 cm
- Medium garment crochet: every 0.75 to 1.25 cm
- Decorative visible mend: as desired, but avoid filling more than roughly 30 to 40% of the surface if drape matters
Method 2: Duplicate crochet for exact structural support
Duplicate crochet works like duplicate stitch in knitting, but you are tracing the path of an existing crochet stitch or reinforcing the visible architecture of the stitch from front or back.
Best uses
- strengthening pocket corners n- rebuilding worn tops of stitches
- reinforcing handle attachment zones
- tracing over rubbed ribbing or textured lines
- stabilizing underarm seams and gusset edges
Step-by-step: reinforcing a pocket corner
Imagine a cardigan pocket worked in single crochet, attached along the sides and bottom, with the upper corners showing strain. Each top corner attachment spans 4 stitches, and the fabric below has begun to elongate.
- Count the anchor field. Mark at least 8 stitches across and 6 rows down from each corner. That is your reinforcement zone.
- Choose yarn. Use the original yarn if smooth and not too bulky, or a slightly finer but stronger matching yarn.
- Start on the wrong side. Anchor 2 to 3 cm away from the corner so the start point does not sit in the highest stress area.
- Trace the stitch heads. Bring the needle up under the two top loops of a stable stitch, then pass down around the post path that matches the original stitch shape.
- Extend below the corner. Reinforce not just the top edge, but the diagonal load path from corner to body. Think of a small triangle, not a single line.
- Work 2 to 3 parallel duplicate paths. One along the pocket edge, one 1 stitch inward, and one diagonally down into the body if needed.
- Test the pocket. Place your hand into the pocket and apply gentle downward pressure. The corner should no longer pull sharply.
Stitch-count reinforcement plan for pocket corners
For a small cardigan pocket:
- top edge reinforcement: 8 to 12 stitches
- side reinforcement depth: 4 to 8 rows
- diagonal spread: cover an area about 6 stitches wide x 6 rows tall at minimum
This triangular spread matters more than stacking many passes directly at the edge.
Method 3: Woven darning for worn-through crochet
When you have a true hole or a section where fibers have abraded away, woven darning can rebuild the missing area while preserving a softer hand than a tightly crocheted patch.
Best areas
- underarms
- seat wear
- inner sleeve rub zones
- side body abrasion
When not ideal
- highly open lace, unless backed first
- very rigid load-bearing handle bases without added support
Step-by-step: repairing a seat stress point
Suppose a DK-weight tunic in linen stitch has a 2 cm oval worn hole at the lower back/seat area, with surrounding fuzz and thinning extending another 1 cm around it.
- Stabilize the perimeter first. With fine matching yarn, work a loose basting outline about 0.75 to 1 cm beyond the hole in stable fabric.
- Trim only true breaks. Do not cut fuzz away aggressively; preserve anything that still contributes to structure.
- Create warp strands. Span the hole vertically with parallel strands anchored into sound fabric on both sides. Keep them evenly spaced, approximately every 3 to 5 mm for DK linen stitch.
- Do not overtighten. The warp should sit level with the surrounding fabric, not pull it inward.
- Weave the weft. Pass horizontally over-under through the warp and, where possible, interlace with surviving crochet loops at the perimeter.
- Blend into surrounding stitches. Extend the weaving slightly into the thinned halo, not only the empty center.
- Check drape. Lift the fabric. The darn should move with the garment rather than sticking out as a plaque.
- Optional wrong-side support. If seat wear is likely to recur, add a featherweight backing patch after darning.
Darning density guide
- Fingering fabric: strands every 2 to 3 mm
- DK/sport fabric: every 3 to 5 mm
- Worsted dense fabric: every 4 to 6 mm
More dense is not always better. If you pack too much yarn in, the mend will become a pressure point that abrades surrounding fabric.
Method 4: Backing patches that preserve drape
Many crocheters resist backing patches because they imagine a stiff patch sewn behind a soft garment. But a properly chosen patch can be nearly undetectable in wear while doubling longevity.
Best patch materials by use
- Light wool garment: thin knit wool, soft woven wool, or a lightly felted matching crochet swatch
- Cotton garment: cotton lawn, handkerchief linen, very light voile, or a matching crochet mesh patch
- Bag handle base: tightly woven cotton, twill tape, grosgrain ribbon, or a dense crochet patch
- Open lace: sheer support like silk organza or nylon tricot, used minimally
Wrong side vs right side decision
Use wrong-side stabilization when:
- the front pattern is visually busy enough to hide subtle repair
- you want to maintain the original look
- the damage is mostly structural, not decorative
- the fabric is open and needs a support layer under it
Use visible decorative mending when:
- the area is already obviously worn
- colorwork or texture can integrate the mend beautifully
- the garment benefits from an intentional handmade story
- the reinforcement can visually rebalance the piece, such as mirrored elbow patches
Step-by-step: bag handle base reinforcement
Imagine a worsted cotton crochet tote worked in single crochet on a 4.5 mm hook. The handle is attached across 10 stitches on each side, and the upper bag edge is stretching.
- Unload the bag. Repairs must be done with the fabric fully relaxed.
- Measure the distortion. If the top edge has stretched from 10 attachment stitches to the equivalent of 12 or 13, reshape gently with steam first.
- Cut backing support. Use cotton twill tape or a tightly woven cotton strip about 2.5 cm wide and long enough to span at least 4 to 6 cm beyond each handle base.
- Position on wrong side. Center the strip under the upper edge and handle anchor zone.
- Baste in place. Use temporary thread to hold it without shifting.
- Sew distributed attachment lines. Stitch through the crochet and backing using vertical columns or box-with-X style paths adapted to the stitch grid. Avoid sewing a single hard rectangle around the perimeter only.
- Reinforce the handle attachment. Add duplicate crochet or whip reinforcement across the original 10 stitches and into 4 to 6 stitches beyond each side.
- Finish and test. Load the bag gradually. The strain should now distribute into the backing strip and wider top edge.
Stitch count and load guidance for handles
For medium totes:
- each handle ideally anchored across 8 to 14 stitches
- reinforcement field should extend to 14 to 20 stitches total width around each handle base if possible
- vertical reinforcement depth: 4 to 10 rows depending on bag size and load
If your handle is attached over fewer than 6 stitches in worsted cotton, consider a redesign as well as a repair.
Method 5: Underarm repairs without losing stretch
Underarms are tricky because they need both strength and mobility. This is where many repairs go wrong: the mend is secure, but the wearer can feel it every time they move.
What underarms need
- soft reinforcement
- no hard knots or bulky joins
- preservation of row-to-row elasticity
- attention to sweat, friction, and repeated extension
Best methods
- duplicate crochet along seam/gusset paths
- sparse sashiko-inspired running stitches on the wrong side
- small woven darns for abrasion holes
- featherlight patch only if the area is too weak to stand alone
Step-by-step: underarm abrasion mend
For a sport-weight wool blend pullover with a 1 cm rubbed opening at the underarm seam line:
- Inspect the seam geometry. Is it a joined seam, a crocheted gusset, or a decrease line? Map the original direction before repairing.
- Rebuild missing loops first. With a fine hook 0.5 to 1 mm smaller than the original, catch live loops if present and work tiny replacement stitches into the gap.
- Duplicate the adjacent stitches. Reinforce 3 to 5 stitches/rows beyond the hole in the direction of movement.
- Add sparse running stitches on the wrong side. Work short, offset stitches parallel to the seam line, not across the full stretch direction.
- Check arm movement. Raise and lower the arm. If the area bites or tents, remove some crosswise reinforcement.
- Steam lightly if appropriate. Let the fabric settle back into shape.
Underarm warning
Do not fill the entire underarm with dense visible stitching. A little support in the right direction outperforms a thick patch that traps stress at its edge.
Decorative visible mending that still behaves well
Visible reinforcement can be beautiful, but decorative choices should still respect function.
Good decorative strategies
- mirrored elbow reinforcements on both sleeves
- geometric running-stitch fields over seat or hip wear
- contrast duplicate crochet echoing pocket edges
- tonal mending in one or two shades darker for subtle depth
- reinforcing bag handles with repeated motifs that align with the stitch grid
Color placement tips
- High contrast highlights every line and can make broad reinforcement feel intentional
- Low contrast blends structure while still adding visual richness
- Variegated repair yarn can disguise uneven wear but may visually muddy textured stitch patterns
- Cool-on-warm or warm-on-cool contrast is often more sophisticated than simply lighter or darker
If you are making one visible mend on a garment, ask whether the piece needs visual balance. One elbow patch may look accidental; two may look designed.
Preserving drape and elasticity: the rules that matter most
If there is one theme in stress-point repair, it is this: strength comes from distribution, not stiffness.
Rule 1: Match the repair to the movement direction
- Elbows need bend-friendly horizontal and offset support.
- Underarms need reinforcement that respects extension and compression.
- Pocket corners and handle bases need diagonal load spread.
- Seat repairs need broad, supple support over an area.
Rule 2: Avoid over-packing yarn
If the repaired section contains significantly more material than the surrounding fabric, drape changes immediately. Favor multiple light passes over one dense patch.
Rule 3: Anchor outside the danger zone
Ends, starts, and direction changes should land in healthy fabric, ideally 2 to 4 stitches beyond wear, more if the area bears load.
Rule 4: Use the wrong side when the front needs softness
Backing support and quiet reinforcement on the wrong side can preserve surface texture and hand better than heavy visible stitching on the front.
Rule 5: Finish with the fabric’s fiber in mind
Wool can often be gently steamed or lightly fulled into cohesion. Cotton benefits from careful pressing and reshaping, not forced shrinking. Acrylic should be handled cautiously around heat.
Common mistakes and how to fix them
Mistake 1: The repair puckers the fabric
Cause: tension too tight, thread too inelastic, or reinforcement spanning a stretched fabric state.
Fix: remove every second stitch line or rework with the fabric fully relaxed. Switch to a softer, finer repair yarn.
Mistake 2: The mend feels stiff or bulky
Cause: yarn too thick, too many passes, patch too heavy.
Fix: downgrade one material level. For example, replace worsted repair yarn with fingering yarn on a worsted garment, or use a lighter backing cloth.
Mistake 3: The hole reopens at the edge of the repair
Cause: you repaired only the visible center and not the weakened perimeter.
Fix: extend reinforcement at least 2 to 4 stitches/rows further in all directions. Re-anchor in healthy fabric.
Mistake 4: Decorative stitching distorts the stitch pattern
Cause: lines ignored the crochet architecture.
Fix: trace actual stitch paths, side bars, or row lines rather than imposing a rigid grid that fights the fabric.
Mistake 5: Handle repairs still stretch under load
Cause: the handle base was strengthened, but the surrounding top edge was not.
Fix: add a broader wrong-side support strip and distribute reinforcement into a larger field.
Mistake 6: The underarm repair scratches or catches
Cause: bulky ends, knots, or coarse thread.
Fix: rework with softer yarn, bury ends farther away, and avoid knots in high-contact areas.
Reinforcement strategies by stress point
Here is the quick-reference version.
Elbows
- Best methods: sashiko-inspired running stitches, duplicate crochet, soft backing patch if badly worn
- Reinforcement area: at least 1.5 to 3 cm beyond wear zone
- Priority: preserve bend and drape
Underarms
- Best methods: duplicate crochet, small darn, sparse wrong-side running stitches
- Reinforcement area: 3 to 5 stitches/rows beyond damage minimum
- Priority: elasticity and low bulk
Pocket corners
- Best methods: duplicate crochet, triangular reinforcement, backing patch on wrong side if fabric is open
- Reinforcement area: 6 to 12 stitches wide, 4 to 8 rows deep
- Priority: redirect downward pull
Bag handles
- Best methods: backing support, duplicate crochet, distributed stitching through top edge
- Reinforcement area: handle base plus 4 to 6 cm beyond if possible
- Priority: load transfer and edge stability
Seat stress points
- Best methods: woven darning, broad visible reinforcement, featherweight backing
- Reinforcement area: 1.5 to 3 cm beyond thinning
- Priority: abrasion resistance without creating a hard sitting ridge
Planning a repair swatch first
When the project really matters, make a swatch before touching the garment.
Use the same or similar yarn and stitch pattern. Work a square at least 12 cm x 12 cm. Then test:
- one line of running stitches
- a denser field of running stitches
- duplicate crochet over 4 to 6 stitches
- a small woven darn
- a backing patch attached with your intended thread
Crumple the swatch in your hand. Bend it. Hang it. Rub it lightly. You will quickly feel which method preserves the right hand.
This matters especially with:
- alpaca blends
- bamboo or silk-heavy yarns
- lofty singles yarns
- heavily draped garments
- open stitch garments where visible mending can easily become too heavy
Finishing for longevity
The repair is not done when the last tail is woven in.
Weave in with load in mind
Run tails in the direction opposite the main pull where possible. On slick fibers, change direction at least once and travel 5 to 7 cm or more.
Block or steam carefully
- Wool: light steam or damp blocking can settle the mend beautifully
- Cotton/linen: reshape while damp, press gently from the wrong side if needed
- Acrylic: avoid over-steaming unless you are certain of the yarn’s behavior
Let the piece rest
After a substantial repair, let the fabric lie flat for several hours before wear. This allows tension to equalize.
Reassess after first use
Wear the garment once or load the bag lightly, then inspect. Small adjustments now prevent larger failures later.
When to redesign instead of simply repair
Sometimes recurring damage is telling you the original structure was underbuilt for the use.
Consider redesign when:
- bag handles attach too narrowly for the weight carried
- a pocket is too large/heavy for the body fabric
- underarm shaping creates a constant sharp pull point
- a seat area in a tunic is too open or too drapey for regular abrasion
- a fiber choice, such as low-twist alpaca for a hard-use tote, is mismatched to function
In those cases, the best repair may include modification:
- widening handle attachment from 6 stitches to 12
- adding a support facing behind pocket tops
- inserting a small underarm gusset
- adding an internal seat panel or lining section
- replacing a handle entirely with a stronger construction
Repair is not failure. It is design feedback.
The deeper satisfaction of a well-made mend
One of the pleasures of crochet repair is that it asks us to look more closely at our own fabric. We see where the rows carry weight, where the stitch pattern flexes, where yarn choice helped or hindered durability. Mending becomes less about disguising damage and more about collaborating with the original structure.
A good crochet repair does not merely close a hole. It restores balance. The sleeve bends again. The pocket carries a hand without sagging. The handle lifts with confidence. The seat of a tunic no longer feels one abrasion away from failure. And the fabric still moves the way it was meant to move.
If you remember only a few things, let them be these:
- Read the stress pattern before choosing the technique.
- Match reinforcement to fiber, stitch architecture, and movement direction.
- Extend support beyond the visibly damaged area.
- Use lighter, more distributed reinforcement when drape matters.
- Let visible mending be intentional, not accidental.
- Test with your hands, not just your eyes.
Crochet is built loop by loop, and it can be rebuilt the same way. With careful stitching, thoughtful materials, and respect for how the fabric wants to move, you can reinforce the most vulnerable parts of a handmade piece without sacrificing the softness and drape that made you love it in the first place.