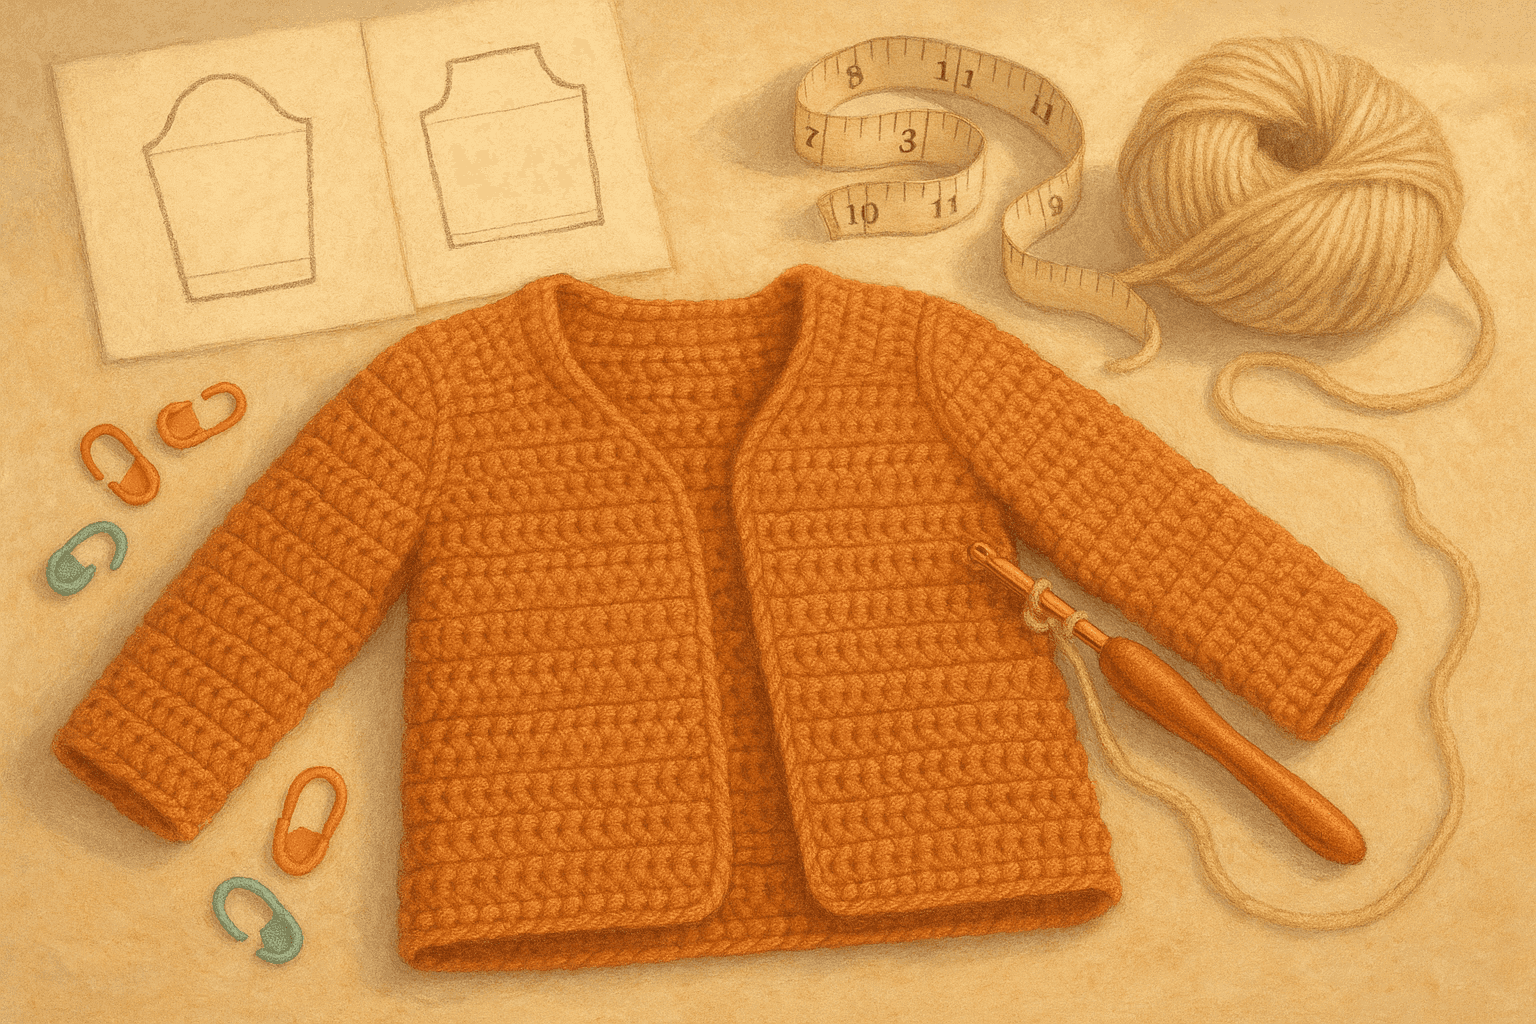
There is a particular kind of optimism that shows up right after a crocheted sweater body is finished. The front and back look tidy, the armholes seem reasonable, and the sleeves—worked so carefully—appear as though they should slip right in and behave. Then you pin everything together, try it on, and reality arrives. The underarm collapses. The sleeve twists backward. There are drag lines pointing from bust to bicep, or a stubborn ridge at the cap that refuses to settle. Sometimes the sleeve even looks perfect on the table and completely wrong on the body.
If you have been there, you are in very good company. Set-in sleeves are one of the clearest places where crochet construction has to do real engineering work. A sleeve is not just a tube attached to a hole. It is a shaped, rotating piece that has to cooperate with the armhole, the shoulder slope, the direction of the arm at rest, and the behavior of the fabric itself. When those factors are in balance, the garment suddenly looks more tailored, hangs better, and feels easier to wear. When they are ignored, even beautiful stitchwork can look strained.
This is where sleeve cap shaping becomes less mysterious and much more practical. The goal is not to force crochet to imitate woven tailoring exactly. Crochet is thicker, springier, and often less willing to disappear into a sharp seam than sewn fabric. But with thoughtful cap ease, front-and-back balance, realistic bicep ease, and controlled sleeve rotation, you can make crocheted set-in sleeves that actually hang correctly.
In this guide, we will walk through the structure behind a good set-in sleeve, how to map stitches to an armhole, when to use decrease-based shaping versus short rows, how fiber and seam support affect the outcome, and how to modify a pattern when the sleeve technically fits the numbers but not the body. I will keep this practical: what to measure, what to count, what to watch for, and how to correct trouble before it is permanently seamed.
Why set-in sleeves fail so often in crochet
A crochet set-in sleeve usually goes wrong for one of five reasons:
- The sleeve cap perimeter does not truly match the armhole seamline.
- The cap height is wrong for the armhole depth and shoulder structure.
- The front and back portions of the sleeve cap are too symmetrical.
- The sleeve tube has poor bicep ease or the wrong pitch, so the cap gets distorted during wear.
- The fabric lacks recovery or seam support, causing the underarm and cap to collapse.
Many patterns reduce sleeve design to one instruction: “decrease evenly at each side until cap fits armhole.” That can produce a sleeve that can be sewn in, but sewing in is not the same thing as hanging correctly. A wearable set-in sleeve needs three-dimensional thinking.
The arm does not hang straight out from the body like a drafting diagram. At rest, most people’s arms sit slightly forward. The shoulder line also slopes, and the back body generally needs a bit more length and support across the upper back than the front. That means the sleeve cap should almost never be perfectly mirrored front to back.
In garment sewing, this is handled through sleeve pitch, front and back notches, cap ease, and deliberate distribution of shape. In crochet, we need equivalent tools: stitch mapping, cap section planning, and careful seaming.
The three measurements that matter most
Before shaping anything, collect the measurements that actually govern the sleeve.
1. Armhole seamline length
Measure the armhole along the seamline, not the raw edge if you are adding a seam allowance effect through mattress stitch or slip-stitch joining. If the body is already blocked, measure it blocked. If not, swatch, block, and estimate how much the armhole edge will relax.
Take separate measurements for:
- Front armhole length
- Back armhole length
- Total armhole length
In many garments, the back armhole length is slightly longer than the front, especially if there is meaningful shoulder shaping.
2. Bicep circumference at the finished sleeve
Measure around the fullest upper arm where the sleeve will sit. Then add ease.
Typical bicep ease guidelines for crochet set-in sleeves:
- Close fit: 1–2 in / 2.5–5 cm positive ease
- Standard fit: 2–4 in / 5–10 cm positive ease
- Relaxed fit: 4–6 in / 10–15 cm positive ease
Crochet generally benefits from a little more bicep ease than knitting if the fabric is dense or the yarn has limited recovery.
3. Sleeve cap height
Sleeve cap height is the vertical distance from the bicep line to the top of the cap. This influences mobility, shoulder appearance, and drag.
General tendencies:
- Higher cap: more tailored look, cleaner hang at rest, often less overhead mobility unless paired with enough bicep ease and a balanced armhole
- Lower cap: easier movement, more casual appearance, greater risk of drag lines or underarm collapse if too low for the armhole
A practical starting range for crochet adult garments is often:
- Cap height = 30% to 40% of armhole depth for relaxed silhouettes
- Cap height = 40% to 55% of armhole depth for more fitted, tailored silhouettes
These are not rigid formulas, but helpful starting points.
Understanding cap ease in crochet
In sewn garments, sleeve caps commonly include easing—extra sleeve cap length gently distributed into the armhole. Crochet can also use cap ease, but in a more restrained way.
Because crochet fabric is thicker and bulkier at seams, too much cap ease creates gathers, ridges, and stiffness rather than smooth shaping. Too little ease, however, can make the sleeve pull and flatten.
A realistic crochet target
For many crochet garments, aim for:
- 0% to 3% cap ease for dense or bulky fabrics
- 2% to 5% cap ease for flexible, drapey fabrics with strong recovery
Example:
- Total armhole seamline = 18 in
- Target cap perimeter = 18 to 18.75 in for most crochet applications
If your sleeve cap perimeter is 20 in for an 18 in armhole, that is usually too much unless the fabric is exceptionally light and elastic.
Where to place the ease
Any slight excess should generally be distributed around the upper cap—not dumped into the underarm. The lower front and lower back portions near the underarm should align cleanly, because bulk there causes collapse, chafing, and visible strain.
Front-back balance and why a symmetrical cap often twists
One of the most useful shifts in thinking is to stop treating the sleeve cap as an identical left-right mountain. A well-hanging sleeve usually has:
- A slightly shallower front curve
- A slightly fuller or longer back curve
- A top point that may sit just a touch forward or be marked so the sleeve rotates into a natural resting position
This reflects the fact that the arm sits slightly forward and the upper back needs room.
Signs your sleeve cap is too symmetrical
- The sleeve seam wants to rotate backward or forward after seaming.
- Horizontal wrinkles appear above the front armhole.
- Diagonal drag lines run from the underarm toward the bust or shoulder blade.
- The garment feels as if the sleeve is fighting the body’s natural posture.
Easy adjustment method
If your total cap perimeter is correct but the sleeve twists:
- Shift 2–6 stitches of cap length from the front half to the back half.
- Or add 1–3 short rows to the back cap only.
- Or reduce the front cap by one shaping step while leaving the back intact.
The exact number depends on gauge and size, but very small changes can transform the hang.
Decrease-based caps vs short-row caps
There are two major strategies for crochet sleeve caps, and each has strengths.
1. Decrease-based sleeve caps
This is the method most crocheters know: begin at the bicep width, then decrease at each side across successive rows to shape the cap.
Pros
- Straightforward to write and follow
- Easy to count and grade between sizes
- Works well in sturdy stitch patterns
- Good for simpler garments and seamed construction
Cons
- Can produce a polygonal rather than rounded cap if shaping is too abrupt
- Harder to fine-tune front/back asymmetry elegantly
- May create visible “steps” in taller stitches
Best uses
- Half double crochet, single crochet, linen stitch, or compact textured fabrics
- Classic pullovers and cardigans with moderate structure
- Beginners learning sleeve geometry
2. Short-row sleeve caps
Short rows build vertical height selectively across parts of the cap without necessarily changing the full width as dramatically.
Pros
- Better control over back-cap fullness and sleeve pitch
- Smoother shaping across the top curve
- Excellent for balancing front and back cap height
- Useful when you need more cap height without over-reducing width
Cons
- Harder to visualize at first
- Can disrupt certain stitch patterns
- Requires careful turning and edge management
Best uses
- Garments needing a more tailored shoulder line
- Sleeves that twist despite matching perimeter numbers
- Softer yarns and fabrics where rounded shaping matters
Hybrid method: often the best of both
In practice, many of the best crochet set-in sleeves use a hybrid:
- Decrease-based shaping at the lower cap to remove width cleanly from the bicep line toward the upper armhole
- Short rows at the upper back cap to build subtle height and rotation
This often gives the cleanest result with the least drama.
Mapping the sleeve cap to the armhole
This is the part that makes everything behave. Instead of “eyeballing until it sort of fits,” map sections of the sleeve to sections of the armhole.
Step 1: Measure the armhole in sections
For each side of the garment, identify:
- Lower front armhole: underarm to about one-third up
- Upper front armhole: one-third up to shoulder
- Upper back armhole: shoulder down to about one-third from underarm
- Lower back armhole: remaining section to underarm
Write down the stitch or inch counts for each section.
Example armhole:
- Lower front = 2.25 in
- Upper front = 2.75 in
- Upper back = 3.25 in
- Lower back = 2.75 in
- Total = 11 in per side? No—be careful here. For the full armhole opening, front plus back combined might total 18 in. Always confirm your measuring path.
For clarity, let’s use a full armhole opening example:
- Front total armhole seamline = 8.5 in
- Back total armhole seamline = 9 in
- Combined = 17.5 in
Step 2: Divide the sleeve cap into matching zones
Mark your sleeve cap with stitch markers:
- Underarm point
- Lower front cap
- Upper front cap
- Cap top
- Upper back cap
- Lower back cap
- Underarm point
Step 3: Match shape, not just length
The lower cap sections should meet the straighter lower armhole smoothly. The strongest curve belongs in the upper sections, especially the upper back. This is where many crochet sleeves improve instantly: the shaping should not be evenly distributed from bottom to top.
A worked planning example
Let’s say your gauge in half double crochet after blocking is:
- 14 sts = 4 in
- 11 rows = 4 in
That means:
- 3.5 sts per inch
- 2.75 rows per inch
Your measurements:
- Full bicep target circumference = 15 in
- Total armhole seamline = 18 in
- Front armhole seamline = 8.75 in
- Back armhole seamline = 9.25 in
- Desired cap ease = 0.5 in total
- Desired cap height = 5.25 in
Calculate sleeve width at bicep
15 in × 3.5 sts/in = 52.5 sts
Round to a practical stitch count based on stitch pattern. Use 52 sts or 54 sts. Let’s use 54 sts.
Calculate cap perimeter target
18 in + 0.5 in ease = 18.5 in
At 3.5 sts/in equivalent around the perimeter, the exact conversion is imperfect because cap perimeter includes row edges and shaped sides, not just top stitches. This is why measuring the actual piece is better than relying on stitch count alone. Still, we can plan by sections.
Calculate cap height
5.25 in × 2.75 rows/in = 14.4 rows
Round to 14 or 15 rows. Let’s use 15 rows for planning.
Plan shaping distribution
For a decrease-based lower cap and refined upper cap, you might do:
- Rows 1–4: rapid underarm removal
- Rows 5–10: moderate shaping
- Rows 11–15: slower shaping plus optional back short rows
Possible lower-cap decrease schedule from 54 sts:
- Row 1: dec 3 sts each side = 48 sts
- Row 2: dec 2 sts each side = 44 sts
- Row 3: dec 1 st each side = 42 sts
- Row 4: dec 1 st each side = 40 sts
- Rows 5–10: dec 1 st each side every row for 6 rows = 28 sts
- Rows 11–13: dec 1 st each side every other row = 22 sts by row 13
- Rows 14–15: shape top gently to finish
This is not a universal formula, but it shows how lower-cap shaping removes width faster, while the upper cap softens.
Add back-cap short rows
If testing shows the sleeve needs more back length, add:
- 1 short row spanning the center 12 sts
- 1 short row spanning the center 18 sts
These two short rows can add useful back-cap height without increasing bulk at the front.
Step-by-step method for engineering a crochet set-in sleeve
Step 1: Swatch honestly
Make a sleeve swatch in the actual stitch pattern, at least 6 x 6 in if possible. Block it the way you will treat the garment.
Record:
- Stitch gauge over 4 in
- Row gauge over 4 in
- How much the fabric grows vertically and horizontally
- Whether the fabric rebounds after stretching
If the swatch sags and stays sagged, reduce ease or choose a firmer seam method.
Recommended hook guidance for garment sleeves:
- Fingering yarn: 3.25–4 mm
- Sport yarn: 3.5–4.5 mm
- DK yarn: 4–5 mm
- Worsted yarn: 4.5–6 mm
But let fabric behavior decide. A too-large hook can make a sleeve cap collapse even when the math is excellent.
Step 2: Build the sleeve tube with proper bicep ease
Work the sleeve to the full bicep circumference first. Keep the top of sleeve—the point where cap shaping starts—clearly marked.
For a standard adult sleeve in DK or worsted crochet, common bicep stitch counts might range widely depending on gauge, but always check the finished inch measurement. Do not trust “size medium” numbers out of context.
A useful checkpoint:
- If the sleeve feels snug before cap shaping even begins, the cap will likely distort once set in.
- If the sleeve is extremely loose, the underarm may bunch and collapse.
Step 3: Mark the armhole sections
Place markers at:
- Underarm seam on body
- Approximate lower-to-upper transition on front armhole
- Shoulder point
- Approximate upper-to-lower transition on back armhole
Then do the same conceptually on the sleeve cap.
Step 4: Shape the lower cap first
This area needs clean reduction so the sleeve can meet the underarm without bunching.
A common lower-cap approach:
- First row: decrease 2–4 sts at each side if your bicep is roomy
- Next 2–4 rows: decrease 1–2 sts at each side
This mimics the steeper lower armhole curve.
Example in hdc:
- Starting count: 54 sts
- Row 1: ch 1, hdc2tog, work to last 2 sts, hdc2tog — 52 sts
- Row 2: repeat — 50 sts
- Row 3: hdc2tog twice at beginning and end if stronger reduction is needed — 46 sts
The exact order depends on your armhole, but the idea is to remove enough width early.
Step 5: Refine the upper cap
Once the lower width is gone, shape the upper cap more gently. This is where many sleeves become too pointed if decreases continue too aggressively.
Try one of these:
- Decrease every row for a few rows, then every other row
- Alternate plain rows with decrease rows
- Add short rows across the top-back section
Your upper front cap usually wants slightly less length than the upper back.
Step 6: Test sleeve rotation before seaming permanently
Baste the sleeve into the armhole with removable yarn or locking stitch markers.
Check these points while the wearer stands naturally:
- Does the sleeve seam hang roughly at the underarm and side as intended?
- Does the sleeve pull backward?
- Are there diagonal lines toward the bust front?
- Is there excess bubbling at the back cap?
- Can the arm move slightly forward without dragging the whole garment?
If the sleeve rotates backward, the back cap may need more length or the sleeve pitch may need to shift forward. If it rotates forward, the reverse may be true.
Step 7: Seam with support, not force
A crochet sleeve should be sewn into the armhole with the pieces supported evenly. Do not stretch one piece to fit the other unless you are easing a very small amount at the top cap.
Best seam choices:
- Mattress stitch for a polished, flexible seam
- Slip-stitch seam for firmer support in dense fabrics
- Backstitch-style sewn seam with matching yarn for sturdy garments
If the yarn is very slippery or the fabric is open, a slightly firmer sewn seam can keep the underarm from dropping over time.
Troubleshooting: what the wrinkles are telling you
One of the fastest ways to improve sleeve shaping is to read the drag lines instead of treating them as vague disappointment.
Problem: Diagonal drag lines from underarm to bust front
Likely causes
- Front cap too long or too full
- Bicep too tight, forcing the sleeve upward and inward
- Sleeve pitch set too far back
Fixes
- Remove 1–3 rows or equivalent shaping from the front upper cap
- Add 0.5–1.5 in bicep ease in the next version
- Rotate sleeve slightly forward during set-in
Problem: Diagonal drag lines from underarm to shoulder blade
Likely causes
- Back cap too short
- Insufficient upper-back sleeve room
- Armhole too shallow at back
Fixes
- Add 1–3 short rows to the back cap
- Increase back cap length by 2–6 stitches worth of perimeter
- Confirm shoulder seam placement is not too far back
Problem: Underarm collapse or puddling
Likely causes
- Cap height too low
- Bicep too wide for the armhole depth
- Fabric too drapey without seam support
- Too much bulk gathered at lower armhole
Fixes
- Raise cap height by 0.5–1.25 in
- Reduce bicep width slightly while preserving mobility
- Use a firmer seam or seam reinforcement
- Rework lower-cap shaping so the underarm aligns cleanly
Problem: Sleeve twists after seaming
Likely causes
- Front/back cap balance is off
- Sleeve pitch not matched to natural arm position
- Cap top marker not aligned correctly to shoulder
Fixes
- Shift cap distribution toward the back by a small amount
- Mark front and back notches clearly before seaming
- Re-baste with the sleeve rotated slightly forward
Problem: Puffy ridge at top of cap
Likely causes
- Too much cap ease n- Upper cap decreases too abrupt
- Fabric too thick for that amount of shaping
Fixes
- Reduce cap perimeter by 0.25–0.75 in
- Replace some top decreases with short rows
- Use finer yarn or a smaller hook for better cap control
Problem: Restricted movement despite correct appearance
Likely causes
- Bicep ease too small
- Cap too high for the fabric and wearer’s needs
- Armhole too high or too narrow
Fixes
- Add bicep ease first; this often solves more than lowering the cap
- Lower cap slightly only if hang remains good
- Review body armhole depth in the pattern, not just sleeve shaping
Fiber recovery and why yarn choice changes the engineering
Sleeve caps live under stress. They are lifted, rotated, and pulled every time the garment is worn. Fiber behavior matters.
Wool and wool blends
Usually the easiest for set-in sleeves because they offer:
- Elastic recovery
- Better rebound after movement
- More tolerance for light cap ease
These are excellent choices for tailored crochet garments.
Cotton and linen blends
Can be beautiful, but watch for:
- Vertical growth
- Limited spring
- Underarm stretching over time
With these fibers:
- Use less cap ease
- Consider a slightly firmer gauge
- Add stronger seam support
- Be cautious with oversized biceps and low caps
Acrylic
Behavior varies dramatically. Some acrylics bounce back well; others bag out.
Swatch and hang the swatch with a few clothespins for several hours if you are uncertain. If the fabric grows and does not recover, sleeve engineering must compensate.
Alpaca, bamboo, silk-heavy blends
These can drape beautifully but may lack enough resilience for a crisp set-in sleeve without structural help.
Consider:
- Tighter gauge
- Smaller amount of cap ease
- Strong shoulder and armhole seams
- Hybrid cap shaping with careful top support
Seam support and stabilization
A gorgeous sleeve can fail because the seam is too soft. Crochet seams are not just finishing—they are architecture.
Where support matters most
- Underarm junction
- Upper cap near shoulder
- Shoulder seam itself
Stabilization options
- Work a firmer join stitch than the body fabric suggests
- Use a sewn seam with matching yarn or fine sewing thread if appropriate
- Add a narrow reinforcement chain or slip-stitch tape inside the shoulder seam
- In very drapey garments, stabilize the armhole edge before seaming the sleeve
The goal is not stiffness. It is preventing gravity from redrafting your garment after three wears.
Modifying a published pattern for better hang
Many crocheters can follow a sleeve pattern exactly and still end up with a twisty or collapsing sleeve because the pattern was graded simply, tested on a limited body range, or written for a different yarn behavior.
Here is how to improve a pattern without rewriting everything.
Modification 1: Increase bicep ease without changing cuff
If the cuff fits but the upper arm is tight:
- Add increase rounds/rows more frequently through the upper sleeve
- Keep the cap shaping start point marked
- Recalculate the number of stitches that must be removed during cap shaping
Example:
- Original bicep: 48 sts at 4 sts/in = 12 in
- Needed finished bicep: 14 in
- New target: 56 sts
That means cap shaping must remove 8 more sts overall than the original pattern before the upper cap is complete.
Modification 2: Add back-cap height only
If the sleeve twists backward or strains across the back:
- Insert 2 short rows near the top-back cap
- Span about one-third to one-half of the sleeve width at the top
- Blend them before final top shaping
Modification 3: Reduce front cap fullness
If the front armhole bubbles or drags:
- Work one fewer plain row on the front half equivalent
- Or deepen one front-side decrease sequence
- Or seam with the front notch slightly lower and the back notch slightly higher, if the difference is minor
Modification 4: Raise cap height without increasing perimeter too much
Use short rows instead of simply adding more decrease rows. More rows can add height with less horizontal bulk than extra width-preserving rows.
Modification 5: Improve underarm balance
If the underarm is bulky:
- Remove 1–2 stitches from each lower sleeve side before cap shaping begins
- Make the first cap decreases steeper
- Ensure the body armhole lower edge is not overly scooped
A practical sleeve-cap worksheet you can use
When planning your next garment, write these down:
- Yarn weight:
- Fiber content:
- Hook size:
- Stitch pattern:
- Stitch gauge per 4 in:
- Row gauge per 4 in:
- Bicep measurement:
- Desired bicep ease:
- Finished bicep circumference:
- Front armhole seamline length:
- Back armhole seamline length:
- Total armhole seamline length:
- Target cap ease:
- Cap height target:
- Lower-front cap section plan:
- Upper-front cap section plan:
- Upper-back cap section plan:
- Lower-back cap section plan:
- Short rows added? Where?
- Final basted fit notes:
This kind of record-keeping makes your second sleeve better—and your next sweater dramatically better.
Suggested stitch patterns for successful set-in sleeves
Not every crochet fabric wants to become a tailored sleeve.
Easiest to shape cleanly
- Single crochet
- Half double crochet
- Extended single crochet
- Linen/moss stitch
- Fine-grained linked stitches
These create smoother cap curves and more controllable seams.
More challenging but possible
- Double crochet at firm gauge
- Light texture repeats with short vertical patterning
- Post-stitch fabrics with restraint
Most difficult for a refined set-in cap
- Very tall open lace
- Heavy bobbles across cap shaping area
- Deep rib textures with strong directional pull
- Extremely bulky yarn worked loosely
If you want a sleeve that hangs beautifully, save the boldest texture for the body or lower sleeve and simplify the cap zone.
Step-by-step summary formula for your next project
Here is a practical sequence you can follow every time:
- Swatch and block in the real stitch pattern.
- Measure the armhole seamline front and back separately.
- Choose bicep ease based on fit and fiber recovery.
- Set sleeve cap height based on silhouette and mobility needs.
- Work sleeve tube to correct bicep width.
- Shape lower cap more aggressively to remove underarm bulk.
- Shape upper cap more gently and keep front/back lengths distinct.
- Add back-cap short rows if needed for pitch and upper-back comfort.
- Baste before seaming permanently and read the wrinkles.
- Stabilize seams according to yarn and fabric behavior.
The takeaways that matter most
A crocheted set-in sleeve hangs correctly when the geometry and the fabric agree with each other. That means the armhole seamline and sleeve cap perimeter must genuinely correspond, but also that the cap must be balanced front to back, the bicep must have enough ease to prevent distortion, and the seam must support the weight of the fabric over time.
If there is one habit worth adopting immediately, it is this: stop evaluating sleeves only by whether they can be sewn in. Baste them, try them on, and read what the garment is telling you. A twist is not random. A drag line is not personal. Underarm collapse is not inevitable in crochet. These are engineering clues.
And if there is one design principle worth keeping close, it is that crochet rewards moderation at the sleeve cap. Moderate ease. Moderate bulk. Controlled shaping. Strategic support. The closer you get to mapping the sleeve to the actual armhole—in sections, with real measurements, in the real blocked fabric—the more likely your garment is to look polished and feel comfortable.
A well-shaped crochet sleeve does something quietly magical: it disappears. Not visually, but mechanically. You stop thinking about it. The sweater sits where it should, the arm moves naturally, the underarm stays neat, and the whole garment looks more intentional. That is the real promise of set-in sleeve cap shaping—not perfection for its own sake, but a crochet garment that finally behaves like it belongs on a body, not just on a blocking mat.