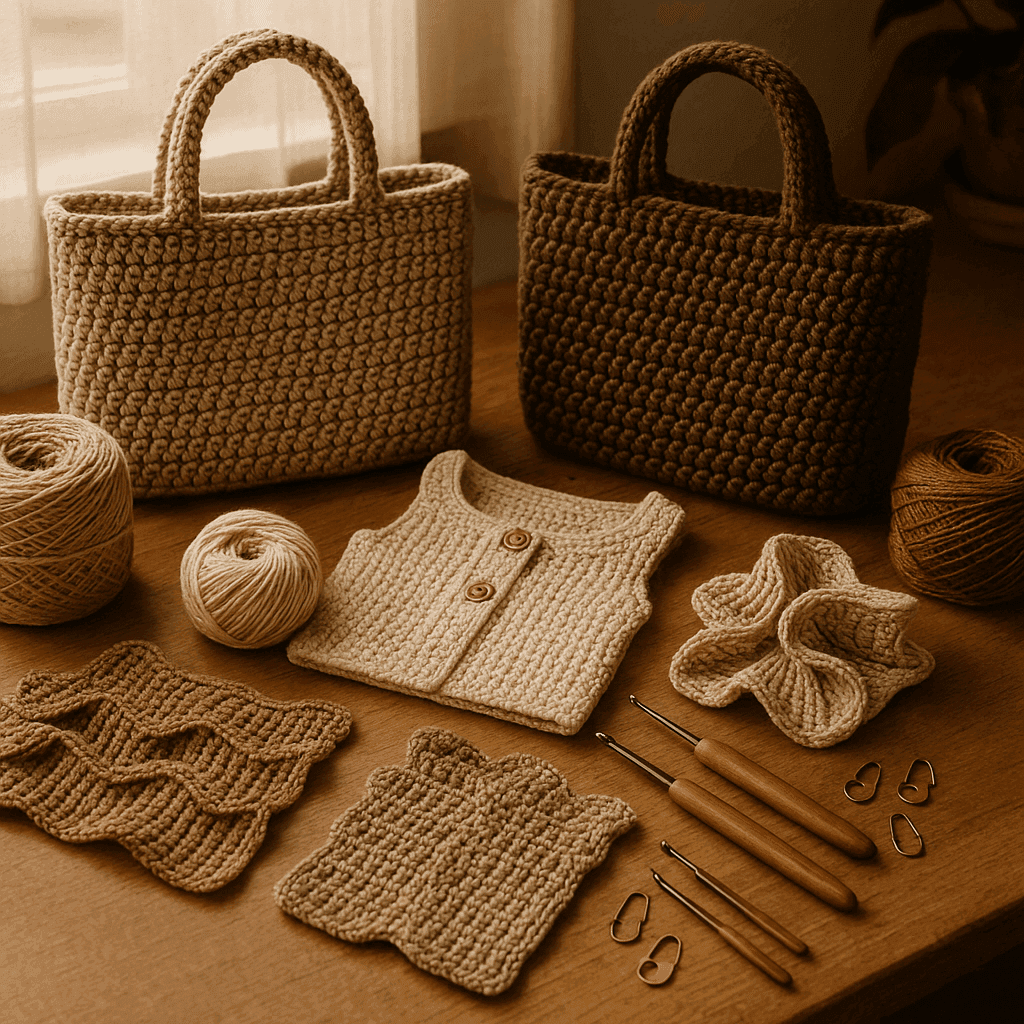
There is a particular kind of crochet frustration that shows up after the very last tail is woven in. You pick up a bag that looked beautifully architectural while it was flat on the table, only to watch the sides slump outward. Or you finish a collar, cuff, sculptural vessel, or fold-over clutch that was supposed to bend neatly along one line, but instead the whole piece crumples wherever it pleases. Sometimes the opposite happens: a garment panel that should drape and move feels like cardboard from edge to edge, with no graceful place for the fabric to collapse.
That moment teaches a useful lesson: crochet fabric does not only need shape, it needs zones of different behavior. If we want a piece to fold where we choose and stay firm where we do not, we have to design that logic into the fabric itself. In sewing, this might come from interfacing, seam placement, boning, bias, pleats, or grain direction. In crochet, we have our own structural toolkit: stitch orientation, row direction, density changes, relief lines, spacer rows, fiber selection, finishing, and strategic reinforcement.
When you begin thinking in terms of shear planes and hinges, a lot of difficult design problems suddenly become clearer. A tote bag needs broad, stable walls but softer side collapse. A phone sleeve needs a crisp flap that closes repeatedly along the same line without stretching out. A wearable cowl or hood might need a fold line that sits close to the face while the surrounding fabric remains rounded. A sculptural crochet form may need articulated panels that open, accordion, pivot, or nest.
The exciting part is that crochet is especially good at this kind of engineered movement because every stitch is directional. We can place elasticity and resistance with remarkable precision. The challenge is learning to read fabric behavior before the final object is assembled.
Understanding shear planes and hinges in crochet
A shear plane in crochet is a line or narrow zone where the fabric is encouraged to bend, compress, or shift relative to the denser fabric around it. A hinge is a deliberate version of that idea: a fold line built to repeat movement in one area while preserving structure elsewhere.
Think of it this way:
- Firm zones resist distortion.
- Mobile zones invite bending or collapsing.
- Transition zones control how one becomes the other.
In crochet, hinges are not always literal creases. Sometimes they are flexible channels, accordion folds, gusset ridges, or articulated joins. Sometimes they are made by reducing bulk. Other times, they are made by concentrating bulk on either side and leaving a valley between.
A successful crochet hinge depends on several variables working together:
- Stitch orientation: whether stitches are worked vertically, horizontally, in rounds, in short rows, or around posts.
- Density contrast: tight stitches beside looser stitches, short stitches beside tall stitches, compact rows beside open spacer rows.
- Relief structure: ridges, post stitches, back-loop work, slip-stitch channels, or recessed rows that define a fold path.
- Fiber behavior: whether the yarn springs back, crushes flat, softens with steam, or holds a crease.
- Finishing: blocking, seaming, lining, cord insertion, reinforcement, or edge treatment.
The reason some crochet pieces seem to “know” how to move is that all of these factors point in the same direction.
What makes crochet bend or stay rigid?
Before designing a fold line, it helps to understand what creates mobility and what creates resistance.
Elements that increase firmness
- Tight gauge relative to yarn size
- Short stitches such as single crochet and slip stitch
- Dense stitch patterns with little negative space
- Non-stretch fibers such as cotton, linen, hemp, raffia, paper yarn, jute blends
- Reinforcing rows, seams, or linings
- Working against the fabric’s natural stretch direction
- Staggered shaping distributed over a broad area rather than concentrated at one line
Elements that increase mobility
- Looser gauge n- Taller stitches such as half double crochet, double crochet, and treble crochet
- Openwork or chain spaces
- Back-loop-only or front-loop-only rows that create natural turning ridges
- Soft fibers such as wool, alpaca, superwash blends, bamboo-heavy yarns
- Short row wedges that introduce directional ease
- Spacer rows or recessed rows between denser sections
Important principle: mobility is relative
A hinge works best when it is not simply floppy. It is more mobile than the zones around it. If the whole fabric is equally soft, the fold will wander. If the entire piece is equally dense, it may refuse to bend where desired and instead buckle unpredictably.
So your goal is not “make it flexible” or “make it stiff.” Your goal is controlled contrast.
Stitch orientation: the first design decision
Crochet changes personality depending on direction. The same yarn and hook can produce very different movement depending on whether you work side to side, bottom up, top down, in rounds, or as modular panels.
Horizontal rows vs vertical columns
Most crocheters already know that fabric often stretches differently across rows than along them. In many common stitch patterns, rows create a natural horizontal grain that can compress and expand in a different way from the vertical grain.
If you want a fold line to run horizontally, you may work a specific row treatment across the width of the fabric:
- back-loop-only row
- slip-stitch row
- chain-space spacer row
- front-post/back-post relief row
- lower-height row inserted between taller rows
If you want a fold line to run vertically, you may need to build that mobility with:
- narrow panels worked separately and joined
- a column of altered stitches
- strategically placed decreases/increases
- a recessed seam or join-as-you-go channel
- turning the work so the grain supports the desired fold direction
Example: bag side collapse
For a rectangular tote, the front and back panels often need to stay broad and flat, while the side zones should fold inward. If the whole body is worked in uninterrupted rounds, the side collapse may happen randomly unless you mark side hinge columns.
A practical approach:
- Use single crochet or waistcoat stitch for the main body.
- Mark two side hinge lines, each centered on 2 stitches.
- Work those 2 stitches in back loop only every 3rd or 4th round.
- Optionally size up your hook by 0.5 mm only for those hinge stitches.
This creates vertical memory lines so the bag repeatedly closes inward at the same places.
Density engineering: designing fabric with zones
Density changes are one of the most reliable ways to control movement. A dense area behaves like a wall; a less dense area behaves like a joint.
Methods for directional density change
-
Change hook size in select areas
- Main panel: 4.0 mm hook
- Hinge channel: 4.5 mm hook
- Reinforced edge: 3.5 mm hook
-
Change stitch height
- Main panel in single crochet
- Hinge in half double crochet or a row of chains/slip stitches
-
Change stitch count distribution
- Add subtle increases before and after a fold line so neighboring sections bow while the center collapses inward
-
Change row frequency
- Work paired short rows around articulated zones to add turning ease
Swatch exercise: three-band hinge test
Make a swatch 30 stitches wide in worsted cotton using a 4.0 mm hook.
- Rows 1-8: sc across, ch 1, turn. (30 sc)
- Rows 9-10: sc 12, hdc 6, sc 12. (30 sts)
- Rows 11-18: sc across. (30 sc)
Now make a second version:
- Rows 1-8: sc across. (30 sc)
- Row 9: sc 12, ch 1 skip 1, sc 4, ch 1 skip 1, sc 12. (28 sc + 2 ch-1 sps)
- Row 10: sc across placing 1 sc in each sc and 1 sc in each ch-1 sp. (30 sc)
- Rows 11-18: sc across. (30 sc)
Fold both swatches across the center band. The first will bend softly. The second will develop a much more obvious fold memory because the spacer row creates a compressible channel.
That is the basic idea behind many hinged crochet structures.
Spacer rows and relief channels
If you take one concept from this entire discussion, let it be this: a hinge often needs a valley.
Many crocheters try to create fold lines by adding ridges alone. Ridges can help, but a repeated bend often becomes cleaner when there is a small area that can compress. Spacer rows and relief channels create that compressible zone.
Effective hinge-building techniques
1. Back-loop-only row
A classic. Working into the back loop leaves a ridge and weakens the row just enough to encourage folding.
Best for:
- flap edges
- cuffs
- soft architectural folds
- collapsible baskets in medium yarns
Caution: Repeated BLO rows can stretch out in high-stress bag structures unless balanced with firmer neighboring sections.
2. Slip-stitch or reduced-height row
Insert a row of slip stitches or very tight single crochet between taller or more relaxed rows. This creates a compressed line.
Best for:
- crisp fold-over tops
- notebook covers
- structured pouches
- sculptural pieces requiring a visible bend axis
Caution: Slip-stitch rows pull in strongly. Match stitch count carefully and consider increasing hook size by 0.5 to 1.0 mm for that row if distortion appears.
3. Chain-space spacer row
A row with tiny gaps can act like a perforation line without becoming weak if used sparingly.
Example setup across a 24-stitch panel:
- Row A: sc 24
- Row B: sc 10, ch 1 skip 1, sc 2, ch 1 skip 1, sc 10
- Row C: sc in every sc and ch-1 sp = 24 sc
This creates a hinge centered over 4 stitches but spread enough to avoid a single hard crease.
4. Post-stitch relief channel
Work front-post stitches on either side of a center recess, or use back-post stitches to sink a column visually and structurally.
Best for:
- accordion side gussets
- sculptural facets
- heavy bags needing strong side definition
5. Join-as-you-go articulation seam
Instead of forcing one broad sheet to fold, create separate panels and join them with a narrower, more flexible connector strip.
Best for:
- cases and boxes
- amulet-style bags
- hinged lids
- wearable armor-inspired crochet
This is often the cleanest option when you need reliable movement without distorting adjacent surfaces.
Fiber choice: your yarn decides half the result
A beautifully designed hinge can fail if the yarn fights it. Fiber controls spring, memory, friction, compression, and edge crispness.
Best fibers for structured hinges and crisp folds
- Cotton: clear stitch definition, little rebound, excellent for bags and cases
- Cotton-linen blends: structured, dry hand, lovely for architectural garments
- Linen: can feel wiry at first, then softens while retaining line
- Raffia or paper yarn: strong fold behavior for sculptural work and hats, though brittle if overworked
- Jute/hemp blends: rustic but excellent for rigid zones
Best fibers for soft articulated movement
- Wool: springy, responsive, ideal for collapsible but resilient garment forms
- Wool blends: easier to shape with steam or wet blocking
- Bamboo/wool blends: useful if you want fluid drape beside defined fold channels
Fibers to handle thoughtfully
- Superwash wool: can grow and reduce fold memory
- Acrylic: behavior varies; some are springy and soft, others squeaky and rigid. Swatch first.
- Silk-heavy blends: luxurious drape, but hinges may blur unless supported by dense structure.
Recommendation by project type
- Bags: worsted or DK cotton, cotton-linen, raffia, tape yarn
- Garments: wool, cotton-wool, linen blends depending on desired body
- Cases: mercerized cotton, tightly spun wool, sturdy acrylic-cotton blends
- Sculptural work: cotton cord, raffia, crochet thread held doubled, linen, wire-supported yarns when appropriate
Gauge, hook size, and fabric testing
When engineering mobility, gauge matters more than usual because a difference of even 0.5 mm in hook size can determine whether a fold line is elegant or mushy.
General hook recommendations
- DK cotton for articulated garments: 3.5 to 4.5 mm
- Worsted cotton for bags: 4.0 to 5.0 mm, often on the smaller side for firmness
- Bulky t-shirt yarn or tape yarn: 6.0 to 8.0 mm depending on density desired
- Fingering wool for sculptural pleats: 2.75 to 3.5 mm
What to test in a hinge swatch
Do not just wash and lay flat. Test movement.
Create a swatch at least 4 x 6 inches (10 x 15 cm) including:
- firm zone
- hinge zone
- firm zone again
Then:
- Fold it sharply 20 times.
- Let it rest flat for 30 minutes.
- Stand it upright or drape it over an edge.
- Steam or block if that will be part of the final finish.
- Observe whether the hinge forms cleanly, stretches, distorts, or migrates.
A good hinge swatch tells you:
- whether the line is too soft or too rigid
- whether the adjacent fabric buckles
- whether the yarn develops memory after handling
Step-by-step design method for hinged crochet fabric
Here is a practical workflow you can use for bags, garments, and sculptural crochet.
Step 1: Identify stable zones and moving zones
Sketch your object and mark:
- surfaces that must remain broad or flat
- edges that must hold shape
- lines where repeated bending should occur
- areas that may collapse when not in use
For example, in a fold-over clutch:
- stable front body
- stable back body
- moving flap hinge near top of back panel
- optional side gusset collapse lines
Step 2: Choose the base fabric for the stable zones
Pick your “wall” fabric first.
Reliable options:
- single crochet
- linked half double crochet
- waistcoat stitch
- tapestry crochet with non-floated color changes
- tight linen/moss stitch for moderate firmness
For a bag panel, a useful starting gauge in worsted cotton might be:
- 18-20 sc and 20-22 rows = 4 inches (10 cm) using a 4.0 mm hook
Step 3: Select the hinge mechanism
Ask what kind of movement you need.
- Soft fold: BLO row or lower-density band
- Repeated crisp fold: slip-stitch row, chain-space channel, or connector strip
- Accordion collapse: paired relief ridges with recessed center
- Pivot between panels: joined seam or narrow gusset strip
- Curved articulation: short rows plus a relief line
Step 4: Place hinge width intentionally
A hinge can be:
- 1 row/round wide for a crisp fold
- 2-4 stitches wide for a narrow vertical channel
- 3-8 rows wide for a soft articulated bend zone
In general:
- narrow hinge = sharper fold, higher stress
- wider hinge = softer bend, lower stress, more forgiving
Step 5: Build transitions gradually
Abrupt shifts can pucker. Sometimes you want that; often you do not.
Try:
- one transition row from sc to hdc before the actual hinge
- mirrored shaping on each side of the fold line
- paired decreases/increases distributed over 2-3 rows
Step 6: Reinforce after the hinge, not through it
A common mistake is over-stiffening the exact line that should move. Instead, reinforce the neighboring zones.
Examples:
- line a bag panel but leave seam allowance ease at the hinge channel
- add cord or hidden fishing line to the upper edge but stop short of the fold row
- seam firmly 1 stitch away from the articulation line
Step 7: Finish for memory
Blocking and finishing can train crochet.
- Steam a fold over a towel edge for a soft but repeatable crease.
- Wet block flat with weighted neighboring panels to stabilize shape.
- For cotton or linen, finger-press and clip in place while drying.
- For sculptural pieces, dry over a form so the hinge settles with the intended angle.
Project-specific applications
1. Bags with collapsing sides
Goal: front and back stay broad; sides fold inward when the bag is empty.
Construction approach
Work body in joined rounds or as panels.
Sample vertical side hinge setup in worsted cotton:
- Foundation: 96 sts around rectangular base
- Front panel: 32 sts
- Side hinge A: 2 sts
- Back panel: 32 sts
- Side hinge B: 2 sts
- Remaining side panel distribution/gusset shaping: 28 sts adjusted as needed depending on shape
A cleaner alternative is symmetry such as:
- Front 35 sts
- Hinge 2 sts
- Back 35 sts
- Hinge 2 sts
- Side shaping distributed around corners/base
The exact count matters less than consistency: mark the same vertical channels every round.
Work rounds 1-20 in sc. On every 4th round, work the 2 hinge stitches BLO or with a 4.5 mm hook while all other stitches use 4.0 mm.
Optional reinforcement:
- Add an interior fabric lining fused lightly to front and back panels only.
- Leave side hinges un-fused so they remain mobile.
Common mistake: If the hinge columns ripple outward, they are too loose relative to the rest of the bag. Reduce contrast: use BLO less frequently or keep the same hook and switch to hdc only every 5th or 6th round.
2. Fold-over clutches and flap closures
Goal: flap folds repeatedly at the same line without distorting the panel.
Sample horizontal hinge row
Using DK mercerized cotton and a 3.75 mm hook:
- Foundation chain for body width: 41 ch
- Row 1: sc in 2nd ch from hook and across. (40 sc)
- Rows 2-30: sc across. (40 sc each row)
- Row 31, hinge row: slip st 40 loosely or use a 4.25 mm hook for this row.
- Rows 32-50: sc across. (40 sc each row)
Rows 1-30 form the body. Rows 32-50 form the flap. The slip-stitch row acts as a fold line.
If this is too harsh, substitute:
- Row 31: sc 18, ch 1 skip 1, sc 2, ch 1 skip 1, sc 18, then work Row 32 back into all stitches and spaces.
This creates a more forgiving hinge.
3. Garment articulation at elbows, cuffs, collars, and peplums
Wearables need hinges that bend comfortably rather than crease like cardboard.
Elbow shaping idea
For a sleeve worked top-down in rounds:
- Mark elbow line across the back half of sleeve.
- Over 6-8 rounds, incorporate short rows across the elbow section to add bend allowance.
- On the center elbow round, work a BLO band or a recessed hdc row to suggest the fold.
Sample numbers for a sleeve with 48 sts around:
- Front sleeve section: 24 sts
- Back sleeve section: 24 sts
- Short rows worked over center 16 sts of back section
- Add 4 short-row turns total, each wrapping or using turning chains neatly
The short rows provide extra length at the elbow, while the hinge treatment encourages folding where the arm naturally bends.
Collar or cowl fold memory
Use a firm neck edge in sc or slip stitch, then transition to taller stitches above a relief channel. The channel allows the collar to roll or fold consistently.
4. Gussets for cases and boxes
Cases often need a panel to open wide but close neatly. Instead of asking a stiff fabric to perform all that movement, treat the gusset as a hinge component.
Best strategy
Create:
- front panel in tight sc
- back panel in tight sc
- side/bottom gusset strip in hdc or BLO sc
- optional relief seams where gusset joins panels
Sample gusset ratio:
- Front panel: 30 sts wide x 40 rows tall
- Back panel: same
- Gusset strip: 8 sts wide x length matching perimeter minus flap
Join with slip stitch through both loops for firmness, or sew through back loops only if you want a recessed turning seam.
This yields a cleaner opening action than forcing the entire body to crease.
5. Sculptural crochet and collapsible forms
In sculpture, hinges can be visible design features. Faceted vessels, foldable bowls, articulated petals, and geometric forms all benefit from combining stiff planes with flexible channels.
Try alternating:
- 10-stitch dense facets in waistcoat stitch
- 2-stitch recessed channels in BLO sc or chain-space ladders
For a six-sided vessel worked in the round:
- Total round count example: 72 sts
- Facets: 6 sections of 10 sts = 60 sts
- Channels: 6 sections of 2 sts = 12 sts
- Total = 72 sts
Mark each channel. Work channels in a lower-density treatment every round or every other round. Steam over a form and pinch the channels inward to establish the final geometry.
Common mistakes and how to fix them
Mistake 1: The whole fabric bends, not just the hinge
Cause: Stable zones are not dense enough.
Fix:
- Reduce hook size for main panels by 0.5 mm.
- Switch body from hdc to sc or linked hdc.
- Add lining or reinforcement to non-hinge areas only.
Mistake 2: The hinge line stretches out after use
Cause: Hinge too loose, fiber too elastic, or stress concentrated on one row.
Fix:
- Widen hinge from 1 row to 2-3 rows.
- Use a less stretchy yarn.
- Reinforce adjacent rows, not the center fold itself.
- Replace BLO-only hinge with a spacer channel plus dense neighboring rows.
Mistake 3: Piece puckers along the hinge before folding
Cause: Height mismatch or too much pull-in from slip stitches.
Fix:
- Use a larger hook for the compressed row.
- Reduce the number of altered stitches in the hinge zone.
- Add transition rows before and after the hinge.
Mistake 4: Fold forms in the wrong place
Cause: The surrounding fabric contains other weak zones, corners, or grain directions that encourage collapse.
Fix:
- Add reinforcement to competing weak areas.
- Reorient stitch direction so the intended hinge becomes the path of least resistance.
- Insert visible relief lines to train the fold.
Mistake 5: Vertical hinges twist
Cause: Joined rounds drifting, uneven stitch tension, or asymmetric side counts.
Fix:
- Use a jogless round strategy if pattern allows.
- Mark hinge stitches with markers and verify alignment every round.
- Count left and right panel widths regularly.
Mistake 6: Bag corners bulge while side hinges collapse poorly
Cause: Corner increases and side hinge logic are fighting each other.
Fix:
- Move increases away from the hinge columns.
- Treat corners as separate structural zones with firmer stitches.
- Add a base insert or lining to stabilize geometry.
Advanced variations to explore
Once you understand the basics, you can combine strategies for more nuanced movement.
Double-channel hinge
Create two narrow fold lines with a slightly raised ridge between them. This works beautifully for box pleats, expandable gussets, and architectural collars.
Example across 12 center stitches:
- sc 4
- BLO 2
- front-post ridge 2
- BLO 2
- sc 2
This creates an accordion-like center that can compress and expand.
Short-row bend plus relief line
Use short rows to add extra length where bending occurs, then overlay a visual hinge row. Excellent for elbows, rounded lids, and sculptural petals.
Hidden support with flexible seam allowance
Line a crochet bag with firm fabric, but stitch the lining so it floats slightly at the hinge. The crochet exterior keeps the fold location while the lining prevents wall collapse.
Corded edges with uncorded hinge
Insert cord, fishing line, or macrame filler in edges that must stay crisp, such as flap edges or vessel rims, but stop the reinforcement before the hinge channel. This creates dramatic control over movement.
Modular articulated panels
Build separate crochet plates and connect them with narrow crocheted bridges, sewn tabs, or even crochet-covered rings. This is especially effective in sculptural and wearable art contexts.
A practical mini recipe: articulated fold panel swatch
If you want one sample that teaches most of these principles, try this.
Materials:
- Worsted cotton, 40-50 g
- 4.0 mm hook
- 6 stitch markers
Finished swatch: approximately 7 x 5 inches depending on gauge.
Instructions
Ch 37.
Row 1: Sc in 2nd ch from hook and across. (36 sc)
Rows 2-10: Ch 1, turn, sc across. (36 sc)
Row 11: Ch 1, turn, sc 14, BLO sc 2, ch 1 skip 1, ch 1 skip 1, BLO sc 2, sc 14. (32 sc + 2 BLO sc pairs + 2 ch-1 sps conceptually spanning 36 positions)
To keep stitch count exact, work instead as follows if you prefer strict accounting:
- sc 14
- BLO sc in next 2 sts
- ch 1, skip next st
- sc in next 2 sts
- ch 1, skip next st
- BLO sc in next 2 sts
- sc 14 This totals 34 worked stitches plus 2 skipped stitches and 2 chain spaces spanning 36 positions.
Row 12: Ch 1, turn, sc 14, sc 2, 1 sc in ch-1 sp, sc 2, 1 sc in ch-1 sp, sc 2, sc 14. Adjust placement to return to 36 sc total.
Rows 13-20: Ch 1, turn, sc across. (36 sc)
Rows 21-22: Ch 1, turn, slip st 16 loosely, sc 4, slip st 16 loosely. (36 sts)
Rows 23-30: Ch 1, turn, sc across. (36 sc)
What this teaches:
- Rows 11-12 create a soft center articulation channel.
- Rows 21-22 stiffen outer areas and preserve a more mobile middle.
- The swatch will naturally fold at the center while side panels remain flatter.
You can refine the recipe by making the center channel wider or replacing the chain spaces with hdc for a gentler hinge.
Finishing techniques that create fold memory
Finishing is not an afterthought here. It is part of the engineering.
Steam shaping
Best for wool blends, some acrylics, and many structured garment yarns.
- Pin the piece in the folded or faceted shape.
- Hover steam rather than pressing hard unless you know the fiber tolerates it.
- Let cool completely before moving.
Wet blocking with clipped folds
Best for cotton, linen, and plant fibers.
- Soak and remove excess water.
- Finger-press along the hinge line.
- Clip or pin the fold over a towel roll, ruler edge wrapped in cloth, or blocking form.
- Let dry fully.
Lining and inserts
For bags and cases:
- Add Peltex, felt, plastic canvas, or sew-in interfacing to rigid panels.
- Keep inserts segmented rather than continuous if the object must fold.
- Leave the hinge zone free or use a lighter reinforcement there.
Topstitch-style reinforcement
A line of hand sewing through the lining and crochet adjacent to the hinge can strengthen the walls while preserving movement. Think of it as creating a fabric counterpart to boning channels, except you stop short of the actual bend point.
How to decide between a fold, a gusset, or a seam
One of the most useful design questions is this: should this object actually be one piece?
Use a fold hinge when:
- the fabric should read as continuous
- the bend is shallow to moderate
- the piece benefits from collapsibility
Use a gusset when:
- the object opens and closes repeatedly
- volume expansion is needed
- side depth matters
- wear stress is high
Use an articulation seam when:
- planes should stay crisp and distinct
- movement needs reliability
- materials are dense or stiff
- sculptural geometry is important
Very often, the cleanest crochet design uses all three in different parts of the same project.
Key takeaways for designing controlled mobility in crochet
If you remember nothing else, remember these principles:
- Crochet movement is designed through contrast, not just softness.
- A good hinge needs firm neighboring zones.
- Stitch direction matters as much as stitch pattern.
- Spacer rows, recessed channels, and altered loop work create reliable fold paths.
- Fiber choice can strengthen or sabotage structural intentions.
- Reinforce near the hinge, not through it.
- Swatching for movement is essential; wash, fold, rest, and test.
- Sometimes the best hinge is not a crease in one sheet, but a gusset or narrow connector panel.
Designing shear planes and hinged fabric in crochet is really about giving your work permission to behave intelligently. Instead of hoping the piece finds its own shape, you decide where it may move, where it must resist, and how those two states meet. That is where crochet becomes not only decorative or functional, but architectural.
And once you start seeing crochet this way, you will notice opportunities everywhere: a tote that collapses neatly at the sides, a sleeve that bends more comfortably, a collar that folds exactly once and stays elegant, a sculptural vessel that opens like a faceted bloom. Structure and mobility are not opposites. In the best crochet design, they are partners.