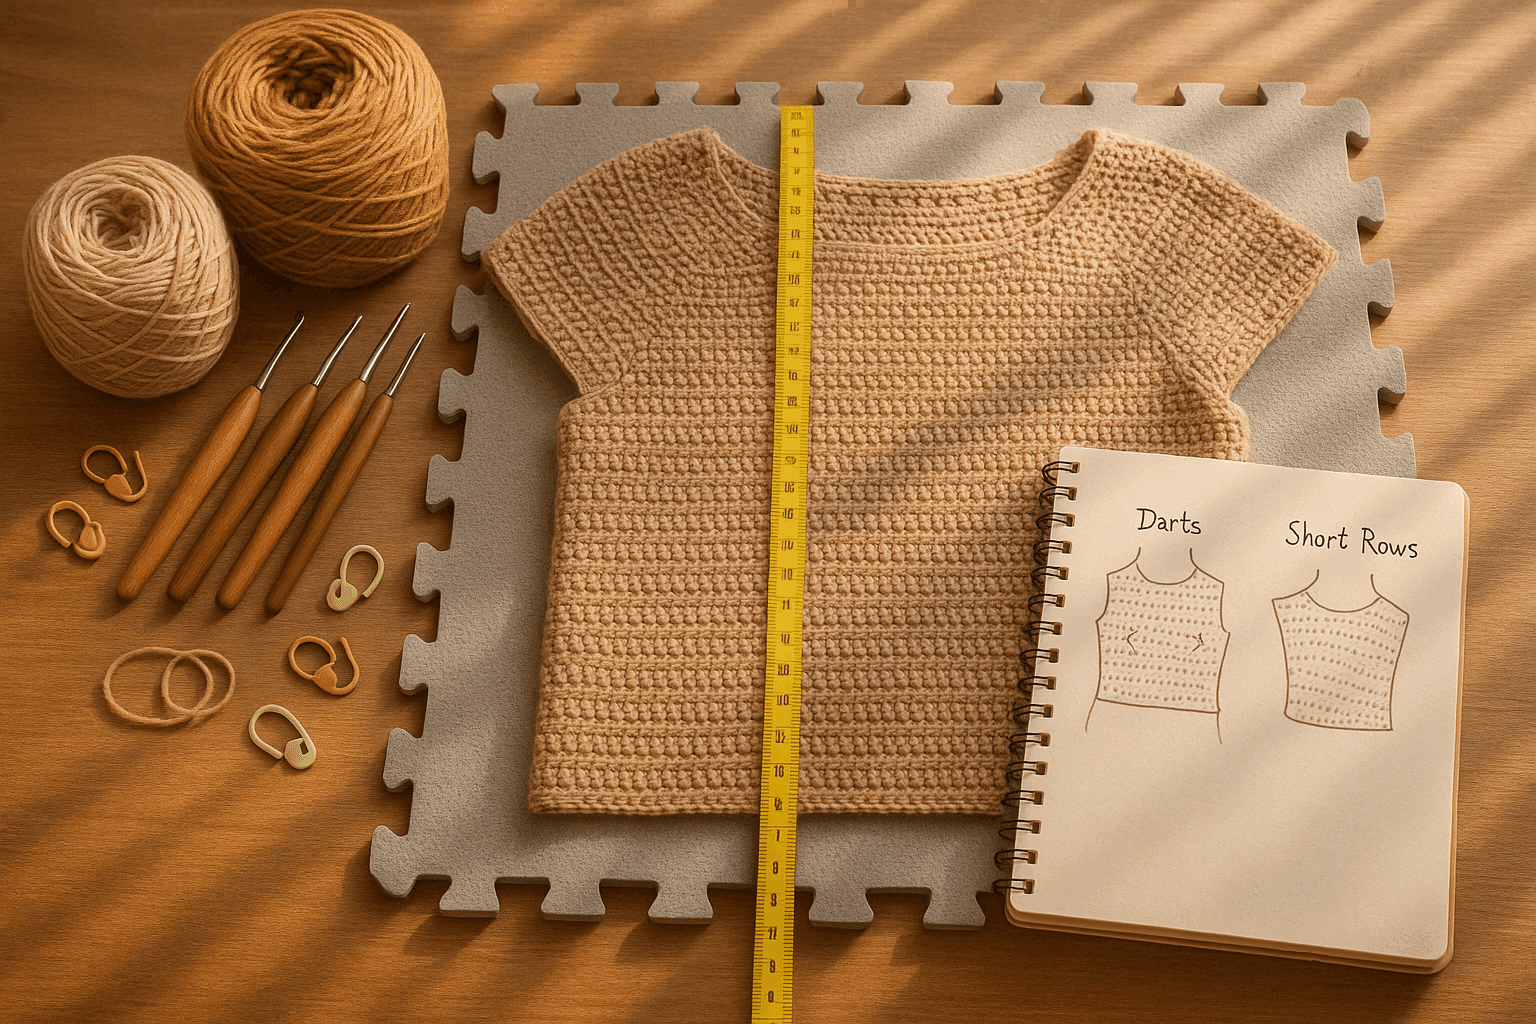
Crochet Short Rows, Dart Shaping, and Bust/Fit Engineering: How to Sculpt Garments Without Ruining Gauge or Drape
There is a particular kind of disappointment that only garment makers know: you finish a sweater that looked perfect on paper, the stitch pattern is beautiful, the gauge swatch behaved, the neckline sits nicely on the hanger—and then you put it on and the whole thing tells the truth. The front hikes up over the bust. The side seams swing backward. The hem dips oddly at the back. The shoulder line pulls toward the neck. Nothing is wrong with your crochet. The garment simply wasn’t shaped for a three-dimensional body.
If you have ever thought, “I matched gauge, so why does this still fit strangely?” this article is for you.
Crochet can absolutely be engineered to fit curves gracefully. Short rows, wedges, darts, selective increases, and thoughtful stitch architecture let you add length where a body needs to travel farther, remove length where fabric collapses, and preserve drape while doing it. The key is understanding that fit is not just about circumference. It is about distance, direction, and recovery.
In this guide, we’ll go deep into how crochet fabric gains and loses length, how fiber content changes behavior over time, where to place bust darts and shoulder shaping, how to convert a flat pattern for fuller busts or curved hips, and how to finish shaped areas so they block smoothly and wear comfortably.
I’ll approach this the way experienced makers often do in real life: first by understanding the fabric, then the body, then the architecture that connects them.
Why shaping matters more in crochet than many patterns admit
A lot of crochet garments are written as if bodies are cylinders with armholes. That can work for oversized pullovers or boxy summer tops, but once you want a sweater, dress, or fitted top to skim rather than strain, shaping becomes essential.
Unlike sewing, where you can remove excess with a stitched dart after the fact, crochet builds shape directly into the fabric. And unlike knitting, where stockinette has a very predictable elastic behavior, crochet can vary wildly based on stitch height, direction, density, and fiber.
That means garment shaping in crochet is a balancing act between:
- Horizontal measurement: bust, waist, hip, upper arm, etc.
- Vertical travel: over the bust, across the shoulder slope, over the seat, around the belly
- Fabric behavior: stretch, bounce-back, gravity, biasing, and sag
- Stitch architecture: where rows stack, where columns compress, where turning creates bulk
When a garment rides up in front, it often does not need more width first. It needs more length over the full bust. When the back neck chokes, it often needs upper back or shoulder shaping, not a deeper front neckline alone. When hip fabric clings and hem waves outward, the issue may be too many abrupt increases or the wrong increase placement—not merely insufficient circumference.
This is where short rows and darts come in.
The core concept: crochet shaping adds or subtracts length in specific places
Before we talk bust darts, let’s clarify what short rows and wedges are doing.
A short row is simply a row worked across only part of the total stitch count, then turned before the edge. Repeating that selectively creates extra row depth in one area without changing the full width of the piece.
A wedge is the geometric result of repeated short rows or selective increases/decreases: one area gains more fabric than another, producing angle, curve, or projection.
A dart is a shaped wedge intended to accommodate contour—most commonly bust, shoulder blade, belly, or seat/hip.
In crochet garments, these tools can be used to:
- Add front length over the bust
- Create bust projection without making the whole torso wider
- Raise or lower the back neck
- Shape shoulder slope
- Add seat room in fitted dresses or skirts
- Smooth side-hip transition in tunics and peplums
- Correct front/back hem imbalance
If shaping is width-focused only, you often get drag lines and excess fabric. If shaping is length-aware, the garment settles where it should.
Where crochet fabric gains and loses length
This is one of the most useful things to understand when engineering fit.
Different crochet structures “spend” yarn differently. Some consume yarn vertically, some horizontally, and some compress under body tension.
1. Tall stitches add length fast, but often with less control
Double crochet (dc), treble crochet (tr), extended stitches, and open mesh gain vertical height quickly. They are useful for shaping because small row additions create visible extra length. But they can also exaggerate sag, especially in superwash wool, bamboo, rayon, silk blends, or acrylics with low memory.
Best uses:
- Gentle short-row wedges in drapey tops
- A-line shaping where fluidity is desirable
- Bust accommodation in garments with positive ease
Watch for:
- Gapping at turns
- Rippled dart edges
- Vertical stretching after wear
2. Shorter stitches give cleaner engineering
Single crochet (sc), half double crochet (hdc), and linked stitches are easier to shape precisely. The extra rows required are more numerous, but transitions can be smoother and more stable.
Best uses:
- Bust darts in fitted garments
- Shoulder shaping
- Underbust contouring
- Waist-to-hip shaping in denser sweaters and dresses
Watch for:
- Bulk if too many turns stack in one place
- Stiffness if gauge is too tight
3. Post stitches and ribbing compress, then grow in wear
Front post/back post textures, vertical ribbing, and relief fabrics can seem springy at first and then relax dramatically with body heat and gravity. Their row height can change more during wear than your swatch suggests.
Best uses:
- Side panels where recovery helps fit
- Lower hems and waist sections if tested carefully
Watch for:
- Darts disappearing visually in heavily textured fabric
- Hems dropping after blocking
4. Side-to-side crochet behaves differently from top-down or bottom-up crochet
If rows run horizontally around the body, short-row shaping affects circumference and vertical drop differently than if rows run vertically from shoulder to hem.
For example:
- In a top-down yoke, adding short rows across the upper back increases back neck depth and shoulder travel.
- In a side-to-side bodice, short rows can create bust projection by literally extending the fabric path over the fullest area.
- In a bottom-up torso, darts near the bust can add front length and shape without changing side seam length dramatically.
Always ask: What direction are my rows traveling relative to the body curve I need to fit?
Fiber content changes everything: recovery, sag, and the success of shaping
A beautifully engineered dart in the wrong yarn may still fail in wear.
Fiber determines whether your shaped area springs back, relaxes permanently, grows downward, or flattens under weight.
High-memory fibers
These generally recover better and hold shaping more reliably:
- Non-superwash wool n- Wool blends with nylon
- Elastic wool-acrylic blends
- Some cotton-wool blends
Good for:
- Defined bust darts
- Shoulder slope shaping
- Waist contouring
- Garments that need to hold a silhouette
Low-memory or high-drape fibers
These often lengthen under gravity and may soften shaping:
- Bamboo
- Rayon/viscose
- Silk-heavy blends
- Linen after wear
- Some acrylics
- Superwash wool, especially in heavier gauges
Good for:
- Relaxed garments
- Softer wedges rather than sharp darts
- Tunics and dresses with fluid drape
Needs caution for:
- Full-bust darts in heavy fabric
- Seat shaping in long garments
- Tall-stitch short rows that may stretch permanently
Cotton: stable but heavy
Cotton is often dimensionally stable row-to-row but can be heavy, especially in larger garments. It can hold a dart line well in a crisp fabric, but in a long dress the cumulative weight may pull shaped sections downward.
A practical rule:
- The heavier and drapier the garment, the gentler the shaping transitions should be.
- The more elastic and resilient the yarn, the more confidently you can use concentrated shaping.
Swatching for fit engineering, not just gauge
Standard gauge swatches are not enough for shaped crochet garments. You need a behavior swatch.
Make at least a 6 x 6 in / 15 x 15 cm swatch, ideally larger, in the actual stitch pattern. Then test:
- Stitch gauge and row gauge before blocking
- Gauge after wet blocking
- Gauge after hanging with clothespins or small weights for 12–24 hours
- Recovery after stretching widthwise and lengthwise
Record:
- Sts per 4 in / 10 cm
- Rows per 4 in / 10 cm
- Difference after blocking
- Difference after hanging
Example behavior swatch record
- Yarn: DK wool-cotton blend
- Hook: 4.0 mm / G-6
- Stitch pattern: hdc in back loop only
- Before blocking: 16 sts x 12 rows = 4 in
- After blocking: 15.5 sts x 11.5 rows = 4 in
- After 24-hour hang: 15.5 sts x 11 rows = 4 in
This tells you row height relaxes more than stitch width. So vertical shaping—short rows, shoulder slope, bust darts—must be used with that relaxation in mind.
If your bust dart adds 1.5 in of front length on paper, but the fabric grows another 0.5 in in wear, that garment may end up too long in front.
The geometry of bust shaping: what a dart is really solving
A fuller bust creates two main fit demands:
- Extra circumference around the full bust
- Extra path length from shoulder/armhole area to waist/hem over the bust apex
Many crocheters solve only the first problem by sizing up. But if upper chest and shoulders fit in the smaller size, sizing up can create a too-wide neckline, dropped armholes, and sloppy shoulders.
A better approach is often:
- Choose size by upper bust/high bust or shoulder fit
- Add full bust adjustment through width, darts, short rows, or side shaping
Signs you need bust shaping rather than just more width
- Hem lifts at center front
- Side seams swing toward the back
- Fabric strains diagonally from bust to underarm
- Neckline pulls forward
- Waist shaping sits too high in front
- Front appears shorter than back when worn
These are classic “the fabric needs farther travel in front” issues.
Bust dart placement by stitch architecture and body landmarks
Placement matters as much as amount.
Identify the bust apex
Measure while wearing the bra or base layer you plan to wear with the garment:
- Distance from shoulder high point to bust apex
- Distance from center front to bust apex
- Distance between bust apex points
- Distance from underarm to bust apex
In a crocheted piece, the dart usually aims toward—but does not necessarily end exactly on—the bust apex.
A good rule is to stop the strongest shaping 1 to 1.5 in / 2.5 to 4 cm before the apex. This avoids a pointy effect and lets the fabric round smoothly.
Where darts work best in crochet
Side bust dart
Inserted from side seam or armhole region toward apex.
Best for:
- Bottom-up and top-down seamed garments
- Fitted tops and sweaters
- Dense stitch fabrics
Advantages:
- Familiar shaping line
- Easy to hide in solid textures
- Adds both contour and front length
Vertical bust dart
Worked upward from waist or underbust area toward bust.
Best for:
- Dresses
- Fitted bodices
- Garments with waist shaping already built in
Advantages:
- Excellent for creating underbust-to-bust contour
- Can blend into decorative panels
Rotated dart / short-row bust wedge
Shaping distributed into short rows below or beside bust rather than a visible classic dart line.
Best for:
- Top-down seamless garments
- Side-to-side tops
- Lace or textured fabrics where dart lines would interrupt patterning
Advantages:
- Very smooth visually
- Great for fuller bust adjustments without obvious dart structure
Matching dart type to stitch architecture
- Dense, plain stitches: side darts or vertical darts work beautifully
- Openwork or lace: use distributed short rows and maintain motif integrity
- Strong vertical ribbing: hide shaping in partial-row wedges between rib columns
- Colorwork/tapestry: avoid sharp darts in motif areas; shape at side panels or below bust
- Highly textured post-stitch fabric: use gentle shaping, because heavy texture can distort around turns
How to calculate a crochet bust dart
There are many ways to do this, but here is a practical maker-friendly method.
Step 1: Determine extra front length needed
For many bodies, the difference between front waist length and back waist length gives a clue. Another common shortcut is to estimate based on cup difference.
A rough starting estimate:
- Small bust difference: 0.5–1 in / 1.25–2.5 cm extra front length
- Moderate full bust adjustment: 1–2 in / 2.5–5 cm
- Fuller bust adjustment: 2–3 in / 5–7.5 cm or more
This is only a starting point. Try on as you go whenever possible.
Step 2: Convert length to rows
Use your actual row gauge.
Example:
- Row gauge = 11 rows per 4 in
- That is 2.75 rows per inch
- Needed extra front length = 1.5 in
- 1.5 x 2.75 = 4.125 rows
Round to something workable: 4 short-row passes or the equivalent distribution.
Step 3: Decide dart width
Dart width is the horizontal area over which shaping is distributed.
Typical side bust dart width:
- 3 to 5 in / 7.5 to 12.5 cm in fitted garments
- 4 to 7 in / 10 to 18 cm in larger sizes or drapier garments
Convert to stitches.
Example:
- Stitch gauge = 15 sts per 4 in
- 3.75 sts per inch
- Dart width = 4.5 in
- 4.5 x 3.75 = 16.875 sts
- Round to 16 or 17 sts
Step 4: Distribute the turns
If you need 4 added rows over a 16-st area, you might work 2 short-row pairs, each extending farther than the previous one.
For instance:
- Work across to dart start, continue 8 sts into dart, turn
- Work back, turn at matching point
- Next row, continue 16 sts into dart, turn
- Work back, turn at matching point
- Resume full row
That creates a smooth wedge with 4 additional row layers at the deepest section.
Step-by-step: adding a side bust dart to a bottom-up sweater front
Let’s use a concrete example.
Sample garment setup
- Yarn weight: DK
- Hook: 4.0 mm / G-6
- Stitch: hdc
- Gauge: 16 sts x 12 rows = 4 in / 10 cm
- Front panel stitch count at bust: 72 sts
- Desired extra front length over bust: 1.33 in
- Row gauge: 12 rows / 4 in = 3 rows per inch
- 1.33 in x 3 = about 4 rows of extra length
We’ll place one dart on each side of the front.
Step 1: Mark landmarks
On the front panel, mark:
- Side seam edges
- Bust apex position
- Dart endpoint, approximately 1 to 1.5 in before apex
Suppose each bust apex lies 18 sts in from the side edge, and we want the dart to end 5 sts before apex. Then the dart will point inward roughly 13 sts from the side seam.
Step 2: Define dart depth and spread
We want 4 extra rows total. We’ll create this with 2 short-row pairs.
Let’s make each dart spread over 16 sts from side seam inward.
Step 3: Work the dart
Assume you are on a right-side row.
Short Row 1:
- Work in pattern across the row until 16 sts remain before side edge.
- Work across those 16 sts.
- Turn.
- Work back to the opposite side edge or to your established return point, depending on whether you are shaping one side at a time. For a panel worked flat, you will usually work symmetrical darts separately on each side over different rows, or work one dart section then the other.
A more controllable panel method is to shape each dart independently:
Left dart example
- RS: Work across to 16 sts before left side edge, place marker if helpful.
- Work to 8 sts before left side edge, turn.
- WS: Work back to dart base, turn.
- RS: Work to left side edge, turn.
- WS: Work back to dart base, then work full row across panel.
Next dart extension
- RS: Work across to 16 sts before left side edge, then to 4 sts before left side edge, turn.
- WS: Work back to dart base, turn.
- RS: Work to edge, turn.
- WS: Work full row.
This creates a wedge with the deepest point at side seam tapering inward. Then repeat mirrored on the opposite side, spacing rows so bust line remains level.
A cleaner designer’s method is often to work each front half separately before joining, especially in cardigans or seamed garments.
Stitch-count note
Short rows do not usually change your live stitch count.
In this example:
- Front remains 72 sts throughout.
- What changes is row accumulation near the side-to-bust region.
Turning methods
Use the turning method that best suits your fabric:
- Chain 1 turn for sc/hdc if the pattern allows
- Stacked single crochet instead of ch-2 for dc-style rows if you want cleaner edges
- Work turns in back loop only or under both loops consistently
- For lace or very visible rows, use a wrapped or shadow-style turn if desired
In many crochet garments, a simple turn is enough if the wedge is blocked well and the stitch pattern is forgiving.
Step-by-step: top-down upper-back and shoulder shaping with short rows
Bust shaping gets the spotlight, but shoulder and upper-back shaping often make a bigger difference to comfort.
If your front neck rises, the garment slips backward, or the shoulder seam sits too high at the armhole, your sweater likely needs short rows across the upper back.
Sample setup
- Yarn weight: worsted
- Hook: 5.0 mm / H-8
- Stitch: linked dc
- Gauge: 14 sts x 9 rows = 4 in
- Back neck section: 32 sts between shoulder markers
Goal
Add about 1 in of extra back-neck depth and shoulder travel.
At 9 rows per 4 in:
- 9 / 4 = 2.25 rows per inch
- To add 1 in, work about 2 to 3 short-row layers
Method
- Start at back neck after establishing yoke or shoulder line.
- Work across center back, stopping before shoulder edge.
- Turn and work back, stopping before opposite shoulder edge.
- On each successive short row, work farther outward.
- Resume full rounds/rows.
Example sequence over 32 sts
- Row 1: Work 20 sts centered across back, turn.
- Row 2: Work back 20 sts, turn.
- Row 3: Work 26 sts, turn.
- Row 4: Work back 26 sts, turn.
- Row 5: Work full 32 sts.
This adds 4 partial-row layers concentrated at upper center back, easing the garment over shoulder blades and preventing front choke.
Stitch count
- Back neck remains 32 sts.
- No stitch count change; only row depth changes.
Converting a flat pattern for a fuller bust
Suppose you have a basic pullover pattern with straight side seams and no bust shaping. You want to adapt it without redrafting the whole garment.
Step 1: Choose your base size correctly
If the garment is meant to be fitted or semi-fitted, choose based on:
- Upper bust/high bust
- Shoulder width
- Neckline fit
- Cross-back fit
Do not automatically size up to full bust unless the design includes enough built-in ease or is intentionally oversized.
Step 2: Calculate the full bust adjustment
Example:
- Upper bust = 38 in
- Full bust = 42 in
- Pattern size chosen = 38 in finished bust plus 2 in ease = 40 in garment
- You need 42–44 in of room depending on fit
That means you may need:
- 2 in more total circumference, or
- Less width increase if the fabric has stretch and you add proper bust length
A crochet FBA often combines:
- Width addition: maybe 1 to 2 in total at front only or distributed at sides
- Length addition: through bust darts or short rows
Step 3: Decide where width should be added
Options:
- Side seam increases under arm through bust zone
- Extra front-panel width only
- Vertical dart release from waist/underbust
- Added stitches between front motifs or panels
Step 4: Add front length
If full bust is 4 in larger than upper bust, start with 1.5 to 2 in extra front length as a test in many yarns.
With gauge 16 sts x 12 rows = 4 in:
- Row gauge = 3 rows per inch
- 1.5 in = about 4.5 rows
- Work 4 or 5 short-row layers total
Step 5: Reposition waist shaping
This is crucial. Once front length is added, waist shaping should still hit the actual waist.
That means:
- Back waist shaping may stay where written
- Front waist shaping may need to start lower in row count, or
- You work the extra bust rows before the waist marker transitions
If you add front bust depth but leave waist decreases at the original vertical location, the waist can ride up over the bust.
Step 6: Check side-seam compatibility
If front and back side seams must match exactly, do one of the following:
- Incorporate shaping as internal darts rather than side-edge row additions
- Add corresponding armhole or lower side balancing rows
- Seam with slight easing if fabric allows
For many crochet garments, internal short-row wedges are the cleanest approach because stitch count and side seam length can remain close enough for easy assembly.
Converting for curved hips, belly, or seat
Bodies are not straight from waist to hem, and crochet responds best when shaping is gradual.
Curved hips
If a tunic or dress fits at waist but clings at high hip or fullest hip, don’t just add a burst of increases at the side seam. That can create points or flare.
Instead:
- Spread increases over 4 “lines” rather than 2 if possible
- Add some shaping to front and back panels, not just sides
- Consider short-row wedges at back seat if the garment hikes up behind
Belly shaping
For an abdomen that projects more than upper chest, front length below waist may need adjustment just as bust does above waist.
Useful methods:
- Small front short-row wedges centered below bust/above hem
- More gradual front waist decreases
- Lowered front waistline placement in dresses
Seat shaping
For fitted skirts and sweater dresses, back seat shaping prevents the back hem from riding up.
Try:
- 2 to 6 short-row layers across center back hip/seat zone
- Distributed over 30 to 60% of back width depending on silhouette
Example:
- Back panel = 80 sts
- Work short rows over center 36 sts, then 48 sts, then 60 sts
- This adds extra travel over seat without widening hem abruptly
Common mistakes and how to fix them
Mistake 1: Dart is too pointy
Symptoms: Bust apex looks peaked or fabric creates a cone.
Causes:
- Dart ends too close to apex
- Too many rows added over too narrow a width
- Fabric too dense/stiff for concentrated shaping
Fix:
- End dart 1 to 1.5 in before apex
- Widen dart spread
- Use more, smaller short-row steps instead of one sharp wedge
- Steam or wet block gently over a tailor’s ham or rounded towel
Mistake 2: Gaps at turning points
Symptoms: Tiny holes at short-row turns.
Causes:
- Loose turning chain
- Tall stitches at turn
- Inconsistent tension
Fix:
- Use stacked sc or lower turning chains
- Tighten first stitch after turn slightly
- Work turn through a more stable loop structure
- For very open fabrics, use wrapped turns or hide turns in textured areas
Mistake 3: Side seams no longer match
Symptoms: Front is longer than back at seam after adding bust shaping.
Causes:
- Dart inserted by changing edge-row count rather than internal wedge placement
Fix:
- Move shaping inward from edge
- Add balancing rows to back or armhole if design allows
- Ease seam very slightly while blocking and seaming
Mistake 4: Shaped area bags out after wear
Symptoms: Bust dart drops lower over the day; front length grows too much.
Causes:
- Yarn has low memory/high drape
- Stitch too tall/open for garment weight
- Swatch didn’t include hang test
Fix:
- Reduce short-row depth in next version
- Use denser stitch in dart zone
- Choose smaller hook for garment body while maintaining drape
- Reinforce shoulder seams and neckline so entire garment doesn’t collapse downward
Mistake 5: Waist shaping is now in the wrong place
Symptoms: Waistline sits high in front or low in back.
Causes:
- Extra front length added without adjusting shaping landmarks
Fix:
- Recalculate vertical landmarks after dart insertion
- Measure from shoulder over bust to waist rather than using flat row counts only
Mistake 6: Pattern texture gets interrupted awkwardly
Symptoms: Lace motif breaks, ribbing jogs, post stitches distort.
Causes:
- Dart added without regard to repeat architecture
Fix:
- Rotate dart into a smoother region
- Place shaping in side panel or plain background sections
- Split shaping into multiple smaller wedges around the motif repeat
Finishing shaped areas so they block smoothly
The shaping may be mathematically correct and still look rough before finishing. That is normal.
Short rows often look like little terraces off the body. Blocking helps them blend.
Wet blocking for wool and wool blends
- Soak garment thoroughly.
- Roll in towels to remove excess water.
- Lay flat on measurements.
- Smooth darts with your hands from widest point toward apex or center.
- Do not stretch the shaped zone flat beyond intended dimensions.
- Let dry completely.
Steam shaping for cotton or acrylic blends
Use caution and test first.
- Hover steam rather than pressing hard
- Pat and smooth wedge transitions with fingers
- Allow to cool in place
Use a rounded support
For bust darts or shoulder shaping, place a rolled towel, tailor’s ham, or soft rounded support under the shaped area while drying. This preserves contour and avoids flattening the engineered volume.
Seam stabilization
In garments with darts, it helps to stabilize:
- Shoulder seams
- Back neck edge
- Sometimes armhole edge
Use slip-stitch reinforcement, a sewn-in ribbon/tape, or a firm joining method to keep the garment’s overall structure from dropping and distorting the shaped sections.
Recommended yarn weights and hook choices for shaped garments
There is no single correct answer, but some combinations are easier to engineer.
Fingering/sport
- Hooks: 3.0–4.0 mm depending on fabric
- Best for: subtle shaping, refined darts, lightweight drape
- Excellent for fitted tops and dresses if patience is not an issue
DK
- Hooks: 3.75–4.5 mm
- Best for: sweaters, tees, cardigans with visible but smooth shaping
- Often the sweet spot for balancing definition and drape
Worsted/aran
- Hooks: 4.5–6.0 mm
- Best for: cozy sweaters, outer layers, sculptural shoulder shaping
- Use care with concentrated darts; wedge transitions can become bulky
Bulky and above
- Hooks: 6.5 mm+
- Best for: simple silhouettes, oversized layering pieces
- Usually not ideal for nuanced bust engineering unless the garment is intentionally architectural
A general shaping tip:
- If the fabric feels thick in your hand and stands away from the body, use broader, shallower wedges.
- If the fabric is supple and thin, you can use more localized shaping.
Variations: different ways to build shape into crochet garments
1. Hidden underbust short rows
Work short rows below the bust instead of aiming from side seam. This adds front length and allows the bust to sit into the fabric without a visible dart line.
Great for:
- Seamless tops
- Mild to moderate full bust adjustments
- Textured stitch patterns
2. Princess-style panel shaping
Use separate front panels with gentle increases/decreases and short rows where a princess seam would run in sewing.
Great for:
- Dresses
- Cardigans
- Color-blocked garments
3. Shoulder-slope shaping at join
Before joining front and back shoulders, work 1–3 short-row steps so shoulder seams angle naturally.
Great for:
- Set-in sleeve garments
- More tailored pullovers
4. Rotated dart into side texture panel
If the main front has lace or colorwork, place the shaping in a plain hdc/sc side panel. This preserves pattern integrity while still giving fit.
5. Compound shaping for fuller bust plus narrow shoulders
Use:
- Base size chosen by upper bust
- Upper-back short rows
- Side bust darts
- Possibly narrower sleeve cap or lifted armhole
This combination often fits dramatically better than simply going up one size.
A practical planning worksheet
Before starting a shaped garment, write down:
Body measurements
- Upper bust
- Full bust
- Waist
- High hip
- Full hip
- Shoulder to bust apex
- Bust apex to apex
- Shoulder to waist front
- Shoulder to waist back
Fabric data
- Yarn fiber content
- Hook size
- Stitch gauge
- Row gauge
- Blocked gauge
- Hung gauge
Fit goals
- Amount of ease at upper bust
- Amount of ease at full bust
- Waist fit preference
- Hem/hip fit preference
Shaping plan
- Extra front width needed: ___ sts
- Extra front length needed: ___ rows
- Dart type: side / vertical / rotated / underbust short row
- Dart endpoint: ___ sts from side / ___ in before apex
- Waist shaping adjusted? yes/no
- Side seam balancing needed? yes/no
This simple worksheet saves so much ripping later.
A note on trying on as you go
Crochet shaping becomes much less mysterious if you try on early and often.
Do this whenever possible:
- Put stitches on hold or use long cords/scrap yarn
- Check hem level from front, side, and back
- Check whether side seam hangs straight
- Check whether neckline stays level
- Check whether armhole is being tugged by bust or shoulder tension
If the side seam swings backward, front likely needs more room or more length. If the center front droops but side seam is right, you may have over-added front length or your yarn is growing. If the upper chest puddles while bust still strains, you need shape, not all-over size.
Key takeaways
Crochet can absolutely sculpt garments for real bodies without sacrificing gauge, drape, or comfort. The magic is not mysterious—it is structural.
Remember these principles:
- Fit is not only width. Bodies often need more travel length in specific places.
- Short rows and darts add length selectively without necessarily changing stitch count.
- Bust shaping works best when it stops short of the apex and is matched to stitch architecture.
- Fiber content matters. Recovery and sag can amplify or soften shaping after wear.
- Choose size by shoulders/upper bust first when fitting fuller busts, then add front shaping deliberately.
- Recalculate waist, hip, and seam relationships after adding bust or seat depth.
- Block shaped zones in three dimensions, not flattened beyond their intended contour.
If you have only ever followed straight-size crochet garment instructions, shaping can feel intimidating at first. But once you understand how to insert a wedge, measure the extra travel your fabric needs, and place it where a body curves, the whole process gets more intuitive. You stop asking crochet fabric to lie about shape, and instead you teach it how to cooperate with the body inside it.
That is real fit engineering.
And honestly, it is one of the most satisfying things in garment crochet: taking a piece from “technically wearable” to “this feels like it was made for me,” because it was.