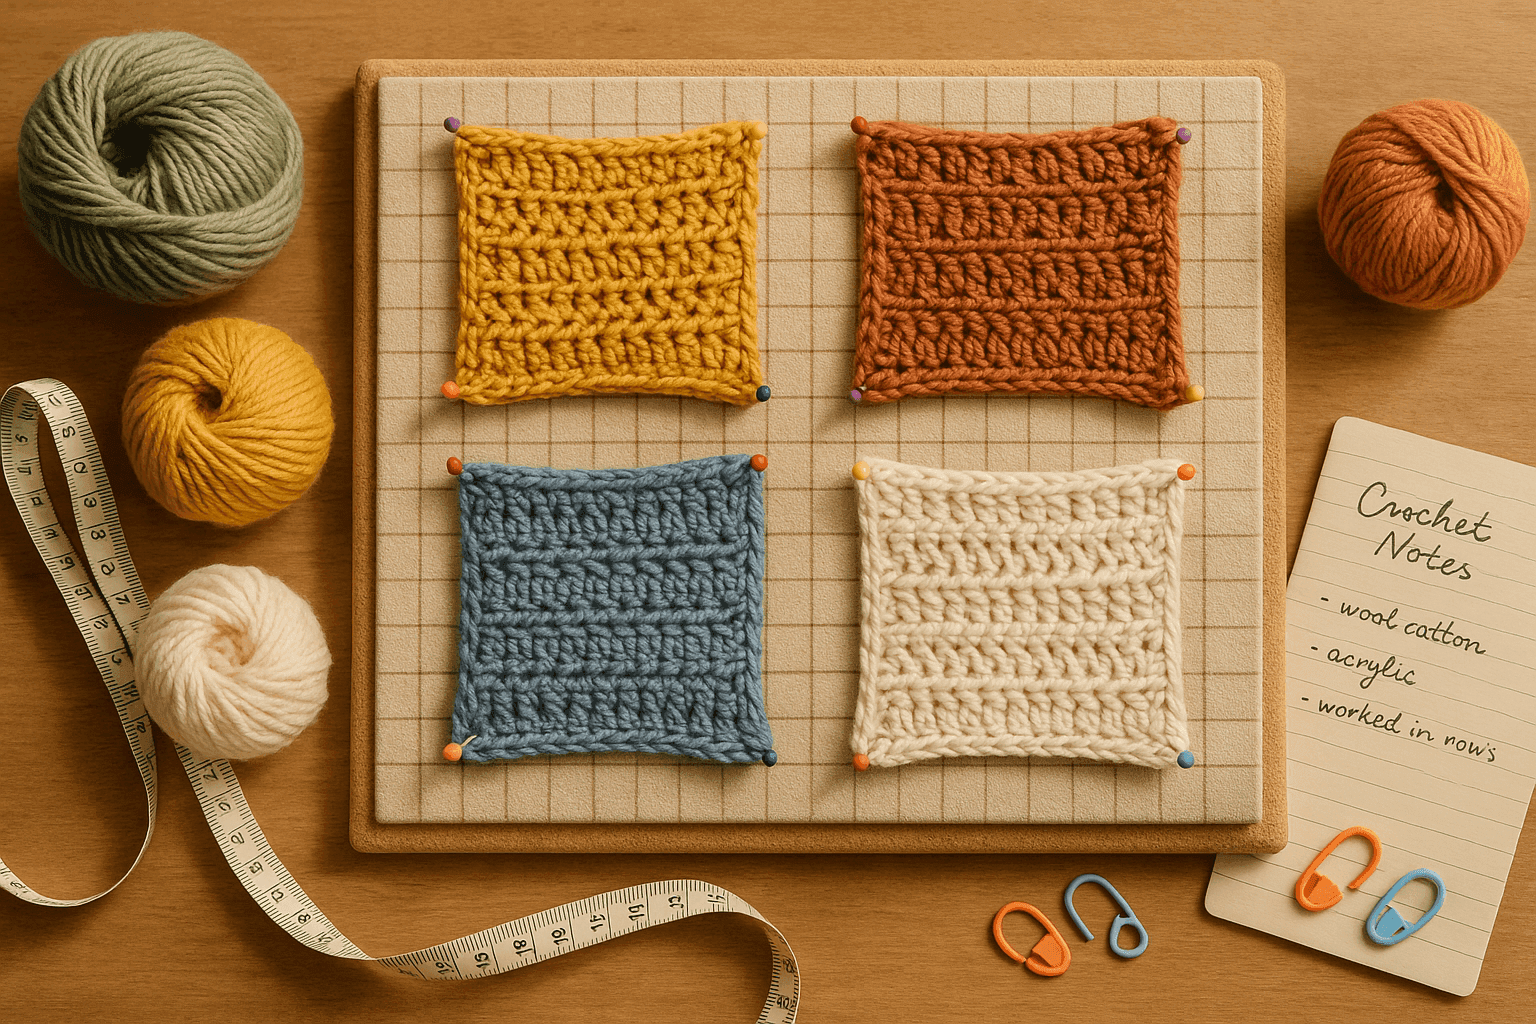
You know that slightly tense moment when a project comes out of its first wash and you hold it up wondering whether it has become a masterpiece or a cautionary tale. The cardigan body looks perfect laid flat, but the ribbing has pulled in more than you expected. The lace panel has opened beautifully, yet the sleeves seem longer. A cotton table runner that looked crisp off the hook now hangs with a softer drape and a little extra length. Most of us were taught to make a gauge swatch, count stitches and rows, and trust that number. But seasoned crocheters learn that flat dry gauge is only the beginning. The fabric you actually live with is the washed, dried, worn, gravity-tested fabric.
That is where shrinkage mapping becomes incredibly useful. A crochet shrinkage map is not just a swatch with a before-and-after note. It is a way of recording how a specific yarn, stitch pattern, hook size, and finishing method move in width and length under real conditions. It helps you predict whether a fabric will grow, draw in, relax, rebound, bias, or settle. Once you can read those behaviors, you can adjust pattern math before you invest weeks in a garment or home textile.
This guide is for crocheters who want the finished size to be intentional rather than hopeful. We are going to look closely at how fibers behave, why stitch structures change dimensions differently, how to swatch for width and length movement, and how to modify shaping, borders, and sizing math based on post-wash reality. I will also show you a practical way to create shrinkage maps you can reuse across projects.
What a crochet shrinkage map actually is
A crochet shrinkage map is a record of dimensional change and recovery. At minimum, it tracks:
- Width before washing
- Length before washing
- Width after washing and drying
- Length after washing and drying
- Width and length after hanging or wearing, if relevant
- Recovery after resting flat
- Notes on drape, stitch definition, bias, halo, and edge behavior
A good map also includes the variables that produced those results:
- Fiber content
- Yarn structure
- Yarn weight
- Hook size
- Stitch pattern
- Fabric orientation
- Wash method
- Water temperature
- Agitation level
- Drying method
- Blocking method
In other words, you are building a data sheet for crochet fabric behavior. Once you do this a few times, you start to see predictable patterns. Superwash wool in open stitches may lengthen dramatically when wet and settle only partly back. Cotton ribbing may pull inward strongly in width but hold length. Acrylic may relax a little in washing and then stay almost exactly where it dried unless heat is involved. Alpaca blends may grow under gravity even when the flat swatch seems stable.
Why flat dry gauge is not enough
Traditional gauge is measured on an unwashed or lightly blocked swatch laid flat. That number is useful, but it misses several things:
- Fiber response to moisture. Fibers swell, soften, tighten, or relax when wet.
- Stitch architecture. Crochet stitches are directional and stack differently in width versus length.
- Elastic recovery. Some fabrics spring back after stretching. Some do not.
- Gravity. A sweater body that weighs 600 g behaves differently from a 15 cm swatch.
- Edges and borders. Edgings can either stabilize or distort the body fabric.
- Wash handling. Soaking, machine agitation, spin cycles, steaming, and hanging all create different outcomes.
If your project is a fitted sweater, a long cardigan, a baby blanket with a broad border, or a curtain panel, these differences matter a lot. Shrinkage mapping lets you replace assumptions with measurements.
The fiber side: how yarn content affects movement
Before we even discuss stitch patterns, fiber content sets the baseline behavior. Not every yarn within a category behaves identically, but these tendencies are useful starting points.
Wool
Non-superwash wool often relaxes when wet and then draws in somewhat as it dries. With agitation, heat shock, or excessive handling, it may full and shrink, especially in width, as the scales on the fibers interlock. Even without dramatic felting, a dense wool fabric can become more compact after washing.
Typical tendencies:
- Moderate wet relaxation
- Good recovery if handled gently
- Possible shrinkage with agitation or temperature swings
- Dense textures may tighten more than open lace
For swatching, try at least a 15 cm x 15 cm inner measurement area, ideally in a total swatch around 20 cm x 20 cm. For garments, test the exact wash method you plan to use. If you are making a cabled-look post-stitch sweater in wool, note both width draw-in and row compression after drying.
Superwash wool
Superwash wool often surprises crocheters because it can grow significantly when wet. The treatment that reduces felting also reduces some of the fiber’s tendency to grab onto itself. Open fabrics, taller stitches, and heavier garments are especially prone to length growth.
Typical tendencies:
- Noticeable wet stretch
- Partial recovery after drying flat
- Can continue to lengthen under garment weight
- Less resistant to gravity than non-superwash wool
If a washed swatch grows 6% in length and 2% in width, a long cardigan may grow more than that once the whole piece is hanging. For this reason, a shrinkage map for superwash should include a “hung for 24 hours” measurement.
Cotton
Cotton generally has low elasticity and high drape once the fabric is established. It may soften and lengthen a bit with washing, especially in looser gauges, but it can also draw in across width if stitches settle and the fabric becomes denser. Ribbed structures can change dramatically in width.
Typical tendencies:
- Limited bounce-back
- Can stretch with gravity over time
- Often softens after washing
- Width draw-in and length growth may happen together depending on stitch pattern
Cotton home textiles are classic candidates for shrinkage mapping. Dishcloths, placemats, and runners can shift enough after laundering that border math and final dimensions need adjustment.
Linen and flax blends
Linen can feel wiry before washing and then relax into a much more fluid fabric. Because it has low elasticity, the post-wash state is often the truer long-term state. Row height and drape can change notably.
Typical tendencies:
- Significant softening after wash
- Low recovery once stretched
- Tends to reveal final drape only after laundering
- Best measured after multiple wash cycles if for garments
Acrylic
Acrylic is often dimensionally stable in ordinary laundering, but not always. It can relax after a first wash, especially if the fabric was crocheted tightly. Heat is the major variable. High dryer heat or aggressive steaming can permanently change stitch shape and size.
Typical tendencies:
- Usually modest wash change without heat
- Can “set” into a new shape with heat
- Dense textures often remain stable
- Ribbing may relax somewhat if overhandled
If you are swatching acrylic, test the exact care method. Machine wash cold and lay flat is not the same as wash and tumble dry low. Steam blocking must be tested first because it can either gently settle the fabric or flatten it beyond recovery.
Alpaca, silk, bamboo, and other drapey fibers
These fibers and blends often produce beautiful fabric with fluid drape, but they are common culprits in length growth. Silk and bamboo can become surprisingly heavy when incorporated into a larger garment. Alpaca has warmth and softness but less spring than wool.
Typical tendencies:
- High drape
- Potential for vertical growth under weight
- Limited snap-back compared with wool
- Open patterns may lengthen considerably
With these fibers, a shrinkage map should absolutely include suspended measurements. Clip the swatch from the top edge and let it hang with a small weighted clothespin or simply under its own weight, depending on the intended use.
Blends
Blends are where mapping becomes especially valuable because the percentages and yarn construction matter. A 50/50 wool-cotton may behave very differently from an 80/20 wool-cotton. A chainette cotton blend behaves differently from a plied cotton blend. Treat every yarn as its own case.
Useful questions for blend behavior:
- Which fiber dominates elasticity?
- Which fiber dominates drape?
- Does the yarn bloom when washed?
- Does the structure flatten or round out?
Why stitch patterns change dimensions differently
Fiber is only half the story. Crochet fabric is directional. A stitch pattern can be stable in width but unstable in length, or the reverse.
Plain single crochet
Single crochet is usually dense and relatively stable. It often has less dramatic vertical growth than taller stitches, but it can compact after washing if worked tightly. It also has a natural tendency toward firmness that can either hold shape or become boardy depending on fiber.
Typical behavior:
- Good dimensional stability
- Possible slight draw-in after wash
- Dense wool single crochet may shrink more with agitation
- Cotton single crochet can become firmer and a bit narrower if the fabric settles
Half double crochet
Half double crochet often has more flexibility and drape than single crochet, but its row structure can compress or relax depending on fiber. It is one of those stitches that benefits from checking both row gauge and actual finished length after washing.
Typical behavior:
- Moderate stability
- Can settle shorter in row height after wash if crocheted loosely
- Can lengthen in drapey fibers
Double crochet and taller stitches
Taller stitches usually show more movement, especially in length. They have more yarn in the vertical leg and more room for the loop structure to open or settle.
Typical behavior:
- Greater potential for vertical growth
- Open gauges exaggerate movement
- Superwash, alpaca, bamboo, silk blends often amplify this
If you are making a long duster in double crochet with a wool-silk blend, ignoring post-wash length change is asking for a hem that settles somewhere around your knees.
Ribbing and post-stitch textures
Front-post/back-post ribbing, slip stitch ribbing, and other textured ribs are highly directional. They frequently draw in strongly across width and may lengthen somewhat when relaxed. Their stretched measurement and resting measurement are both important.
Typical behavior:
- Significant width contraction at rest
- Good expansion when worn if fiber has elasticity
- Cotton ribs may stretch out with wear and recover poorly
- Wool ribs recover better
For cuffs, waistbands, hat brims, and sweater hems, your shrinkage map should include:
- Resting width
- Stretched width
- Post-wash resting width
- Post-wash stretched width
- Recovery after stretching for 1 minute
Lace and mesh
Lace can either expand dramatically when blocked or draw in when unblocked after washing, depending on the finishing method. The larger the holes and the longer the stitches, the more variable the dimensions.
Typical behavior:
- Big changes with blocking style
- Width and length can move independently
- Pinning aggressively may produce a larger “display” size than normal-use size
For wearables, I prefer measuring two states:
- Relaxed post-wash dry size
- Light-use blocked size
That way you know whether the fabric lives at the blocked dimension or only visits it.
Dense textured stitches: bobbles, popcorns, puffs, waistcoat, thermal structures
Dense textures can compact after washing as the fabric settles. They often become thicker and slightly narrower. Some yarns bloom and fill gaps, changing the visual density and measurement.
Typical behavior:
- Potential width draw-in
- Slight row compression after wash
- Increased heft may cause some length drop in garments
Directional stitches and bias
Some stitch patterns, especially those worked with asymmetric insertion points or repeated directional slants, may bias. Tunisian is famous for curl, but standard crochet can also skew in certain textures. Washing can either correct or exaggerate this.
Typical behavior:
- One side may pull longer than the other
- Panels may twist after washing
- Borders can either tame or intensify skew
A shrinkage map should include diagonal measurements corner to corner if you suspect bias. If those diagonals change unevenly, the fabric is distorting, not simply shrinking or growing.
Building a practical shrinkage map: step by step
Here is a method you can use for garments and home textiles. It sounds methodical because it is, but once you do it a few times, it becomes straightforward.
Materials to use
- The exact yarn for the project
- The planned hook size, plus one size smaller and one size larger if you are still deciding
- Locking stitch markers or contrasting thread
- Measuring tape or ruler with millimeter markings
- Scale if garment weight matters
- Notebook or spreadsheet
- Blocking mats and pins if relevant
Swatch size
Make a swatch large enough to behave like fabric, not a coaster. I recommend:
- Minimum total swatch size: 20 cm x 20 cm
- Preferred for unstable fabrics: 25 cm x 25 cm
- Inner measured area: 10 cm x 10 cm or 15 cm x 15 cm, marked with thread or pins
Why larger? Edge distortion can lie to you. A tiny swatch can appear stable because the edges dominate the whole piece.
Mark the measured window
Work the swatch, rest it for several hours, then mark a centered 10 cm x 10 cm or 15 cm x 15 cm square. Use contrasting thread to run tiny markers at the corners. Do not rely only on the outer edges.
Record:
- Stitch count across measured width
- Row count across measured length
- Total swatch width and length
- Swatch weight if useful
For example:
- Yarn: DK 55% wool, 45% cotton
- Hook: 4.0 mm
- Stitch pattern: Hdc through third loop
- Measured window before wash: 15 cm width x 15 cm length
- Stitches in 10 cm: 18
- Rows in 10 cm: 13
- Total swatch: 22 cm x 22.5 cm
Wash exactly as the finished item will be treated
This matters enormously. “Hand washed gently and rolled in a towel” is not equivalent to “machine washed delicate with spin.” If the recipient will toss it in the washer, test that. If it will be steam blocked and never laundered often, test steam.
Record:
- Water temperature
- Soap used or none
- Soak duration
- Agitation level
- Spin speed if machine washed
- Drying method: flat, hung, tumble, pinned, steamed
Measure at multiple stages
I suggest at least four stages for garments:
- Before wash, rested
- Immediately after wash, supported and wet
- Dry after finishing
- After hanging/wearing simulation for 12 to 24 hours
For home textiles, three stages may be enough:
- Before wash
- Dry after laundering
- After a second wash if repeated use matters
Calculate percentage change
This is the core of the map.
Formula:
- Width change % = ((post-wash width - pre-wash width) / pre-wash width) x 100
- Length change % = ((post-wash length - pre-wash length) / pre-wash length) x 100
If the number is negative, it shrank. If positive, it grew.
Example:
-
Pre-wash width: 15 cm
-
Post-wash width: 14.1 cm
-
Width change: ((14.1 - 15) / 15) x 100 = -6%
-
Pre-wash length: 15 cm
-
Post-wash length: 15.9 cm
-
Length change: ((15.9 - 15) / 15) x 100 = +6%
That tells you the fabric draws in 6% across width and grows 6% in length.
Record recovery
Stretch the swatch gently to mimic wear, then let it rest flat again.
Measure:
- Width after stretching
- Width after 30 minutes rest
- Length after hanging overnight
- Length after resting flat again
This helps you separate temporary stretch from permanent growth.
Reading the map: what the numbers mean in real projects
Let’s say your sweater front is designed to finish at 50 cm width and 60 cm length after washing.
Your swatch map says:
- Width change after wash: -4%
- Length change after wash: +3%
To achieve the target post-wash dimensions, you need to crochet the piece pre-wash at:
- Required pre-wash width = 50 / 0.96 = 52.08 cm
- Required pre-wash length = 60 / 1.03 = 58.25 cm
So instead of aiming for 50 x 60 off the hook, you aim for about 52.1 x 58.3 cm.
Now convert that into stitches and rows.
If your pre-wash gauge is:
- 18 stitches per 10 cm
- 12 rows per 10 cm
Then:
- Width stitches needed = 52.08 x 1.8 = 93.74 stitches, round according to pattern repeat
- Length rows needed = 58.25 x 1.2 = 69.9 rows, round according to shaping requirements
If the stitch repeat is 4 + 1, you might round to 93 or 97 depending on ease and symmetry.
This is where shrinkage mapping becomes truly practical. You are not guessing whether to “make it a little shorter.” You are making a measured adjustment.
How to swatch specifically for width movement, length movement, and gravity
Width movement test
Use at least 3 repeats of the stitch pattern, preferably more.
Measure:
- Resting width before wash
- Resting width after wash
- Stretched width after wash
- Resting width after stretch and recovery
This is critical for ribs, side-to-side fabrics, and borders.
Length movement test
Use enough rows to represent the vertical stack realistically.
Measure:
- Length before wash
- Length after wash and dry
- Length after hanging from top edge for 12 to 24 hours
This matters most for cardigans, dresses, tunics, curtain panels, and long blankets.
Gravity test
For drapey fibers or long garments, suspend the swatch.
A simple method:
- Wash and dry the swatch flat first
- Clip it from the top edge
- Let it hang 24 hours
- Measure length gain
- If relevant, add a small weight equal to the swatch’s proportional share of garment weight
Even a 2% additional length gain under suspension can translate to several centimeters in a finished garment.
Pattern math adjustments based on shrinkage maps
Once you have the map, apply it to the pattern systematically.
Body width
If the fabric draws in after wash, add width before washing. If it grows, subtract width. Apply separately to chest, hip, and hem if the stitch pattern changes in different zones.
Body length
If the fabric grows vertically, reduce row count before finishing. If it shortens, add rows. For garments with waist shaping, distribute the adjustment so the waist and bust shaping still sit in the correct places.
Sleeves
Sleeves are notorious because they combine circumference, length, and weight. A sleeve in a drapey yarn may lengthen more than the body because the narrower tube hangs differently.
Check:
- Upper arm circumference change
- Cuff rib recovery
- Total sleeve length after wash and after hanging
If the sleeve length grows 5%, a 48 cm sleeve may become 50.4 cm. That 2.4 cm matters.
Necklines and openings
If a neckline edge relaxes outward, stabilize it with a tighter edging, smaller hook, or reinforcing slip-stitch round. If a front band pulls in too much, account for the draw-in or change the edge treatment.
Borders
Borders are often where good dimensions go bad. A dense border on a soft body fabric can cinch the piece inward. A lace border on a firm center can flare. Shrinkage mapping helps here too.
Make a composite swatch:
- Main fabric center
- Planned border on one or two sides
- Wash and dry as a unit
Measure both the center and the bordered edge. This reveals whether the border acts as a stabilizer or a distorting force.
Common stitch-pattern scenarios and how to plan for them
Ribbed hem on a sweater body
Problem: The body is worked in plain stitches, but the ribbed hem draws in strongly after washing.
Plan:
- Swatch body and ribbing separately
- Swatch them joined if possible
- If hem draw-in is intentional, make sure the transition does not ripple
- If not intentional, increase stitches at the join or use a larger hook for the ribbing
Example:
- Body post-wash width: stable
- Ribbing post-wash resting width: -12%
- Ribbing post-wash stretched width: recovers to target
That may be perfect for a fitted hem, but only if the wearer can still pull it over the hips and it rebounds properly.
Lace yoke with dense body
Problem: The yoke opens and enlarges under blocking, while the body remains compact.
Plan:
- Measure blocked yoke circumference separately
- Keep shoulder depth shorter pre-block if length growth occurs in the yoke
- Stabilize neckline with a non-stretch finishing round if needed
Cotton home textile with border
Problem: Center panel stays close to gauge, but the edging waves after laundering.
Plan:
- Reduce border stitch frequency
- Use a smaller hook for the edging
- Add a plain setup round to stabilize the edge
Side-to-side garment
Problem: What is “row gauge” in the pattern may become body width in the finished garment.
Plan:
- Map the direction of movement relative to the finished anatomy
- If rows compress after wash, that affects width, not length
- Adjust counts according to fabric orientation, not just stitch type
This is one of the most important mindset shifts in shrinkage mapping: always ask which direction of the fabric corresponds to the dimension you care about.
Troubleshooting: common mistakes and how to fix them
Mistake 1: Swatching too small
A 10 cm square total swatch is often not enough, especially for lace, ribbing, or textured stitches.
Fix:
- Make at least a 20 cm square swatch
- Measure only the inner window
Mistake 2: Measuring only once
Many fabrics change between wet, dry, and worn states.
Fix:
- Take stage measurements
- Include a hanging test for drapey garments
Mistake 3: Blocking the swatch harder than the finished object will be treated
If you aggressively pin a lace swatch but never plan to pin the actual cardigan after each wash, the swatch is giving you a fantasy dimension.
Fix:
- Match swatch finishing to real care habits
- Record both relaxed and blocked states if necessary
Mistake 4: Ignoring fiber blend percentages
“Wool blend” is too vague to predict behavior.
Fix:
- Record exact content, such as 70% superwash merino, 20% silk, 10% yak
- Treat each yarn as unique
Mistake 5: Forgetting the effect of hook size
A 0.5 mm change in hook can alter openness, drape, and post-wash movement.
Fix:
- If dimensions are critical, swatch with two or three hook sizes
- Compare not only gauge but change percentages
Sometimes the best hook is not the one that hits dry gauge most easily, but the one whose washed fabric lands exactly where you need it.
Mistake 6: Using only stitch count without row count analysis
Crochet row height is especially prone to change in tall stitches.
Fix:
- Record stitches and rows per 10 cm before and after wash
- Convert finished target dimensions using the pre-wash gauge and post-wash change factors
Mistake 7: Not accounting for garment mass
A swatch does not weigh what a full cardigan weighs.
Fix:
- Perform a hanging test
- Be extra cautious with superwash, alpaca, bamboo, silk, and loose gauges
Variations: different ways to build your map depending on project type
For fitted garments
Make three swatches if the garment uses more than one fabric zone:
- Main body fabric
- Ribbing or bands
- Any lace or texture panel
Track:
- Width change n- Length change
- Recovery
- Hanging length gain
Then apply the map separately to each zone.
For oversized sweaters and cardigans
Prioritize gravity behavior. Even if chest width is forgiving, shoulder drop, armhole depth, and sleeve length are not.
Add:
- Hung measurement after 24 hours
- Seamed versus unseamed test if seams are optional
Seams often act as stabilizers. A cardigan assembled with shoulder seams may grow less than a seamless drop-shoulder pullover in the same yarn.
For baby items
Because laundering is frequent, test at least two wash cycles. Softening, bloom, and mild compaction often appear more clearly after repeated washing.
Track:
- First wash change
- Second wash change
- Edge stability
For blankets and home textiles
Large pieces may spread under their own weight, especially in cotton and bamboo blends.
Add:
- Border test
- Laundering repeat test
- Diagonal measurement if bias is suspected
For bags and baskets
Sometimes you want shrinkage or compaction. A wool basket may benefit from controlled felting. A cotton market bag may intentionally lengthen under load.
Track:
- Loaded stretch length
- Recovery after unloading
- Wash-set shape
Finishing choices that alter post-wash size behavior
Blocking style
- Wet blocking can relax and set shape significantly.
- Steam blocking can be gentle or transformative, especially on acrylic.
- Spray blocking usually causes less dimensional shift.
Always test the method you will actually use. Acrylic in particular can become over-relaxed if overheated.
Seaming
Seams add structure. Mattress-style seaming or slip-stitch joins can reduce growth and stabilize edges. If your swatch is unseamed but your garment will be heavily seamed, the final piece may move less than the swatch suggests.
Edgings and facings
A firm edging can prevent necklines from stretching out. A folded hem or crochet facing can anchor a drapey fabric. A too-tight border can create draw-in.
Lining or interfacing
For home decor or bags, lining changes everything. A lined runner or cushion front may no longer express its natural post-wash movement the same way. In that case, build and test a layered sample.
A sample shrinkage map in practice
Here is a simplified example for a pullover body worked in a wool-cotton blend.
Yarn: DK, 60% wool, 40% cotton
Hook: 4.5 mm
Stitch pattern: Alternating hdc and dc
Swatch total size before wash: 24 cm x 24.5 cm
Measured window before wash: 15 cm x 15 cm
Gauge before wash: 17 stitches and 11 rows per 10 cm
Wash method: Machine wash delicate cold, remove promptly, lay flat to dry
Measured window after dry: 14.4 cm width x 15.6 cm length
Gauge after dry: 17.7 stitches and 10.6 rows per 10 cm
Hung for 24 hours after dry: 14.3 cm width x 15.9 cm length
Recovery after flat rest: 14.4 cm width x 15.7 cm length
Calculated changes:
- Width after dry: -4%
- Length after dry: +4%
- Additional hanging length gain: +2% from original dry length state
- Final resting state after hanging and flat recovery: about +4.7% length from original
Interpretation:
- The fabric consistently draws in across width.
- It grows in length after washing and a bit more under gravity.
- Most of the hanging growth recovers, but not all.
If the intended finished body dimensions are 52 cm chest width and 58 cm body length after washing and use, then pre-wash target dimensions are approximately:
- Width: 52 / 0.96 = 54.2 cm
- Length: 58 / 1.047 = 55.4 cm
Now using pre-wash gauge:
- Width stitches: 54.2 x 1.7 = 92.14 stitches
- Length rows: 55.4 x 1.1 = 60.94 rows
If the pattern repeat requires an even stitch count, you may choose 92 stitches. For the rows, you may work 61 rows and then check actual fabric behavior during assembly.
This is exactly the kind of adjustment that prevents a sweater from ending up short and wide or narrow and too long.
Creating a reusable shrinkage notebook
If you crochet regularly, keep your maps. Over time, they become one of your most valuable design tools.
Useful categories to record:
- Yarn brand and colorway
- Fiber content
- Yarn structure: plied, chainette, blown, ribbon
- Hook size
- Stitch pattern
- Direction worked
- Before wash gauge
- After wash gauge
- Width and length change percentages
- Recovery notes
- Best use notes, such as “excellent for cardigans with seams” or “grows too much for long sleeves at loose gauge”
After a while, you will start noticing trends. Maybe your favorite mercerized cotton always drops in length when worked in dc mesh. Maybe a particular non-superwash wool settles beautifully in textured yokes but compacts too much in dense ribbing. This accumulated knowledge is what turns a capable crocheter into a very reliable maker.
Key takeaways
Crochet shrinkage mapping is really about respecting the truth of fabric. The fabric you crochet on the hook is not yet the final fabric. Water, handling, heat, gravity, and stitch architecture all collaborate to create the finished dimensions.
If you want garments and home textiles to land at the size you intended, remember these essentials:
- Swatch larger than feels convenient.
- Measure an inner window, not just the edges.
- Record width and length separately.
- Wash exactly as the finished item will be treated.
- Test hanging behavior for drapey fibers and long pieces.
- Track recovery, not just immediate post-wash size.
- Apply percentage change to pattern math before crocheting the full project.
- Swatch borders, ribbing, and mixed stitch zones separately when they affect fit.
The biggest shift is mental: stop treating gauge as a single number and start treating it as a sequence of fabric states. Once you do that, you can design and crochet with much more confidence. Your hems will sit where you planned. Your sleeves will stop surprising you. Your blankets will wash up to the dimensions you expected. And your relationship with swatching may become less about obligation and more about control.
That, to me, is the pleasure of advanced crochet. We are not just making stitches. We are engineering fabric with enough understanding to let beauty and practicality coexist. A shrinkage map is simply one of the best tools for doing exactly that.