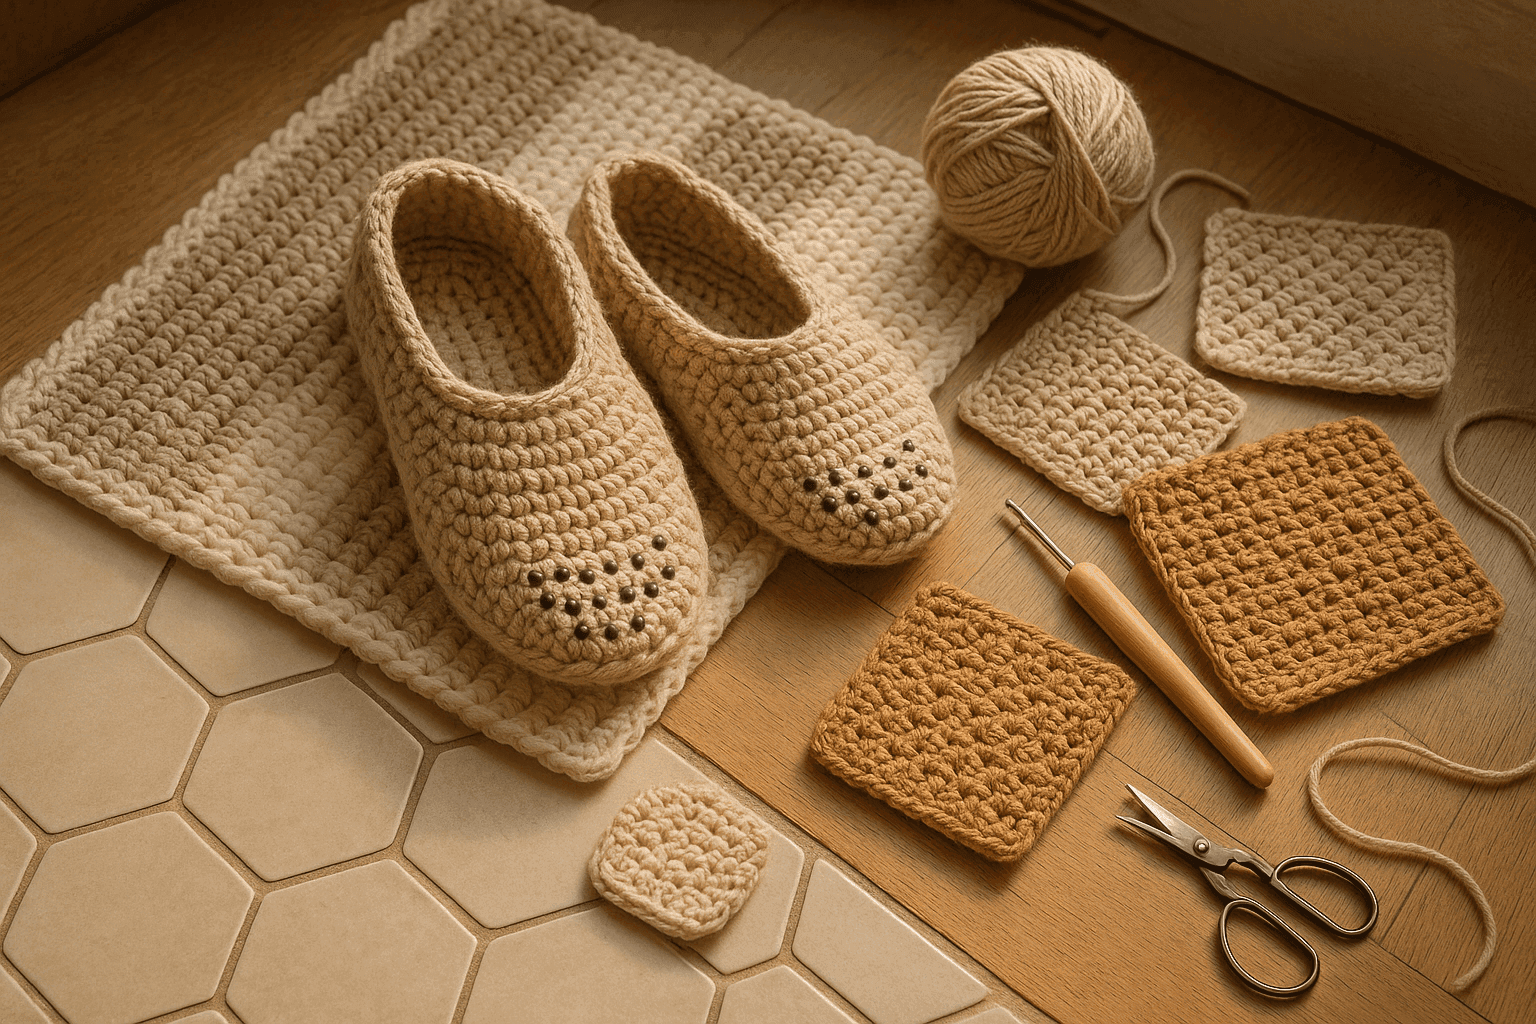
There is nothing like finishing a pair of crochet slippers, slipping them on, taking three confident steps across the kitchen floor—and discovering that what you actually engineered was a tiny handmade skating rink. The same thing happens with bath mats that drift, pet pads that bunch under excited paws, bag bases that abrade through faster than expected, and stair treads that look beautiful until they start creeping out of place. Most of us meet this problem the same way: after the project is complete, when the surface is already doing exactly what the yarn, stitch structure, and finish told it to do.
That is the useful shift in thinking here. Slip resistance in crochet is not an afterthought or a single product you paint onto the bottom at the end. It is a design problem with several levers: fiber friction, yarn twist, stitch density, texture direction, abrasion behavior, moisture response, backing choice, and finish chemistry. When you start treating soles, rug backs, and grip zones as engineered wear surfaces rather than decorative fabric, your decisions become much clearer. You stop asking only, “What looks nice?” and start asking, “What will this touch, how much load will it take, in which direction will it move, and how will it behave after ten washes?”
For crochet makers, this is especially important because crochet produces a very specific kind of fabric. Compared with many woven textiles and some knit structures, crochet often has more dimensional relief, more edge definition at the stitch level, and more opportunities to direct texture intentionally. That is an advantage. A crochet surface can be dense and hard-wearing, squishy and tactile, pebbly and high-friction, or smooth and glide-prone depending on your yarn and stitch choices. The trick is understanding which combinations help a sole grip a hardwood floor, which help a bath mat stay put on tile, and which survive abrasion without turning fuzzy, slick, or compacted.
In this guide, we will look at how traction really works in crochet surfaces, then move through practical design methods for slippers, mats, stair treads, pet pads, and bag bases. I will also give you swatching methods that are genuinely useful—not the kind you make, admire, and ignore, but test swatches that tell you whether a fabric grips, wears, washes, and rebounds the way you need.
Why crochet surfaces slip, grip, wear, or fail
At the simplest level, traction is resistance to movement between two surfaces. In our case, one of those surfaces is your crochet fabric, and the other is a floor, stair, tabletop, or whatever the piece contacts in use. But traction is not one thing. It comes from several interacting factors:
- Fiber-to-floor friction: how naturally grippy the yarn material feels against wood, tile, laminate, stone, vinyl, or fabric.
- Surface topography: the micro-landscape made by stitches, ridges, bumps, and relief.
- Compression under load: how much the crochet flattens when stepped on or weighted.
- Abrasion behavior: whether the yarn gets fuzzy, polished, matted, or worn smooth over time.
- Moisture response: what happens when the fabric is wet, damp, soapy, or humid.
- Structural stability: whether the surface stays flat or shifts, curls, buckles, or stretches.
That last point matters more than many people expect. A perfectly grippy yarn can still perform poorly if the crocheted fabric distorts and causes only a few high points to touch the floor. Likewise, a coarse texture may feel grippy by hand but skate under body weight if the stitches compress into a smooth plane.
So instead of searching for one “best non-slip crochet yarn,” think in systems:
- The base material system: fiber, ply, twist, yarn finish.
- The stitch system: density, relief, direction, thickness, and contact patch.
- The reinforcement system: backing, sewn sole, interfacing, or applied grip finish.
- The use system: dry indoor use, wet bathroom use, pet use, heavy traffic, gentle wear, washable or not.
Fiber friction: what the yarn itself contributes
Fiber content is your first engineering decision. Not because one fiber is magically non-slip, but because each fiber wears, compresses, and interacts with floors differently.
Cotton
Cotton is often a strong candidate for bath mats, rug backs, and some indoor slipper soles because it is relatively matte, less springy than wool, and can create a dense, substantial fabric. It tends to feel less slick than many synthetics, especially mercerized-free, non-polished cottons.
Strengths:
- Good friction in dry conditions
- Washable
- Can be crocheted densely
- Less elastic rebound means the fabric can sit firmly rather than bounce
Limitations:
- Can become heavy when wet
- Repeated abrasion may flatten stitch texture
- Mercerized cotton can be smoother and more glide-prone than unmercerized cotton
For wear surfaces, I usually prefer worsted to bulky cotton or cotton blends with a matte finish. A kitchen cotton can work for small grip zones or bag bases, but for bath mats and treads, a thicker, sturdier cotton is easier to build into a supportive structure.
Wool
Wool has natural surface scales and often offers pleasant friction, especially before heavy wear polishes it down. It also fulls or felts under abrasion and moisture, which can either help or hurt depending on your goal.
Strengths:
- Good tactile grip
- Cushioned and resilient
- Can felt slightly, creating a denser sole
- Warm and comfortable in slippers
Limitations:
- Wash care may be restrictive
- Can shrink or distort
- Wet wool behaves differently from dry wool
- Felted wear may become dense but not always high-traction on smooth floors
Wool excels in slippers when combined with a secondary grip strategy: suede patches, latex-free grip fabric, silicone dots, or sewn-on leather/faux leather soles. Wool alone can still slide on polished hardwood.
Acrylic
Acrylic is common, inexpensive, and often easy care, but for wear surfaces it needs careful handling. Many acrylic yarns develop a smoother, slightly shiny abrasion pattern over time, especially on hard floors.
Strengths:
- Accessible and washable
- Lightweight
- Colorfast in many cases
Limitations:
- Can become slick with wear
- Pills or fuzzes under abrasion, then mats down
- Heat-sensitive, which matters for some applied finishes and laundering
Acrylic is usually not my first choice for the bottom-most contact layer of slippers or mats unless I am adding a robust non-slip backing.
Blends
Blends are often where the sweet spot lives. Cotton-acrylic blends can reduce weight and improve washability. Wool-nylon blends can improve abrasion resistance. Cotton-linen or cotton-hemp blends can create a drier hand and more tooth.
For traction-oriented crochet, look for blends that preserve a matte surface and resist becoming polished. A soft, silky hand may feel lovely in the skein but is often a warning sign for low-friction applications.
Jute, hemp, linen, raffia, and utility fibers
These can be excellent for bag bases, baskets, mats, and some decorative tread covers because they are coarse, dry, and abrasion-resistant. But they are not universally comfortable or suitable for skin-contact soles.
Best uses:
- Bag bottoms
- Entryway mats in low-moisture settings
- Decorative over-surfaces layered atop a non-slip base
Cautions:
- Can feel harsh underfoot
- Some fibers shed dust or break down with repeated flexing
- Water exposure may cause stiffness, mildew risk, or distortion depending on fiber
Yarn twist, ply, and abrasion behavior
Two yarns with the same fiber content can perform very differently depending on twist and construction.
High twist vs low twist
A higher-twist yarn generally resists fuzzing and abrasion better. The stitch definition is firmer, and relief elements stay crisper longer. For soles and tread surfaces, this often means better durability and more stable texture.
A low-twist yarn may feel plush at first but abrades faster, blooms, pills, and collapses into a smoother contact surface. That can reduce traction over time.
Plied vs single
A plied yarn usually handles abrasion more gracefully than a loosely spun single. If you are making a wear zone that will repeatedly scrape against flooring, plied yarn is usually safer.
Tape, chainette, and novelty constructions
These can be useful, but test them aggressively. Tape yarn can create broad flat contact, chainette can compress unpredictably, and chenille-type surfaces may feel grippy in hand but shift strangely under pressure.
For hard-working surfaces, the general rule is simple: the more the yarn behaves like a stable cord, the easier it is to predict in a sole or mat.
Stitch topography: the shape of the surface matters
This is where crochet really shines. Stitch topography is the actual three-dimensional landscape the floor feels.
Smooth fabric is not always safer
A plain dense single crochet fabric can be durable, but if worked very flat in a smooth yarn, it may behave almost like a padded disk sliding over the floor. Dense does not automatically equal grippy.
Relief and micro-texture improve grip
Textures that create many small contact interruptions often improve traction. Think:
- Waistcoat stitch with a firm gauge
- Single crochet through back loop used strategically for ridges
- Extended single crochet in dense rows
- Pebble textures
- Low-profile seed-like stitch alternation
- Tight thermal or half-thermal structures
The key is low-profile texture, not giant bobbles. Large raised stitches compress under weight, wear unevenly, and can feel unstable underfoot.
Directional texture matters
Texture can be engineered to resist movement in one direction more than another. This is especially useful for stair treads and slipper soles.
For example:
- Crosswise ridges can help resist forward/back sliding.
- Chevron or herringbone-oriented relief can help disperse movement.
- Napped or brushed directional surfaces may grip one way and glide the other.
If you are making a sole, consider where push-off occurs: usually from heel to toe through the ball of the foot. A sole that has subtle transverse ridges under the ball and heel often performs better than one with purely lengthwise ribbing.
Stitch density and contact patch
A fabric that is too open reduces consistent floor contact and allows edges to curl or collapse. For wear surfaces, start denser than you would for a garment.
Recommended starting points:
- DK yarn: 3.25–4 mm hook for dense swatching
- Worsted yarn: 4–5 mm hook for dense soles and rug faces
- Bulky yarn: 5.5–6.5 mm hook if the structure remains compact
As a rule, go 0.5–1.5 mm smaller than the hook you might choose for a drapey fabric in the same yarn.
A useful benchmark for a sole swatch in worsted cotton is roughly:
- Single crochet: 16–20 sts x 18–22 rows over 4 in/10 cm
You do not need to hit that exact gauge. What matters is that the stitches sit snugly, with minimal daylight between them, and the fabric does not stretch dramatically when tugged.
Engineering slippers: traction without sacrificing comfort
Slippers are the classic slip-resistance challenge because they combine movement, body weight, flex, and comfort.
Best base strategies for crochet slippers
- Crochet upper + separate sole insert
- Crochet sole + sewn-on suede/leather/grip fabric
- Crochet sole + applied grip finish
- Double-thickness crochet sole with embedded stabilizer
If you want the best performance, option 2 is usually strongest. Crochet alone can make a functional indoor sole, but adding a bottom layer gives more predictable wear.
A practical sole structure
For a medium adult slipper, start with an oval sole in worsted or aran cotton blend using a 4–4.5 mm hook.
Foundation sole example:
- Ch 13
- Round 1: Sc in 2nd ch from hook and next 10 sts, 3 sc in last ch; working on opposite side, sc in next 10 sts, 2 sc in last st. Join or work continuously. 26 sts
- Round 2: Inc, sc 10, 3 inc across toe curve, sc 10, 2 inc across heel curve. 32 sts
- Round 3: Sc 1, inc, sc 10, (sc 1, inc) 3 times, sc 10, (sc 1, inc) 2 times. 38 sts
- Round 4: Work even or add 2–4 increases as needed for foot shape. 38–42 sts
Then add a second sole layer or work 2–4 additional rounds even in tight single crochet or waistcoat stitch. Aim for a sole thickness that compresses slightly but not fully flat under fingertip pressure.
For stronger wear:
- Make 2 identical soles.
- Sandwich a layer of felt, canvas, cork fabric, or flexible foam between them.
- Whipstitch or slip stitch together through both layers.
Stitch zones for traction
Rather than using one stitch everywhere, divide the sole into zones:
- Heel zone: dense single crochet or thermal stitch for impact resistance
- Midfoot zone: plain dense fabric for flexibility
- Ball zone: low ridges or pebbled texture for push-off grip
- Toe zone: smoother, tightly worked fabric to reduce catching
A simple zoned approach is to place back-loop single crochet ridges every 2nd or 3rd round under the heel and ball only. Keep the rest plain to preserve comfort.
Adding grip finishes to slippers
Common options:
- Silicone sock paint or grip medium
- Puffy fabric paint used sparingly
- Sewn suede patches
- Flexible anti-slip sheet cut to shape and stitched on
For best results, avoid coating the entire sole in one continuous slick film. Instead, apply dots, short lines, or broken chevrons. That preserves flexibility and creates multiple friction points.
A reliable pattern is:
- Heel: 6–8 dots arranged in a horseshoe
- Ball: 8–12 dots or 4 short bars
- Toe edge: 3–5 small dots if needed
Let finishes cure fully, usually 24–72 hours depending on product, before testing.
Bath mats, rug backs, and wet-area grip
Bathrooms change everything. Water reduces friction, and soap residue reduces it further. A bath mat that is “fine” dry may become very unsafe damp.
Best yarn choices for bath mats
- Cotton
- Cotton-linen
- Cotton-poly utility blends with matte finish
Avoid very plush, slippery chenilles or highly polished fibers for the contact surface. Thick absorbency is nice, but if the mat skates when stepped on wet, it is not doing its job.
Face texture vs back grip
For mats, think in two layers:
- The face: absorbency, comfort, appearance
- The back: anti-slip function
The crochet itself can help, but in many bathrooms you will still want one of these:
- Sewn-on non-slip rug mesh
- Removable rug underlay beneath the crochet piece
- Applied silicone or latex-free grip pattern
- Crochet cover attached to a washable commercial non-slip mat base
If machine washability matters, a separate removable underlay is often smartest. It lets you wash the crochet portion thoroughly without degrading the grip backing as quickly.
A dense bath mat swatch target
In worsted cotton with a 4.5 mm hook:
- 14–17 hdc or sc sts over 4 in/10 cm
- 12–18 rows over 4 in/10 cm, depending on stitch
Try stitch combinations like:
- Single crochet and half double crochet stripes
- Tight lemon-peel texture
- Waffle-inspired texture only if worked low and firm
- Linked stitches for denser fabric
Avoid oversized post-stitch relief that traps too much water and compresses unpredictably.
Stair treads: where movement direction is everything
Stair treads require more caution than almost any other crochet wear surface. Decorative crochet on stairs must not shift, curl, or create a trip edge.
If you make crochet stair treads, they should be:
- Firmly sized to the tread
- Backed or anchored securely
- Low profile
- Edge-stable
- Tested under actual household use
Best construction for stair treads
A strong approach is:
- Crochet a dense rectangular top layer in cotton or utility blend
- Sew it to a stair tread pad, cork-backed fabric, or non-slip textile base
- Bind or reinforce edges so they cannot curl
Suggested stitch pattern:
- Tight half double crochet in the third loop for subtle horizontal texture
- Or single crochet with occasional back-loop ridge rows every 4–6 rows
For a sample stair tread panel:
- Ch 31 in worsted cotton with 4.5 mm hook
- Row 1: Sc in 2nd ch from hook and across. 30 sts
- Rows 2–36: Sc across, working every 5th row in back loop only for subtle ridging. 30 sts each row
- Finish with a crab stitch edge or sewn binding to resist edge flare
Measure your stair carefully and adjust stitch counts. The tread should lie flat with no stretching to fit.
Pet pads and crate mats
Pet surfaces need a different balance: grip against the floor, comfort under the animal, easy washing, and resistance to claws.
Good choices
- Cotton or cotton blend outer fabric
- Dense low-profile stitch
- Detachable anti-slip backing or underpad
- Double-thickness structure for wash survival
Avoid highly looped textures that catch claws. Dense single crochet, linked stitches, or low pebble textures are safer.
If making a small pet pad, work a rectangle with a target density of:
- Worsted cotton, 4–4.5 mm hook
- Ch to desired width
- Row 1 sc, then continue in sc or linked hdc
- Aim for 16–18 sts per 4 in and a fabric that folds but does not collapse
Bag bases and high-abrasion contact zones
Bag bottoms are not about preventing people from slipping, but the engineering principles are similar. You want friction, abrasion resistance, shape retention, and compatibility with the surfaces the bag is set on.
Best strategies for bag bases
- Use a firmer yarn than the bag body
- Crochet with a smaller hook for density
- Add a base insert of plastic canvas, bag base board, or thick felt
- Reinforce with leather, cork fabric, or coated canvas
A nice trick is to switch from a soft body yarn to a stronger base yarn for the bottom 2–4 rounds. This preserves the look of the bag while improving wear where it counts.
Step-by-step: how to design and test a grip-oriented crochet surface
This is the process I recommend whether you are making slippers, mats, or wear patches.
Step 1: Define the real use case
Write down:
- Dry or wet use?
- Hardwood, tile, laminate, carpet, or mixed flooring?
- Light or heavy traffic?
- Barefoot, socks, pet paws, or bag abrasion?
- Washable how often?
- Softness required, or utility-first?
This will keep you from solving the wrong problem.
Step 2: Choose 2–3 candidate yarns
Pick yarns that differ meaningfully. For example:
- Worsted unmercerized cotton
- Cotton-acrylic utility blend
- Wool-nylon blend
Label everything. If you are serious about performance, tiny notes save hours later.
Step 3: Crochet comparison swatches
Make at least three 5 x 5 in / 12.5 x 12.5 cm swatches per yarn:
- Dense single crochet
- Low-profile textured stitch
- Double-thickness or reinforced sample
Use hooks 0.5 mm apart if needed to tune density.
For each swatch, record:
- Yarn and lot
- Hook size
- Stitch pattern
- Starting chain and final stitch count
- Rows/rounds
- Finished dimensions before washing
Example swatch setup in worsted cotton:
- Swatch A: Ch 21, rows of sc for 20 rows. 20 sts x 20 rows
- Swatch B: Ch 21, lemon-peel texture for 20 rows. 20 sts x 20 rows
- Swatch C: Ch 21, thermal-style sample for 20 rows. 20 sts x 20 rows
Step 4: Test dry friction
Place the swatch on the actual surface. Add a consistent weight if possible—a heavy book, a small hand weight, or even a bag of rice.
Test three things:
- Forward push
- Side push
- Twisting motion
Score each from 1 to 5.
A useful homemade method:
- Put a 2–5 lb weight on the swatch
- Lift one end of a board or tray beneath it gradually
- Note the angle where the swatch starts to slide
Higher slide angle = better grip.
Step 5: Test wet or damp behavior if relevant
For bathroom or pet use, dampen the swatch evenly—not dripping, just realistically wet. Repeat the friction tests on the intended floor surface. If soap exposure is likely, do one more test with a tiny amount of diluted soap residue, then rinse and retest.
You will learn very quickly which yarns become dangerous when damp.
Step 6: Test abrasion
Rub the swatch over the intended surface 50–100 passes by hand, or place it under a weighted object and move it back and forth. Then inspect:
- Fuzzing
- Flattening of ridges
- Shine development
- Broken fibers
- Distortion
If a textured swatch becomes smooth almost immediately, it was decorative texture, not durable traction.
Step 7: Wash test
Wash exactly as the finished item will be washed. Air dry or tumble according to plan. Re-measure and retest.
Record:
- Shrinkage
- Stretching
- Curling
- Finish failure
- Grip change
- Handle change
This step catches so many problems early. Some finishes crack, some yarns harden, some cottons relax and widen, and some textures become dramatically flatter.
Step 8: Build a hybrid if needed
Often the best result is not one material, but a layered system:
- Crochet fabric + underlay
- Crochet sole + suede patch
- Cotton face + silicone grip dots
- Dense insert + textured cover
Handmade does not mean single-material purity. It means deliberate construction.
Troubleshooting common problems
“My slippers still slide even with a dense sole.”
Possible causes:
- Yarn is inherently slick or has polished with wear
- Sole texture is too smooth under compression
- Sole is too soft and flattening completely
- Floor finish is extremely slick
Fixes:
- Add suede or grip fabric patches
- Apply silicone dots in traction zones
- Switch to higher-twist matte yarn
- Add a second sole layer or stabilizer
“My rug curls or creeps instead of gripping.”
Possible causes:
- Too many or too few edge stitches
- Uneven density
- Backing is absent or poorly attached
- Fabric is too elastic
Fixes:
- Block and re-measure
- Add a sewn non-slip backing
- Reinforce perimeter with a firmer border
- Rework with denser gauge and lower-stretch yarn
“The grip paint peeled off after washing.”
Possible causes:
- Fabric was dusty or finished with softener
- Product was applied too thickly
- Cure time was too short
- Yarn flex exceeded product tolerance
Fixes:
- Wash and dry fabric before application
- Use thinner, smaller dots or lines
- Extend cure time fully
- Test a different product on a swatch first
“The texture felt grippy at first but wore smooth quickly.”
Possible causes:
- Low-twist or fuzzy yarn
- Relief stitches too soft and lofty
- Abrasion concentrated on a few high points
Fixes:
- Switch to plied higher-twist yarn
- Use lower-profile texture distributed across the surface
- Increase density and thickness
- Add reinforcement at wear hotspots
“The project is grippy enough, but now it is stiff and uncomfortable.”
Possible causes:
- Hook too small for the application
- Too many layers throughout the whole piece
- Finish overapplied
Fixes:
- Keep traction engineering only in contact zones
- Use zoned construction with flexible midsections
- Use broken grip patterns instead of full coatings
Variations by project type
Best all-crochet indoor slipper approach
- Wool or cotton-blend upper
- Double-thickness cotton-blend sole
- 4–4.5 mm hook for worsted yarn
- Ridged ball/heel zones
- Silicone dots added after testing
Best washable bath mat approach
- Worsted or bulky cotton face
- Dense low-profile texture
- Separate removable non-slip underlay
- 4.5–6 mm hook depending on yarn
- Avoid overbuilt plushness that stays soggy
Best stair tread approach
- Low-profile cotton rectangle
- Sewn to secure anti-slip base
- Reinforced edges
- Subtle crosswise ridges
- No loose corners, no lofty texture
Best pet pad approach
- Dense cotton-blend top
- Double-thickness body
- Claw-safe low relief
- Removable underpad or stitched grip mesh
- Machine-wash-tested construction
Best bag base approach
- Strong plied cotton, utility blend, hemp blend, or raffia-type yarn
- Hook 0.5–1 mm smaller than bag body
- Insert plus optional leather or cork reinforcement
- Smooth enough to sit evenly, textured enough to resist abrasion shine
A note on floor compatibility
Not all floors behave the same. A finish that grips tile may mark sealed wood. A latex backing may discolor some vinyl surfaces. Silicone dots are often more universally floor-friendly, but always test in an inconspicuous area.
Be especially cautious with:
- Oiled wood floors
- Delicate finishes
- Heated floors
- Highly polished stone
- Luxury vinyl with finish sensitivity
For gifts or patterns intended for broad use, include a note recommending user testing on the specific floor surface before regular use.
Practical takeaways for designing crochet that grips instead of skates
If you remember only a handful of things, let them be these.
First, traction starts long before the finishing stage. A non-slip coating cannot fully rescue a poor foundation. Choose a yarn with a matte, durable surface and a stitch structure that creates stable low-profile texture.
Second, dense is good, but dense and smooth can still slide. The most useful crochet wear surfaces usually combine firmness with micro-texture.
Third, higher-twist, plied yarns generally outperform soft, fuzzy, low-twist yarns in abrasion-heavy zones. What feels cushy in the skein may become polished and slick in use.
Fourth, use zone thinking. The whole project does not need to be engineered like a boot sole. Put reinforcement, texture, and finishes where contact and force actually happen: heel, ball, rug perimeter, stair front edge, bag base corners.
Fifth, swatch like a maker who intends the object to live a real life. Test dry grip, damp grip, abrasion, washing, and recovery. Record your findings. The fastest path to better results is not guessing better—it is comparing better.
Finally, do not treat backing and finishes as cheating. A crochet fabric can be beautiful, clever, and well designed while still benefiting from suede, mesh, silicone, cork, or a removable underlay. In fact, that willingness to combine textile knowledge with practical reinforcement is often what turns a pretty handmade item into a truly excellent one.
The satisfying part is that once you start noticing these relationships—fiber tooth, stitch relief, directional ridges, compression, wear polish—you can apply them everywhere. Slippers stop skating. Mats stay where they belong. Bag bases last longer. Pet pads bunch less. Your crochet begins to act less like a generic fabric and more like a purpose-built surface. And that is one of the most rewarding shifts a crochet maker can make: not just forming stitches, but engineering how those stitches meet the world.