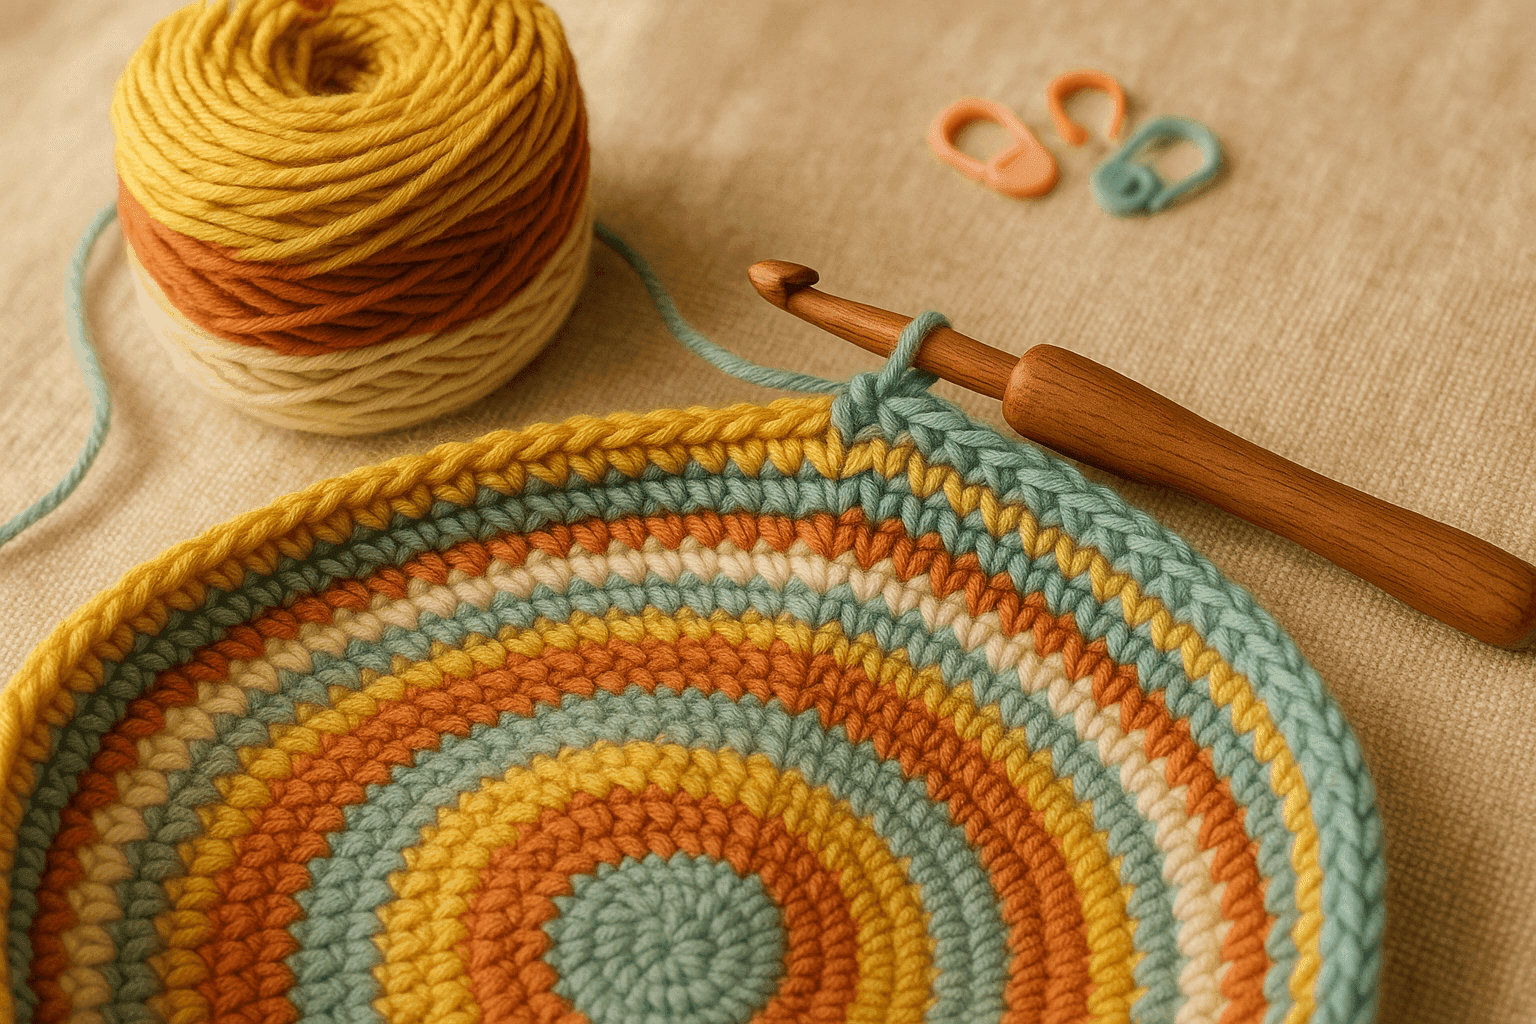
There is a very specific kind of crochet disappointment that usually arrives three or four rounds after you thought everything was going beautifully. Your colorwork looked crisp while it was lying flat in your lap, but once the tube starts to grow—on a hat, sleeve, yoke, or basket—you notice it: one stripe steps upward at the join, another seems to tilt, and a section you expected to look cleanly horizontal has a subtle spiral energy that makes the whole fabric feel slightly “off.” Not wrong, exactly. Just not behaving the way your sketch promised.
Most of us first learn color changes with the simple, sensible rule: switch to the new color on the last yarn-over of the previous stitch. That rule is still correct. It gives a clean color boundary at the stitch level and is the foundation for almost every tidy transition in crochet. But once you begin working stripes in rounds—especially fitted tubes and shaped garments—you discover that the last-yarn-over method solves only one part of the problem. The rest has to do with the geometry of crochet itself: stitch height, the way rounds stack or spiral, how joins create a seam, how yarn twist can influence torque, and how the fabric may bias as it grows.
That is where spinning joins, jogless transitions, helical rounds, and bias-aware planning become not just useful tricks but design tools. If you understand how the structure behaves, you can decide whether to hide the transition, feature it, offset it deliberately, or choose fibers and colors that make the movement look intentional.
This article takes a technique-deep look at color transitions beyond the basics. We will look at why jogs happen, how different joining systems affect alignment, how helical striping changes the visual rhythm, and how fabric geometry influences every decision. I will also walk through practical stitch counts, hook and yarn choices, planning methods, troubleshooting, and design strategies for hats, yokes, sleeves, and stripe-heavy projects.
Why stripe jogs happen in crochet at all
In knitting, a stripe jog in the round comes from the fact that rounds are really a spiral. Crochet can behave the same way, but with extra complexity because crochet stitches are taller, more asymmetrical, and more directional. A crochet stitch is not a perfectly square pixel. It has a front, a back, a top “V,” a leaning post, and a start/end relationship to the stitches around it.
When you make a color change in rounds, three structural realities matter:
- The stitch changes color one stitch before you visually think it does. Because you complete the previous stitch with the new color, the transition sits at the top of the prior stitch.
- The round either closes with a seam or continues in a spiral. If you slip stitch to join, you create a fixed meeting point. If you work continuously, the beginning of round advances in a helix.
- Crochet stitches have height and directional lean. Taller stitches—half double crochet, double crochet, treble—make visual jogs more obvious than single crochet because the color boundary has more vertical distance to misalign.
That means stripes are not just a color problem. They are a structural problem.
As a rule of thumb:
- Single crochet (sc) shows the smallest jogs and handles jogless methods most gracefully.
- Half double crochet (hdc) often shows more drift because the stitch is taller and the top loops can appear slightly slanted.
- Double crochet (dc) gives the most obvious stair-step effect in simple joined stripes.
- Textured stitches can either disguise joins beautifully or make them dramatically more visible depending on placement.
A quick baseline swatch before you design
Before you choose a stripe method for a full project, work a tube swatch. This sounds fussy, but it will save you from committing to the wrong transition system.
Try this baseline swatch:
- Yarn: worsted weight (#4)
- Hook: 5.0 mm (H/8) for sc or 5.5 mm (I/9) for hdc/dc
- Foundation: ch 36, join carefully without twisting, or use a magic ring and increase to a flat circle if testing hats
- Work 4 rounds each in Color A and Color B using the stitch pattern planned for your project
- Repeat until you have at least 12 rounds total
Record:
- Whether the seam drifts left or right
- Whether the stripe appears level when laid flat versus worn on the body
- Whether one color transition is more visible than the other
- Whether the fabric torques after blocking or relaxing overnight
This small test reveals a lot about your yarn, hook, tension, and stitch combination.
The standard joined-round stripe and what it does well
Let’s start with the classic method because it remains useful.
Standard joined-round color change
For a round of single crochet:
- Work the final sc of the round until 2 loops remain on hook.
- Yarn over with the new color and pull through both loops.
- Slip stitch to the first sc to join.
- Chain 1 if your pattern counts it as turning into the next round, or begin directly if not.
For double crochet:
- Work the final dc until 2 loops remain.
- Yarn over with the new color and pull through the final 2 loops.
- Slip stitch to the first dc or to the top of the starting chain/standing dc.
- Chain the turning chain or use your preferred starting method.
What it gives you
- Predictable round counts
- Easy places to begin shaping or motifs
- Straightforward math for pattern writing
- A stable seam line that can be hidden under an arm, at the back of a yoke, or along the inside of a sleeve
What it does not solve
- The stripe jog at the join
- A visible “step” in taller stitches
- Seam drift if stitch placement isn’t perfectly consistent
If your project has low contrast colors, fuzzy yarn, or a texture-heavy fabric, this may be perfectly adequate. In many real garments, especially worn pieces, the standard join is functionally and visually fine. The more polished techniques are worth using when contrast is high, stripes are narrow, or the seam sits in a visible location.
Jogless joins: what they are actually doing
A jogless join is not magic. It is a small structural adjustment that tricks the eye into reading the color boundary as more level than it truly is.
Different stitch families need different jogless strategies, but the principle is consistent: you compensate for the height difference at the round closure by adding or repositioning a stitch-like element.
Jogless join for single crochet stripes
One of the most reliable methods for sc stripes in joined rounds is:
- Work the round in Color A.
- On the last sc, complete with Color B.
- Slip stitch to first sc to join.
- Work the first sc of the new round.
- At the end of the round, before joining to that first sc, remove the hook from the live loop.
- Insert the hook under both loops of the first sc of the round from back to front or front to back depending on the method you prefer.
- Pull the live loop through to create a false top loop.
- Continue or tighten gently.
Another common version is the “slip stitch to first stitch, chain 1, then fasten off and use a needle finish” for very crisp color bands. This is especially effective if you are working narrow decorative stripes rather than carrying yarn continuously.
Jogless join for half double crochet and double crochet
Because taller stitches show a bigger jog, many crocheters use one of these:
- Standing first stitch at the start of each new color round instead of chains
- Invisible join at the end of the round when fastening off
- Stacked single crochet in place of a chain-2 or chain-3 beginning
- Chainless starting double crochet to reduce the gap and improve alignment
A practical dc stripe method:
- Finish the last dc of Round 1 with Color B.
- Slip stitch to top of first dc to join and fasten off Color A if not carrying it.
- Begin Round 2 with a standing dc in Color B in the same joining stitch.
- Work the round.
- At the end, use an invisible join into the top of the standing dc if fastening off, or slip stitch neatly if continuing.
This does not remove all evidence of the round break, but it often looks much cleaner than a chain-3 start.
When jogless joins work best
- Stripes of 2 or more rounds each
- Single crochet or compact stitches
- Projects where a true seam is acceptable
- High-contrast stripes where the seam needs visual softening
When jogless joins may not be worth it
- Very textured or lacy rounds where the eye won’t notice the jog
- Extremely stretchy fabric where the join distortion becomes more visible than the jog itself
- Projects with many one-round stripes, where cutting yarn every round would be impractical
Spinning joins and helical rounds
Now we move to the technique that many crocheters find both brilliant and slightly mind-bending: helical striping, sometimes called spinning rounds.
In helical crochet, you do not close each round with a slip stitch. Instead, each color travels in its own continuous spiral. The result is that the hard round break disappears, and with it, the classic jog.
The basic idea
Imagine you are working a two-color tube, one round in Color A and one round in Color B. Instead of joining at the end of each round:
- Work Color A around until one stitch before the place where Color B is waiting.
- Drop Color A.
- Pick up Color B and work it around until one stitch before Color A.
- Repeat.
Each color advances in a continuous helix. There is no seam, no slip stitch join, and no chain start interrupting the stripe edge.
Simple two-color helical sc tube: step-by-step
Sample setup:
- Yarn: DK or worsted (#3 or #4)
- Hook: 4.5 mm to 5.0 mm
- Round count: 40 sc per round
- Colors: A and B
- With Color A, make a ring or chain and join to create a tube base. For a pure practice swatch, you can start with foundation single crochet 40 and join.
- Work 1 full round of sc in Color A: 40 sc.
- In the next stitch, begin Color B and work 40 sc.
- Now locate where Color A is waiting.
- Pick up Color A and work sc until 1 stitch before the point where Color B begins to stack directly above itself.
- Drop A. Pick up B and work until 1 stitch before A.
- Continue alternating.
That “1 stitch before” instruction prevents a color from overtaking the other and creating a gap or doubled column.
Stitch counts matter in helical rounds
Use markers. Always.
For helical striping, place:
- A marker at the beginning of Color A’s round path
- A marker at the beginning of Color B’s round path
- Optional locking markers every 10 stitches for larger circumferences
If your tube is 40 stitches around, each color should consistently work 40 stitches per full cycle. If one color begins claiming 39 or 41 stitches repeatedly, your stripe widths will drift.
What helical rounds do beautifully
- Eliminate classic jog lines in narrow stripes
- Create very clean 1-round or 2-round striping in single crochet
- Reduce visible interruption in sleeves, hats, and baskets
- Keep the fabric continuous and flexible without seam buildup
The trade-offs
- More complicated to track than joined rounds
- Not ideal for every increase/decrease arrangement
- Harder to align with precise motif placement
- Can become messy if the carried floats are pulled too tightly
Helical striping in taller stitches: proceed with caution
You can work helical striping in hdc or dc, but the taller the stitch, the more likely the structure is to show leaning columns, slight gaps, or visual blur at the handoff points.
If you want helical striping in taller stitches:
- Keep the stripe width at 1 round or 2 rounds max for the cleanest effect
- Use a hook that gives good stitch definition without looseness
- Avoid overly slippery yarn until you have tested the method
- Consider working into tighter stitch patterns such as hdc in the third loop or compact dc variants
For many projects, single crochet, waistcoat stitch, or extended single crochet gives a better result for helical stripes than standard dc.
Stacked and blended transition rounds
Sometimes the right answer is not “hide the jog completely” but “design the transition so the eye enjoys it.” This is where stacked or blended transition rounds become powerful.
Stacked transition rounds
A stacked transition means you deliberately place a buffer round between full stripes. This can be a narrow neutral, a texture round, or a mixed-color round.
Examples:
- 4 rounds navy, 1 round cream, 4 rounds rust
- 3 rounds green, 1 round back-loop-only green, 3 rounds ivory
- 2 rounds charcoal, 1 round slip-stitch surface detail, 2 rounds ochre
The eye reads the buffer as a design line rather than a failed alignment.
Blended rounds
A blended transition can be made several ways in crochet:
- Alternating stitches by color in a transition round, such as (sc A, sc B) around
- Mosaic-like transitions where the old color drops in and out over 1–2 rounds
- Marled rounds by holding two strands together for one transition round
- Tweed effect with a speckled yarn between solids
Sample blended round for 48 sc:
- Round 1: 48 sc in Color A
- Round 2: (1 sc in A, 1 sc in B) repeat 24 times = 48 sc
- Round 3: 48 sc in Color B
This is especially useful in high-contrast pairings like black/cream, navy/white, or red/pink, where a hard line emphasizes every structural irregularity.
Fabric geometry: the part that explains “mysterious” stripe behavior
Now to the heart of the issue: why identical transition methods can look different on a flat yoke, a tapered sleeve, and a close-fitting hat.
Crochet fabric is not neutral. It has geometry, memory, and directional tendencies.
1. Stitch lean
Most crochet stitches lean slightly depending on your working direction and tension. Over many rounds, that lean can make stripes appear to rise or fall subtly.
2. Tube circumference
A small circumference, like a sleeve cuff at 32–40 stitches around, magnifies any jog or seam drift because the transition repeats in a tight visual field. A large yoke with 120+ stitches around spreads the distortion more gently.
3. Increase distribution
If your rounds include increases, the stripe line may ripple or tilt where extra stitches are inserted, especially in visible columns.
4. Fabric bias
Bias is the tendency of fabric to skew diagonally. In crochet, bias can come from:
- Consistent yarn twist and personal tension
- Asymmetry in the stitch itself
- Continuous spiraling without balancing structure
- Certain stitch patterns, especially tall and directional ones
5. Blocking and wear
A stripe that looks slightly off in the hand can settle beautifully after washing and blocking—or become more obvious once worn and stretched. Cotton often reveals structure crisply; wool can forgive it; bamboo and rayon may drape enough to shift the visual line entirely.
How yarn twist and fiber affect stripe alignment
This is one of the most under-discussed parts of crochet colorwork.
Yarn twist
A tightly twisted yarn can enhance stitch definition and make every transition sharper. That is wonderful if you want crisp stripes, but it also makes joins and jogs more visible.
A softer, loftier yarn can blur the edges slightly and reduce harsh jog visibility.
If your fabric seems to torque:
- Check whether your yarn has a strong S- or Z-twist feel
- Compare with a second yarn in the same weight
- Swatch in the round and let it rest
Sometimes what seems like a “bad jogless join” is actually yarn-induced fabric skew.
Fiber behavior
- Wool: forgiving, springy, often best for smoothing minor distortions
- Cotton: crisp, clear, excellent stitch definition, shows every join honestly
- Acrylic: variable; can either mimic wool softness or show hard edges depending on spin
- Bamboo/rayon blends: fluid and shiny, can soften stripe boundaries but may exaggerate stretching
- Alpaca-heavy yarns: halo can disguise joins, but drape may affect alignment on the body
Color contrast matters as much as fiber
- High contrast emphasizes every structural change
- Low contrast hides jogs and seam drift
- Heathered or tweedy colors are excellent camouflage
- Variegated yarns can either disguise transitions or create chaos, depending on repeat length
If you want invisible transitions, choose neighboring values or softened heathers. If you want bold graphic stripes, accept that the engineering must be more exact.
Planning stripe sequences for hats, yokes, and sleeves
Different shapes reward different transition methods.
Hats
Hats are small-circumference tubes with shaping, which means both jogs and bias become obvious quickly.
Best options for hats
- Helical single crochet for 1-round stripes
- Jogless joined rounds for 2+ round stripes
- Buffer rounds where crown shaping is active
Sample striped hat body
After crown increases are complete, assume 72 sc around.
Stripe plan:
- Rounds 1–2: Color A, 72 sc
- Rounds 3–4: Color B, 72 sc
- Rounds 5–6: Color C, 72 sc
For joined jogless rounds:
- Use standing sc at the start of each color round
- Join with slip stitch and create a false stitch top if desired
- Place the seam at the back
For one-round stripes:
- Work 72 sc in helical rounds per color cycle
- Use markers for each color’s beginning
- Check every 3 cycles that stitch counts remain true
Common hat issue
The stripe near the crown looks more slanted than the stripe on the body.
Why: Increase rounds distort visual horizontality.
Fix: Begin clean stripes after crown shaping, or use blended rounds through the shaping section.
Yokes
Yokes present a different challenge: the circumference changes rapidly, and increases are often distributed in decorative lines.
Best options for yokes
- Joined rounds with planned seam placement if the pattern has a back break
- Blended transition rounds during increase-heavy sections
- Wider stripe bands rather than one-round stripes
Sample yoke segment:
- Round 1: 96 dc
- Round 2: (7 dc, inc) repeat 12 times = 108 dc
- Round 3: 108 dc
In a shaping sequence like this, a helical stripe may become visually busy because the increase points disrupt the smooth spiral flow. A better choice may be:
- 3 rounds Color A
- 1 transition round alternating A/B in sc or hdc
- 3 rounds Color B
If you need the stripes to look level across the chest, consider placing increases in less visually dominant sections or using textured transitions.
Sleeves
Sleeves combine tapering, underarm joins, and close-view wear. They are one of the best places to think intentionally about seam drift.
Best options for sleeves
- Joined rounds with seam aligned to the underarm
- Narrow helical stripes if tapering is minimal
- Jogless methods paired with low-contrast color changes
Sample sleeve section in hdc:
- Start: 44 hdc around
- Every 6th round, decrease 2 stitches at underarm
- Continue stripe repeat of 2 rounds A, 2 rounds B
In this case, keep all decreases at or near the underarm seam. Even if the seam drifts by 1 stitch over several rounds, it remains visually hidden.
If you choose helical striping while decreasing, mark the decrease zone carefully and maintain color stitch counts so one color does not absorb the shaping asymmetrically.
Managing seam drift
Even in joined rounds, the seam rarely remains perfectly vertical forever. Crochet stitches pull the beginning of round subtly sideways.
Ways to manage drift
- Move the beginning-of-round marker intentionally. Shift it by 1 stitch every few rounds if the pattern allows.
- Use shaping at the seam. In sleeves and side-body panels, increases/decreases can absorb visual drift.
- Choose a less visible seam location. Back neck, underarm, inside leg, back of hat.
- Avoid chain starts. Standing stitches and stacked starts often reduce visual wobble.
- Keep tension consistent at joins. Over-tight slip stitches pull the seam off-line.
Sample drift check
Every 5 rounds, lay the tube flat and look at the seam column. If it has shifted more than 1 stitch to the left or right, evaluate whether:
- Your slip stitch join is too tight
- Your first stitch after the join is being skipped or doubled
- Your beginning chain is counting inconsistently
Common mistakes and how to fix them
Mistake 1: The jogless join looks lumpier than the jog
Cause: The corrective slip stitch or false stitch top is too tight.
Fix: Loosen the live loop before drawing it through. Match the height of surrounding top loops rather than tightening immediately.
Mistake 2: Helical rounds leave gaps where colors trade places
Cause: The working yarns are being stretched too far or one color is overtaking the other.
Fix: Switch colors 1 stitch before overlap, keep carried strands relaxed, and smooth the tube after each color handoff.
Mistake 3: Stripe counts drift in helical work
Cause: Losing track of each color’s start point.
Fix: Use separate markers for each color and count stitches per color cycle. On a 60-stitch tube, each color should own exactly 60 stitches if working 1-round stripes.
Mistake 4: The seam visibly zigzags in joined rounds
Cause: Inconsistent first-stitch placement, especially after a starting chain.
Fix: Replace chain starts with standing or stacked stitches. Confirm whether the slip stitch join counts as a stitch—usually it does not unless the pattern says otherwise.
Mistake 5: Fabric twists even though the stripes are technically correct
Cause: Bias from yarn twist, stitch structure, or tension.
Fix: Block the swatch, try a different hook size, test another yarn, or switch from continuous rounds to joined rounds for better structural balance.
Mistake 6: Carrying yarn up the inside creates puckering
Cause: Floats are too tight.
Fix: Spread the fabric to full circumference before catching or carrying the unused color upward. If stripes are more than 2 rounds tall, consider cutting and rejoining instead of carrying.
Choosing between methods: a practical decision framework
When deciding among standard joins, jogless joins, helical rounds, and blended transitions, ask these questions:
How visible is the stripe area?
- Front-and-center yoke stripe: use cleaner transitions
- Underarm sleeve stripe: standard or lightly jogless may be enough
How tall are the stitches?
- sc: ideal for helical and jogless experiments
- hdc: manageable with careful starts and joins
- dc: often best with standing starts, wider stripes, or transition rounds
How strong is the color contrast?
- Black and white: every join will show unless carefully engineered
- Moss green and olive: standard methods may look surprisingly smooth
Is the fabric shaped?
- Flat or evenly cylindrical: helical can shine
- Heavily increased/decreased: joined rounds may be easier to control
Will the seam location be hidden?
- Yes: prioritize fabric integrity and ease
- No: invest in a more polished transition method
Recommended hook sizes and yarn pairings for clean stripes
These are starting points, not laws, but they help.
Single crochet stripes
- Fingering (#1): 2.75–3.5 mm
- Sport (#2): 3.25–4.0 mm
- DK (#3): 3.75–4.5 mm
- Worsted (#4): 4.5–5.0 mm
A slightly firmer gauge often produces crisper, more aligned stripes than a loose gauge.
Half double and double crochet stripes
- DK (#3): 4.0–5.0 mm
- Worsted (#4): 5.0–5.5 mm
- Aran (#4/#5): 5.5–6.0 mm
Do not go so loose that the join area gaps open. For stripes, stitch definition matters more than maximum drape.
A sample mini exercise for comparing methods
If you really want to understand how these techniques interact, make three swatches of the same tube.
Use:
- 48 stitches around
- Worsted weight yarn
- 5.0 mm hook
- Colors A and B
- 8 rounds total: alternate every 2 rounds
Swatch 1: Standard joined rounds
- Round 1: 48 sc A
- Round 2: 48 sc A
- Round 3: 48 sc B
- Round 4: 48 sc B
- Repeat once
Swatch 2: Jogless joined rounds
Work the same sequence, but use standing first stitches and a false stitch top or your preferred jogless correction at each color transition.
Swatch 3: Helical rounds
Work 1-round stripes continuously until you have 8 rounds total, maintaining 48 stitches per color cycle.
Compare:
- Which swatch looks most level?
- Which one has the nicest hand?
- Which one would you actually enjoy repeating across a whole garment?
- Which one behaves best after a light block?
That last question matters. The prettiest unblocked swatch is not always the best finished fabric.
Design strategies for intentionally hidden or intentionally emphasized transitions
Not every stripe needs to be invisible. Sometimes the smartest design choice is to use the structure artistically.
To hide transitions
- Place seam at a visually quiet area
- Use heathered or low-contrast colors
- Work in single crochet or compact stitch patterns
- Use standing starts instead of chains
- Add a narrow transition round
- Keep gauge firm and even
To emphasize transitions elegantly
- Use a neutral separator stripe
- Add surface slip stitch over the join line
- Turn the seam into a faux design spine at center back
- Pair high-contrast colors with intentionally stepped stripe repeats
- Use stacked rounds as architectural bands in yokes or sleeves
One of my favorite mindset shifts is this: a transition is not always a flaw to erase. It can be a line to compose with. Once you see it that way, you stop fighting the fabric and start designing with its actual behavior.
Final takeaways
Crochet stripes are governed by more than color timing. The cleanest transition depends on the interaction between stitch height, round closure, yarn twist, fabric bias, circumference, and shaping. If you only change color on the last yarn-over but ignore the structure around it, the fabric will still tell the truth.
Here is the practical summary:
- Use the last yarn-over color change as your foundation for all neat transitions.
- Choose jogless joined rounds when you want stable round counts and a softened seam, especially for 2+ round stripes.
- Choose helical or spinning rounds when you want the cleanest narrow stripes and can manage stitch tracking carefully.
- Use standing stitches, stacked starts, and invisible joins to improve taller-stitch striping.
- Add stacked or blended transition rounds when a perfect hard line is less important than a beautiful visual rhythm.
- Plan for bias, seam drift, and shaping from the beginning instead of treating them as mistakes later.
- Match your method to your fiber, yarn twist, contrast level, and project shape.
Most importantly, swatch in the round. Not flat, not theoretically, not just in your head. In the round, with the real yarn, at the real gauge, in the real stripe sequence. Crochet tells you what it wants to do if you give it enough stitches to speak clearly.
And once you understand how spinning joins, jogless corrections, and fabric geometry interact, stripe design becomes much more satisfying. You stop chasing a knitted ideal of perfect horizontal bands and start making crochet stripes that are clean, intentional, and structurally honest. That is the point where technique turns into design—and where your hats, sleeves, yokes, and striped pieces begin to look not just tidier, but truly considered.