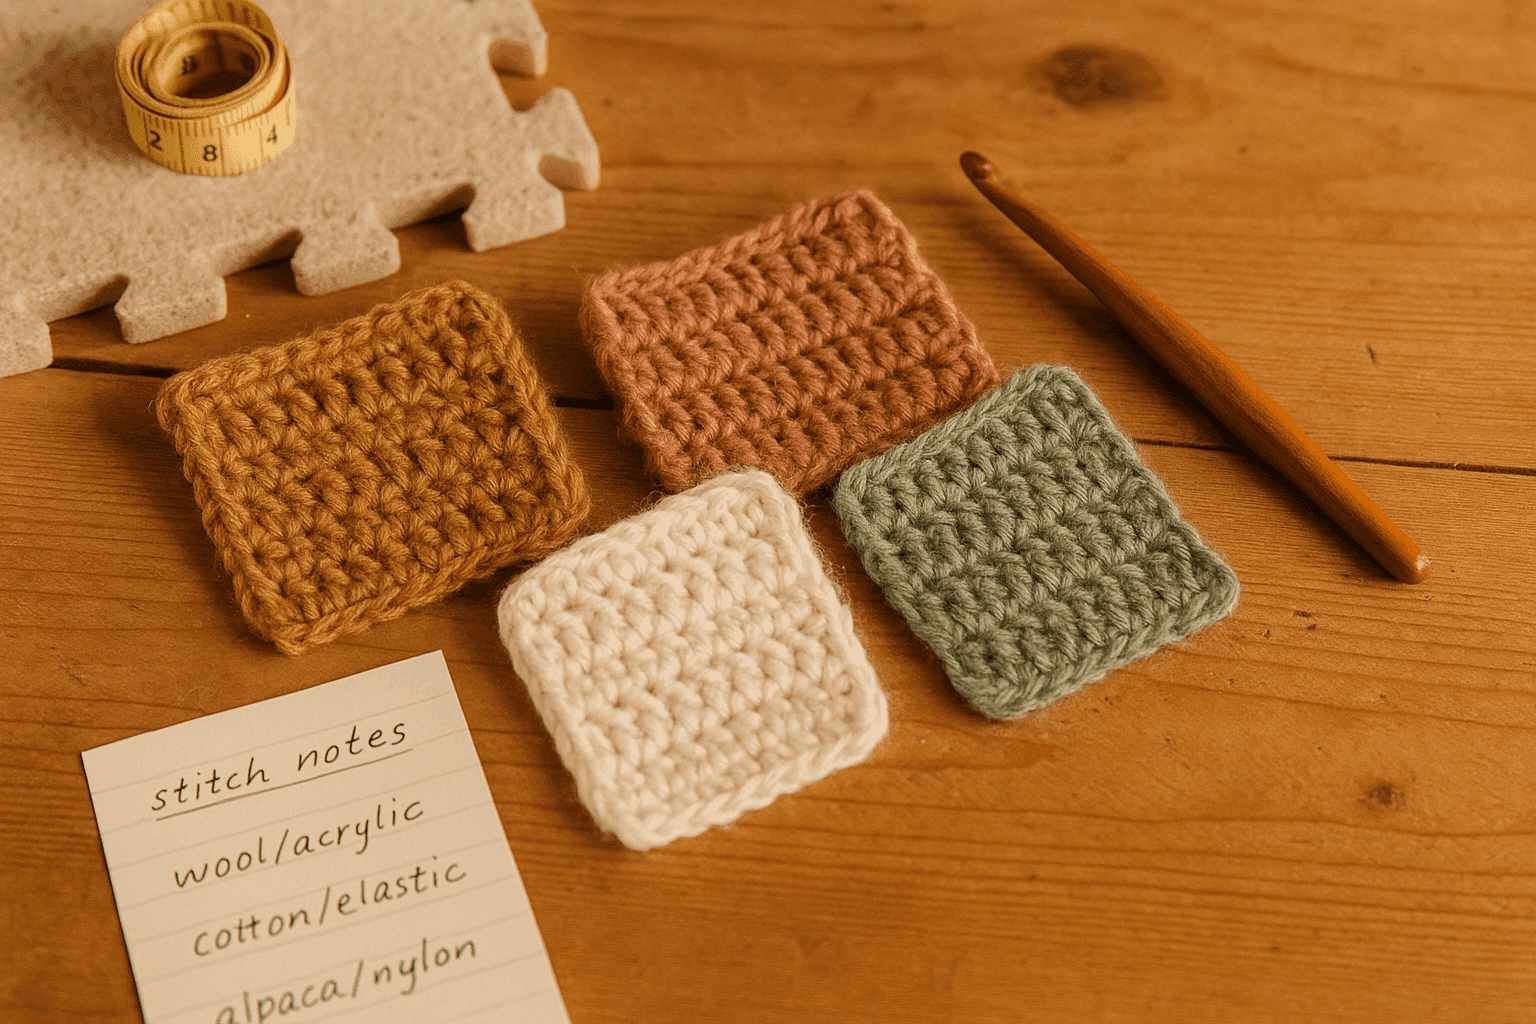
There is a very specific kind of disappointment that shows up a few days after you finish a crochet garment. On the blocking mat, everything looked balanced. The hem was straight, the side seams matched, the sleeves sat neatly, and the fabric had that satisfying combination of drape and stitch definition that made all the swatching feel worth it. Then you wear it. Maybe just once, maybe for a full day. By evening the cuffs are longer, the elbows are puffed out, one front panel looks subtly taller than the other, and the lower edge has developed a gentle but undeniable wave.
If you have ever wondered why a project can be technically correct and still behave like this, the answer is often not your stitch consistency alone. It is stitch memory mismatch: the way different fibers inside the same yarn recover from stress at different rates, to different lengths, and with different levels of enthusiasm. In blended yarns, one fiber may spring back, another may hold stretch, and a third may soften and relax under humidity or body heat. Crochet, with its highly structured loops and directional architecture, can amplify those differences dramatically.
This is one of the most important design issues in crochet garments and accessories, especially when we reach for sophisticated blends because they promise the best of several fibers at once: wool/acrylic for softness and easier care, cotton/elastic for fitted wear, alpaca/nylon for halo and strength, linen blends for summer drape. Blends can be wonderful. They can also produce sagging hems, bagged elbows, torque shifts, rippled bands, length creep, and panels that no longer mirror each other after use.
The good news is that this behavior is not random. Once you understand how fiber recovery works, how crochet stitch architecture directs force, and how to swatch for movement instead of just gauge, you can predict which fabrics will stay crisp, which will grow, and which need structural support built into the pattern.
What “stitch memory mismatch” really means
When crocheters talk about memory, we usually mean a fabric’s ability to return to its original dimensions after being stretched, compressed, or worn. But in a blended yarn, “memory” is never a single property. It is a negotiation between fibers.
A simple way to think about it:
- Elastic recovery is how well the fiber springs back after stretch.
- Plastic deformation is how much of the stretch becomes permanent.
- Relaxation rate is how fast the fiber changes shape under ongoing tension.
- Moisture response is how humidity, blocking, and wear affect the fiber’s dimensions.
- Surface behavior is how much the fibers grip each other and resist sliding within the yarn.
If a yarn combines fibers that behave differently in these categories, the stitches record that disagreement. Over time, the disagreement shows up in the fabric.
For example:
- Wool/acrylic: wool often contributes resilience and crimp; acrylic may soften and hold shape differently depending on how it was spun and heat set. The result can be a fabric that feels springy at first but gradually relaxes in length if the acrylic portion allows the structure to settle.
- Cotton/elastic: cotton on its own has low rebound and likes to stay where it has been pulled; elastic can recover strongly, but if the elastic percentage is low or unevenly distributed in a chainette or plied construction, some areas retract while others remain elongated.
- Alpaca/nylon: alpaca is famously drapey and low-memory compared with wool. Nylon adds strength and abrasion resistance, but not necessarily the kind of spring that keeps hems from dropping. Fabrics often lengthen under their own weight.
- Linen blends: linen can begin crisp, then soften significantly with wear. If blended with a more elastic or lofted fiber, you may see selective relaxation: the linen-dominant portions of the stitch settle flatter while the springier portions continue to push outward.
In all these cases, the problem is not that the yarn is “bad.” It is that the crocheted structure asks every loop to cooperate mechanically, even when the fibers inside those loops recover differently.
Why crochet magnifies mixed-fiber behavior
Knitted fabrics distribute stretch across open intermeshing loops. Crochet tends to build more self-contained stitches, each with distinct posts, tops, and turning points. That means yarn recovery differences often become more visible in crochet than they do in knitting.
Three crochet traits matter here.
1. Stitch height stores vertical distortion
Tall stitches such as dc, tr, and dtr have long posts. Long posts are efficient at translating fiber relaxation into visible length gain. If the blend contains a low-memory fiber, those posts can settle downward and stay there.
This is why a wool/acrylic cardigan in mostly dc may look tidy on the table but develop:
- a dropped hem at center front
- sleeve length growth
- front band flare
- shoulder-to-bust lengthening
By contrast, shorter stitches such as sc and linked stitches tend to contain distortion better because there is less unsupported vertical span within each stitch.
2. Directionality creates bias and torque
Crochet has a built-in directional rhythm. Right-side rows and wrong-side rows do not always behave identically, especially in textured patterns. If the yarn blend also has uneven recovery, that directional bias can turn into visible torque.
You may notice:
- side seams twisting forward
- ribbing slanting after wear
- one edge growing more than the other
- filet or mesh panels skewing off square
This is especially common when smooth, slippery fibers are paired with fibers that grip. The yarn may rotate or settle within the stitch path, and the fabric follows.
3. Dense or highly textured stitch patterns localize stress
Post stitches, cables, puff stitches, and dense ribs concentrate force in specific columns or ridges. If a blend relaxes unevenly, those stressed regions may either collapse or stand proud compared with their neighbors.
The result can be:
- sag lines under bust shaping
- stretched-out rib columns at waist or cuff
- ridges that flatten while adjacent panels stay compact
- decorative motifs that pull surrounding fabric out of square
In other words, the architecture of the stitch pattern can amplify whatever mismatch the fibers already contain.
Fiber behavior: what each component tends to contribute
These are not absolute rules, because spin, ply, finishing, and blend ratio matter enormously. But as a design shorthand, these tendencies are useful.
Wool
Usually offers:
- good resilience
- crimp-based bounce
- moderate to strong recovery
- useful blocking response
Watch for:
- superwash wool may stretch more than non-superwash
- soft fine wools may not support heavy open fabrics well
- wool blended with very inelastic fibers may still lose the recovery battle in long sections
Acrylic
Usually offers:
- lightness relative to some natural fibers
- shape retention that varies by manufacturing and heat setting
- easy care
Watch for:
- some acrylics relax with heat and body warmth
- lofty acrylic can compress and stay flatter after wear
- acrylic may not “pull back” a heavy drapey blend the way wool does
Cotton
Usually offers:
- stitch definition
- cool hand
- stability when dry in compact structures
Watch for:
- low elastic recovery
- pronounced length growth under gravity
- slow rebound at elbows, knees, cuffs, and hems
- heavier yardage that can drag tall stitches downward
Elastic fibers or stretch filaments
Usually offer:
- active retraction
- shape retention in fitted garments
- support for ribbing and negative ease
Watch for:
- if percentage is low, you may get partial recovery rather than full recovery
- aggressive blocking can damage intended spring
- uneven stitch size becomes more obvious because the fabric snaps back around irregular loops differently
Alpaca
Usually offers:
- softness
- warmth without excessive bulk
- beautiful drape
Watch for:
- low memory relative to wool
- growth over time, especially in tall stitches
- halo obscuring subtle distortion until the piece has been worn
Nylon
Usually offers:
- strength
- abrasion resistance
- support in sock or hard-wearing yarns
Watch for:
- added durability is not the same as added spring
- in soft drapey blends it may preserve integrity while still allowing length growth
Linen
Usually offers:
- coolness
- crisp stitch definition at first
- lovely drape after wear
Watch for:
- significant softening and relaxing with use
- crease memory rather than elastic recovery
- a garment that looks architectural initially but loosens into a more fluid silhouette
How stitch architecture suppresses or amplifies memory mismatch
This is where design choices become powerful. The same yarn blend can behave very differently depending on the stitch structure.
Structures that amplify distortion
These usually grow, sag, or skew more readily:
- all-over dc, tr, or extended stitches
- open mesh with long chain spaces
- loose post-stitch ribbing
- heavy textured fabrics with long floats or layered relief
- top-down garments with uninterrupted vertical weight paths
- bias or diagonal constructions without stabilizing edges
Structures that suppress distortion
These generally hold dimensions better:
- sc, hdc in the third loop, and compact linked stitches
- smaller hook relative to yarn diameter
- stitch patterns with frequent anchoring points
- horizontally worked ribbing joined under gentle tension
- fabrics combining dense support zones with open decorative zones
- seams or faux seams that interrupt drift
A practical comparison
Suppose you are using a DK wool/acrylic blend and getting 16 dc x 9 rows = 4 in/10 cm on a 5.0 mm hook.
If you make a cardigan body in plain dc, the vertical row height may increase noticeably after hanging and wear. The same yarn worked in linked dc or a sc-hdc texture on a 4.5 mm hook may come off the hook feeling firmer, but it will often preserve silhouette much better.
Likewise, a cotton/elastic blend in a fitted top may perform beautifully in:
- waist ribbing: 12 sc blo x 14 rows = 4 in/10 cm
- body texture: 15 hdc x 11 rows = 4 in/10 cm
But if the same yarn is worked loosely in open V-stitches at 14 sts x 8 rows = 4 in/10 cm, the cotton can lengthen between elastic recovery points, producing a peplum-like drop you never intended.
The swatch you actually need: recovery swatching, not just gauge swatching
A gauge swatch tells you whether your starting dimensions match the pattern. It does not tell you how the fabric behaves after stress. For blended yarns, you need a recovery swatch.
Make at least three swatches, each 6 x 6 in / 15 x 15 cm minimum, larger if the stitch pattern has strong vertical or horizontal texture.
Swatch set
- Control swatch: your intended stitch pattern and hook.
- Denser swatch: same stitch pattern, hook 0.5 mm smaller.
- Structural swatch: a modified stitch pattern that adds support, such as linked stitches, tighter edges, or periodic anchoring rows.
Label each swatch with:
- yarn name and fiber content
- hook size
- stitch pattern
- starting stitch and row counts
- pre-block gauge
- post-block gauge
Example control swatch notes:
- Yarn: 50% wool / 50% acrylic, DK
- Hook: 5.0 mm
- Foundation: ch 25
- Rows: 16
- Pattern: dc across, ch 2 turn
- Measured center 4 in: 16 sts x 9 rows pre-block
- After wet block: 15.5 sts x 8.5 rows
Stress tests to perform
1. Hang test
Pin the top edge or clip it gently and hang the swatch for 24 hours. Attach a small consistent weight at the bottom if you want to simulate garment drag. Even 1.5 to 2 oz / 40 to 60 g is enough for a small swatch.
Measure before and after:
- total length
- total width
- center stitch count per 4 in/10 cm
- edge ripple or flare
If a 6 in swatch becomes 6.5 in long, that is an 8.3% increase in length. On a 24 in garment body, that predicts roughly 2 extra inches of drop if unsupported.
2. Wear simulation
Stretch the swatch widthwise ten times, then lengthwise ten times, firmly but consistently. Let it rest flat for one hour and remeasure.
Record:
- how much it returns
- whether edges remain distorted
- whether ribs or columns separate
- whether post stitches stay expanded
3. Warmth and humidity test
Place the swatch in a steamy bathroom for 20 minutes, or lightly steam nearby without direct pressing. Let it cool and dry flat.
Some acrylic blends relax, some wool blooms and shortens slightly, some linen blends soften and lengthen. This test often predicts real-life wear better than blocking alone.
4. Wash cycle test
If the project will be machine washed, test that exact method. Laundering can permanently alter the “negotiation” between fibers.
What counts as acceptable recovery?
For garments intended to hold shape:
- Length change under 3% after hanging is excellent.
- 3% to 5% is manageable with design adjustments.
- 5% to 8% requires structural planning.
- Over 8% means you should either redesign, choose another stitch pattern, or embrace a drapier final silhouette intentionally.
For accessories like bags, wraps, and market totes, more growth may be acceptable or even useful. For fitted cuffs, waist shaping, collars, and hems, it usually is not.
Mapping high-risk zones in garments and accessories
Not every part of a project suffers equally. You can often use a challenging blend successfully if you know where to reinforce it.
High-risk zones in garments
- hems n- sleeve elbows
- cuffs
- shoulder-to-bust line
- button bands
- neckline edges
- pocket openings
- underarm joins
- yoke-to-body transition rows
High-risk zones in accessories
- bag handles
- bag bottoms
- shawl neck edge
- hat brim
- mitten cuff
- slipper heel
- basket rim
A helpful design habit is to sketch the piece and mark each area as:
- support required
- moderate risk
- safe for drape
For example, in an alpaca/nylon pullover, you might classify:
- hem: support required
- sleeve cap and upper arm: moderate risk
- body side panels: safe for drape
- cuffs: support required
This keeps you from using one uniform stitch solution where the fabric needs different mechanical behavior in different regions.
Step-by-step: how to design or modify for mixed-fiber recovery
Here is a practical workflow you can use whether you are designing from scratch or adapting an existing pattern.
Step 1: Read the yarn beyond the ball band
Fiber content alone is not enough. Note:
- yarn weight category
- grist and yardage per 100 g
- number of plies or chainette construction
- amount of halo
- twist direction and firmness
- whether the yarn feels springy, crisp, slick, dense, or airy
A 50/50 wool/acrylic spun firmly in 4 plies behaves differently from a fluffy wool/acrylic singles-style yarn, even if the fiber percentages match.
Step 2: Choose the target behavior before the stitch pattern
Ask what the fabric must do.
Examples:
- Fitted ribbed tank: recover at waist and neckline, resist strap growth.
- Relaxed cardigan: allow some drape in body, prevent front band flare and shoulder drop.
- Summer tee: hold width, allow mild softening in length.
- Crossbody bag: resist handle stretch and bottom distortion.
Once you identify those priorities, your stitch choices become clearer.
Step 3: Swatch at least two hooks and two structures
Do not stop when gauge matches. Compare behavior.
Example with cotton/elastic sport blend:
- Swatch A: 4.0 mm, hdc all over, 18 sts x 12 rows = 4 in
- Swatch B: 3.5 mm, hdc all over, 19 sts x 13 rows = 4 in
- Swatch C: 4.0 mm, alternating sc and hdc, 17.5 sts x 12.5 rows = 4 in
After testing, you may find Swatch A grows 6% in length, B grows 2.5%, and C grows 3% but drapes better. Now you can choose with information instead of hope.
Step 4: Build support into edges
If a blend tends to lengthen, edges need intentional control.
Options include:
- starting with a firmer foundation such as foundation single crochet instead of a loose chain
- using a smaller hook for the hem or cuff only
- adding edge rows in sc, slip stitch, or linked stitches
- working hem bands perpendicular to the body for spring and restraint
- inserting a sewn stabilizing tape behind button bands or shoulder seams
A simple hem strategy:
- Body in hdc with 5.0 mm hook
- Last 4 rows at hem in sc with 4.5 mm hook
- Optional final round: slip stitch loosely in each st around
That small shift can significantly reduce hem flare and length creep.
Step 5: Interrupt long vertical drop paths
Long uninterrupted columns encourage gravity-led growth.
Ways to break them up:
- add a waist seam or faux seam
- change stitch pattern below the bust or at hip level
- include horizontal texture bands
- join panels rather than working the body as one hanging tube
For a drapey alpaca/nylon sweater, side panels in a denser stitch can act like hidden structural beams while the center front and back keep softer texture.
Step 6: Reduce stress concentration at elbows, knees, and cuffs
If a blend bags out where the fabric bends repeatedly, avoid tall open stitches in those zones.
Try:
- lower sleeve worked in sc, hdc, or linked hdc
- cuff circumference reduced by 5 to 10% relative to relaxed forearm measurement if the swatch proves reliable recovery
- frequent shaping rather than one dramatic decrease section
- ribbing worked tightly with a smaller hook
Example cuff counts:
- Forearm round before cuff: 42 sts
- Blend has moderate growth tendency
- Decrease over 2 rounds to 36 sts
- Work cuff in sc blo with 4.0 mm hook for 12 rounds
The exact count depends on gauge, but the principle is to create a zone with enough stitch density to resist bagging.
Step 7: Adjust ease according to recovery, not fantasy sizing
Designers often choose ease based on style. With mixed-fiber yarns, ease must also reflect likely growth.
If your fabric gains 4% length and 2% width after wear, then:
- positive ease in a cardigan body may become more dramatic over time
- negative ease in a fitted tee may disappear at bust and waist
- drop shoulders may become extra-droppy very quickly
As a rule of thumb:
- Low-memory blends: reduce vertical length slightly in pattern pieces if swatches predict growth.
- Elastic blends: avoid oversizing “just in case”; let the yarn recover do the work.
- Heavy drapey blends: keep shoulder width and armhole depth especially disciplined.
Step 8: Re-test after any major modification
Changing from dc to linked dc, or from 5.0 mm to 4.5 mm, can alter gauge enough to affect shaping. Re-swatch and repeat at least the hang test.
Common failure modes and how to fix them
Sagging hems
Why it happens: Long vertical stitches plus heavy or low-memory fibers accumulate downward stretch.
Fixes:
- rework hem in smaller hook
- add firmer border rows in sc or slip stitch
- shorten body length by predicted growth percentage
- switch lower body to denser stitch pattern
- add sewn hem tape for garments needing sharp edges
Bagged elbows
Why it happens: Repeated bending stretches the outer elbow area; low-recovery fibers do not rebound fully.
Fixes:
- use shorter stitches in lower sleeve
- reduce sleeve ease
- add shaping around elbow line
- reserve soft open texture for upper sleeve only
- choose rib or linked structure where bend recovery matters
Distorted front bands
Why it happens: The body stretches vertically while the band either resists or stretches differently, causing flare, buckling, or pulling.
Fixes:
- work bands after body has rested or been blocked
- pick up stitches at a controlled ratio
- use smaller hook for the band
- stabilize with ribbon, twill tape, or crochet reinforcement chain on wrong side
A useful pickup starting point is:
- about 3 sts for every 4 row ends in dc fabric
- then adjust based on the swatch and actual row height
Torque shifts and skewed panels
Why it happens: Directional stitch bias combines with yarn twist, fiber slippage, and uneven recovery.
Fixes:
- alternate join locations in the round
- seam panels instead of working continuously in spirals
- use balanced stitch patterns with regular anchoring
- block aggressively only after testing whether the effect rebounds or worsens
Width collapse with length growth
Why it happens: Fibers migrate within the stitch, allowing the panel to elongate as it narrows.
Fixes:
- choose a denser hook/stitch combination
- add side seams or faux seams
- avoid excessively tall stitches
- increase horizontal anchoring, such as regular sc rows between textured sections
Pattern modification examples by blend type
Wool/acrylic cardigan
Typical issue: body and sleeves lengthen after wear; front bands ripple.
Better plan:
- Body: linked dc or hdc instead of plain dc
- Hook: if pattern calls for 5.5 mm, test 5.0 mm as well
- Hem: 4 to 6 rows sc with 0.5 mm smaller hook
- Shoulders: seam rather than leave fully unsupported
- Front band: add after body hangs 24 hours
Sample stitch counts for a back panel example:
- Foundation: 78 fsc
- Work 64 rows in linked dc
- Hem rows 1 to 6 in sc
- Check width at center: 17 sts = 4 in
- Check row gauge in linked dc: 11 rows = 4 in
Cotton/elastic fitted top
Typical issue: body grows between bust and waist if stitch pattern is too open.
Better plan:
- Upper body: hdc or split hdc for smoother fit
- Waist shaping: frequent small changes rather than abrupt reductions
- Straps: reinforce with smaller hook or sewn support
- Neckline: edge in slip stitch or sc to prevent flare
Example shaping sequence:
- Bust circumference section: 96 sts
- Decrease round every 4th round, 4 times total = 80 sts at waist
- Work 6 rounds plain
- Increase round every 5th round, 3 times total = 92 sts at high hip
Because the yarn contains elastic, these smaller intervals often recover better than large shaping jumps.
Alpaca/nylon pullover
Typical issue: shoulders drop, sleeves and body lengthen, cuffs bloom outward.
Better plan:
- Avoid oversized drop shoulder unless growth is intentional
- Use set-in or modified drop shoulder with seamed support
- Keep body in compact texture
- Add firm cuff and hem treatment
- Shorten sleeves by projected growth amount
If sleeve length from underarm to cuff is intended to finish at 18 in and swatch predicts 6% growth, begin at approximately:
- 18 in ÷ 1.06 = 16.98 in
So working to about 17 in before finishing is a reasonable starting target, then verify with garment-scale hanging.
Linen blend summer tee
Typical issue: crisp fabric becomes softer and longer, neckline widens.
Better plan:
- Use smaller neckline and shoulder dimensions than final target if swatch confirms softening
- Limit chain spaces near shoulder and neck
- Include at least one stabilizing round at neck edge
- Consider side seams for shape retention
Troubleshooting checklist while you crochet
Sometimes you can catch a problem before the project is finished.
Watch for these warning signs:
- the fabric feels longer in your lap every session
- row gauge changes after the first repeat
- a folded panel does not match itself after resting overnight
- ribbing looks neat immediately after crocheting but relaxes by the next day
- one edge develops a slight scallop with no stitch-count error
- motifs that began square now measure rectangular
When you notice one of these signs:
- Stop and measure width and length against your notes.
- Hang the worked section for several hours.
- Compare row gauge now versus at the beginning.
- Frog early if the growth is substantial; it is almost always easier than rescuing the silhouette later.
- Rework only the vulnerable section in a denser stitch if the rest of the fabric behaves well.
Variations: designing with the effect on purpose
Not every memory mismatch is a flaw. Sometimes the best design choice is to use it deliberately.
You can lean into selective relaxation for:
- waterfall fronts in cardigans
- softly dropping cowl necks
- draped summer tunics
- shawls that need neck-hugging softness with widening wings
- bags that mold gently but still need reinforced handles
The trick is to confine growth to zones where it improves the design and suppress it where it ruins function.
For example:
- Use a linen blend mesh body with a compact sc neckline and armhole edging.
- Use an alpaca/nylon drapey center panel framed by denser wool-blend side columns.
- Use cotton/elastic ribbing at waist and cuffs attached to a more fluid body fabric.
A strong designer is not the person who forces every yarn to behave identically. It is the person who notices what the yarn wants to do and builds a structure that channels it.
A practical worksheet for future projects
Before committing to a blended-yarn garment or accessory, answer these questions:
- Which fiber in this blend is most likely to dominate after wear?
- Is the yarn heavy for its yardage?
- Does the stitch pattern create long vertical posts or open spans?
- Which zones need the most recovery?
- What percentage of growth did the hang swatch show?
- Can I reduce that growth with a smaller hook or denser structure?
- Do I need seams, bands, tape, or reinforcement?
- Should the finished length be shorter than the intended worn length?
- Will blocking improve this yarn, or merely reveal future sag sooner?
- Am I designing for first wear or tenth wear?
That last question matters most. Blended yarn success is rarely about the garment fresh off the hook. It is about whether the fifth outing still resembles your plan.
Takeaways
Mixed fiber blends are full of promise because they combine desirable traits: softness with durability, drape with strength, coolness with shape, spring with ease of care. But crochet records every disagreement between those fibers. When one component recovers quickly and another settles slowly, the fabric remembers both stories at once.
That is what creates stitch memory mismatch.
The effects show up as sagging hems, bagged elbows, torque shifts, flared bands, narrowed widths, length creep, and panels that no longer match. Tall stitches, open meshes, directional textures, and uninterrupted hanging columns amplify the issue. Denser stitches, smaller hooks, support edges, seams, anchoring rows, and targeted reinforcement suppress it.
The most useful skill here is not simply matching gauge. It is learning to swatch for behavior. Measure, hang, stretch, steam, wash, and remeasure. Record percentages. Map high-risk zones. Then modify the structure where the project needs stability most.
If you do, blended yarns become far more predictable and much more enjoyable to design with. Your garments can keep their intended line, your accessories can keep their function, and your yarn choices can be guided by informed mechanics rather than hopeful guesswork.
And when a finished piece still looks like itself after real wear, that is one of the most satisfying kinds of crochet success: not just beautiful stitches, but fabric that remembers what you asked it to be.