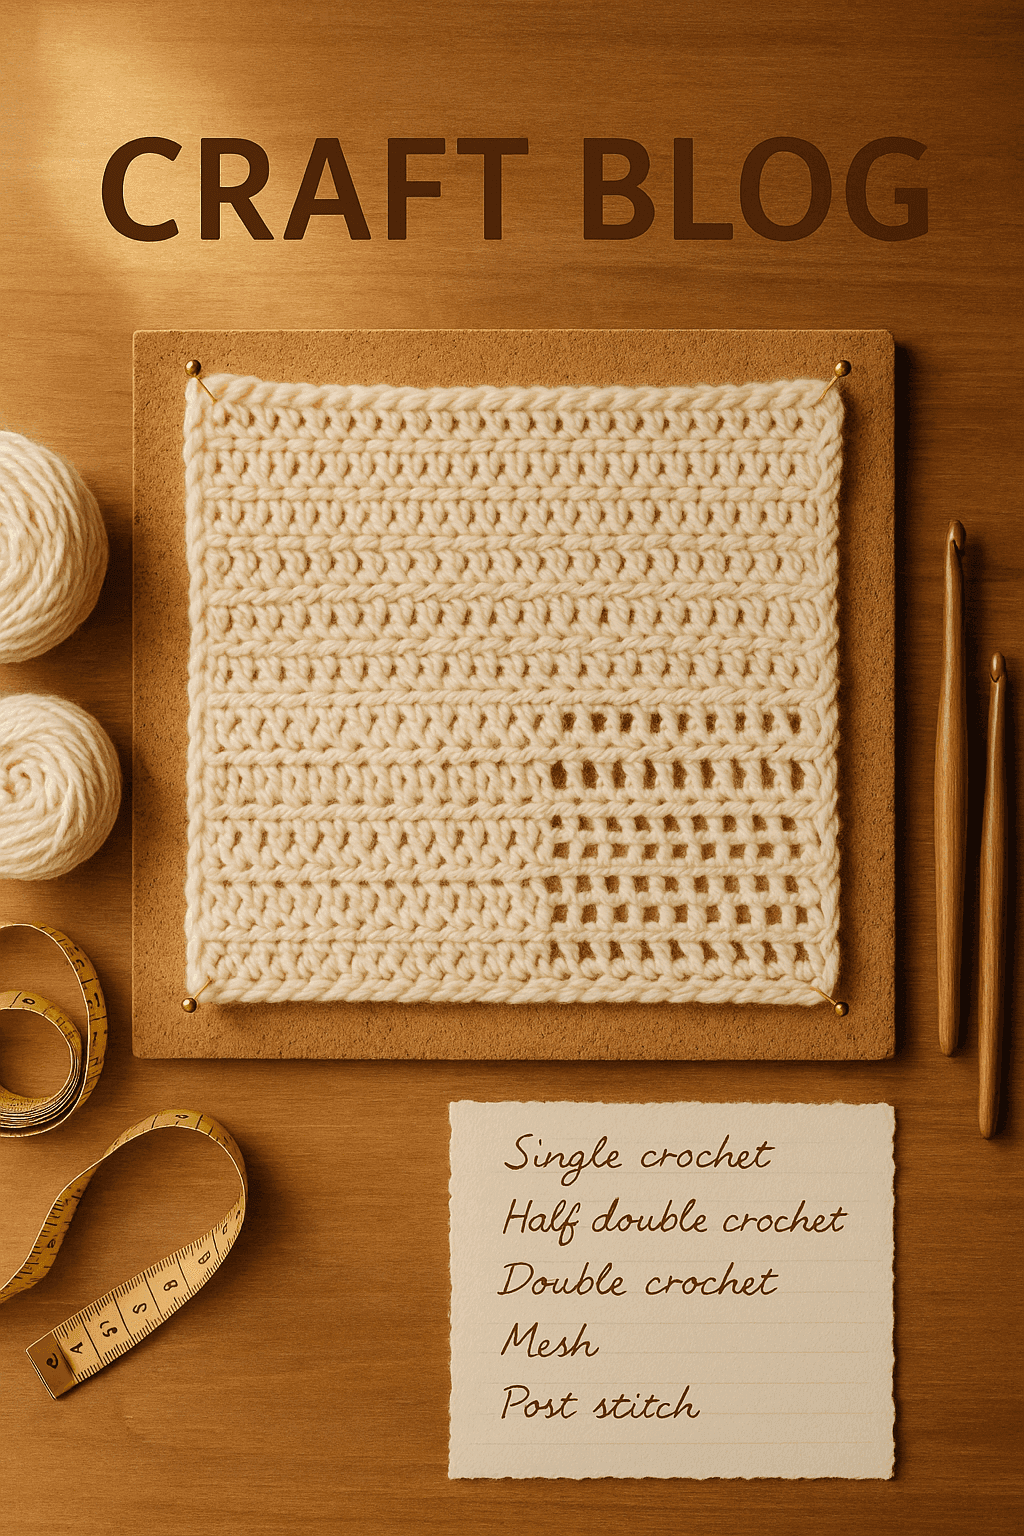
There’s a particular kind of crochet frustration that almost every experienced maker meets sooner or later: the swatch lies to you. You make a motif with crisp color blocks, a textured center, maybe a mesh border and a few shaping lines, and everything looks sensible while it’s still in your hands. Then you lay it flat and discover that one side ruffles, the center cups, the stripe jogs inward, or the supposedly square motif is suddenly more of a philosophical square than an actual one.
Often, the problem is not your tension in the usual sense. It’s not that you “crochet too tight” or “too loose” overall. The real culprit is frequently take-up ratio: the amount of yarn a stitch consumes in order to create its shape in fabric. In mixed-stitch crochet, take-up ratio is one of the most important—and most overlooked—structural concepts. A single crochet, a half double crochet, a double crochet, a slip stitch, a front-post double crochet, and a chain-space mesh may all occupy comparable visual space in a motif, but they do not use comparable yarn lengths to get there. That difference changes drape, elasticity, row height, row width, density, edge behavior, and the way motifs distort under their own internal tensions.
If you’ve ever wondered why a textured panel narrows inside a cardigan body, why a band of slip stitches drags a hat inward, or why a filet section balloons next to solid stitches even though your stitch count is “correct,” this is the subject underneath the symptom.
In this article, we’ll go deep into how take-up ratio works in crochet, why stitch architecture matters, how different fibers exaggerate or soften the effects, and how to swatch and adjust with intention. We’ll also walk through practical correction math and design strategies so your mixed-stitch fabrics stay dimensionally stable instead of fighting themselves.
The core idea: what take-up ratio means in crochet
Take-up ratio is the amount of yarn required to form a given stitch relative to the space that stitch occupies in the finished fabric. If two stitches cover roughly the same visible area but one requires much more yarn path to build, that stitch has a higher take-up ratio.
In weaving and knitting, the term is common because yarn bends around intersections or loops and therefore consumes more length than the flat dimensions of the cloth suggest. Crochet does this dramatically because every stitch is a built looped structure. Yarn doesn’t travel in a straight line from one point to another. It wraps, rises, anchors, crosses, and returns.
In practical crochet terms, take-up ratio affects:
- Row height
- Stitch width
- Fabric thickness
- Stretch and recovery
- Edge flare or contraction
- How different stitch sections interact when joined together
- Yardage estimates
- Blocking response
When crocheters talk about gauge, we often simplify it to stitches and rows over 4 in/10 cm. That’s necessary, but incomplete. Two swatches can appear to “match gauge” in one direction while behaving very differently in actual fabric because the stitches consume yarn differently and store tension differently.
That is why mixed-stitch design requires more than counting stitches. It requires understanding yarn path.
Why similar gauge does not mean similar yarn consumption
Here’s the counterintuitive part: stitches that look close in width or that can be forced into similar gauge dimensions may still consume radically different amounts of yarn.
For example:
- Slip stitch (sl st) is short, compact, and dense. It often consumes a surprising amount of yarn for the amount of visible height it produces because the loops are tight and layered.
- Single crochet (sc) is also compact, but typically distributes yarn into a sturdier, slightly taller unit.
- Half double crochet (hdc) sits in a useful middle ground, with more vertical path than sc and more loop bulk near the top.
- Double crochet (dc) gains height partly through longer vertical legs, which can create a taller stitch without proportionally increasing width.
- Post stitches wrap around existing stitch posts, adding a major extra yarn path and thickness.
- Mesh structures such as chain spaces plus dc may create large open areas with less yarn across the surface area of the fabric than a dense stitch section of the same dimensions.
So a 4-inch-wide panel of front-post stitches can contain significantly more yarn and stored tension than a 4-inch-wide panel of plain dc. A mesh panel can look relaxed and broad while using less yarn per square inch than a dense sc panel. If you seam those structures together or switch between them in the same row without compensating, the fabric redistributes stress. That’s when distortion appears.
Yarn path analysis: how stitches actually spend yarn
Let’s break this down structurally.
Slip stitch
Slip stitch seems tiny, but it is efficient in a deceptive way. Because the stitch barely rises, multiple parts of the loop structure are compressed into a short vertical distance. The yarn bends tightly and layers densely.
Typical behavior:
- Very low row height
- Strong horizontal contraction
- Thick, dense hand for its size
- Limited stretch unless worked very loosely
- Tendency to pull adjacent taller stitches inward
A slip stitch band inserted into taller fabric often acts like a drawstring unless the stitch count or hook size is adjusted.
Single crochet
Single crochet builds a compact, stable fabric. Compared with dc, it consumes less yarn per stitch but more yarn per inch of height because you need more rows to travel the same vertical distance.
Typical behavior:
- Short row height
- Moderate width
- Dense structure
- Good stability for edges and motifs
- Can compress taller neighboring structures
Because sc is firm, a stripe of sc inside a dc-heavy project often narrows or stiffens the fabric unless planned for.
Half double crochet
Half double crochet is often underestimated in mixed-stitch design. The yarn-over adds bulk and changes the top of the stitch, creating a cushier and slightly more elastic fabric than sc. Its top can lean or stack differently depending on turning method.
Typical behavior:
- Mid-height row
- More bulk than sc
- Can appear to “squat” if tension is tight
- Useful transitional stitch between short and tall sections
Hdc is often the best bridge when moving between sc and dc because it moderates both height and yarn consumption.
Double crochet
Double crochet uses taller legs to gain height. That means each stitch can cover more vertical distance, often with more openness and flexibility than shorter stitches.
Typical behavior:
- Taller row height
- More drape than sc or hdc
- Usually wider visual spacing between posts
- More likely to flare if overused in a count designed for shorter stitches
A dc section beside sc can look roomy even when the total width is similar in an unblocked swatch. After washing, that dc often relaxes further and reveals the mismatch.
Post stitches
Front-post and back-post stitches dramatically increase yarn path because the stitch wraps around the post of a lower-row stitch instead of entering the top loops in a direct path.
Typical behavior:
- Higher yarn consumption per stitch
- Greater thickness
- Strong directional pull
- Horizontal contraction in dense repeats such as cables or ribbing
- Surface relief that alters drape and width
A panel of alternating FPdc/BPdc can easily be narrower than a plain dc panel with the same stitch count. In ribbing, that contraction is useful; in a motif, it may become distortion if ignored.
Mesh and chain-space structures
Mesh stitches create open area with minimal yarn crossing that area. A dc, ch-1, skip-1 repeat can spread broadly across width while using less yarn over the open spaces than dense stitch patterns.
Typical behavior:
- Airier hand
- Larger apparent dimensions for the yarn consumed
- Greater mobility and bias potential
- More dramatic blocking response
- Risk of flaring next to dense sections
This is why filet-style motifs may balloon beside solid sections unless the designer intentionally adjusts counts or hook sizes.
Why mixed-stitch motifs distort
Distortion happens when neighboring stitch structures ask the same fabric to do incompatible things.
A few common examples:
- A dense center with a loose border causes the border to flare.
- A mesh center with a dense frame causes the center to sag or balloon.
- Vertical texture panels narrow because post stitches contract horizontally.
- Horizontal bands of sc or slip stitch pull in between dc sections.
- Color blocks in different stitch patterns no longer line up because rows are not truly equivalent in height.
The key point is this: stitch count parity is not structural parity.
Forty stitches of sc are not dimensionally equivalent to forty stitches of dc in most contexts. Ten rows of dc are not the same height, density, or tension profile as ten rows of sc. Even if you alter hook size enough to approach matching width, the internal yarn distribution may still differ enough to change drape and edge behavior.
The role of fiber: why yarn choice changes everything
Take-up ratio doesn’t exist in isolation from fiber. The same mixed-stitch pattern can behave very differently in wool, cotton, acrylic, alpaca, linen blends, or chainette yarns.
Wool
Wool tends to be forgiving because it has memory and elasticity. It can absorb some mismatch in stitch structure and then settle with blocking.
Effects:
- Better recovery after distortion
- Post-stitch contraction may soften after blocking
- Mesh may open attractively without permanent sagging
Cotton
Cotton has less elasticity and more direct structural honesty. It will show every mismatch.
Effects:
- Dense stitches become very firm
- Mesh can spread and stay spread
- Mixed motifs may buckle more sharply
- Edges need more deliberate correction
When working complex mixed-stitch garments in cotton, swatching is not optional.
Acrylic
Acrylic varies, but many acrylic yarns are springy in the skein and then relax significantly after washing or steam.
Effects:
- Stitch transitions may seem acceptable before finishing and then exaggerate later
- Texture may flatten under aggressive heat
- Mesh may lengthen under wear
Alpaca and drapey blends
These fibers often have less memory and more weight.
Effects:
- Tall stitches lengthen further under gravity
- Mesh expands dramatically
- Dense short stitches can act as anchors and create cupping between sections
Linen and bast blends
These often soften with wear and wash, but start crisp.
Effects:
- Early swatches may seem too rigid to assess accurately
- Fabric can grow after use
- Stitch transitions may become more pronounced over time
How to swatch for take-up ratio instead of only standard gauge
A standard gauge swatch is useful, but for mixed-stitch work you need a comparative swatch.
Here is a practical method.
A structured take-up swatch
Use the actual yarn intended for the project, or as close as possible. For most garments and accessory fabrics, work with:
- Yarn weight: DK, worsted, or the weight called for in your pattern
- Hook size: Start with the recommended hook for the yarn, then adjust as needed
- DK: 4.0-4.5 mm is a common starting point
- Worsted: 5.0-5.5 mm is a common starting point
Chain a foundation wide enough for measurement consistency.
Example swatch setup:
- Ch 41
- Work over 40 sts across
- Create vertical bands of 8 sts each:
- 8 sl st
- 8 sc
- 8 hdc
- 8 dc
- 8 mesh equivalent (for example: dc, ch 1, sk 1 across, adjusted to fill 8-st space)
Work each band for at least 20 rows, or until the swatch is at least 5 in/12.5 cm tall.
If you want a more controlled comparison, make separate swatches, each:
- Foundation: Ch 31
- Work width: 30 sts or pattern units
- Rows: 20 rows minimum
- Measure: width before blocking, height before blocking, width after blocking, height after blocking
Record:
- Total yarn used for each swatch if possible
- Stitches per 4 in/10 cm
- Rows per 4 in/10 cm
- Whether edges curl, flare, or draw in
- Subjective notes on drape and recovery
If you own a precise kitchen scale, weigh the yarn before and after each swatch. Even a 1 g resolution scale can teach you a lot.
What to look for in the swatch
Ask these questions:
- Which stitch type is widest at the same count?
- Which stitch type is tallest at the same row count?
- Which section feels stiffest?
- Which section rebounds after stretching?
- Which section changes the most after washing and drying?
- Which transitions visibly pucker at the boundary?
Those answers tell you where compensation is needed.
Step-by-step: designing a dimensionally stable mixed-stitch panel
Let’s walk through a realistic process for a panel that includes sc, dc, post stitches, and mesh.
Step 1: Define the finished dimensions
Suppose you want a rectangular panel measuring:
- Width: 12 in / 30.5 cm
- Height: 16 in / 40.5 cm
You plan:
- 2 in sc border on each side
- 4 in textured post-stitch panel in the center
- 2 in mesh stripe on each side of the center
- Remaining sections in dc
At this point, do not assign stitch counts yet.
Step 2: Swatch each structure separately
Using worsted yarn and a 5.5 mm hook, you might find:
- sc: 16 sts x 20 rows = 4 in
- hdc: 14 sts x 16 rows = 4 in
- dc: 13 sts x 12 rows = 4 in
- post-stitch rib over dc base: 15 sts x 12 rows = 4 in, but strong contraction after relaxing
- mesh (dc, ch 1, sk 1): 11 pattern units x 12 rows = 4 in, and the width opens to 4.25 in after blocking
Already, we can see equal counts will not behave equally.
Step 3: Convert dimensions to counts by section
For the sc border, 2 in at 16 sts per 4 in means:
- 16 ÷ 4 = 4 sts per inch
- 2 in x 4 = 8 sc per side
For the post-stitch center, 4 in at 15 sts per 4 in means:
- 15 ÷ 4 = 3.75 sts per inch
- 4 in x 3.75 = 15 sts
For each mesh stripe, 2 in at 11 units per 4 in means:
- 11 ÷ 4 = 2.75 units per inch
- 2 in x 2.75 = 5.5 units
You cannot crochet half a unit, so this is where design interpretation starts. You might choose 5 units if you want containment, or 6 units if you know the mesh relaxes attractively.
Let’s use 5 units per side.
For the remaining width:
Total used so far:
- 8 sc left border
- 5 mesh units left
- 15 post-stitch center
- 5 mesh units right
- 8 sc right border
This cannot be directly summed because mesh units are not the same as single stitches. A mesh unit of dc, ch 1, sk 1 usually occupies the width of about 2 base stitches. So 5 mesh units generally consume width across about 10 base stitches.
Recalculate in base-space terms and compare to actual measured width from swatches. This is why charting and measured swatch width matter more than nominal counts.
Step 4: Build a schematic, not just a stitch list
Write each section as measured width rather than raw stitch count alone.
Example:
- Left sc border: 8 sc = 2 in
- Left mesh stripe: 5 mesh units = 1.8 in unblocked / 2 in blocked
- Center post panel: 15 sts = 4 in blocked
- Right mesh stripe: same as left
- Right sc border: 8 sc = 2 in
- Remaining width assigned to dc sections based on actual blocked swatch width
This kind of planning prevents “correct on paper, wrong in fabric” outcomes.
Step 5: Introduce transition rows
Transition rows are one of the best tools for take-up management.
For example, if moving from sc to dc:
- Do not jump from 40 sc straight to 40 dc and expect perfect stability.
- Instead try:
- Row A: 40 sc
- Row B: increase to 44 hdc
- Row C: work 44 dc or reduce slightly depending on swatch results
Or if moving from dc to slip stitch ribbing:
- Last dc row: 40 dc
- Transition row: 36 sc
- Ribbing row: 36 sl st blo
Those 10% reductions or increases can absorb structural mismatch.
Correction math you can actually use
When one section pulls in or flares, you need a simple way to estimate correction.
Width correction formula
If your reference fabric width is based on one stitch pattern, and your inserted pattern has a different stitch gauge, use:
Needed stitch count = target width × stitches per inch of inserted pattern
Example:
A panel needs to be 3 inches wide.
- In dc, your gauge is 3.25 sts/in
- In post stitch, your gauge is 3.75 sts/in
Then:
- dc panel count for 3 in = 3 x 3.25 = 9.75, round to 10 sts
- post-stitch panel count for 3 in = 3 x 3.75 = 11.25, round to 11 sts
If you substitute a 10-st dc panel with a 10-st post panel, it will likely be too narrow.
Row correction formula
If replacing vertical texture or colorwork rows:
Needed row count = target height × rows per inch of inserted pattern
Example:
Target height = 5 in
- dc rows: 3 rows/in
- sc rows: 5 rows/in
For 5 in:
- dc requires 15 rows
- sc requires 25 rows
So a 15-row sc insert in a 15-row dc body will be much shorter and will buckle the surrounding fabric.
Ratio method for transitions
You can also compare stitch gauges directly.
Adjustment ratio = inserted pattern st gauge ÷ reference pattern st gauge
Using dc to post stitch:
- post stitch = 15 sts/4 in
- dc = 13 sts/4 in
- ratio = 15 ÷ 13 = 1.154
That means the post-stitch section needs about 15.4% more stitches to match the width of the dc fabric.
Likewise, if converting from sc to dc:
- sc = 16 sts/4 in
- dc = 13 sts/4 in
- ratio = 13 ÷ 16 = 0.8125 when moving target counts from sc context to dc context
Or viewed practically, dc needs fewer stitches to span the same width.
Common distortion scenarios and how to fix them
Problem 1: A textured post-stitch panel narrows inside a plain body
Symptoms:
- Vertical panel pulls inward
- Body fabric ripples beside it
- Garment waist or front panel looks drawn in unintentionally
Causes:
- Post stitches consume extra yarn by wrapping around posts
- Ribbed texture contracts horizontally
Fixes:
- Add 8-20% more stitches in the textured panel, depending on swatch data
- Use a larger hook only for the textured section
- Space texture repeats with plain dc columns between them
- Wet block aggressively if fiber allows
Problem 2: A mesh section flares beside solid stitches
Symptoms:
- Openwork stripe spreads wider than neighboring fabric
- Edges wave after blocking
- Motif loses geometric shape
Causes:
- Mesh has lower surface yarn density and more mobility
- Chain spaces open wider under tension or washing
Fixes:
- Reduce mesh repeat count
- Replace some ch-1 spaces with tighter chain spaces or stacked stitches
- Use a smaller hook in the mesh section
- Anchor mesh with periodic solid rows
Problem 3: Horizontal sc bands pull in between dc rows
Symptoms:
- Fabric cinches at stripe rows
- Blanket or garment forms ridges and hourglass lines
- Color stripes in different stitches look uneven
Causes:
- sc is shorter and often narrower than dc at the same count
- denser rows resist the openness of adjacent dc rows
Fixes:
- Increase stitch count in sc rows by 5-15%
- Use hdc instead of sc for transition stripes
- Work sc with a larger hook
- Substitute linked dc or extended sc if texture allows
Problem 4: Motif center cups while border ruffles
Symptoms:
- Circular or square motif won’t lie flat
- Center appears dense and tight
- Outer rounds wave outward
Causes:
- Dense inner rounds consume more yarn in less circumference
- Outer rounds in taller or airier stitches add too much width too quickly
Fixes:
- Increase more gradually in tall/open rounds
- Add an intermediate round in hdc between sc and dc rounds
- Reduce chain-space sizes in border rounds
- Block and measure each round progression in design phase
Common mistakes and precise fixes
Mistake: Swatching only one stitch pattern in a mixed-stitch project
Fix: Make at least three swatches:
- main fabric
- contrasting structure
- transition between them
Mistake: Assuming hook size alone will solve everything
Fix: Hook changes help, but they don’t erase architectural differences. Adjust counts first, then hook size.
Mistake: Ignoring blocked measurements
Fix: Always record both pre-blocked and blocked dimensions. Especially for mesh, wool, superwash, alpaca blends, and acrylic.
Mistake: Matching stitch counts instead of measured widths
Fix: Measure actual inches/centimeters of each stitch pattern under realistic finishing conditions.
Mistake: Using short rows or shaping lines across mixed stitch heights without recalculating row depth
Fix: If one side of a shaped section is sc-heavy and the other dc-heavy, convert shaping into measured height increments rather than row-for-row assumptions.
Finishing strategies that improve dimensional stability
Blocking is not magic, but it is part of the engineering.
Wet blocking
Best for wool and many natural fibers.
Benefits:
- Relaxes stored tension
- Opens mesh consistently
- Helps post stitches settle
- Reveals the true relationship between sections
Steam blocking
Useful with caution for acrylic and some blends.
Benefits:
- Can ease mild distortion
- Smooths transitions
Risks:
- Oversteaming can flatten texture
- Acrylic can be over-set and lose resilience
Pinning by measured landmarks
Do not just “make it look nice.” Pin according to:
- total width
- stripe widths
- panel centerlines
- corner diagonals
- motif side lengths
This matters especially in geometric crochet.
Edging as a correction tool
A thoughtful edging can stabilize a mixed fabric.
Examples:
- Crab stitch can firm up a loose edge.
- Slip stitch edging can control flare if worked loosely enough not to pucker.
- Sc edging with distributed decreases can tame a mesh edge.
- Dc or hdc edging with distributed increases can release a tight textured edge.
When adding border stitches along row ends, use measured pickup ratios.
Typical starting points:
- Along sc row edges: pick up about 1 stitch per row
- Along hdc row edges: about 3 stitches per 4 rows if needed, though test this
- Along dc row edges: about 2 to 3 stitches per 3 rows, depending on openness
These are starting points, not laws. Swatch and inspect.
Smart variations for stable multi-structure fabric
Use transitional stitches
If your design jumps from sc to treble-like openness, insert hdc or extended sc as a bridge.
Use linked stitches
Linked dc can create taller fabric with less gappiness and often more structural compatibility beside dense stitches.
Break up long texture panels
Instead of a solid 20-st post-stitch cable panel, alternate texture with plain columns to reduce contraction.
Control mesh with anchors
Insert a solid row every 4-6 rows in mesh-heavy fabrics to reset width.
Let fiber do the work strategically
Use springier yarns for ambitious mixed structure. Save less elastic yarns for projects where stitch architecture is simpler or carefully sampled.
A practical mini case study
Imagine a pillow front built from:
- 12 rows dc background
- center diamond in sc texture
- outer corners in mesh
- raised post-stitch frame
Your first sample measures 16 in square before blocking, but after blocking:
- mesh corners spread to 16.5 in diagonal reach
- post frame pulls inward at the sides
- sc diamond stays rigid and causes slight cupping
How to correct:
- Reduce mesh corner chain spaces from ch-2 to ch-1.
- Add 1 plain dc between every two post stitches in the frame.
- Change sc diamond outer round to hdc.
- Use a 5.0 mm hook for mesh corners and 5.5 mm for the dc body if working sections separately, or tighten mesh structurally if working continuously.
- Re-swatch the frame-plus-corner junction specifically.
That sequence addresses yarn path, not just symptoms.
Designing color blocks and shaping lines that stay true
Color blocks often reveal distortion more clearly than solid-color fabric because the eye notices when lines that should be straight begin to bend.
To keep color blocks crisp in mixed stitches:
- Align changes with measured row heights, not equal row counts.
- If one color block is denser, compensate with stitch count or row count.
- Consider using the same base stitch for all colorwork areas and reserving texture for overlays or surface treatments.
- Use basting lines or blocking grids when finishing large graphic panels.
For shaping lines:
- Treat increases and decreases differently in each stitch pattern.
- A dec in dc removes a different amount of width than a dec in sc in practical fabric behavior.
- If a princess line or raglan line crosses stitch-pattern changes, test that exact sequence in a mini swatch.
Key takeaways for polished mixed-stitch crochet
The biggest shift is to stop thinking only in terms of stitch identity and start thinking in terms of yarn path and fabric behavior.
A stitch is not just “short” or “tall.” It is a structure that consumes yarn in a specific way, stores tension in a specific way, and asks neighboring stitches to cooperate with that geometry. Once you understand that, a lot of crochet mysteries become easier to solve.
Here are the principles I come back to again and again:
- Equal stitch counts do not guarantee equal dimensions.
- Dense stitches and open stitches almost always need compensation when combined.
- Post stitches contract; mesh spreads; slip stitch compresses; dc relaxes.
- Fiber content determines how visible and permanent those differences become.
- Blocked swatches tell the truth better than in-hand swatches.
- Transition rows are structural tools, not decorative extras.
- Correction math is simpler than ripping back the whole project later.
If you want your motifs to stay square, your texture panels to sit flat, your color blocks to align, and your shaping to remain intentional, build the habit of testing each structure as part of a system rather than as an isolated stitch.
That is the real lesson of take-up ratio. Mixed-stitch crochet can be beautiful, sophisticated, and deeply satisfying—but only when we respect that different stitches do not spend yarn equally. Once you begin designing with that in mind, your fabrics become calmer, smarter, and much more polished.