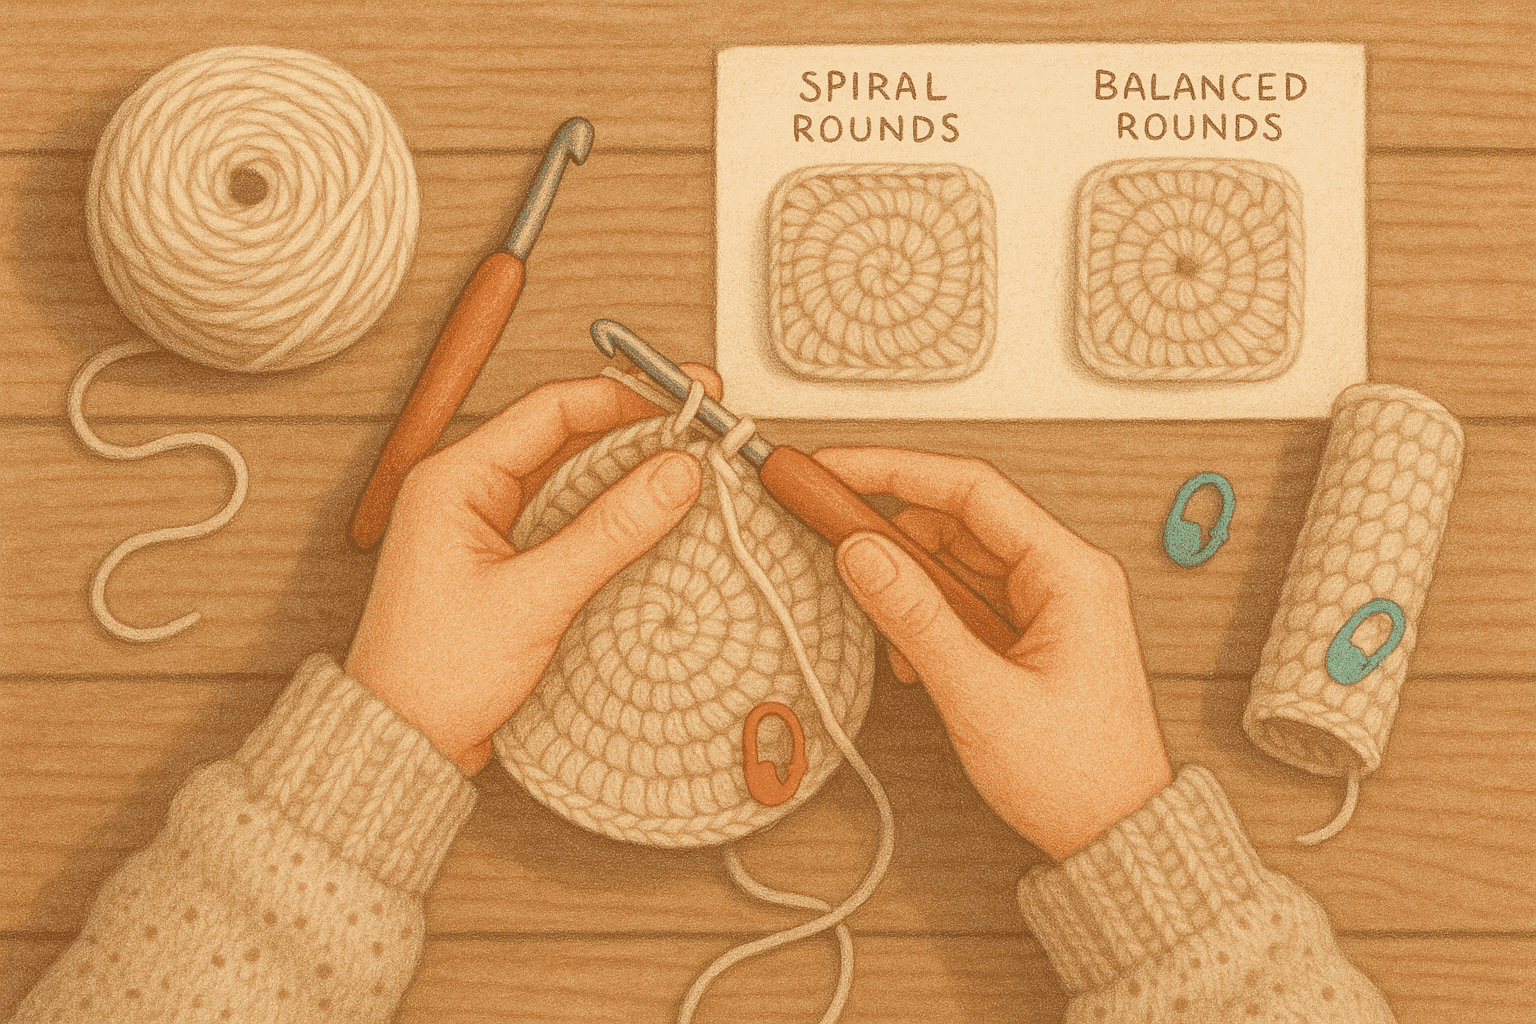
Every crocheter who has made a hat, sleeve, yoke, basket, or simple tube has had that moment: you set your work flat on the table, step back, and realize the fabric seems to be quietly turning on itself. The seam has wandered. The columns lean. The side of the sleeve that was meant to run straight under the arm has drifted toward the front. Even when your stitch count is perfect, the tube can look like it has ideas of its own.
That visual corkscrewing is one of the most persistent frustrations in crochet worked in the round, especially in garments and other projects where vertical alignment matters. The good news is that this is not just “bad luck,” and it is not always a tension problem. It is often the result of crochet torque: the directional bias created by the way loops are drawn through loops, by the slant of individual stitches, by whether we work in a continuous spiral or joined rounds, and by how yarn structure, stitch height, and increases distribute stress through the fabric.
If you understand where that bias comes from, you can design around it. Better yet, you can use a toolbox of balancing methods—alternating stitch direction, counterspiral sections, compound rounds, strategic increase placement, seam choreography, fiber selection, and blocking logic—to build round crochet that behaves more like an engineered textile than a hopeful experiment.
This guide is for crocheters who want straighter tubes on purpose. We will look closely at hats, sleeves, yokes, and tubular garments, but the same logic can help with leg warmers, bags, baskets, amigurumi limbs, and any cylindrical form where visual alignment matters.
What crochet torque really is
Crochet stitches are not perfectly neutral units. A standard stitch—whether single crochet, half double crochet, double crochet, or taller—has a built-in directional structure. The yarn wraps the hook in a particular direction, enters the fabric from a particular angle, and completes the stitch by drawing one or more loops through others. The resulting “V”s and posts tend to lean slightly.
When those leaning units repeat in the round, the lean accumulates. In a continuous spiral, there is no reset point. Each new stitch sits on a slightly shifted base, and over many rounds the visual effect becomes a spiral drift. In a joined round, you interrupt that accumulation somewhat, but you often introduce a different issue: a visible join jog or seam that still creeps if the stitch architecture favors one side.
Three forces commonly combine here:
- Stitch slant: Basic crochet stitches naturally lean.
- Working direction: Right-handed crocheters working conventionally in the round often see drift in one direction; left-handed crocheters often see the mirror image.
- Yarn twist and fabric memory: A yarn with strong ply twist, bounce, or sheen can make directional bias more visible.
The important thing to understand is that stitch count alone does not guarantee a straight tube. You can have exactly 60 stitches every round and still get a visual corkscrew because the geometry inside those 60 stitches is not balanced.
Where tube distortion shows up most
Some projects forgive a little spiraling. Others expose it immediately.
Hats
A beanie worked from the crown down in continuous single crochet or half double crochet often starts beautifully, then the increase points begin to drift and the side “seam” marker seems to walk around the hat. Ribbing added later may correct some edge behavior, but the body still leans.
Sleeves
Sleeves are unforgiving because the underarm line matters. If decreases or shaping are meant to align beneath the arm, seam drift becomes obvious when worn. A sleeve can twist visually even if the fit is fine.
Yokes
Circular yokes are essentially controlled expansion in the round. If increase rounds stack in a directional way, motifs and faux seams can shift. Once split for sleeves, that bias can carry into the body and arms.
Tubular garments
Sweater bodies, skirts, necks, cuffs, and leg tubes all reveal whether stitch columns are running vertically or corkscrewing around the form.
Structured containers
Baskets and buckets show torque through leaning sidewalls. Because the fabric is stiff, the distortion can be architectural rather than subtle.
The biggest myth: “Just use joined rounds and it will be straight”
Joined rounds can help, but they are not a universal fix. They reduce uninterrupted spiral accumulation by closing each round, usually with a slip stitch and a turning or restart method. However:
- The slip stitch join itself can create a hard seam.
- Chainless starts, stacked starts, or chain starts each behave differently.
- If you never turn, the stitch slant may still accumulate visually.
- If your increases are always placed in the same relationship to the join, the “spokes” can skew.
So yes, joined rounds are useful—but they work best when paired with a broader balancing plan.
The main strategies for straighter tubes
Here is the practical toolkit we will build through the rest of the article:
- Alternate stitch direction by turning at the end of rounds.
- Use counterspiral sections so one directional bias offsets another.
- Build compound rounds that mix stitch types or insertion logic to neutralize slant.
- Place increases and decreases strategically instead of stacking them mechanically.
- Choose seam placement deliberately based on visibility, shaping, and garment anatomy.
- Match yarn and hook to the behavior you want.
- Block with logic, not wishful thinking.
Let’s break these down in a way you can apply immediately.
Technique explanation: alternating stitch direction
Turning at the end of each round is one of the most powerful anti-torque tools in crochet.
When you work Round 1 in your usual direction, the stitches lean one way. If you join, turn the work, and crochet Round 2 in the opposite direction, the next layer of slant counteracts the first. Over many rounds, this creates a more balanced fabric.
This is especially effective in:
- single crochet tubes
- half double crochet hats
- yoke sections with simple textures
- sleeves where a straight underarm line matters more than an invisible seam
Basic method for a balanced turned tube
Example setup: 60-stitch tube in single crochet using DK yarn and a 4.0 mm hook.
- Foundation: Create 60 stitches in the round.
- Round 1: Sc in each st around, join with sl st to first sc. (60)
- Turn.
- Round 2: Ch 1, sc in each st around, join with sl st to first sc. (60)
- Turn.
- Repeat Round 2.
That simple turn changes the fabric significantly.
Hook and yarn recommendation
For garments where drape still matters, use:
- Sport weight yarn: 3.25-3.75 mm hook
- DK yarn: 3.75-4.5 mm hook
- Worsted yarn: 4.5-5.5 mm hook
Choose the smaller end of the usual range when you need clearer stitch architecture and less lateral wobble, but do not size down so far that the tube becomes rigid unless that is your goal.
Common mistake
Mistake: Forgetting that the seam appearance changes when turning, so decorative textures no longer face exactly the same way.
Fix: Swatch first. Flat-friendly textures like basic sc, hdc, dc, and many post-stitch ribs tolerate turning well. Strongly directional textures may need redesign.
Technique explanation: counterspiral construction
Counterspiral construction means intentionally working sections whose directional biases oppose each other, so the final tube reads straighter overall.
There are several ways to do this.
Method 1: Spiral body + turned correction band
This is useful in hats and cuffs.
For example, work the hat body in a continuous spiral for speed and smoothness, then add a turned lower band that visually reins in the drift. The fabric is not mathematically “undoing” the upper spiral, but the eye reads the lower edge as a stabilizing reference.
Method 2: One spiral direction in one section, opposite direction in another
This is more common in advanced construction. You might crochet one section conventionally, then reverse working direction after a join, or work an attached finishing section from the opposite side.
Method 3: Paired mirrored pieces
In garments with two sleeves or two leg tubes, you can intentionally mirror the torque behavior so the finished pair looks balanced on the body.
For example:
- Right sleeve: begin decreases 2 stitches before marker.
- Left sleeve: begin decreases 2 stitches after marker.
This does not erase torque, but it can make the visual drift feel symmetrical rather than random.
Technique explanation: compound stitch direction
Compound rounds combine different stitch behaviors within one round or round sequence so their lean cancels or softens.
This sounds technical, but you may already know versions of it.
Example 1: Single crochet + slip stitch control rounds
A tube worked entirely in single crochet may spiral strongly. Inserting an occasional control round of slip stitches or waistcoat stitches can visually straighten columns and compact the fabric.
Sample sequence for a firm tube:
- Rounds 1-3: sc around
- Round 4: sl st blo around
- Rounds 5-7: sc around
- Round 8: sl st blo around
Use with caution in garments because slip stitch rounds reduce elasticity.
Example 2: Alternating stitch heights
Half double crochet often shows pronounced twist in some hands. Pairing it with rounds of single crochet or linked stitches can interrupt that drift.
Sample sequence for a hat body (72 stitches):
- Round 1: hdc around, join. (72)
- Round 2: sc around, join. (72)
- Round 3: hdc around, join. (72)
- Round 4: sc around, join. (72)
The resulting fabric can appear more vertical than all-hdc.
Example 3: Linked stitches
Linked double crochet reduces the gaps and individual sway of standard double crochet. If your dc tube visibly slants, linked dc can behave more like a cohesive fabric wall.
Example 4: Front loop/back loop patterning
Selective loop use changes where stress sits in the round. BLO rounds can create hinge lines; FLO rounds can expose ridges. Used carefully, they can redirect how the fabric folds and where the eye perceives straightness.
Step-by-step: engineering a straighter hat tube
Let’s walk through a practical crown-down hat body using anti-torque logic.
Materials
- DK weight wool or wool blend, 180-220 m per 100 g
- 4.0 mm hook for crown
- 3.75 mm hook for body if you want extra control
- 2 stitch markers: beginning of round and center front reference
- Tapestry needle
Gauge
In turned single crochet rounds after light blocking:
- 20 sc x 22 rounds = 10 cm / 4 in
Gauge will vary, but note both stitches and rounds, because vertical distortion matters here.
Crown setup
Use joined rounds with staggered increases to reduce spoke lines.
- Round 1: Magic ring, 8 sc in ring, join. (8)
- Round 2: Ch 1, 2 sc in each st around, join. (16)
- Turn.
- Round 3: Ch 1, *sc in next st, 2 sc in next st; repeat from * around, join. (24)
- Turn.
- Round 4: Ch 1, *sc in next 2 sts, 2 sc in next st; repeat from * around, join. (32)
- Turn.
- Round 5: Ch 1, *sc in next 3 sts, 2 sc in next st; repeat from * around, join. (40)
- Turn.
- Round 6: Ch 1, *sc in next 4 sts, 2 sc in next st; repeat from * around, join. (48)
- Turn.
- Round 7: Ch 1, *sc in next 5 sts, 2 sc in next st; repeat from * around, join. (56)
- Turn.
- Round 8: Ch 1, *sc in next 6 sts, 2 sc in next st; repeat from * around, join. (64)
- Turn.
For a smoother circle, offset every other increase round by starting 1-3 stitches before the written repeat. Keep stitch count correct; move the beginning-of-round marker if needed.
Body section
Once crown diameter is correct, stop increasing.
- Rounds 9-28: Ch 1, sc in each st around, join. (64)
- Turn after every round.
Optional counterspiral stabilization band
Switch to 3.75 mm hook.
- Round 29: Ch 1, sc blo in each st around, join. (64)
- Turn.
- Round 30: Ch 1, sc in each st around, join. (64)
- Turn.
- Round 31: Ch 1, sc in each st around, join. (64)
The BLO round creates a controlled hinge and the final rounds visually settle the lower edge.
Why this works
- Turned rounds oppose slant.
- Joined rounds define a reset point.
- Staggered increases reduce spoke distortion.
- Slightly smaller hook in the body firms the columns.
- The lower stabilization band helps the eye read the hat as straight.
Step-by-step: engineering a straighter sleeve tube
Sleeves are where seam placement becomes critical.
Materials
- Fingering to DK garment yarn with some memory: wool, wool/nylon, wool/cotton blend
- Hook matched to gauge, often 3.25-4.5 mm
- 3 stitch markers: beginning of round, underarm center, decrease alignment
Setup example
Suppose your sleeve begins with 72 stitches at the upper arm and needs to decrease to 48 stitches at the cuff.
You need to remove 24 stitches total. If decreasing 2 stitches in each decrease round, you need 12 decrease rounds.
If the sleeve length from split to cuff shaping end is 36 rounds, you can distribute:
- Decrease round every 3rd round for 12 times.
Straight-underarm decrease method
Mark the true underarm center. Place decreases symmetrically around this point.
Decrease Round:
- Work to 2 sts before underarm center marker.
- Sc2tog, slip marker, sc2tog.
- Work in pattern to end of round.
- Stitch count decreases by 2.
If using turned rounds:
- Round 1: decrease round, join, turn.
- Round 2: work even, join, turn.
- Round 3: work even, join, turn.
- Round 4: decrease round, join, turn.
This maintains a centered underarm line instead of allowing the decrease pair to migrate.
Seam placement logic
If a visible join is unavoidable, place it where the garment anatomy hides or explains it:
- underarm for sleeves
- center back for yokes or necklines
- side seam area for body tubes
- back of hat if a decorative front motif needs uninterrupted alignment
Do not just accept the beginning-of-round where it lands after shaping. Move it intentionally when necessary.
How to move a seam without changing stitch count
At the end of a round, if you need the seam to shift by 1 stitch:
- Work one extra slip stitch before beginning the next round, or
- End the round 1 stitch early and restart at the desired point.
Use this sparingly, and document it in your pattern notes. A subtle seam shift can rescue alignment across a long tube.
Step-by-step: balancing a circular yoke
Yokes combine expansion, drape, and high visibility. This is where compound methods shine.
Example framework
Let’s say your yoke uses 96 stitches after setup and expands to 144 stitches before sleeve separation.
You need 48 added stitches total.
If your yoke has 6 increase rounds, add 8 stitches per increase round.
Rather than placing those 8 increases directly above one another every time, rotate their relationship to motif or marker positions.
Balanced yoke plan
- Setup Round: 96 sts
- Increase Round A: 8 evenly spaced increases = 104 sts
- 2 even rounds
- Increase Round B: 8 evenly spaced increases, shifted 6-8 sts from previous increase positions = 112 sts
- 2 even rounds
- Increase Round C: 8 increases shifted again = 120 sts
- Continue until 144 sts
If working plain stitches, join and turn every round. If the motif does not tolerate turning, consider turning every other increase round or introducing neutralizing spacer rounds in a less directional stitch.
Stitch recommendation for yokes
- Linked dc for smooth fabric with less sway
- Hdc only if swatched for torque behavior
- Sc for highly controlled structure, though slower and denser
Fiber choice: not all yarns exaggerate torque equally
Fiber and yarn structure matter more than many crocheters expect.
Yarns that may show torque more clearly
- High-twist plied yarns
- Smooth mercerized cotton
- Silk blends with sheen
- Dense worsted-spun yarns with crisp stitch definition
These are not bad choices—they simply reveal stitch direction very clearly.
Yarns that may soften visible drift
- Lofty woolen-spun yarns
- Fuzzy fibers like alpaca blends or brushed yarns
- Lightly haloed wool blends
- Chainette constructions
These blur the exact edges of each stitch, so minor spiraling reads less strongly.
Practical recommendations by project
- Hats: wool or wool blend, DK to worsted, moderate elasticity
- Sleeves: wool, wool/nylon, or wool/cotton blends that recover after blocking
- Yokes: smooth enough to read shaping, but not so rigid that every lean is highlighted
- Summer tubes: cotton blends may need extra anti-torque planning because cotton can set directional bias visibly
Hook choice and tension logic
A larger hook increases drape, but can also allow stitch slant to read more dramatically because the fabric has room to shift. A very small hook locks the structure, but may create stiffness and exaggerated seam ridges.
The sweet spot is usually a hook that produces:
- clear but not stretched stitch tops
- enough elasticity for the tube to settle on the form
- enough firmness that columns do not wander excessively
General starting points
- Fingering: 2.75-3.5 mm
- Sport: 3.25-3.75 mm
- DK: 3.75-4.5 mm
- Worsted: 4.5-5.5 mm
If your tube is spiraling badly, make two swatches:
- same yarn, one hook size smaller
- same yarn, turned rounds instead of spiral
Compare before changing the entire pattern.
Strategic increases and decreases for visual straightness
Even perfectly calculated shaping can look crooked if all shaping points stack.
Increase placement tips
- Offset increases every other round in crowns and yokes.
- Avoid always placing the first increase immediately after the join.
- In plain fabric, distribute increases by distance rather than by habit.
- In garments, relate increases to body landmarks when possible.
Decrease placement tips
- Keep paired decreases symmetrical around a marker line.
- For sleeves, anchor shaping to underarm center.
- For tapered body tubes, align decreases with intended side seams.
- If the stitch pattern twists, use markers for the anatomy line, not just the round start.
Common mistake
Mistake: Using the beginning-of-round marker as if it were automatically the side seam or underarm line.
Fix: Separate functional markers. Use one marker for round start and another for garment alignment. They are not always the same location.
Troubleshooting common torque problems
Problem: My seam keeps drifting even though I join every round
Likely causes:
- You are not turning, so slant still accumulates.
- The join method adds bulk that visually pushes the seam sideways.
- Your increase or decrease placement is tugging the seam.
Fixes:
- Try joined-and-turned rounds for 10-15 rounds in a swatch.
- Test a chainless start or stacked single crochet instead of ch-1/ch-2 starts.
- Move the seam to a less visible location and anchor shaping to a separate marker.
Problem: My hat body twists even though the crown is flat
Likely causes:
- Continuous spiral body in a slant-prone stitch like sc or hdc.
- Yarn twist is emphasizing directional columns.
Fixes:
- Switch to joined turned body rounds.
- Insert a balancing round every 3-4 rounds.
- Drop hook size by 0.25-0.5 mm for the body.
Problem: My sleeve underarm line drifts toward the front
Likely causes:
- Decreases are attached to beginning-of-round rather than underarm center.
- Spiral construction is carrying directional bias through shaping.
Fixes:
- Place a fixed underarm marker and decrease symmetrically around it.
- Join and turn from the sleeve split onward.
- Shift seam placement back to underarm after the first few rounds if needed.
Problem: Turning rounds made my texture look wrong
Likely causes:
- Directional stitch pattern not suited to turning.
Fixes:
- Reserve turning for plain sections only.
- Use linked or compound stitches that reduce slant without full turning.
- Add a facing, band, or edging section worked turned to visually stabilize the tube.
Problem: Blocking helped, then the twist returned after wearing
Likely causes:
- Fiber lacks memory, especially plant fibers.
- Structural torque remains stronger than the blocked reset.
Fixes:
- Build more balance into the fabric rather than relying on finishing.
- Use blended fiber with some resilience.
- Steam lightly for appropriate fibers, but avoid flattening stitch architecture.
Blocking logic: what blocking can and cannot do
Blocking is a finishing tool, not a structural substitute.
What blocking can do
- Relax uneven tension
- Smooth mild seam jogs
- Encourage a tube to dry in a straighter orientation
- Set dimensions and improve drape
What blocking cannot reliably do
- Permanently erase strong spiral bias in inelastic fibers
- Rebuild a sleeve where decrease alignment is off
- Neutralize a highly twisted yarn in an all-spiral fabric
Smart blocking method for tubes
- Wet block or steam appropriately for the fiber.
- Insert a form if useful: rolled towel, hat form, sleeve blocker, or measured tube.
- Align marker lines vertically before drying.
- Measure circumference at top, middle, and bottom.
- Let dry fully before removing support.
For hats, block over a form that matches head ease goals. For sleeves, lay flat with underarm line centered, then rotate and check from all sides before drying.
Variations to try
Once you understand the balancing logic, you can adapt it to many styles.
Variation 1: Faux side seam as a design feature
Instead of hiding the seam, emphasize it with a column of slip stitches, reverse single crochet, or one purl-like stitch line. This gives the eye a deliberate vertical reference.
Example: On a 100-stitch body tube, designate stitch 1 as faux seam.
- Work stitch 1 in slip stitch every round.
- Work remaining 99 stitches in pattern.
This can visually pin the tube.
Variation 2: Split-direction lower band on hats
Work the hat body in spiral rounds, then switch to joined-and-turned rounds for the final 6-10 rounds before ribbing. This often straightens the visual read near the face, where skew is most noticeable.
Variation 3: Linked-stitch sleeves
If standard dc sleeves twist too much, rewrite the sleeve in linked dc:
- Same stitch count
- Same decrease schedule
- Better column cohesion
Always reswatch because row gauge may change.
Variation 4: Compound yoke bands
Alternate:
- 1 round linked dc
- 1 round sc
- 1 round linked dc
- increase round in linked dc
This gives structure without the full density of all-sc.
Variation 5: Mirrored paired tubes
For mitts, socks worked in crochet, or sleeves, intentionally mirror seam shifts and decrease placement so the pair balances on the body.
A practical swatching protocol for anti-torque design
If you want reliable results, swatch specifically for drift, not just gauge.
Make three tube swatches, each 40 stitches around and 20 rounds tall in your chosen yarn.
Swatch A
- continuous spiral in chosen stitch
Swatch B
- joined rounds, no turning
Swatch C
- joined rounds, turning every round
Mark one vertical line on each swatch with locking markers in the same stitch column at the start. After 20 rounds, compare how far that line appears to drift.
Measure:
- circumference
- round gauge
- visible seam movement
- column slant under natural light
This test will tell you more than any general advice can.
Common mistakes and exact fixes at a glance
Mistake 1: Relying on continuous spiral for a garment tube that needs vertical alignment
Fix: Switch to joined-and-turned rounds at least for the visible or shaped sections.
Mistake 2: Stacking increases directly over one another in crowns and yokes
Fix: Offset increase placement every other increase round while preserving total stitch count.
Mistake 3: Treating beginning-of-round as anatomy marker
Fix: Add separate markers for underarm, side seam, center front, or center back.
Mistake 4: Choosing crisp cotton and open gauge, then expecting no drift
Fix: Tighten gauge slightly, introduce turned rounds, or select a blend with more memory.
Mistake 5: Depending on blocking to solve structural torque
Fix: Correct the construction method first, then block to refine.
When you should accept some spiral behavior
Not every tube needs to be perfectly straight. In fact, some crochet benefits from natural spiral energy.
It may be perfectly reasonable to leave the fabric as is when:
- the texture is organic and the spiral is subtle
- the project is soft and drapey rather than architectural
- the seam is hidden in wear
- visual alignment does not affect fit or function
- speed matters more than engineering precision
A little movement is part of crochet’s character. The goal is not to force crochet into pretending it is knitted stockinette or woven cloth. The goal is to understand the material honestly enough to choose when to neutralize its bias and when to let it sing.
Key takeaways
If you remember only a few things from this article, make them these:
- Crochet in the round naturally develops directional bias; perfect stitch count does not guarantee a straight tube.
- Continuous spirals tend to amplify visual corkscrewing, especially in sc and hdc.
- Joined-and-turned rounds are one of the most effective ways to balance torque.
- Counterspiral sections and compound round planning can reduce drift without flattening all texture.
- Strategic increase and decrease placement matters as much as the math.
- Seam placement should follow garment anatomy or visual logic, not convenience.
- Fiber, yarn twist, and hook size all influence how strongly torque appears.
- Blocking can refine mild drift, but it cannot permanently fix poor structural choices.
- The most reliable path is to swatch specifically for drift using the exact stitch, yarn, hook, and round method.
When you start thinking of tubes as engineered fabric systems rather than simple repeated rounds, your crochet changes. Hats sit straighter. Sleeves hang cleaner. Yokes read more intentionally. Seams stop wandering off like mischievous little trails. And perhaps best of all, you gain that deeply satisfying maker feeling that the fabric is finally doing what you meant it to do.
That is one of the pleasures of advanced crochet: not just making stitches, but understanding how stitches behave together in space. Once you learn to balance torque in the round, you do not merely avoid corkscrewing—you gain control over the visual grammar of your work.