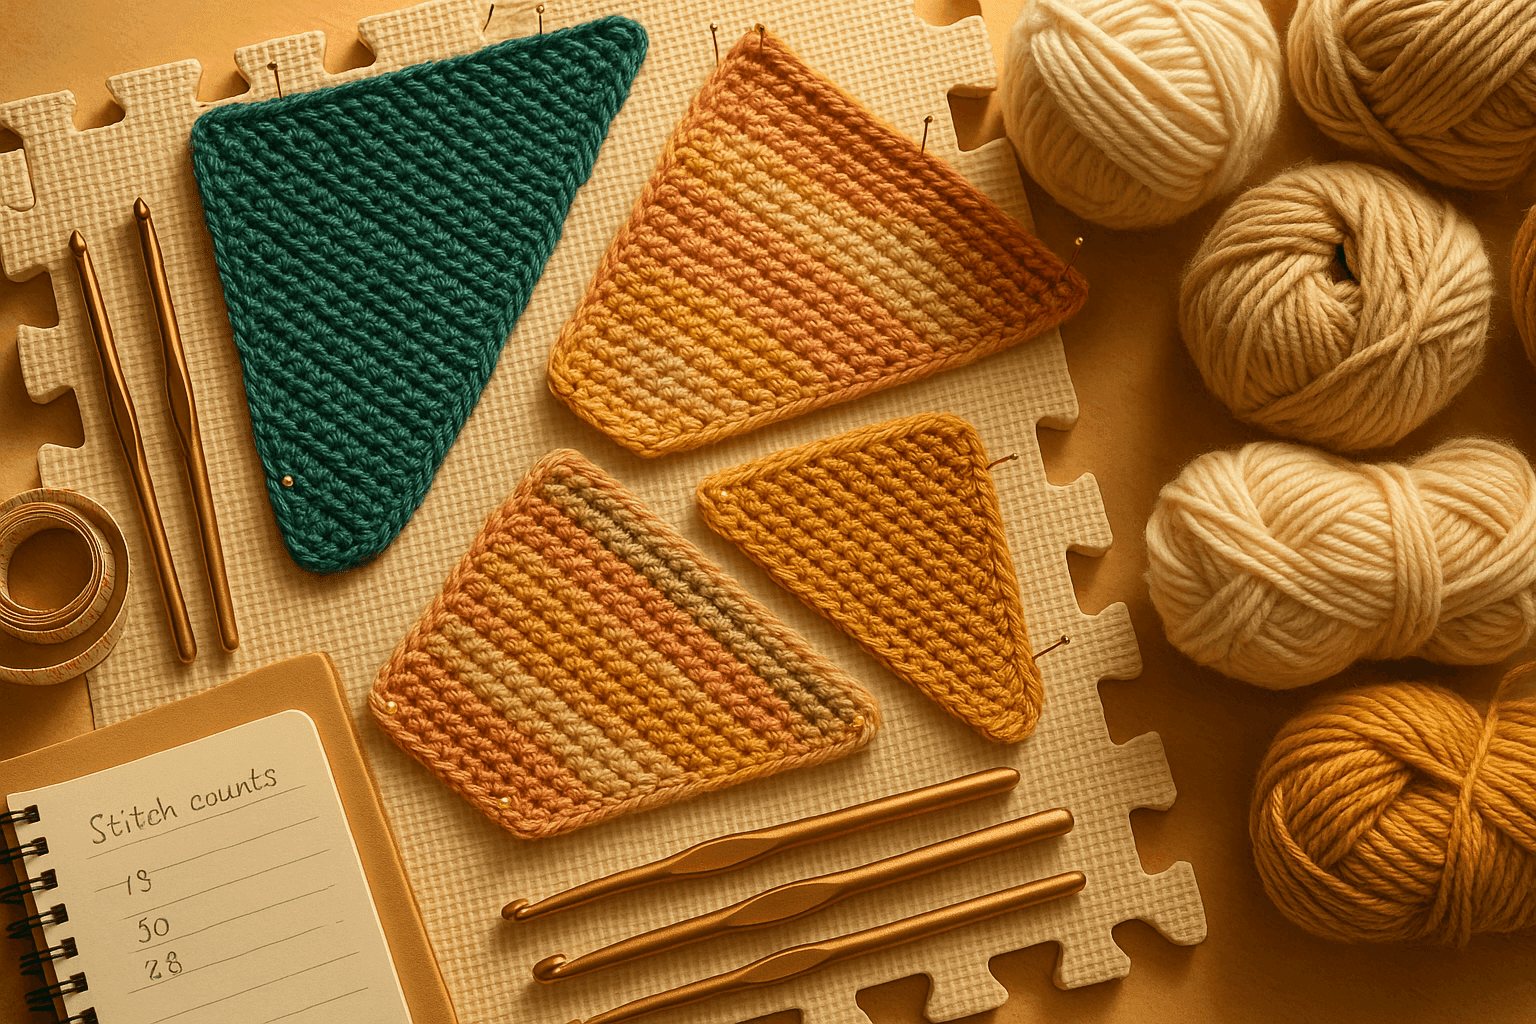
There is a particular moment most crocheters meet fabric torque: you set down a rectangle you were sure was straight, step back, and realize the columns have drifted, the edge is leaning, or a stripe that should read horizontal seems to creep around the piece in a subtle spiral. For years, many of us learn to treat that behavior as a flaw to be corrected at all costs. We change hooks, tug harder, block flatter, or restart with a little suspicion toward the yarn. But crochet has always had a directional life of its own. The path the loop takes, the way the hook enters and exits, the handedness of the maker, the twist of the yarn, and whether the fabric grows in rows, joined rounds, or continuous spirals all create movement. That movement is not just distortion. It is design information.
When you begin to read torque as part of crochet’s visual grammar, fabric skew stops being merely something to fix and becomes something you can place, pair, interrupt, redirect, or celebrate. A cowl can gain a gentle helical sweep. A garment side panel can counterbalance the front and back. A striped yoke can look alive rather than static. A hem can kick and spiral in a controlled way instead of collapsing unpredictably. The key is not abandoning stability, but understanding which forces create drift and how to balance them so fit remains dependable.
This article is about using crochet torque deliberately: how skew forms, how to measure it, how to design mirrored and counter-skewed structures, and how to harness spiral grain without sacrificing wearability. I’ll focus on practical methods you can swatch, count, and repeat, because bias-active fabric behaves best when we stop guessing and start observing.
What crochet torque actually is
In textile terms, torque is the turning force expressed as visible skew, spiral grain, or directional drift in the finished fabric. In crochet, it often shows up as:
- vertical stitch columns slanting left or right
- a fabric strip twisting along its length
- side seams rotating toward the front or back
- stripes creeping diagonally instead of stacking evenly
- motifs that look subtly pulled off square
- hems that flare more on one side than another
Unlike woven fabric, where grain is set by warp and weft, crochet creates structure loop by loop along a continuous path. Every stitch has an entry angle, a pull-through path, and a relation to the stitch below. That means crochet naturally records direction.
Torque increases when several directional factors line up:
- the stitch anatomy encourages lean
- your tension reinforces it
- the yarn twist pushes in the same direction
- the construction path never interrupts the bias
- the geometry of the piece gives the skew room to travel
Torque decreases when those factors oppose each other or are broken up by mirrored shaping, seams, return rows, motif joins, or finishing.
The goal is not to eliminate all skew. Some of the most attractive crochet fabrics have a little rotational energy. The goal is to know whether your fabric is active, how active it is, and where that energy should go.
Why crochet skews: the major variables
1. Stitch path and stitch anatomy
Different stitches store direction differently. Single crochet often shows skew more clearly than taller stitches because it is compact and the top loops sit with a pronounced offset. Half double crochet can also drift strongly, especially in dense gauges. Double crochet often appears more forgiving because its height diffuses the angle, but columns can still slant noticeably.
Slip stitch fabric can torque dramatically, especially in ribbed or knit-look constructions. Stitches worked consistently through one loop only, third loop, or back bump can intensify directional grain because they lock the hook path into a repeating slant.
As a broad rule:
- single crochet (sc): compact, can show strong column lean
- half double crochet (hdc): dense and often bias-active
- double crochet (dc): visually more open, but still directional
- slip stitch / waistcoat / knit-look textures: often highly torque-sensitive
- lace or mesh: skew may be present but visually less dominant
2. Handedness and working direction
Right-handed and left-handed crocheters often produce opposite visual lean in the same stitch pattern, because the hook path is mirrored. Even among right-handed crocheters, the exact way yarn is tensioned and pulled through can change the degree of bias.
Rows that are turned interrupt directional buildup because each row is worked in the opposite direction. Continuous rounds do the opposite: they reinforce the same directional travel over and over, which is why spiral skew is especially visible in hats, sleeves, baskets, and top-down garments worked in the round.
Joined rounds can reduce visible drift compared with spirals, but they do not erase stitch asymmetry. They simply create a reset point.
3. Yarn twist and ply balance
Yarn has opinions. A tightly spun singles yarn can behave very differently from a balanced 4-ply. Some yarns bias strongly in one direction because of how the strands were spun and plied. Others are relatively neutral.
Important distinctions:
- Singles yarn: can bloom beautifully but may bias more dramatically
- High-twist yarn: crisp stitch definition, often more energetic directional behavior
- Balanced plied yarn: usually more stable, though not perfectly neutral
- Crepe or energized yarns: can magnify spiral behavior
- Plant fibers: may reveal structural skew sharply because they have less elastic forgiveness
A familiar phenomenon: a yarn that hangs straight in knitting may still skew in crochet, because the stitch architecture differs. Always test the actual crochet fabric.
4. Fiber content and memory
Fiber affects whether skew merely appears or becomes structurally persistent.
- Wool and wool blends: often relax and block well; torque can be softened or redistributed
- Cotton and linen: hold crisp structure; if they skew, they may keep skew unless countered in design
- Acrylic: can vary widely; some spring back, some stay exactly as made
- Silk, bamboo, rayon: drape amplifies visible spiral movement; great for intentional surface effects, risky for unsupported garment fit
- Alpaca: drape plus growth can turn mild bias into garment rotation over time
5. Construction geometry
Geometry determines whether drift has room to accumulate.
A narrow scarf worked lengthwise in single crochet may twist more than a motif-based wrap because there are no interruptions in the path. A seamless pullover can rotate around the body if all sections bias in one direction. A garment made from mirrored panels may look perfectly composed because each panel’s torque balances its partner.
Bias-active geometries include:
- long uninterrupted panels
- tubes worked in continuous rounds
- diagonal stripes over dense stitch fields
- top-down circular or spiral constructions
- asymmetrical hems with no seam anchors
Bias-resistant or bias-balancing geometries include:
- mirrored left/right pieces
- center seams or faux seams
- joined motifs
- alternating row direction
- strategic bands worked perpendicular to the main fabric
A practical swatching protocol for measuring skew angle
If you want to design with torque, you need more than “this seems twisty.” Measure it. A simple skew protocol will tell you how active a fabric is and whether two fabrics can be paired.
Swatch size and setup
Make at least three swatches per fabric condition so you can compare results. For garment work, I recommend a generous swatch:
- Yarn weight: use the intended yarn, ideally in the actual colorway
- Hook size: start with the hook you expect to use, then make comparison swatches at 0.5 mm smaller and 0.5 mm larger
- Swatch size for dense fabrics: 30 stitches wide x 30 rows minimum
- Swatch size for taller/open fabrics: enough rows to create at least a 6 x 6 in / 15 x 15 cm measurable area
For worsted-weight yarn, common starting points might be:
- sc: 4.5 to 5.5 mm hook
- hdc: 5 to 6 mm hook
- dc: 5.5 to 6.5 mm hook
For DK weight:
- sc: 3.75 to 4.5 mm
- hdc: 4 to 5 mm
- dc: 4.5 to 5.5 mm
These are starting ranges, not rules. The goal is to compare behavior, not chase a universal number.
What to record
On each swatch, record:
- yarn name and fiber content
- yarn weight category
- hook size
- stitch pattern
- worked flat or in the round
- turning every row, or joined/continuous rounds
- starting chain count and total rows/rounds
- measured stitch gauge over 4 in / 10 cm
- measured row gauge over 4 in / 10 cm
Then add bias-specific notes:
- direction of lean: left or right
- edge drift: how far top edge shifts relative to bottom edge
- column angle in degrees
- whether blocking reduces, preserves, or increases skew
Measuring skew angle
Lay the rested swatch flat without stretching. Find a representative stitch column near the center. Use a ruler or gridded mat.
Method 1: Column angle
- Mark a vertical reference line using the grid.
- Follow one stitch column or repeated texture line in the swatch center.
- Measure the angle between true vertical and the actual column path.
A simple interpretation scale:
- 0–2°: low skew
- 3–5°: moderate skew
- 6–9°: strong skew
- 10°+: highly bias-active
Method 2: Edge drift
- Square the bottom edge to the grid.
- Compare where the side edge begins at the bottom and where it lands at the top.
- Record the horizontal shift.
Example: A swatch 30 stitches x 30 rows in single crochet measures 6 in tall and the top corner sits 3/4 in to the right of the bottom corner. That is meaningful drift for a garment panel.
Method 3: Tube rotation test
For in-the-round fabrics, make a small tube:
- Foundation: 48 sc, joined or worked continuously
- Rounds: 30 rounds
- Hook: the intended size
Flatten the tube so one point is your visual center front. Let it hang for several hours. If the “side” line rotates forward by 1/2 to 1 in over a 6–8 in tube, the fabric has active spiral grain.
Block and re-measure
Always measure:
- fresh off hook
- after resting 24 hours
- after blocking suitable to the fiber
This matters because wool may relax from 6° to 3°, while cotton may remain at 6° and simply look cleaner. That difference is a design decision.
Designing with skew instead of fighting it
Once you know your fabric’s behavior, you can choose among three strategies:
- Feature the skew so it becomes a visible design line.
- Pair and balance the skew so movement remains but fit stays centered.
- Interrupt or redirect the skew where stability matters most.
Strategy 1: Feature the skew
Use torque where movement is desirable:
- sculptural hems
- spiral cowls
- dynamic striping
- draped fronts
- basket or vessel forms
- asymmetrical accessories
Strategy 2: Pair and balance the skew
Use mirrored or opposing sections in:
- sweaters and cardigans
- fitted tops
- bags with stable base orientation
- hats with centered motifs
- shawls that should hang evenly
Strategy 3: Interrupt or redirect the skew
Use seams, bands, motifs, or perpendicular edgings where:
- necklines must sit centered
- armholes must not rotate
- button bands must remain straight
- bag straps must not spiral under load
Step-by-step: a design workflow for bias-active fabrics
Here is the process I recommend when planning a garment or accessory with deliberate torque.
Step 1: Choose your active fabric intentionally
Start with one stitch pattern and one yarn, then verify its bias personality.
Example swatch plan:
- Swatch A: 30 sc x 30 rows on 5 mm
- Swatch B: 30 sc x 30 rows on 5.5 mm
- Swatch C: 30 hdc x 30 rows on 5 mm
Suppose results are:
- A: 4° right lean
- B: 2° right lean
- C: 6° right lean
Now you know hdc will give stronger directional energy, while the larger hook softens the skew in sc. If you want subtle movement in a cardigan body, use A or B. If you want a spiraling cowl, use C.
Step 2: Decide where the bias should be visible
Ask yourself:
- Should the eye notice the spiral immediately, or only on second look?
- Does the skew belong at the hem, side, center, or surface?
- Will it help the silhouette or fight it?
For garments, the safest places to feature visible bias are:
- lower body panels
- sleeve cuffs and lower sleeves
- peplum or flared hems
- side panels
- yokes with balanced repetition
Riskier places include:
- bust shaping without seams
- neckline edges
- center front closures
- fitted waist sections in drapey fibers
Step 3: Create left/right companions
This is the most important skill in counter-skew design. If one panel leans right, you need to decide whether the partner panel should:
- also lean right, creating a continuous wraparound spiral, or
- lean left, creating balance across the body
To create opposite-leaning companions, you can:
- have right- and left-handed makers produce mirrored sections
- work one panel from the opposite edge if the stitch pattern changes visibly with direction
- use mirrored join placement or mirrored surface treatment
- pair flat-worked sections with reversed assembly orientation
- combine a bias-active panel with a structural stabilizer panel
For most solo designers, the most accessible tactic is assembly mirroring rather than trying to literally reverse one’s crochet handedness. A panel with a visible slant can often be flipped in how it is positioned within the garment so the lean reads as mirror-imaged across center front or center back.
Step 4: Place seams to control rotation
Seams are not failures of seamless crochet. They are engineering.
A well-oriented seam can:
- anchor a drifting panel
- halt the accumulation of spiral grain
- relocate torque toward a less visible edge
- keep side lines from walking forward or back
Useful seam strategies:
- Center back seam: excellent for stabilizing garments with front visual continuity
- True side seams: prevent full-body rotation better than seamless tubes
- Princess-style seams: allow shaped sections to counter one another
- Shoulder seams with tape or reinforcement: stop yokes from creeping
If your swatch shows 3/4 in drift over 6 in, do not expect a 24-inch body tube to hang politely without an anchor. Give it seams.
Step 5: Balance motifs and stripes
Bias is most visible when it disturbs expected alignment. That means stripes, color blocks, and motifs need special handling.
For stripes in a bias-active fabric:
- keep stripe sequences narrow if you want a subtle barber-pole effect
- use mirrored stripe directions across paired panels if fit symmetry matters
- place high-contrast stripes where a spiral effect is welcome, not where it will emphasize rotation
For motif placement:
- avoid putting a rigid square motif against a strongly skewing panel unless a seam interrupts the change
- center motifs on anchored zones such as yokes or waistband sections
- use repeated diagonal motifs to echo the fabric drift rather than contradict it
Step 6: Add stabilizing zones where needed
Not every part of a design needs to share the same torque.
You can combine:
- bias-active body fabric
- low-skew ribbing or edging
- sewn facings or tapes
- motif yokes with panelled lower sections
- perpendicular bands worked across the skew
A practical garment formula is:
- Body: hdc or sc with measured skew
- Side panel: same yarn, lower-skew stitch pattern or tighter gauge
- Hem band: perpendicular rows to arrest flare
- Neckline/button band: reinforced with slip stitch edge and, if needed, a sewn ribbon or twill tape
Pairing left and right bias zones in garments
This is where torque becomes a full design language rather than a novelty.
Front/back balancing
If both front and back are worked in the same stitch and direction, the whole garment may rotate around the torso. To counter this:
- make front and back as separate panels
- orient them so visible slant opposes across shoulder line or side seam
- seam them rather than continuing in a tube
A simple test layout: place blocked panels side by side on a table. If both “want” to roll toward the same side, your assembled garment probably will too.
Left/right body panels
For cardigans and fitted pullovers, side panels are excellent torque managers.
Try a 4-panel setup:
- center front left
- center front right
- back left
- back right
Each panel can be 20–40 stitches wide depending on size and yarn. Arrange them so neighboring panels oppose one another in lean. The eye reads dynamic movement, but the body experiences equilibrium.
Sleeves
Sleeves are natural homes for controlled spiral grain because the arm already rotates in space. But two sleeves should feel like a pair.
Good options:
- intentionally make both sleeves spiral in the same visual direction for a matched set
- mirror the sleeves so line movement reflects across the body
- keep upper sleeve stable and let only lower sleeve or cuff torque visibly
If working top-down sleeves in continuous rounds, track the “underarm line” every 5 rounds with a marker. If it begins to migrate more than 1 stitch every 4–6 rounds, consider joined rounds, a faux seam, or periodic directional interruption.
Hats and cowls
Here torque can be celebrated more freely.
For a spiral cowl:
- work hdc or sc in continuous rounds
- choose a yarn with clear stitch definition
- use 48, 60, or 72 stitches depending on gauge and desired circumference
- work enough rounds to show at least 2 full visual spiral repeats
For a balanced hat:
- use joined rounds for the crown if motif centering matters
- switch to continuous rounds lower down if you want subtle grain movement
- keep stripes narrow, such as 2 rounds each color, for dynamic spiraling
Harnessing torque for specific visual effects
Sculptural hems
A hem with controlled skew can look wind-shaped rather than simply ruffled.
Recipe concept:
- Main body in moderate-skew hdc
- Increase at a measured rate: 2 stitches evenly spaced every 6th row for flare
- Finish with a lighter hook size for the last 2 rows to keep edge control
The fabric’s directional tendency will encourage the hem to swing and twist. Use this on tunics, skirts, and open cardigans.
Dynamic striping
Bias-active stripe fields create motion even in simple stitch patterns.
For stable but lively stripes:
- choose 3–5 round stripe widths in round-based work
- choose 2–4 row stripe widths in flat work
- avoid very wide high-contrast bands unless dramatic drift is desired
If the stripe crawl becomes too aggressive, interrupt with a solid-color stabilizing band worked in turned rows.
Spiral surface effects
Surface slip stitch, post-stitch ribs, and textured ridges can intensify or redirect torque.
Use them carefully:
- place ridges along the natural lean to amplify spiral flow
- place short opposing ridges to visually rebalance a section
- avoid heavy surface texture on already unstable drapey fabric unless anchored by seams
Fiber-specific finishing for skew control
Finishing is where many bias-active fabrics either become elegant or unruly.
Wool and wool blends
Best for reshaping and setting.
- Wet block fully
- Pat into alignment without overstretching width
- Pin columns or seam lines to intended angle
- Let dry completely
If you want to preserve deliberate skew, block to dimensions but do not force columns fully vertical. Set the shape, not the moral lesson.
Cotton and linen
Best for crisp, visible design lines, but less forgiving.
- Steam lightly if appropriate
- Finger-shape and measure carefully
- Use seams and bands rather than relying on blocking to remove skew
If making bags or garments, consider adding sewn support where stress will magnify drift.
Acrylic
Test before assuming. Some acrylics relax beautifully; some resist. If steam is safe, use caution. Aggressive heat can flatten texture permanently.
Silk, bamboo, rayon, alpaca blends
Drape can exaggerate rotation under body weight.
- Hang swatches before finalizing gauge
- Measure after 24 hours hanging
- Reinforce shoulders, necklines, and closures
- Avoid unsupported long bias-active fronts unless swing is the point
Common mistakes and how to fix them
Mistake 1: Swatching too small
A tiny 4-inch square may not reveal the true spiral behavior of the fabric.
Fix: Make larger swatches, at least 30 stitches x 30 rows or a 6 x 6 in measured area.
Mistake 2: Judging skew before the fabric rests
Fresh crochet can look more twisted because the yarn is still energized.
Fix: Let swatches rest 24 hours, then block and re-measure.
Mistake 3: Treating yarn as neutral
Two yarns with the same weight can produce very different torque.
Fix: Swatch the actual yarn, colorway, and hook combination.
Mistake 4: Using continuous rounds where alignment matters
If you need centered motifs, clean side lines, or stable button placement, uninterrupted spirals may fight you.
Fix: Switch to joined rounds, add a faux seam, or work in panels.
Mistake 5: Ignoring seam engineering
A long seamless garment in a strongly skewing fabric may rotate no matter how pretty the stitch pattern is.
Fix: Add side seams, center back seam, or panel divisions. Stability is design.
Mistake 6: Overcorrecting with extreme blocking
Forcing a bias-active fabric completely straight can flatten texture, alter dimensions, or create rebound after wear.
Fix: Accept some directional character. Balance the fabric structurally instead of bullying it flat.
Mistake 7: Pairing active fabric with unstable drape everywhere
A torque-prone stitch in bamboo or alpaca across a full-length cardigan can grow and rotate dramatically.
Fix: Use stabilizing zones, lighter drape in critical areas, or seams plus reinforcement.
Troubleshooting specific scenarios
“My side seam keeps creeping to the front.”
Cause: both body sections are skewing in the same direction, and the seam is not strong enough to resist rotation.
Fixes:
- split the body into more panels
- add a firm mattress or slip-stitch seam
- insert a stabilizing faux side seam worked over 1–2 stitches each round
- reduce bias by changing hook size up or down and re-swatching
“My stripes look like a barber pole, but I wanted them level.”
Cause: round direction and stitch skew are compounding.
Fixes:
- use joined rounds
- turn at the end of each round if pattern permits
- narrow the stripe sequence
- place stripes on mirrored panels rather than one uninterrupted tube
“My hem twists beautifully on the table but hangs awkwardly on the body.”
Cause: unsupported torque plus body weight and differential drape.
Fixes:
- stabilize the upper body section
- add weight evenly with edging, not only at one edge point
- reduce increase rate to control flare
- keep torque effect below hip or below high-motion zones
“Blocking removed the spiral effect I liked.”
Cause: the fiber was highly responsive and you set it too flat.
Fixes:
- re-wet and block to dimensions while preserving some column angle
- use a more active yarn or denser stitch next time
- feature the spiral with striping or texture so it remains visible after finishing
“The left and right fronts don’t look like a pair.”
Cause: one panel may be assembled in the wrong orientation, or the visible stitch slant is not mirrored.
Fixes:
- lay pieces out before seaming and check visual flow from hem upward
- mark right side and top edge on every panel immediately after blocking
- if needed, redesign one front as a separate mirrored panel rather than relying on fold symmetry
Variations and design experiments to try
Once you understand the basic mechanics, torque becomes an exciting design tool.
1. The mirrored scarf
Work two long panels in the same skewing stitch pattern, each 24 stitches wide and as long as desired. Seam them at center lengthwise with opposite orientation so the grain diverges away from the seam like mirrored water currents.
2. Counter-skew cardigan fronts
Make left and right front panels separately, each 30–45 stitches wide depending on size, and orient them so the visible slant mirrors across center front. Add a stable back panel with side seams to prevent full-body rotation.
3. Spiral-grain market bag
Use cotton for crisp grain visibility, but give it structure:
- Base in low-skew dense rounds
- Body in moderate-skew hdc continuous rounds
- Side faux seam markers every round to monitor rotation
- Reinforced strap anchors sewn after blocking
4. Controlled-torque sleeve cuffs
Keep the sleeve body stable, then switch in the last 12–20 rounds to a denser bias-active stitch. The cuff develops a subtle twist without compromising sleeve cap fit.
5. Helical color yoke with stable body
Use joined rounds or paneling through the body, but let a short yoke section exploit spiral striping. This keeps fit centered while giving the upper garment a lively surface.
6. Bias-echo motif placement
If the fabric leans 5° right, place motifs or eyelet lines on a corresponding diagonal instead of insisting on strict vertical placement. The whole piece reads intentionally composed.
A sample planning worksheet
Here is a concise framework you can use when developing a design.
Fabric: hdc, worked flat
Yarn: DK wool-cotton blend
Hook trials: 4.5 mm, 5 mm, 5.5 mm
Swatch counts: 32 sts x 28 rows each
Results:
- 4.5 mm: 7° right lean, firm hand
- 5 mm: 5° right lean, ideal drape
- 5.5 mm: 3° right lean, too open
Chosen fabric: 5 mm
Use of torque: mirrored front panels, sculptural lower hem
Stability zones: shoulder seams, center back seam, neckline band in slip stitch and sewn support
Stripe plan: 3-row repeating stripes only below bust
Sleeve plan: worked flat and seamed, not in spirals
Blocking plan: wet block to measurements while preserving visible diagonal grain
This kind of worksheet turns torque from an accident into a construction choice.
What to remember when fit matters
A bias-active fabric can still make a reliable garment if you separate visual movement from structural responsibility.
Let the active fabric do the expressive work, but assign fit control to:
- seams
- shoulder structure
- necklines
- waist anchors
- perpendicular bands
- reinforcement where weight hangs
If your pattern piece must stay rectangular, choose lower skew. If your piece can benefit from movement, choose moderate skew and decide where to anchor it. If the whole design depends on sculptural drift, build in enough control that the effect remains intentional after wear.
That is the heart of using crochet torque as design language: not pretending the fabric is neutral, and not surrendering to chaos either. You are listening to the directional character already present in crochet and composing with it.
The most interesting fabrics are often the ones that reveal how they were made. Crochet’s spiral grain, leaning columns, and drifting stripes are evidence of the hook’s path through yarn and space. When you understand that path, you can soften it, sharpen it, mirror it, or let it unfurl exactly where it will do the most good.
So the next time a swatch lands on the table with a sly little twist, do not ask only how to straighten it. Ask what it wants to become, what panel it belongs beside, where the seam should hold it, which fiber will let it sing, and whether the bias is not a flaw at all, but the beginning of the design.