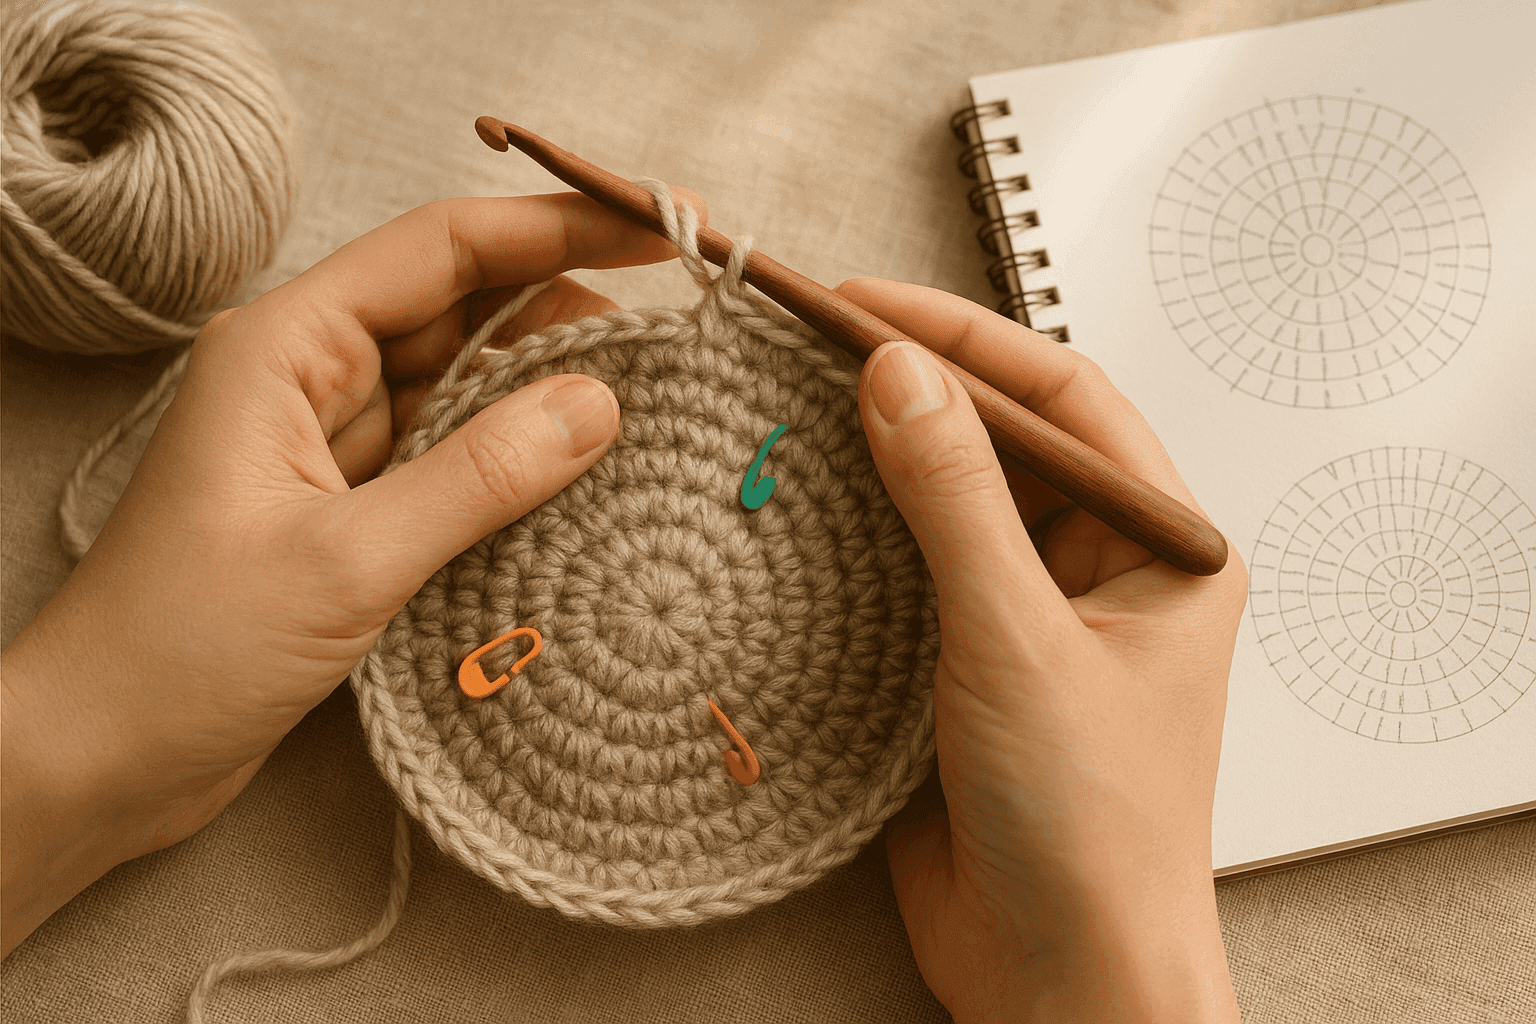
You know that moment when a hat crown should look perfectly balanced on paper, yet one side seems to “walk” forward round after round? Or when a top-down yoke feels subtly cleaner in one sample than another even though the stitch counts are identical? Most of us are taught to focus on how many increases to make in a round. But once you spend enough time crocheting garments, hats, sleeves, and circular motifs, you start noticing that where those increases land matters just as much.
That is where crochet torque steering becomes genuinely useful. Increase placement is not only a counting issue; it is a fabric-engineering choice. In crochet worked in the round—especially continuous spirals—stitches slant, rounds can drift, and the cumulative path of the fabric behaves a bit like a spiral ramp. Put all your increases in one kind of rhythm, and you amplify that drift. Shift them deliberately, and you can soften, cancel, disguise, or even harness it.
If you have ever wondered why one hat crown sits round and smooth while another gets a visible swirl, why a circular yoke develops tidy faux “rays” or turns slightly lopsided, or why sleeves shaped in the round can look cleaner when increase points migrate instead of stacking, this is the deep-dive. We are going to look at asymmetric increase placement as a practical design tool: how it affects spiral drift, visual symmetry, crown height, flare, and shaping behavior across different kinds of projects.
This is not about abandoning your standard formulas. It is about understanding the mechanics well enough to make better decisions. Once you can see increase placement as torque steering, you gain much finer control over in-the-round crochet.
The core idea: count alone does not determine shape
When you increase in the round, each added stitch contributes to circumference. That part is straightforward. If you add 6 stitches every round in single crochet, or 12 stitches every round in double crochet, you create a rate of expansion that tends toward a flat circle under typical conditions.
But crochet stitches are not neutral little columns the way charts can make them seem. They lean. They have a front and back. They are built by drawing loops through previous stitches at a slight angle. In continuous rounds, the start of the round itself creeps sideways because you are climbing around a helix rather than stepping up on perfectly stacked rings.
That means increase placement affects at least three things at once:
- Structural expansion: how quickly width is added
- Directional bias: whether the visual flow of the fabric drifts or balances
- Surface patterning: whether increase lines stack, stagger, swirl, or disappear
Two pieces can have the exact same final stitch count and very different behavior because one distributes its increases symmetrically and the other asymmetrically.
What “torque steering” means in crochet
I am using “torque steering” as a practical metaphor. Crochet fabric in the round often has a rotational tendency caused by stitch slant, working direction, and yarn behavior. You can think of that tendency as a mild steering pull. Increase placement acts like adjusting the wheel.
- Place increases in a way that follows the natural drift, and the spiral effect becomes stronger.
- Place increases in a way that resists the natural drift, and the fabric looks more visually centered.
- Alternate or offset increase points, and you can diffuse concentration lines that would otherwise stack into obvious spokes.
- Deliberately cluster or bias increases, and you can push a crown taller, flatter, sharper, or more directional.
In other words, increases are not merely additive. They are steering inputs.
Why crochet drifts in the first place
Before we talk about controlling drift, it helps to identify where it comes from.
1. Stitch slant
Most crochet stitches have a slight directional lean. The amount varies by stitch:
- Single crochet (sc) often shows a compact, subtle slant, but in spirals it still creeps.
- Half double crochet (hdc) can create a stronger visual rope-like travel line because of the extra yarn over.
- Double crochet (dc) often reveals drift clearly in the turning top loops and post alignment.
- Tall stitches exaggerate visual drift because the eye follows their vertical columns.
2. Continuous spiral rounds vs joined rounds
In a continuous spiral, there is no true reset point. You keep climbing upward, and the beginning of round migrates. This often produces the strongest visible drift.
In joined rounds, you close each round and begin the next with a chain. That can reduce cumulative spiral drift, though it introduces its own seam behavior and sometimes a jog.
3. Handedness and working direction
Right-handed crocheters working in the standard direction often observe drift in one visual direction; left-handed crocheters may see the mirror image. The precise appearance depends on stitch style and project orientation, but handedness absolutely changes how slant presents.
4. Yarn twist and ply behavior
A tightly spun yarn with strong twist can reinforce stitch bias. A lofty woolen-spun yarn may mask some of it. S- and Z-twist behavior can interact with your working motion in ways that either sharpen or soften the appearance of drift.
5. Tension and hook/yarn pairing
Dense fabric made with a small hook often shows increase lines and slant more clearly. Airier fabric can visually disperse the same shaping. For experimentation, I recommend making swatches in at least two hook sizes.
Symmetric vs asymmetric increase placement
Let’s define terms clearly.
Symmetric increase placement
This means increases are distributed in an evenly spaced, repeating way around the round. Examples:
- A standard flat sc circle adding 6 stitches per round, with increases evenly spaced
- A dc yoke adding 12 stitches per round at regular intervals
- A sleeve with paired underarm increases mirrored on both sides
Symmetric placement tends to create visual balance, but only if the underlying stitch drift does not overwhelm it.
Asymmetric increase placement
This means increases are not mirrored or evenly aligned around the round. This can include:
- Shifting increase points by 1–3 stitches each round
- Placing one increase slightly before a marker and its pair slightly after another marker
- Clustering increases into sectors of different spacing
- Intentionally rotating increase positions to counter spiral creep
Asymmetry is not necessarily visible as lopsided shaping. Used well, it can actually make the finished fabric appear more balanced because it compensates for crochet’s built-in slant.
The classic flat-circle formulas—and why they are only a starting point
These formulas remain useful:
- sc circle: begin with 6 sc in a ring; increase 6 sts each round
- hdc circle: often begin with 8 hdc; increase 8 sts each round
- dc circle: often begin with 12 dc; increase 12 sts each round
Example, standard sc flat circle:
- Rnd 1: 6 sc in magic ring. (6 sts)
- Rnd 2: inc in each st around. (12 sts)
- Rnd 3: sc 1, inc around. (18 sts)
- Rnd 4: sc 2, inc around. (24 sts)
- Rnd 5: sc 3, inc around. (30 sts)
On paper, this is perfectly regular. In fabric, the increase points can stack in visible hexagonal rays, or they can begin to spiral if you work continuously and do not reset your visual landmarks.
Now compare that to a shifted version:
- Rnd 1: 6 sc in magic ring. (6 sts)
- Rnd 2: inc in each st around. (12 sts)
- Rnd 3: sc 1, inc around. (18 sts)
- Rnd 4: sc 1, inc, sc 2 around, sc 1. (24 sts)
- Rnd 5: sc 2, inc, sc 2 around. (30 sts)
The stitch count is the same, but the increase points are offset. That simple shift can break up stacking lines and soften polygon edges.
This is the first practical lesson of torque steering: the same math can produce different visuals depending on increase location.
How asymmetric increases amplify or cancel spiral drift
Let’s get specific.
When asymmetry amplifies drift
If you consistently place your increases slightly “ahead” in the same direction that your rounds naturally travel, the eye reads a stronger spiral. This can happen when:
- You move every increase marker forward by 1 stitch each round in a continuous spiral
- You place decorative increase pairs so they chase the beginning of round
- You stack increases relative to the current round start rather than a stable visual axis
This is not always bad. In a shell motif, beret, or sculptural piece, a controlled spiral can be beautiful.
When asymmetry cancels drift
If your fabric tends to drift left visually, shifting increase points slightly right relative to the fabric’s apparent columns can neutralize that movement. In practice, this may mean:
- Delaying one increase in each sector by 1 stitch
- Alternating which sectors shift each round
- Moving increase pairs opposite the direction in which the round start migrates
Because every crocheter’s slant is a little different, cancellation is sample-based. There is no universal “shift 1 stitch every 3 rounds” rule that works for everyone. But the principle holds: counter-bias the increase location against the fabric’s natural travel.
A practical test swatch for drift direction
Before applying this in a garment, make two small crown swatches.
Materials
- Worsted weight yarn, 40–60 g
- Hook: 5.0 mm/H for sc, or 5.5 mm/I for dc as a starting point
- 6 stitch markers in one color, 1 beginning-of-round marker in another
Swatch A: standard distribution
For sc:
- Rnd 1: 6 sc in ring. (6)
- Rnd 2: inc around. (12)
- Rnd 3: sc 1, inc around. (18)
- Continue increasing 6 sts per round through Rnd 10. (60)
Mark the first increase of each round.
Swatch B: offset distribution
Work the same total counts, but shift the increase sequence by 1 stitch every other round.
Example:
- Odd rounds: standard spacing
- Even rounds after Rnd 4: begin with half the spacing before the first increase, then continue around
Compare:
- Which swatch looks more circular?
- Which shows stronger spoke lines?
- Does one appear to twist or walk?
- Does one lie flatter or dome slightly?
This single experiment will teach you more than a page of theory.
Crown shape: how increase location changes height and profile
Hat crowns are where crocheters most often see torque steering in action.
We often simplify crown shaping to “more increases makes it flatter, fewer increases makes it taller.” True—but placement also matters.
Evenly stacked increases
When increases line up in fixed radial positions, the crown often develops:
- Visible spoke lines
- A polygonal tendency if gauge is firm
- A more mechanical, segmented expansion
In some hats this is desirable, especially if you want six- or eight-point star geometry.
Staggered increases
When increases are shifted from round to round, the crown often develops:
- A smoother visual surface
- Less obvious rays
- A more rounded dome transition
This is often preferred for close-fitting beanies or baby hats where you want the shaping to disappear into the fabric.
Biased increase sectors
If increases are distributed unevenly—say more concentrated in one half of a round—you can create directional shaping or subtle tilt. Usually this is undesirable in an everyday hat, but extremely useful in:
- Sculptural berets
- Character hats
- Anatomically informed shaping for unusual silhouettes
Crown-height effect
Even with the same total increase count, clustered increases can create local flare while leaving other areas to climb more vertically before widening. The eye reads this as a different crown profile.
A practical comparison in sc:
Sample 1: evenly spaced 6 increases each round
- Typically gives a balanced dome when you stop increasing at the right diameter.
Sample 2: 6 increases each round, but 3 pairs placed close together and 3 wider gaps opposite
- Often creates a crown that appears to have directional flattening in some sectors and extra lift in others.
The stitch count is unchanged. The geometry is not.
Yoke symmetry: why placement matters beyond simple circumference
Top-down circular yokes in crochet are especially sensitive because you are shaping across shoulders, chest, upper back, and upper arms all at once. If increase placement is not thoughtfully engineered, a yoke can:
- develop visible spiraling motifs that were not intended,
- shift decorative repeats off center,
- make front and back appear slightly mismatched,
- or flare awkwardly over bust and upper arm transitions.
Symmetric yoke increase systems
Common systems include:
- evenly spaced increase rounds,
- set “increase bands” every few rounds,
- raglan-style increase points adapted into a round,
- or motif-led expansions in lace/fans.
These work, but crochet drift can make centered motifs slide. If your front placket, neckline center, or sleeve divide must stay visually aligned, it can help to treat the yoke as having anchored axes rather than simply an ever-rotating round.
Anchored-axis strategy
Place markers for:
- center front,
- center back,
- left shoulder/sleeve zone,
- right shoulder/sleeve zone.
Instead of spacing increases only from the beginning of round, measure them relative to these axes. Then, if drift starts pulling the fabric visually, nudge increase positions 1 stitch as needed to maintain balance around those landmarks.
This is asymmetry in service of symmetry.
Example: top-down dc yoke
Suppose you begin with 96 dc around the neckline and want to increase 12 sts every increase round.
A conventional round might be:
- dc 7, inc around. (108 sts)
But if the yoke shows visible leftward drift in your fabric, you might place those 12 increases as:
- front sector: increase after 7, 15, 23 sts
- sleeve sector: after 8, 16, 24 sts
- back sector: after 7, 15, 23 sts
- second sleeve sector: after 8, 16, 24 sts
Same total increase count. Slightly different sector spacing. This can visually recenter the yoke and keep the sleeve zones from appearing to rotate.
Sleeves in the round: paired increases don’t have to be rigidly stacked
Sleeve shaping is often taught with two increases every increase round, usually near the underarm “seam.” That is a very useful baseline. But stacked paired increases can create a strong faux seam or drift line.
Standard sleeve increase setup
Example in sc, beginning sleeve circumference 36 sts:
- Increase round: sc to 1 st before marker, inc, slip marker, inc, sc to end. (+2 sts)
Repeat every 4th or 6th round until desired circumference.
This creates a clean expansion line, but in some yarns the paired increases form a pronounced ridge.
Asymmetric sleeve steering options
-
Offset the pair
- One increase 2 sts before marker, one 1 st after marker.
- This softens the seam effect.
-
Alternate offset direction every increase round
- Round A: increase before marker and after marker.
- Round B: shift both increases 1 stitch outward from the marker.
- This disperses bulk.
-
Split one underarm pair into two quarter points
- Useful if you want less visible underarm buildup and more cylindrical shaping.
This matters especially in fitted sleeves, where accumulated increase ridges can read as unintended design lines.
Circular motifs and mandalas: steering between spokes and swirl
Motifs make increase placement highly visible.
Want clean spokes?
Stack increases in consistent locations. Use markers and joined rounds. This emphasizes radial order.
Want a smoother, less polygonal circle?
Stagger increase points. This breaks the spokes and rounds out edges.
Want an intentional spiral motif?
Work continuously and shift increases forward systematically. Pair with hdc or dc for stronger travel lines.
A basic experiment in dc:
- Start with 12 dc in ring. (12)
- Increase 12 sts each round to 72 sts by Round 6.
Version A:
- Standard evenly spaced increase formula each round.
Version B:
- Shift the location of the first increase by 1 stitch every round.
Version B usually develops a much stronger sense of rotational movement even though it remains technically circular.
Joined rounds versus spirals: different steering environments
Torque steering exists in both methods, but you will use it differently.
In continuous spirals
Best for:
- smooth surface texture,
- amigurumi,
- some hats,
- sleeves without visible joins.
Challenges:
- beginning of round drifts,
- increase points can chase the spiral,
- visual symmetry is harder to maintain.
Steering tools:
- offset increases against drift,
- use stable axis markers independent of BOR,
- occasionally reset with a jogless transition if pattern allows.
In joined rounds
Best for:
- motifs,
- visible pattern repeats,
- yokes needing centered symmetry,
- garments where alignment matters.
Challenges:
- seam or join jog,
- turning chains may distort counts or visuals,
- stacked increases can look rigid.
Steering tools:
- stagger increase points round to round,
- shift join placement if pattern permits,
- replace turning chains with standing stitches where appropriate.
Stitch-specific behavior: sc, hdc, dc, and taller stitches
Single crochet
- Typical increase rate for flat circle: 6 sts per round
- Good for hats, toys, dense sleeves, baskets, fitted crowns
- Drift may be subtle but cumulative
- Staggered increases are often enough to smooth out hexagon tendencies
Common issue:
- Crown looks six-sided instead of round
Fix:
- Offset increase points every other round or work partial offsets, such as beginning one round with half the spacing before the first increase.
Half double crochet
- Typical increase rate for flat circle: 8 sts per round
- Useful for hats and yokes with a little more drape
- Can show a strong rope-like spiral in continuous rounds
Common issue:
- Yoke appears to twist visually even when stitch counts are correct
Fix:
- Anchor increases to sector markers instead of relying only on repeated arithmetic from BOR.
Double crochet
- Typical increase rate for flat circle: 12 sts per round
- Very common in yokes, mandalas, lacy hats
- Tall enough that drift and stacking become highly visible
Common issue:
- Strong spoke lines or “wagon wheel” effect
Fix:
- Shift increase placement by 1–2 sts in alternating sectors from round to round.
Taller stitches
- Increase rates vary by fabric goal
- Excellent for dramatic flare, but less forgiving visually
- Small asymmetries become more visible
Tip:
- Swatch before committing to a full garment yoke.
Yarn weight and hook recommendations for testing and application
To really understand this technique, swatch in yarns that let you see the structure.
Best practice swatching yarns
- DK weight + 4.0–4.5 mm hook: very readable stitch anatomy
- Worsted weight + 5.0–5.5 mm hook: excellent for hat and sleeve experiments
- Sport weight + 3.5–4.0 mm hook: useful for garment yokes where finer drift shows up
Fiber notes
- Smooth wool or wool blend: best for seeing increase lines clearly
- Cotton: reveals geometry sharply; useful for motifs and crowns
- Acrylic: practical for testing, though loft can vary widely
- Haloed yarns: mohair, alpaca halo, fuzzy blends can mask subtle steering effects
If your goal is precision shaping, begin with smooth plied yarn. Once you know your preferred increase strategy, you can transfer it to more textured yarns.
Step-by-step: steering a smoother beanie crown in sc
Here is a concrete hat-crown method using asymmetric increase placement to reduce visible spokes while keeping the math familiar.
Materials
- Worsted weight yarn, about 80–120 g depending on size
- Hook: 5.0 mm/H or size needed for gauge
- Stitch marker
Target gauge
- Approximately 14–16 sc per 4 in/10 cm
- Approximately 16–18 rounds per 4 in/10 cm
Crown setup
For an average adult beanie in sc, many crocheters aim for a crown diameter around 6.5–7 in / 16.5–18 cm before working even, depending on fit and yarn behavior.
Crown instructions
- Rnd 1: 6 sc in magic ring. (6 sts)
- Rnd 2: inc in each st around. (12 sts)
- Rnd 3: sc 1, inc around. (18 sts)
- Rnd 4: sc 1, inc, sc 2 around, sc 1. (24 sts)
- Rnd 5: sc 2, inc, sc 2 around. (30 sts)
- Rnd 6: sc 2, inc, sc 4 around, sc 2. (36 sts)
- Rnd 7: sc 5, inc around. (42 sts)
- Rnd 8: sc 3, inc, sc 6 around, sc 3. (48 sts)
- Rnd 9: sc 3, inc, sc 4 around. (54 sts)
- Rnd 10: sc 4, inc, sc 8 around, sc 4. (60 sts)
Notice that we are not simply stacking each increase at the end of a fixed repeat. Some rounds begin with a partial lead-in. Some distribute the increase near the middle of a segment. The total count is still 6 added stitches per round.
Continue or stop increasing
Measure after blocking or after letting the fabric relax naturally.
- For a close-fitting adult hat, stop around 60–66 sts in this gauge if crown diameter is correct.
- For looser fit or larger size, continue:
- Rnd 11: 66 sts
- Rnd 12: 72 sts
Work even
Once desired crown diameter is reached, work 1 sc in each st around until hat length from crown center measures desired total.
Typical finished lengths:
- Child: 7.5–8.5 in / 19–21.5 cm
- Teen/small adult: 8.5–9 in / 21.5–23 cm
- Adult: 9–10.5 in / 23–26.5 cm
Step-by-step: engineering a balanced dc yoke with anchored sectors
This is a planning method more than a one-size-fits-all pattern, but it is very usable.
Materials
- Sport or DK yarn for clear drape in garments
- Hook appropriate to gauge, often 3.75–4.5 mm
- 4 sector markers + 1 BOR marker
Setup example
Begin with 96 dc evenly around neckline in joined rounds.
Place markers:
- Marker 1: center front
- Marker 2: right sleeve zone
- Marker 3: center back
- Marker 4: left sleeve zone
For simplicity, imagine four sectors of 24 sts each.
Increase round goal
Add 12 sts on increase rounds.
Standard version
- Increase 3 times per sector, evenly spaced.
Steering version
If your fabric drifts and throws the front off-center:
- Front and back sectors: place increases after sts 7, 15, 23
- Sleeve sectors: place increases after sts 8, 16, 24
Next increase round, reverse or adjust if needed:
- Front and back: after 8, 16, 24
- Sleeves: after 7, 15, 23
This tiny asymmetry prevents all sectors from visually rotating together. It is particularly helpful with textured yokes where increase rounds need to vanish into the pattern.
Troubleshooting common problems
Problem: My hat crown forms a noticeable spiral line
Possible causes:
- Continuous spiral rounds in hdc or dc
- Increase points consistently following round travel
- Strong yarn twist or firm gauge
Fixes:
- Shift increase points opposite the visible spiral by 1 stitch every other round
- Try joined rounds for the crown only, then transition to spiral if desired
- Use a slightly larger hook to reduce harsh line definition
Problem: My flat circle turns hexagonal or polygonal
Possible causes:
- Increases stacked in fixed radial positions
- Tight tension in sc or dc
Fixes:
- Stagger increases round to round
- Begin selected rounds with half the spacing before the first increase
- Block lightly to assess true shape before changing math drastically
Problem: My yoke front no longer feels centered
Possible causes:
- Beginning-of-round migration dictating increase logic
- Decorative pattern repeat fighting the crochet slant
Fixes:
- Mark center front and back independently of BOR
- Redistribute increases relative to garment axes, not just arithmetic repeats
- If needed, place one sector’s increase 1 st later and the opposite sector’s 1 st earlier
Problem: Sleeve increases create a ridge under the arm
Possible causes:
- Both increases stacked at exactly the same seam-adjacent spots every time
- Dense gauge emphasizing bulk
Fixes:
- Offset one increase to either side of marker
- Alternate the offset round to round
- Spread increase pair across a 4–6 st underarm zone
Problem: My crown is too pointy or too flat even though counts are “correct”
Possible causes:
- Increase frequency inappropriate for stitch height
- Increase placement causing local clustering or over-dispersion
- Gauge differing from intended formula
Fixes:
- First verify gauge and crown diameter targets
- Then assess whether increases are too concentrated in recurring zones
- Redistribute more evenly for flatter shaping, or cluster slightly for more dome height
Common mistakes when learning asymmetric placement
1. Changing too many variables at once
If you alter stitch type, hook size, increase count, and placement all in one sample, you will not know what caused the result.
Fix: Keep count and gauge as stable as possible; change only placement.
2. Forgetting to track true stitch counts
Asymmetric does not mean casual. It is still easy to lose a stitch when the repeat is less regular.
Fix: Use markers generously and count every round.
3. Steering by beginning of round instead of by the fabric
The BOR marker is useful, but not sacred. If the fabric is visually drifting, responding only to BOR can worsen the problem.
Fix: Read the columns and surface lines of the fabric itself.
4. Overcorrecting
A shift of 2–3 stitches every round can create a new visible spiral in the opposite direction.
Fix: Start with subtle changes: 1 stitch offset every other or every third round.
5. Assuming everyone’s crochet will behave the same
Your handedness, tension, and yarn choice matter.
Fix: Sample your own fabric. Torque steering is empirical.
Deliberate variations to try
Variation 1: The anti-spoke flat circle
Goal: smoother circles for appliqué, coasters, bag bases.
Method:
- Maintain standard increase count for the stitch used.
- Shift first increase location by half a repeat every other round.
Best with:
- sc or dc in cotton.
Variation 2: The controlled spiral crown
Goal: emphasize elegant swirl in a beret or textured hat.
Method:
- Work continuous rounds.
- Move increase placement forward 1 stitch each round.
- Use hdc or dc to make the swirl more visible.
Best with:
- smooth wool or wool-blend yarn.
Variation 3: The anchored garment yoke
Goal: keep front/back symmetry in top-down garments.
Method:
- Use axis markers at CF, CB, and sleeves.
- Alternate sector-specific increase offsets to compensate for drift.
Best with:
- joined dc or hdc rounds in garment yarns.
Variation 4: Diffused sleeve shaping
Goal: reduce visible underarm seam lines.
Method:
- Instead of stacking 2 increases at one seam marker, spread them within a 4–8 stitch underarm zone.
- Alternate exact positions on successive increase rounds.
Best with:
- fitted sleeves in sc, hdc, or linked dc.
Variation 5: Crown profiling by sector bias
Goal: subtly alter silhouette.
Method:
- Keep total increases constant but place some sectors slightly closer together and others farther apart.
- Use cautiously and sample first.
Best with:
- fashion hats, sculptural work, experimental forms.
How yarn twist, stitch anatomy, and handedness interact
This is where advanced crocheters can really refine their shaping.
Yarn twist
A high-twist yarn often sharpens line definition. If your increase rays or spirals look too strong, a softer-spun yarn may produce a calmer surface using the same placement plan.
Stitch anatomy
The top loops of crochet do not sit directly above the center of the stitch below in a perfectly vertical way. Increases magnify this offset because two stitches are emerging from one anchor point. Repeating that offset in a fixed direction creates a visual lane. Dispersing it breaks up the lane.
Handedness
Left-handed crocheters often need the mirror logic of right-handed instructions when describing “move increases forward/backward” in visual terms. Rather than memorizing direction labels, observe your own swatch and adjust opposite the visible drift.
That will always be more reliable than a universal directional rule.
A useful design mindset: think in sectors, not only repeats
One of the biggest leaps in shaping skill comes when you stop seeing increase rounds solely as repeating formulas like sc 8, inc around. Those formulas are useful, but they are abstractions.
In actual design work, it is often better to think in:
- sectors for circles and crowns,
- axes for yokes,
- zones for sleeves,
- travel lines for motifs.
Then ask:
- Where is the fabric naturally pulling?
- Where do I need visual stillness?
- Where can I allow motion?
- Do I want shaping to show or disappear?
That is the difference between simply following increase math and engineering the look of the fabric.
Takeaways
The headline lesson is simple: increase placement is a shaping tool, not just a bookkeeping detail.
If you remember only a few things, let them be these:
- In crochet worked in the round, stitches slant and rounds drift.
- The same total increase count can produce different visual and structural results depending on placement.
- Asymmetric increase placement can either amplify or counteract spiral drift.
- Staggered increases usually soften spokes and polygon edges.
- Anchored sector markers help keep yokes and garments visually centered.
- Sleeve increases do not have to stack rigidly at one faux seam.
- Crown height and flare are influenced not only by increase frequency but by how those increases are distributed.
- Yarn twist, hook size, stitch choice, and handedness all affect the outcome.
Most importantly, this is a technique best learned with swatches in your own hands. Make a standard crown. Make a shifted crown. Compare them in good light. Once you start seeing torque steering, you will notice it everywhere—in hats that fit better, yokes that sit straighter, circles that lie smoother, and sleeves that shape more gracefully.
That is the satisfying part of advanced crochet: the math stays useful, but the fabric starts talking back. When you learn to listen, and then place your increases accordingly, you gain a whole new level of control.