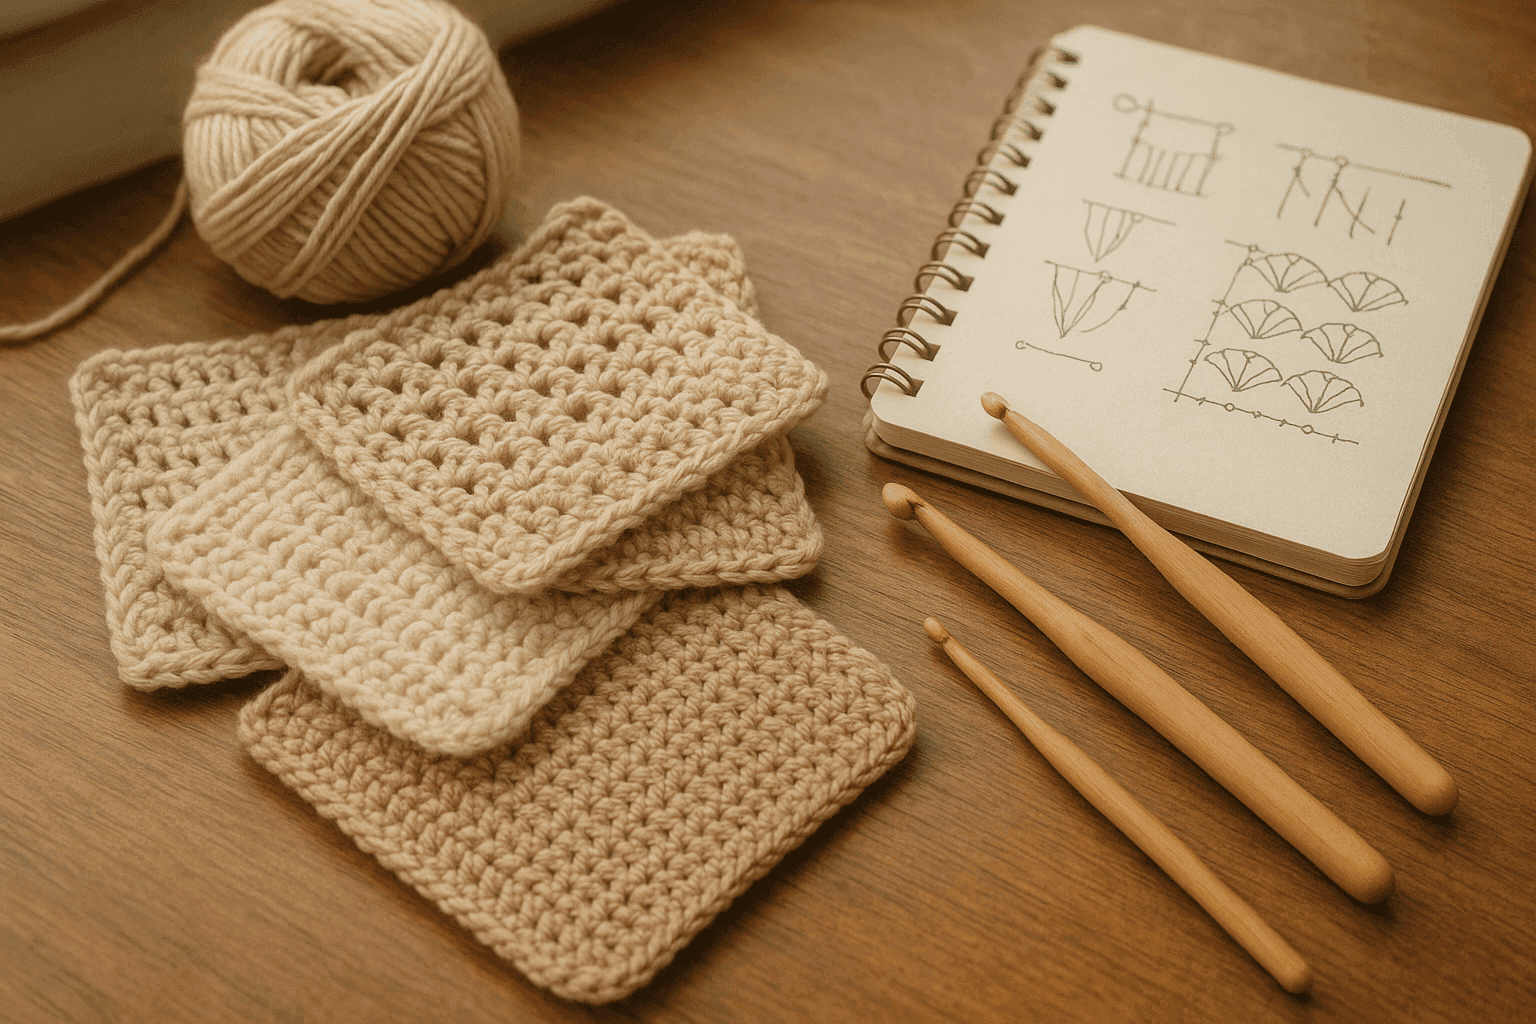
There is a particular kind of crochet frustration that sneaks up on even very experienced makers: you set down a beautifully even swatch, admire your stitch definition, and then notice that the whole fabric seems to lean. A ribbed section slants. A panel twists after a few inches. A tube wants to spiral whether you invited it to or not. Maybe you wash it, steam it, block it harder, pin it flatter, and for a while it behaves. Then the piece dries, relaxes, gets worn, or is seamed into a garment—and the skew comes right back.
Most of us are taught to treat crochet twist as a finishing problem. Steam it. Wet block it. Add more pins. Stretch the opposite direction. Sometimes that helps, especially when the issue is mild and the fiber is cooperative. But when twist is structural—when it is built into the stitch path, the row sequence, the yarn ply, or the shaping logic—finishing can only do so much. The better approach is to design the fabric so torque is canceled as it forms, rather than corrected after the fact.
That is what crochet twist neutralization is really about: understanding why a fabric accumulates directional bias, and then intentionally building balance into the fabric through alternating row logic, mirrored stitch paths, loop-entry choices, ply-aware yarn selection, and construction methods that distribute or cancel skew.
If that sounds technical, it is—but it is also wonderfully practical. Once you understand where the twist comes from, you can predict it, swatch for it, and change it. You can decide whether a lean is harmless, decorative, or worth eliminating. You can modify a pattern before you commit to a sweater quantity. You can build flatter blankets, straighter scarves, squarer panels, and more obedient garment pieces without relying on heroic blocking.
Why crochet fabric twists in the first place
Crochet stitches are not neutral little columns. Each stitch is a path. Your hook enters at a certain angle, catches yarn in a specific direction, draws loops through, and wraps new yarn around an existing structure. Repeat that thousands of times and the fabric records those repeated motions.
Twist or skew usually comes from one or more of these sources:
- Directional stitch architecture: many crochet stitches naturally lean because the top loops and post structure are asymmetrical.
- Row or round repetition: if every row builds bias in the same direction, torque accumulates.
- Working in continuous spirals: rounds with no turn create a relentlessly one-directional stitch path.
- Yarn ply direction: the yarn itself may tighten or relax under your working motion, increasing bias.
- Fiber behavior: some fibers spring back, some relax, some bloom, and some remember the twist strongly.
- Uneven increases and decreases: shaping concentrated on one side or worked with non-mirrored methods can introduce directional drag.
- Loop-entry habits: always working through one loop orientation or using front/back loop methods in only one direction can magnify lean.
- Colorwork floats and carrying methods: stranded sections can pull one way while textured stitches pull another.
- Finishing and seaming choices: stretching or joining against the grain can lock in distortion.
The key idea is this: skew is cumulative. If a fabric has ten small bias decisions in the same direction, they add up. If you intentionally alternate, reverse, or mirror some of those decisions, the same energy can cancel instead.
The concept of balanced stitch paths
A balanced fabric is not one where every single stitch is symmetrical. Crochet rarely works that way. A balanced fabric is one where the directional forces average out over a useful span of fabric.
That span might be:
- 2 rows in a flat swatch
- 4 rounds in a tube
- 1 motif pair worked as mirror images
- 1 garment front and back assembled in opposite orientation
- 1 textured repeat with paired left- and right-leaning decreases
Think of it like cabling in knitting or grain balancing in sewing. You are not eliminating structure; you are distributing it so the finished piece remains aligned.
In practical crochet terms, you neutralize twist by using techniques such as:
- Turning every row rather than always working from the same side
- Alternating stitch families or loop-entry methods on consecutive rows
- Mirroring increases and decreases so left and right shaping balance
- Reversing the direction of special stitches where possible
- Splitting a project into panels and joining them strategically
- Choosing yarns whose ply and fiber behavior do not intensify the stitch bias
- Blocking to settle rather than force the fabric
A closer look at alternating row logic
Alternating row logic is one of the simplest and most powerful tools for neutralization.
When you work flat and turn at the end of each row, the stitch path reverses direction. That alone often reduces skew because the hook approaches the next row from the opposite side. In many fabrics, especially those based on single crochet, half double crochet, and basic textured repeats, this reversal helps cancel the lean built into the previous row.
But not all turning systems are equally balanced.
Common flat-row systems
-
Turn every row, work standard stitches normally
This is the default for most flat crochet and often the most balanced choice. -
Turn every row, but use directional texture identically on both sides
Better than not turning, but some post stitches, loop-only methods, and front-facing decorative stitches may still bias the fabric. -
Do not turn; cut yarn and restart each row from the same edge
This keeps the right side facing but also repeats the same directional stitch path. It can increase skew in some fabrics. -
Turn and intentionally mirror the stitch action
This is more advanced and especially helpful in textured or sculptural work.
Where alternating rows matter most
Alternating row logic matters most when:
- the stitch is short and compact, like single crochet
- the yarn has a lively twist
- the fabric is dense
- the swatch is wide enough for lean to become visible
- the project must hang straight, like scarves, cardigan bands, and curtain panels
Example swatch protocol: single crochet bias check
Make two swatches using the same yarn and hook.
Yarn: worsted weight (#4) smooth plied yarn
Hook: 5.0 mm (H/8)
Foundation: ch 31
Swatch A: worked flat, turning every row
- Row 1: sc in 2nd ch from hook and in each ch across. (30 sc)
- Ch 1, turn.
- Rows 2–26: sc across. (30 sc each row)
Swatch B: right-side-only rows by cutting and restarting
- Row 1: same as A. (30 sc)
- Cut yarn.
- Rejoin at right edge for each new row; sc across each row from right to left for 26 rows total. (30 sc each row)
Wet block both lightly, allowing them to dry flat without stretching. Measure:
- width at top, middle, bottom
- diagonal shift from lower left corner to upper left corner
- visible column lean
In many yarns, Swatch B will show more directional drift because the same stitch path is repeated from the same visual side each time.
Mirrored stitch paths: the next level of control
Turning rows helps, but some fabrics still skew because the stitch itself carries a strong directional identity. This is where mirrored stitch paths become useful.
A mirrored stitch path means that you deliberately pair a left-leaning action with a right-leaning action over a defined repeat.
Common places to mirror
- increases at opposite sides of a panel
- decreases in shaping lines
- shell or fan placement
- crossed stitches
- post-stitch cables
- paired texture columns
- filet or mesh motifs with directional eyelets
Mirrored decreases
Standard decreases can pull fabric in a direction depending on where the loops are drawn together.
For example, in single crochet shaping:
- a conventional sc2tog may visually pull one way
- an alternative decrease placement on the opposite side may look cleaner and balance the line
When shaping neckline edges, raglan lines, sleeve caps, and wedge motifs, try to pair decrease methods so the right edge and left edge are true mirrors rather than identical instructions repeated on opposite sides.
That sounds subtle, but it matters. “Repeat the same decrease at each edge” often produces non-matching directional structure. “Work mirrored decreases” produces more symmetrical behavior.
Mirrored increases
Likewise, increases can spread asymmetrically.
If you place 2 stitches in the first stitch and 2 stitches in the last stitch of every row, that is mathematically balanced in count, but not always structurally balanced in path. You may get cleaner results by:
- placing edge increases one stitch in from the edge on both sides
- using stacked increases mirrored around a center line
- balancing increase rows with plain rows
- alternating the order of increase placement in textured patterns
Simple mirrored increase swatch
Yarn: DK weight (#3)
Hook: 4.5 mm
Foundation: ch 21
Row 1: hdc in 3rd ch from hook and across. (20 hdc)
Rows 2–16, Version A: ch 2, turn, 2 hdc in first st, hdc across to last st, 2 hdc in last st. Increase 2 sts per row.
Counts: Row 2 = 22, Row 3 = 24 ... Row 16 = 50
Rows 2–16, Version B: ch 2, turn, hdc in first st, 2 hdc in next st, hdc across to last 2 sts, 2 hdc in next st, hdc in last st. Increase 2 sts per row.
Counts: same as Version A
Version B often gives a more stable edge because the increase energy is not stacked directly into the turning-edge structure. That can reduce edge flare and apparent skew.
Reversible loop-entry systems
Loop-entry decisions are another quiet source of bias. If you consistently work through front loop only, back loop only, or third loop in a way that always favors one visual side, you may create a fabric with a built-in twist or ridge pull.
Why loop choice matters
The top of a crochet stitch contains two loops, front and back, each oriented in relation to the working side. Entering one loop consistently shifts where tension is anchored. Across many rows, that can influence the direction in which the fabric wants to settle.
Strategies for balance
- Alternate front-loop and back-loop rows in rib-like textures.
- Use paired reversible textures rather than one-sided ridging across wide panels.
- If working flat, check whether the “same instruction” on turned rows is truly creating a mirrored structure visually.
- In the round, break up long sections of one-loop-only fabric with reset rounds worked through both loops.
Example: balanced rib illusion swatch
Yarn: aran weight (#4) wool blend
Hook: 5.5 mm
Foundation: ch 25
Row 1: sc in 2nd ch from hook and across. (24 sc)
Version A: all BLO
- Rows 2–20: ch 1, turn, sc blo across. (24 sc)
Version B: alternating BLO/FLO reset
- Row 2: ch 1, turn, sc blo across. (24)
- Row 3: ch 1, turn, sc in both loops across. (24)
- Row 4: ch 1, turn, sc flo across. (24)
- Row 5: ch 1, turn, sc in both loops across. (24)
- Repeat Rows 2–5 through Row 20.
Version B usually holds a straighter profile while preserving a ridged effect because the loop-entry bias is distributed rather than repeated in one direction.
Ply direction and yarn structure: the part many crocheters overlook
Sometimes the fabric is not only responding to the stitch; it is responding to the yarn’s own twist.
Most commercial yarns are plied in either an S or Z structure, and your crochet motion may either tighten that structure or let it relax. This can change stitch definition, drape, split resistance, and skew.
You do not need to become a spinning expert to use this information. You just need to observe.
Signs the yarn is contributing to skew
- the swatch curls or leans even in plain stitches with careful counting
- your yarn tightens or kinks as you work
- the strand untwists and blooms unusually while stitching
- one crochet hook style seems to worsen splitting and bias
- the same pattern behaves very differently in a different yarn category
Yarn structures that often behave differently
- Tightly plied smooth yarns: excellent stitch definition, but can show directional bias clearly.
- Lofty woolen-spun yarns: often more forgiving, sometimes less sharp in visible skew because fibers bloom and settle.
- Singles or low-ply yarns: may flatten or bias in softer ways, but can distort under dense stitch patterns.
- Cabled yarns: often more stable, though sometimes springy and firm.
- Plant fibers like cotton and linen blends: can hold shape strongly and reveal skew clearly because they have less elastic recovery.
- Acrylic: varies widely; some relax nicely, some lock into the worked structure until steamed.
Practical ply-aware test
Take your intended yarn and make three mini swatches:
Yarn: project yarn
Hooks: recommended size, one size smaller, one size larger
Foundation: ch 19
Swatch 1: 12 rows sc
Swatch 2: 12 rows hdc
Swatch 3: 12 rows dc mesh (dc, ch 1, skip 1)
Record:
- whether the strand kinks while working
- whether stitches look ropey or flattened
- whether the fabric leans after resting 24 hours
- whether washing relaxes or worsens bias
A yarn that behaves beautifully in open dc mesh may skew badly in dense sc. That does not mean the yarn is wrong; it means the stitch path and ply are not ideal partners for that use.
Flat fabric, tubes, panels, and motifs all accumulate torque differently
Twist neutralization changes depending on construction.
Flat fabric
Flat fabric has the easiest opportunity for cancellation because you can turn the work and mirror shaping.
Best practices for flat fabric
- Turn every row unless you have a visual reason not to.
- Build repeats over 2 or 4 rows rather than 1 if the texture is strongly directional.
- Mirror edge shaping.
- Place high-torque textures away from unsupported edges.
- Add a balancing border only after the main fabric has relaxed.
Good candidates for row balancing
- scarves n- blanket panels
- garment fronts and backs
- shawl bodies worked in rows
- placemats and runners
Tubes worked in the round
Tubes are where twist becomes especially stubborn because the stitch path keeps traveling in one continuous direction. That is why hats, sleeves, baskets, and body tubes can develop a visible spiral even when the stitch count is correct.
Options for neutralizing in tubes
-
Joined rounds with turning
Join each round, turn, and work the next round in the opposite direction. This can dramatically reduce spiral bias. -
Joined rounds without turning
Better for some visual patterns, but still directional. -
Continuous spiral with periodic reset rounds
Useful when you want no seam, but less effective than turning rounds. -
Tube made as a flat panel and seamed
Often the straightest option for garments if the stitch pattern is bias-prone.
Round-turning swatch for tubes
Yarn: sport weight (#2)
Hook: 4.0 mm
Foundation: ch 40, join carefully without twisting
Version A: continuous rounds
- Rnd 1: sc around. (40)
- Place marker, do not join.
- Rnds 2–20: sc around. (40)
Version B: joined and turned rounds
- Rnd 1: sc around, join with sl st to first sc. (40)
- Ch 1, turn.
- Rnd 2: sc around, join. (40)
- Ch 1, turn.
- Repeat through Rnd 20.
Version B often hangs straighter and shows less spiral drift, though the texture and seam line differ.
When not to fight the spiral
Sometimes the spiral is part of the appeal. Amigurumi, rope baskets, and certain beanies often use the natural flow of continuous rounds successfully. Neutralization is most valuable when alignment matters more than seamlessness.
Panels and strategic seaming
One of the most underused anti-skew methods is simply refusing to force a problematic stitch into a seamless construction.
If a sweater body twists in the round, consider:
- front and back panels worked flat and seamed
- side panels that interrupt the directional bias
- faux seams that anchor vertical alignment
- shoulder reinforcement that keeps the fabric from rotating on the body
A seam is not a failure. A well-placed seam is a structural tool.
Why seams help
- They interrupt continuous torque.
- They anchor grain lines.
- They allow mirrored panel placement.
- They distribute garment weight more evenly.
- They prevent soft fibers from rotating under wear.
For home textiles, joining motifs or strips can do the same thing. A large blanket worked as one giant directional fabric may skew more than one assembled from balanced sections.
Motifs and modular construction
Motifs can either neutralize twist beautifully or compound it, depending on how they are arranged.
Motif advantages
- Shorter rounds reduce cumulative drift.
- Rotation during joining can balance directional stitch paths.
- Mirrored motif placement can cancel visual lean.
Watch for these issues
- all motifs joined in the same orientation when each contains a directional spiral
- petal or shell motifs with one dominant slant repeated across a grid
- square motifs that are not truly square until aggressively blocked
Better motif planning
- Alternate motif orientation in a checkerboard layout.
- Rotate every second motif by 90 or 180 degrees.
- Test a joined group of 4 motifs before committing.
- Use a join that does not overtighten one axis.
Colorwork interactions and hidden torque
Colorwork introduces another layer because floats, carried yarn, and color changes can add sideways tension.
Situations that increase skew in colorwork
- carrying one color too tightly across the back
- using a denser contrast color with a loftier main color
- working tapestry crochet in tight single crochet rounds
- long repeated motifs that pull in one horizontal direction
- changing color at the same point every row without considering structure
Ways to balance colorwork
- Swatch in the actual color sequence, not just one color.
- Compare carried-float tension in opposite directions if working flat.
- In tapestry crochet, size up the hook if the fabric narrows and twists.
- Break up long directional repeats with neutral spacer rounds or rows.
- If possible, mirror the motif chart across the center of a panel.
Simple tapestry bias test
Yarn: two colors of the same base yarn, DK weight
Hook: 4.5 mm
Foundation: ch 25
Work 20 rows of single crochet tapestry with a 6-stitch color block shifting one stitch to the right every row. Then work a second swatch shifting one stitch to the left every row. If one direction distorts more than the other, your carrying tension and stitch path are interacting directionally.
That information is gold when editing charts for bags, cushions, and sweater yokes.
Step-by-step method for diagnosing and neutralizing twist in a project
Here is the practical workflow I recommend when a fabric matters enough to deserve precision.
Step 1: Identify the project’s alignment priority
Ask what matters most:
- perfectly straight drape
- square finished dimensions
- stable edges for seaming
- balanced shaping lines
- no visible seam
- reversible appearance
You may not be able to maximize every quality at once. For example, a seam-free spiral tube may not be the straightest possible tube.
Step 2: Swatch at a useful size
A tiny 4-inch swatch often misses directional problems. Make a larger one.
Recommended anti-skew swatch size
- Flat fabric: at least 30 stitches wide x 24 rows tall
- Round tube: at least 40 stitches around x 20 rounds tall
- Motif: at least 4 motifs joined together
- Colorwork: at least one full chart repeat plus 2 edge repeats
Measure before and after washing. Let the swatch rest for 24 hours. Hang it if the final project will hang.
Step 3: Track stitch counts and edge integrity
Skew is not always true torque. Sometimes it is counting drift or edge inconsistency pretending to be bias.
Check:
- are you truly maintaining the same stitch count every row?
- are turning chains being mistaken for stitches or ignored inconsistently?
- are the first and last stitches tight enough to shorten one edge?
- are foundation chains overly tight compared to worked rows?
Example edge count checklist
For a 30-sc row swatch:
- Row 1 = 30 sc
- Every row after = 30 sc exactly
- Mark first and last stitch of every row for the first 10 rows
- If width changes by more than 5% before blocking, examine tension before blaming yarn torque
Step 4: Compare three variables only
When troubleshooting, do not change everything at once. Test three separate swatches:
- same yarn, different row logic
- same row logic, different hook size
- same hook and row logic, different yarn
This isolates the true cause.
Step 5: Introduce balancing logic
Choose the least disruptive correction first.
Try in this order:
- turn rows or rounds
- mirror shaping
- reset loop entry every other row or round
- shift from tube to panel construction
- adjust hook size for a less torque-prone fabric density
- change yarn structure
Step 6: Re-swatch and wash again
Bias that disappears only under aggressive blocking is still bias. Aim for a fabric that lies reasonably straight after ordinary laundering and drying.
Pattern modification strategies
Many crocheters can diagnose twist but are less sure how to alter a published pattern without wrecking the design. Here are reliable modification approaches.
Convert continuous rounds to joined-and-turned rounds
Best for:
- hats with visible spiral drift
- sleeves with skewed texture columns
- cowl patterns where alignment matters
You may need to:
- move the round-start seam line
- replace a spiral increase formula with joined-round placement
- adjust decorative stitch placement by 1 stitch at joins
Convert in-the-round garments to flat panels
Best for:
- pullovers with side twist
- cardigans with drifting fronts
- tunics with dense stitch patterns
You will need:
- 1 selvage stitch at each seam edge if desired
- matched row counts between front and back
- seaming method that does not stretch the edge
Mirror shaping directions explicitly
Instead of writing:
- “dec 1 st at each edge every other row 8 times”
Write and work:
- right-side rows: left edge uses method A, right edge uses mirrored method B
- wrong-side rows: maintain the mirror visually, not just verbally
Add balancing rows
In textured fabric, inserting a plain row every 2–4 rows can reset distortion.
Example:
- Rows 1–2: crossed dc texture
- Row 3: plain dc
- Rows 4–5: crossed dc texture reversed or mirrored
- Row 6: plain dc
Relocate shaping away from edges
Edge shaping amplifies distortion because turning, edge tension, and shaping all meet in the same place. Moving increases or decreases one stitch inward often improves stability.
Common mistakes and how to fix them
Mistake 1: Assuming blocking will solve structural skew
What happens: the project looks straight only while pinned.
Fix: redesign the stitch path. Turn rows, mirror shaping, or change construction.
Mistake 2: Testing only in a tiny swatch
What happens: bias appears after 8 inches in the real project.
Fix: swatch larger and let it rest before measuring.
Mistake 3: Misreading tension problems as yarn-twist problems
What happens: one edge pulls in because turning chains or edge stitches are inconsistent.
Fix: mark edges, count every row, and compare top/middle/bottom widths.
Mistake 4: Using non-mirrored decreases on both sides of shaping
What happens: sleeve or neckline lines appear mismatched or panel rotates.
Fix: choose left- and right-side decrease methods intentionally.
Mistake 5: Forcing dense single crochet in a spiral tube when straight columns matter
What happens: obvious rotation in hats, bags, sleeves.
Fix: use joined-and-turned rounds or seam a panel.
Mistake 6: Ignoring yarn behavior
What happens: pattern works in wool but skews in cotton.
Fix: swatch in the actual fiber and adjust hook size or construction.
Mistake 7: Making colorwork corrections too late
What happens: motif panel narrows and drifts after several repeats.
Fix: test the chart with carried yarn before beginning the project proper.
Finishing methods that preserve alignment
Finishing should support structural balance, not fight against it.
Washing and blocking
Use blocking to settle stitches into their intended relationship.
- Wool and wool blends: wet block gently, pat into shape, avoid overstretching torque out of the fabric.
- Cotton: block to measurements and let dry completely supported; cotton can hold both good and bad alignment strongly.
- Acrylic: steam carefully to relax surface memory, but do not flatten texture unless that is intentional.
- Linen blends: expect softening after laundering; recheck gauge and hang behavior.
Pinning strategy
Instead of stretching corners apart aggressively, pin:
- center points first
- grain or column lines second
- edges last
This helps maintain the fabric’s internal alignment.
Seaming
Use seams as stabilizers.
- Mattress-style joins or neat slip-stitch seams can anchor vertical edges.
- Do not ease significantly skewed edges together without correcting the source; that only redistributes distortion.
- For garments, seam after blocking the individual panels so each piece is aligned before assembly.
Borders and edgings
Borders can either help or worsen skew.
Helpful borders:
- balanced, moderate-density rounds
- edge treatments with equal distribution on all sides
- plain setup round before decorative edging
Risky borders:
- very tight crab stitch on only one edge
- heavy shells on a fabric already pulling sideways
- post-stitch bands worked onto unstable edges without a stabilizing setup row
Suggested stitch and hook pairings for reduced skew
These are not absolute rules, but they are useful starting points.
Dense utility fabric
- Stitch: sc or linked sc with turned rows
- Yarn: wool blend or stable acrylic, worsted weight
- Hook: 5.0–5.5 mm for a firm but not rigid fabric
- Use for: bags with seams, cushion fronts, structured panels
Straight-hanging garments
- Stitch: hdc or dc-based texture with mirrored shaping
- Yarn: DK or sport wool blend, smooth but not overtwisted
- Hook: 0.5 mm larger than the minimum needed for gauge if drape allows
- Use for: cardigans, tops, vests
Home textiles needing square geometry
- Stitch: mesh, block stitch, balanced shells with reset rows
- Yarn: cotton blends or wool blends depending on use
- Hook: enough size to prevent compact torque buildup
- Use for: runners, throws, curtains, table toppers
Variations: different ways to build balanced fabrics
Depending on your style and project, you can apply neutralization in several ways.
Variation 1: The simplest balance system
- work flat
- turn every row
- avoid one-loop textures for long spans
- use a forgiving yarn
This is ideal for beginners to anti-skew thinking.
Variation 2: Structural garment balance
- work fronts and backs separately
- mirror shaping carefully
- seam shoulders and sides
- add bands after blocking
This is often the cleanest approach for wearable pieces.
Variation 3: Reversible texture balance
- alternate texture rows with plain rows
- mirror crossed stitches
- use loop-entry resets
Useful for scarves, wraps, and blankets viewed from both sides.
Variation 4: Motif-based cancellation
- make modular pieces
- rotate motifs during layout
- join in balanced grids
Excellent for afghans, cushions, and statement garments.
Variation 5: Ply-aware substitution
- keep the pattern
- change the yarn to one that shows less torque
- slightly adjust hook size for better relaxation
Sometimes this is the most efficient fix if the design itself is sound.
A practical decision tree
If your crochet fabric twists, ask:
-
Is the stitch count correct?
If no, fix counting and edges first. -
Is the fabric worked in one continuous direction?
If yes, try turning rows or rounds. -
Is the shaping mirrored structurally or only mathematically?
If only mathematically, rewrite shaping. -
Is the yarn tightening or untwisting while you crochet?
If yes, test a different hook size or yarn. -
Does blocking solve it only temporarily?
If yes, the issue is structural. -
Would a seam or modular construction improve alignment?
If yes, consider changing construction.
What to write into your own patterns and notes
If you design patterns—or simply annotate them for yourself—record anti-skew decisions explicitly.
Include notes like:
- “Turn every round to reduce spiral bias.”
- “Left and right decreases are mirrored.”
- “Work setup row through both loops after every 3 BLO rows.”
- “Panel construction chosen to preserve vertical alignment.”
- “Swatch in full color sequence; carrying tension affects width.”
These notes save time the next time you revisit the pattern or substitute yarn.
The real takeaway: design out the torque
The biggest shift is moving from a finishing mindset to a design mindset. If a fabric twists, it is communicating something about the relationship between stitch path, yarn structure, and construction. Instead of trying to overpower that message with blocking, listen to it.
Turn the rows. Mirror the shaping. Reset the loop entry. Change the panel logic. Rotate the motifs. Swatch in the real fiber. Let the yarn tell you what it wants to do, then guide it into a structure where opposing forces balance each other.
That is what experienced makers learn over time: straight fabric is rarely an accident. It is the result of many small, intentional choices that keep torque from accumulating in the first place.
And the encouraging part is that none of this requires perfection. It requires observation. A larger swatch. A willingness to compare two methods instead of assuming all crochet behaves the same. Once you start seeing stitch paths as directional and designable, you gain an entirely new level of control.
You do not have to block harder. You can build smarter.
When your crochet fabric lies square, hangs straight, and keeps its alignment after washing and wear, that is not luck. That is balanced construction doing exactly what you asked it to do.