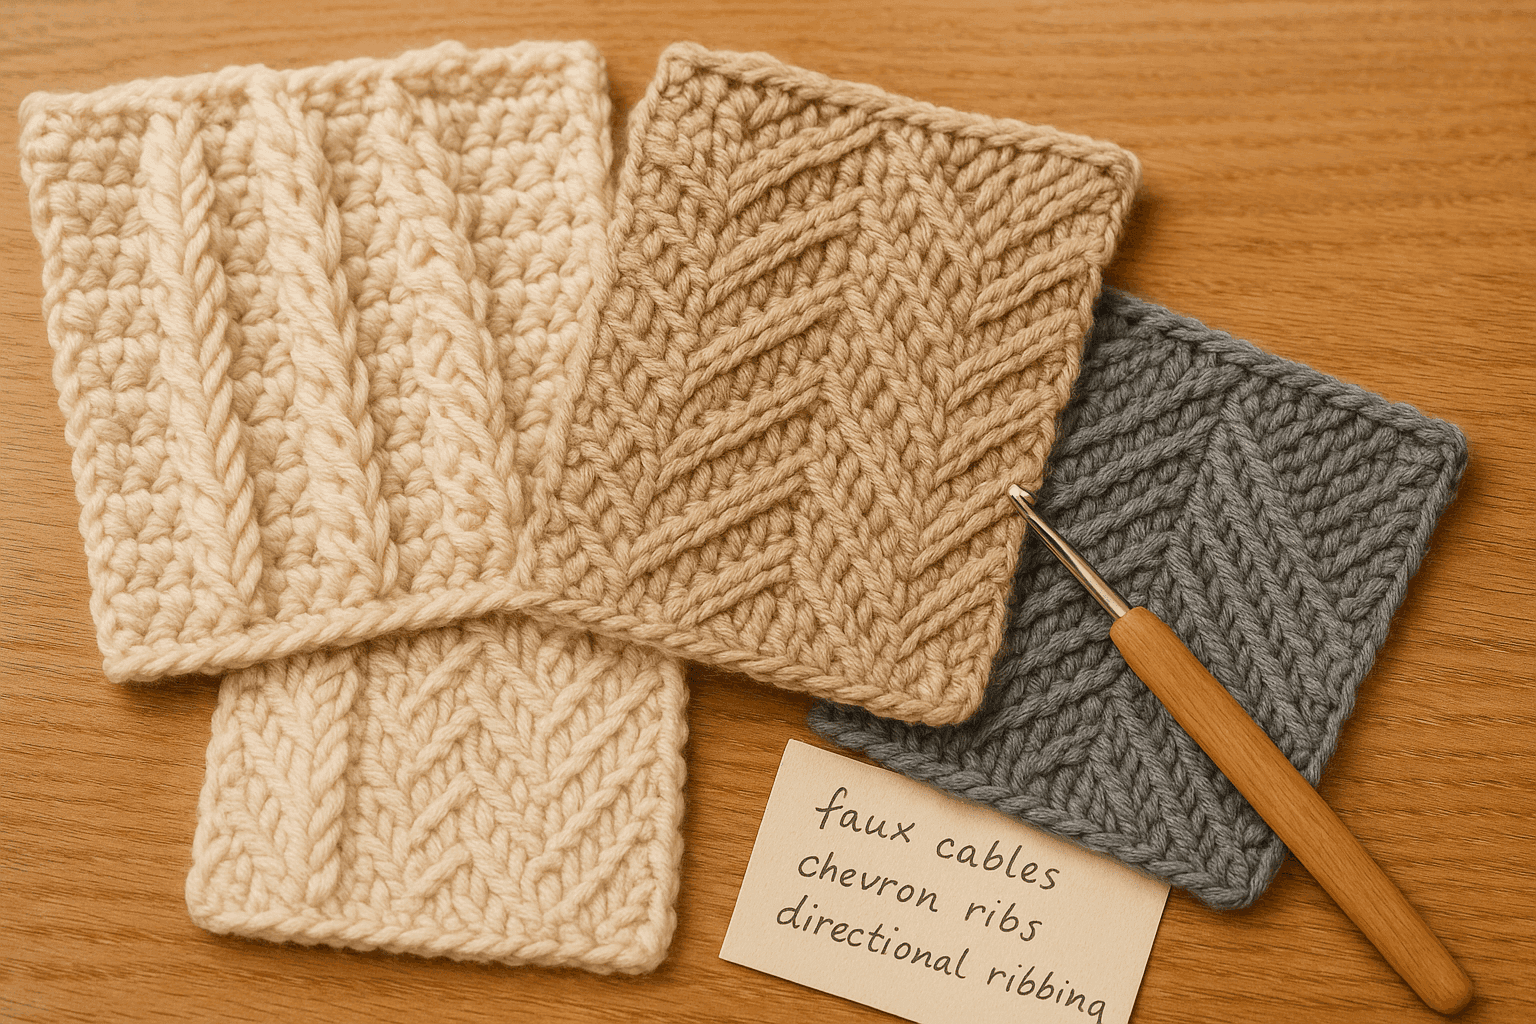
There’s a particular kind of excitement that shows up when a swatch starts behaving differently from what the stitch name would suggest. You think you’re making ribs, and suddenly the columns begin leaning toward each other. You think you’re testing post stitches, and instead you get a fabric that looks gently cabled from both sides without the heavy braid and deep shadow of a classic cable panel. Or you notice that one version of the swatch stretches beautifully around the body while another version, made with the same yarn and hook, seems to resist sideways pull and spring back more cleanly.
That moment is where twist-shift columns become useful. Rather than relying on large crossed stitches or dense front-post cable structures, this approach builds surface movement by changing three quieter variables across vertical columns: where you enter the loop, the angle at which you insert the hook, and the path your stitch travels around or across the post structure below. Those small changes alter how yarn tension stacks through the fabric. The result can be a reversible faux-cable, a chevroning rib, or a fabric with deliberately biased stretch and recovery.
For garment makers, accessory designers, and anyone who enjoys technical swatching, this is a valuable design language. It gives you ways to create texture and movement without adding much thickness. It also produces fabrics that are often more wearable than dramatic post-stitch cables because the cloth stays flatter, layers better, and can be shaped more predictably. If you’ve ever wanted the visual rhythm of cables with the comfort of ribbing—or the control of directional elasticity without resorting to knitting—this is a technique family worth learning deeply.
What twist-shift columns actually are
At its core, a twist-shift column is a vertical line of stitches whose appearance is changed by reassigning loop entry and stitch travel on purpose from row to row or round to round. Instead of always inserting under the same top loops in the same orientation, you selectively target front loop only (FLO), back loop only (BLO), a loop behind the back loop, the horizontal bar, or the post itself, and you may approach that target from an unusual angle. You can also anchor a stitch slightly to the left or right of the column you want to visually emphasize. These strategies create the impression that a column twists, shifts, braids, or leans, even though the actual structure remains much lighter than a true cable crossing.
Three design levers matter most:
- Loop entry: which loop or bar receives the hook.
- Insertion angle: whether the hook approaches straight on, diagonally, or in a crossed path.
- Post path or anchoring path: how the yarn wraps around, in front of, behind, or across the stitch column below.
When those levers are repeated consistently, the eye reads the resulting line as a distinct architectural feature. If you alternate them strategically, you can make mirrored columns, zigzag channels, directional ribs, and resilient fabrics with controlled expansion.
Why this method is different from standard crochet ribbing and cables
Traditional crochet ribbing often relies on BLO rows or alternating front-post/back-post stitches. Both methods are excellent, but each has limitations. BLO ribbing can be very stretchy, yet it tends to form obvious horizontal turning ridges and may torque if used carelessly in shaping. Front-post/back-post ribbing has strong visual definition, but it can become thick, somewhat rigid, and occasionally less reversible than you might want.
Traditional crochet cables, meanwhile, usually depend on layered post stitches crossing over each other. They can be beautiful but often come with bulk, deep relief, and heavier yarn consumption. In garments, especially fitted ones, those properties may not be ideal. A sweater yoke, cuff, hat brim, or close-fitting neckline often benefits more from shallow architectural texture than from high-relief cables.
Twist-shift columns sit between these families. They allow you to:
- Suggest cable movement without stacking bulky post stitches.
- Redirect stretch across the fabric.
- Make columns that are visible on both sides.
- Build chevron effects without lace holes.
- Keep the fabric flatter and more drapey.
- Fine-tune recovery through gauge and fiber choice.
Because the technique relies on subtle routing rather than dramatic overlap, success depends heavily on consistency. A half-size hook change, a different turning method, or one row worked into the wrong loop can noticeably change the column behavior.
The key structural concepts
Before getting to stitch patterns, it helps to understand what your fabric is doing mechanically.
1. Front loop versus back loop targeting
In a standard crochet stitch, the top “V” has two visible loops: front and back. Working into just one of them leaves the other exposed. That exposed loop creates a hinge line. When repeated vertically, those hinge lines stack into ribs.
- FLO often pushes the free back loop behind the working plane, creating one kind of tilt.
- BLO leaves the front loop exposed, often producing a stronger ridge and flexible fold line.
By alternating FLO and BLO across chosen columns, you can make adjacent columns appear to roll toward or away from each other.
2. Crossed insertion angle
Instead of inserting into the next stitch in a straightforward path, you may insert slightly leftward or rightward, or enter a target stitch from a slanted angle while still preserving stitch count. This changes yarn travel and causes the top loops to sit diagonally.
The trick is subtlety. You are not skipping random stitches and making compensating increases and decreases unless the pattern specifically calls for that. In many twist-shift fabrics, the count remains stable because the hook still completes one stitch per target. The visual crossing comes from angle and path, not from dramatic relocation.
3. Staggered anchoring
A stitch can visually belong to one column while physically anchoring into a neighboring column below. This is one of the most powerful tools for faux-cable effects. If column A occasionally anchors into the edge of column B’s territory, and column B returns the favor on the next row or in mirrored sequence, the two columns appear to twist around each other.
4. Recovery and directional stretch
Any time you bias the path of stitches, you are changing how force moves through the fabric. Some versions stretch easily sideways but not vertically. Others expand diagonally. Some recover beautifully if the yarn has elasticity; some bag out if worked too loosely in slippery fiber.
That means yarn and gauge matter just as much as stitch logic.
Best yarns, hook sizes, and gauge expectations
This technique shines when the yarn shows line clearly without excessive halo.
Recommended yarn weights
- DK (category 3): Excellent for wearable swatches and balanced stitch visibility.
- Worsted/aran (category 4): Ideal for learning and for hats, cuffs, and outerwear textures.
- Sport (category 2): Good for finer garments, though the effect will be subtler.
Recommended fibers
- Wool or wool blends: Best overall for memory, recovery, and sculpted columns.
- Wool-acrylic blends: Good balance of stitch definition and washability.
- Cotton blends: Nice for crisp ribs and warm-weather garments, but expect less bounce.
- Superwash wool: Beautiful definition, though sometimes less springy than non-superwash.
- Plant fibers alone: Use with caution for fitted ribs; they can grow and relax over time.
Hook sizes
Start with the hook recommended on the ball band, then test one size smaller and one size larger.
For most swatching:
- Sport: 3.5-4 mm
- DK: 4-4.5 mm
- Worsted: 5-5.5 mm
If your columns look mushy or collapse into each other, go down 0.5 mm. If the fabric becomes boardy and the faux-cable effect disappears into stiffness, go up 0.5 mm.
Gauge behavior
Expect twist-shift fabrics to behave differently from plain single crochet or half double crochet.
Typical tendencies:
- Narrower width than standard fabric in the same stitch count.
- More depth/texture but less bulk than post-stitch cables.
- Greater horizontal elasticity when BLO/FLO hinge lines dominate.
- More diagonal torque when crossed insertion is overused in one direction.
Always wash and rest your swatch before judging recovery. Measure:
- Width at rest.
- Width stretched comfortably.
- Width after 10 minutes of rest.
- Length before and after hanging the swatch briefly.
That gives you real information for garment planning.
Foundation swatch: learning the three behaviors
Below is a practical swatch that teaches rib, twist, and chevron behavior in one piece.
Swatch specifications
- Yarn: DK wool or wool blend
- Hook: 4.5 mm
- Finished swatch: about 6 x 6 in / 15 x 15 cm after light blocking
- Abbreviations: ch, sc, hdc, FLO, BLO, RS, WS, st(s)
Foundation
Ch 26.
Row 1 (RS): Hdc in 2nd ch from hook and in each ch across. 25 hdc. Ch 1, turn.
This gives you a stable base. We’ll divide the columns as follows:
- sts 1-5: plain rib zone
- sts 6-10: left-lean twist zone
- sts 11-15: chevron rib zone
- sts 16-20: mirrored right-lean twist zone
- sts 21-25: plain rib zone
Row 2 setup
Row 2 (WS):
- Sts 1-5: hdc in BLO across 5 sts.
- Sts 6-10: alternate FLO, BLO, FLO, BLO, FLO.
- Sts 11-15: work all 5 sts in FLO.
- Sts 16-20: alternate BLO, FLO, BLO, FLO, BLO.
- Sts 21-25: hdc in BLO across 5 sts.
Stitch count: 25 hdc. Ch 1, turn.
This row establishes different hinge lines.
Row 3: introduce shift
Row 3 (RS):
- Sts 1-5: hdc in BLO across.
- St 6: insert hook into BLO of next st but approach slightly from right to left.
- St 7: normal hdc in FLO.
- St 8: insert hook into BLO of next st but draw the working loop slightly in front of st 7 before completing.
- St 9: normal hdc in FLO.
- St 10: hdc in BLO.
- Sts 11-15: work hdc in FLO across, but on sts 12 and 14 angle the hook toward the center of the 5-st group.
- St 16: hdc in BLO.
- St 17: normal hdc in FLO.
- St 18: insert hook into BLO from left to right diagonal.
- St 19: normal hdc in FLO.
- St 20: hdc in BLO approached slightly from left to right.
- Sts 21-25: hdc in BLO across.
Stitch count remains 25. Ch 1, turn.
The changes are small, but you should begin seeing the center groups move.
Rows 4-8: repeat and stabilize
Rows 4-8: Repeat Row 3, maintaining the same loop choices and insertion direction.
After five consecutive rows, the visual pattern will become clear:
- the plain rib zones stay steady,
- one twist zone leans inward,
- the center chevron zone forms a shallow V,
- the mirrored zone leans in the opposite direction.
What to look for
- Are the 5-st side panels stretching more than the twist zones?
- Does the center panel compress vertically while opening horizontally?
- Are both twist panels visually balanced, or is one tighter because your dominant hand favors one diagonal?
This first swatch teaches an important truth: the effect is cumulative. One unusual row does very little. Repeated routing creates a column identity.
Building a reversible faux-cable column
Now let’s make a dedicated faux-cable panel that reads well from both sides.
Why reversibility matters
Scarves, cowls, open cardigans, cuffs, and turned hems all benefit from texture that does not rely on a single “public” side. Deep front-post cables often look best only from the front. A twist-shift faux-cable can be much more balanced.
Faux-cable panel pattern
- Yarn: worsted wool blend
- Hook: 5 mm
- Panel width: 18 sts
- Edge stitches: 3 sts each side for stability
- Cable illusion zone: center 12 sts
Foundation: Ch 19.
Row 1: Sc in 2nd ch from hook and each ch across. 18 sc. Ch 1, turn.
Row 2:
- Sts 1-3: sc in both loops.
- Sts 4-7: sc in BLO.
- Sts 8-11: sc in FLO.
- Sts 12-15: sc in BLO.
- Sts 16-18: sc in both loops.
Row 3:
- Sts 1-3: sc both loops.
- St 4: sc BLO.
- St 5: sc BLO, but angle insertion slightly toward st 6.
- St 6: sc FLO, drawing yarn so the top loop settles over the gap between sts 5 and 6.
- St 7: sc FLO.
- St 8: sc FLO angled toward center.
- St 9: sc BLO angled toward center.
- St 10: sc BLO.
- St 11: sc FLO.
- St 12: sc FLO angled toward center.
- St 13: sc BLO angled toward center.
- St 14: sc BLO.
- St 15: sc BLO.
- Sts 16-18: sc both loops.
Row 4: Work as Row 3.
Row 5: Mirror the center behavior:
- Sts 1-3: sc both loops.
- Sts 4-6: sc BLO with slight centerward angle.
- Sts 7-9: sc FLO, middle stitch angled centerward.
- Sts 10-12: sc BLO, middle stitch angled centerward.
- Sts 13-15: sc FLO with slight outward release at st 15.
- Sts 16-18: sc both loops.
Rows 6-12: Alternate Rows 3 and 5.
Final stitch count on every row: 18 sc.
Why it works
The panel alternates exposed loops and insertion direction so the eye reads a rope-like exchange through the center. But because the stitches are not dramatically stacked over one another, both sides show a tidy, rhythmic line. The “cable” appears drawn into the surface rather than perched on top.
Best uses
- Hat brims where you want elasticity without heavy bulk
- Sweater side panels
- Mitt cuffs
- Scarf columns
- Mock-plackets on cardigans
Designing chevron ribs without lace holes
A classic crochet chevron often relies on increases and decreases. That’s useful, but it produces obvious peaks, valleys, and often decorative eyelets unless worked densely. Twist-shift chevron ribs create the impression of zigzagging columns without changing row width.
Core principle
Chevron ribs happen when neighboring rib columns tilt toward and away from each other in a repeated sequence. You are designing line direction, not edge geometry.
A simple 8-st repeat works well:
- Sts 1-2: BLO
- Sts 3-4: FLO angled rightward
- Sts 5-6: FLO angled leftward
- Sts 7-8: BLO
Repeat this across the row. On the next row, preserve loop identity but reverse the centerward angle on sts 3-6 to maintain the zigzag.
Sample chevron rib swatch
- Yarn: DK merino
- Hook: 4 mm
- Multiple: 8 sts + 2 edge sts
Foundation: Ch 34.
Row 1: Hdc in 2nd ch from hook and across. 33 hdc. Ch 1, turn.
Row 2: 1 edge hdc in both loops, 2 hdc BLO, 2 hdc FLO angled slightly right, 2 hdc FLO angled slightly left, 2 hdc BLO; repeat to last st, 1 edge hdc both loops. 33 hdc. Ch 1, turn.
Row 3: 1 edge hdc both loops, 2 hdc BLO, 2 hdc FLO angled slightly left, 2 hdc FLO angled slightly right, 2 hdc BLO; repeat to last st, 1 edge hdc both loops. 33 hdc. Ch 1, turn.
Rows 4-12: Repeat Rows 2 and 3.
Fabric behavior
This swatch usually stretches more across the ribs than along them, but the chevron path limits full sideways expansion compared with plain BLO ribbing. The visual energy is lively, and because there are no true increases or decreases, the edges remain straight.
Where this is useful
- Sweater hems that need grip without severe cinching
- Neckbands with visual movement
- Yokes requiring shallow texture
- Pillow panels and blankets where a reversible zigzag texture is welcome
Creating directional stretch on purpose
One of the most practical uses of twist-shift columns is shaping fabric behavior even when the silhouette remains simple.
Left-dominant stretch versus right-dominant stretch
If most crossed insertions slant in one direction, the fabric may prefer to expand along that diagonal under tension. In wearables, that can be useful or annoying.
Useful examples:
- A cuff that twists gently around the wrist
- A hat band that hugs around the head while resisting vertical collapse
- A side panel that flexes around the bust but stays neat in length
Annoying examples:
- A hem that spirals after blocking
- A scarf panel that skews visibly
- Sleeve cuffs that don’t mirror each other because one was worked flat and the other in the opposite orientation
How to balance it
- Mirror directional columns on either side of center.
- Alternate the slant every 2-4 rows.
- Use a more elastic yarn if the fabric must recover repeatedly.
- Keep edge stitches plain to prevent edge creep.
A practical wearable formula
For a fitted brim or hem panel:
- 20-30% plain BLO rib columns
- 40-50% twist-shift columns
- 20-30% stabilizing both-loop columns
This ratio often gives enough movement to be interesting without becoming unstable.
Step-by-step design method for your own fabrics
If you want to invent your own version rather than following a recipe, use this sequence.
Step 1: Choose a base stitch
Best options:
- sc for crisp, compact columns
- hdc for balanced stretch and visibility
- extended sc or linked stitches for smoother planes in finer yarns
For first experiments, choose hdc. It is forgiving and reveals loop targeting clearly.
Step 2: Define your column map
Draw vertical lines on graph paper or in a notebook. Mark each column as one of these:
- P = plain both-loop
- B = back loop only
- F = front loop only
- L = left-lean insertion
- R = right-lean insertion
- S = staggered anchor
A beginner-friendly repeat might look like:
P B B L F R B B P
Step 3: Decide your repeat depth
Some effects need only 2 rows. Others need 4 or 6 rows before the line becomes obvious.
- Reversible faux-cables: often 4-row repeat
- Chevron ribs: often 2-row repeat
- Strong directional stretch: often 3-6 row repeat
Step 4: Swatch at least 20 stitches wide and 20 rows tall
Anything smaller can lie to you. A narrow swatch doesn’t show how edge stabilization changes the interior behavior.
Step 5: Record stitch counts every row
These fabrics are easy to distort accidentally because the unusual insertion path can make you miss the final stitch or split a loop.
Write the count on paper after each row until the motion is familiar.
Step 6: Wash and stress-test
Stretch widthwise, let rest, hang briefly, steam lightly if the fiber allows, and compare. This is the difference between an attractive swatch and a trustworthy garment fabric.
Common mistakes and how to fix them
Twist-shift work rewards precision. Here are the problems makers run into most often.
Mistake 1: The column effect disappears after blocking
Why it happens:
- Hook too large
- Fiber too drapey or slippery
- Not enough contrast between targeted loops
Fix:
- Go down 0.5-1 mm in hook size.
- Increase the number of consecutive pattern rows.
- Choose a yarn with more memory, such as wool or a wool blend.
- Use sc instead of hdc if the fabric needs crisper line.
Mistake 2: One faux-cable leans more strongly than its mirror
Why it happens:
- Tension differs on your dominant and non-dominant insertion angles.
- Mirrored rows are not truly mirrored.
Fix:
- Mark the first stitch of each special column with removable markers.
- Pause to deliberately loosen the tighter diagonal side.
- Work two matching swatches, one mirrored, and compare before starting a garment pair.
Mistake 3: Edges flare or pull in
Why it happens:
- Special loop targeting too close to the selvedge
- No stabilizing edge stitches
Fix:
- Reserve 1-3 stitches at each edge worked in both loops.
- Add a smaller turning chain to avoid a loose edge.
- If using hdc, consider standing hdc or chainless turning methods for cleaner borders.
Mistake 4: Fabric torques after several inches
Why it happens:
- Too much one-direction crossing
- Inconsistent turning behavior
Fix:
- Introduce mirrored columns or reverse the slant every few rows.
- Count rows in pairs and make sure the directional sequence resets.
- Block the swatch, then evaluate whether the torque is aesthetic or structural.
Mistake 5: You keep losing stitch count
Why it happens:
- Crossed insertion makes the next stitch hard to identify.
- Exposed loops create misleading ridges.
Fix:
- Place markers every 5 or 10 stitches.
- After each special section, count completed stitch tops, not just base targets.
- On learning swatches, use light-colored yarn with strong stitch definition.
Mistake 6: The fabric feels too dense for wearables
Why it happens:
- Stitch choice too compact
- Hook too small
- Too many post-like redirections in a small area
Fix:
- Switch from sc to hdc.
- Increase hook size by 0.5 mm.
- Break up dense columns with plain rib columns or occasional both-loop rows.
Shaping with twist-shift columns
This is where many designers get excited, because column logic interacts beautifully with garment architecture.
Hems and waist shaping
Use vertical repeats around the body, then place decreases in the plain columns instead of the twist columns. That keeps the visual lines uninterrupted.
For example, in a 48-st hem panel with a 12-st repeat, work decreases every 4th row in the plain spacer columns only. The twist columns continue uninterrupted, and the eye reads a continuous rib/cable structure even as the circumference changes.
Bust and hip ease
If a garment needs expansion, position the most elastic versions of your columns over the areas requiring movement. BLO-heavy columns usually offer more hinge-based expansion than both-loop stabilizer columns.
Sleeve cuffs
A multiple of 6 or 8 stitches works especially well. Keep 1-2 plain columns at the seam or join area so the faux-cable motif does not get broken by the round transition.
Necklines
For neckbands, avoid extreme directional shift unless you want a visibly spiraled edge. A shallow chevron rib or mirrored faux-cable repeat is usually more polished.
Working in the round versus flat
Twist-shift columns behave differently depending on construction.
Worked flat
Advantages:
- Easier to inspect both sides
- Easier to mirror the motif consciously
- Good for panels and scarves
Challenges:
- Turning changes the visual orientation of angled insertion
- You must mentally reverse some movements on WS rows
Worked in the round
Advantages:
- No turning, so slant logic stays consistent
- Excellent for hats, cuffs, and yokes
Challenges:
- Spiral tendency may become stronger if the motif is not balanced
- Join rounds can interrupt column continuity
Tip: For joined rounds, place the seam in a plain both-loop column. For spiral rounds, use a marker and check every 2-3 rounds that your decorative columns remain aligned.
Finishing strategies for polished fabric
These fabrics can look remarkably sophisticated when finished thoughtfully.
Blocking
- Wool: Steam or wet block gently, then let the columns settle naturally without over-stretching.
- Cotton blends: Wet block and pin edges straight, but do not flatten the ribs aggressively.
- Acrylic blends: Use caution with steam; too much heat can erase texture.
The goal is not to iron the fabric flat. It is to even out tension while preserving the ridged pathways.
Seaming
Use seam methods that respect the columns.
- Mattress seam for side joins in flat panels
- Slip stitch seam through edge loops for structured accessories
- Join in plain edge columns so decorative lines stay uninterrupted
Edgings
A clean edging helps frame directional texture.
Good options:
- One round/row of sc in both loops
- Twisted single crochet / crab stitch for a firm edge
- Narrow i-cord-like crochet edging for necklines if you want a refined finish
Avoid very frilly or highly contrasting edgings unless the project specifically needs them. The fabric’s visual movement is already doing a lot.
Variations to explore
Once you understand the basic grammar, many variations become possible.
1. Micro faux-cables
Use sport yarn and sc with a 3.5-4 mm hook. Work narrow 2- or 3-column exchanges for a fine, almost knitted appearance.
2. Wide sculptural ribs
Use worsted or aran yarn and hdc with a 5-5.5 mm hook. Alternate 3 BLO columns with 3 twist-shift columns for bold hat brims and sweater hems.
3. Asymmetric directional panels
Intentionally bias the insertion angle in one direction across an entire side panel of a garment. This can create elegant wrap behavior in cardigans, though you must test torque carefully.
4. Faux-braided bands
Arrange three neighboring column groups and have the center group alternate left and right staggered anchoring every 2 rows. You get a braided suggestion without true crossing bulk.
5. Chevron-to-straight transitions
Start with pronounced chevron ribs near a cuff or hem, then gradually reduce the insertion angle over several repeats until the fabric becomes nearly straight ribbing. This creates graceful visual easing.
A sample wearable application: hat brim panel
Here is a practical example you can adapt.
- Yarn: worsted wool blend
- Hook: 5 mm
- Brim strip width: 12 rows tall worked side-to-side
- Length: to fit head circumference with 10-15% negative ease
Foundation: Ch 13.
Row 1: Sc in 2nd ch from hook and across. 12 sc. Ch 1, turn.
Rows 2-5:
- Sts 1-2: sc both loops
- Sts 3-4: sc BLO
- Sts 5-8: twist-shift zone alternating FLO/BLO with slight centerward insertion on sts 5 and 8
- Sts 9-10: sc BLO
- Sts 11-12: sc both loops
Rows 6-9: Mirror the twist-shift zone.
Rows 10-12: Repeat Rows 2-4.
Measure the strip after light stretching. For a 22 in / 56 cm head, aim for a finished brim circumference around 19.5-20 in / 49.5-51 cm depending on yarn recovery. Join the short ends and work the hat body from one long edge.
This brim gives the wearer comfort similar to ribbing, but with a more architectural look than plain BLO rows.
The biggest takeaway for designers
Twist-shift columns are less about memorizing a single stitch pattern and more about learning to control crochet’s pathway logic. Once you understand that a column can be visually redirected by loop choice, insertion angle, and anchoring path, you stop thinking only in terms of named stitches and begin thinking in terms of fabric engineering.
That shift opens up a lot of creative possibility.
You can make a faux-cable that stays soft and reversible. You can build chevrons without piercing holes into the fabric. You can place stretch where a body needs it and stability where a garment edge demands it. And you can do all of that without resorting to thick, stacked braid structures.
If you’re exploring this for the first time, keep your first few swatches simple: light-colored wool, hdc or sc, clear stitch markers, and careful notes. Work mirrored versions. Block them. Pull them sideways. Hang them. Wear them tucked into a cuff for an hour if you’re serious about recovery. Crochet gives us tremendous freedom, but with freedom comes the need to test our assumptions.
The reward is a fabric language that feels advanced without being fussy. These are textures that look thoughtful, wearable, and polished—exactly the kind of details that make a handmade piece feel intentional.
So the next time a rib column seems a little too plain or a cable feels too heavy, try changing the route instead of the stitch count. Enter a different loop. Angle the hook on purpose. Let one column borrow the path of another. That’s where twist-shift design begins, and once you see it, you’ll start finding uses for it everywhere.