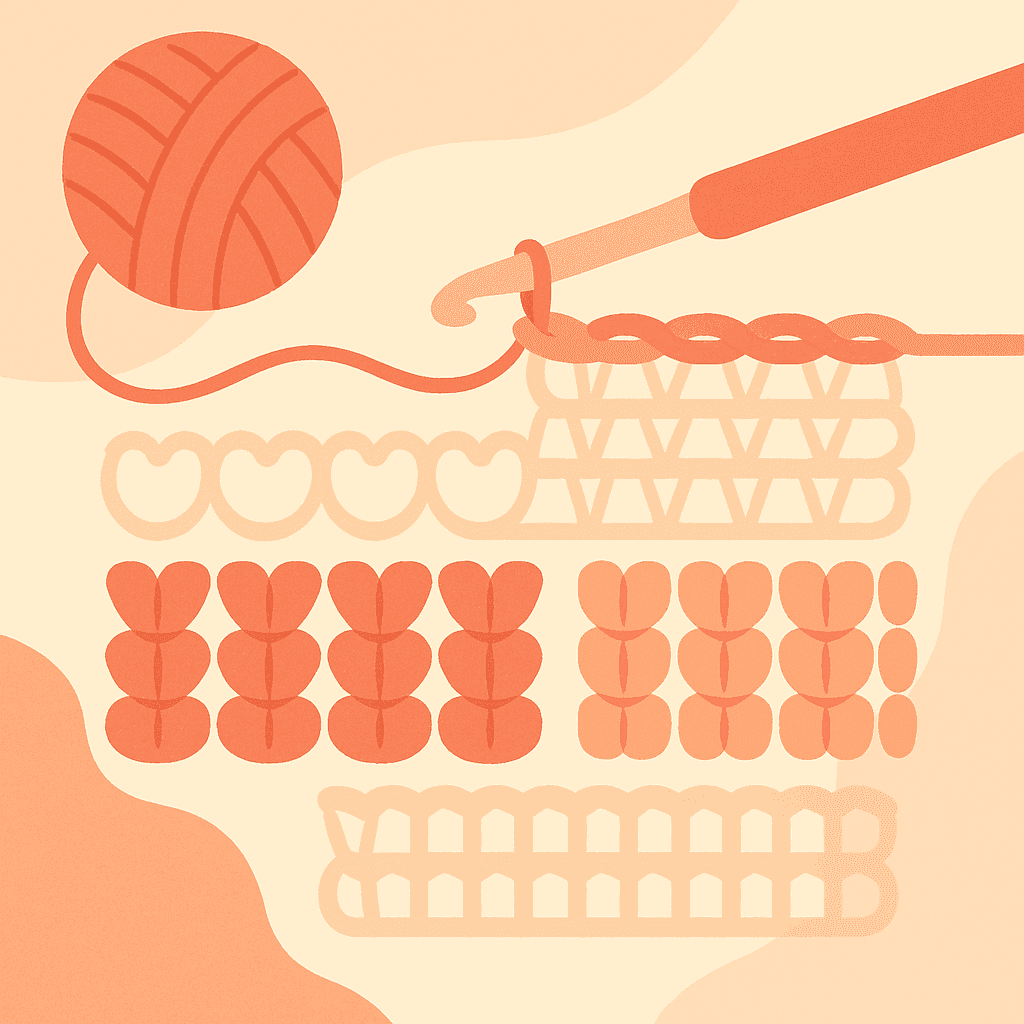
Foundation Half Double Crochet (FHDC): How to Crochet a Stretchy Start for Blankets, Tops, and Dresses (No Starting Chain)
If you love the look and speed of half double crochet (HDC) but dread wrestling with a long starting chain, FHDC is the answer. Foundation Half Double Crochet builds your first row of stitches and its matching foundation chain at the same time. The result: a clean, stretchy edge that matches the gauge of your HDC fabric—no flare, no tight hems, and no miscounted chains.
This guide covers how to FHDC step-by-step, the stitch math to convert any chain-based pattern, how to join FHDC in the round, troubleshooting, and when FHDC beats FDC or traditional chains in blankets and wearable patterns.
TL;DR
- FHDC creates the foundation chain and the first row of HDC together for a stretchier, more accurate start.
- Best for HDC-based fabrics: blankets, sweaters, tops, dresses, skirts, and any hem or neckline that needs give.
- Core sequence: yarn over (yo), insert hook into the base chain of the previous FHDC, yo, pull up a loop, yo, pull through 1 loop (foundation chain), yo, pull through 3 loops (HDC).
- Stitch math: if a pattern says “ch C, hdc in Xth ch from hook,” then your FHDC count equals C minus X-1. Example: ch 102, hdc in 3rd ch → work 100 FHDC.
- Joining in the round: join the top as usual and close the small gap at the base with the tail, or slip-stitch the base chains together before joining the top for a neater ring.
What Is FHDC and Why It Matters
Foundation Half Double Crochet (FHDC) is a foundation stitch technique that replaces “ch a million, then work your first row into the chain.” Instead, each FHDC stitch builds:
- a foundation chain link (at the base), and
- a half double crochet (on top)
Because each stitch includes a dedicated foundation link, the bottom edge has the same elasticity and recovery as your HDC fabric. This is the biggest technical advantage over long starting chains, which are notoriously finicky—too tight (puckering) or too loose (flaring).
A FHDC edge is also structurally sound. It produces a neat, consistent braid of “little Vs” at the bottom, which you can later work into just like a regular chain for borders or picked-up ribbing.
Terminology note:
- US terms: FHDC = Foundation Half Double Crochet.
- UK terms: FHTR = Foundation Half Treble Crochet.
- In this article, I use US terminology.
When FHDC Beats Chains (and When It Doesn’t)
Choose FHDC when you want to:
- Avoid chain tension problems on long foundations.
- Achieve a hem or neckline that stretches and recovers like the rest of the fabric (critical in garments and baby blankets).
- Skip re-counting chains; you simply count stitches as you make them.
- Match HDC gauge from the very first row, especially for HDC-in-the-third-loop fabrics where a chain start can look and behave differently.
Consider a traditional chain (or an alternate start) when:
- You need a firm, non-stretchy bottom (e.g., certain tapestry mosaic setups where a rigid edge prevents distortion).
- The pattern’s first row is not HDC-heavy (e.g., lace motifs that rely on exact chain architecture).
- You’re working motifs or squares that start from a ring, where a chain ring or magic ring remains cleaner.
What about FDC (Foundation Double Crochet)?
- FHDC vs FDC: Use FHDC when your fabric is based on HDC. FDC is taller and often looser. Swapping FDC into an HDC pattern can alter row height and drape. If your pattern is HDC, FHDC will better match the drape and gauge, reduce the “slouch” at the hem, and avoid height mismatches in your stitch repeat.
Tools, Yarn, and Gauge Notes
- Hook: Start with the hook size recommended by your pattern. If your FHDC edge is tight compared to the following rows, use a hook 0.5 mm larger for the FHDC row only; if it’s flaring, go 0.5 mm smaller or adjust your tension on the “pull through 1” step.
- Yarn: Fiber choice affects edge behavior. Wool and blends tend to recover well; cotton, bamboo, and linen can grow. FHDC helps, but you may still want a slightly smaller hook for the foundation in low-elastic fibers.
- Gauge: Always swatch with FHDC if you plan to use it for the project. Measure the width of the foundation row versus Row 2; they should match. If the foundation row is narrower, loosen the “pull through 1” step; if wider, tighten it or reduce hook size for the foundation.
Step-by-Step: How to FHDC (US Terms)
Abbreviations:
- sl st = slip stitch
- ch = chain
- yo = yarn over
- hdc = half double crochet
- fhdc = foundation half double crochet stitch
Before you begin: Many crocheters find it easier to see where to insert the hook if they hold the stitch so the bottom “V” is horizontal and facing them. Consider using a contrasting stitch marker every 25 stitches to keep count.
First stitch:
- Make a slip knot. Ch 2.
- Yo, insert hook into the second chain from the hook.
- Yo, pull up a loop (3 loops on hook).
- Yo, pull through 1 loop only. This creates the foundation chain for this stitch. Tip: keep this step loose enough to match your HDC gauge.
- Yo, pull through all 3 loops. This completes your first FHDC.
Subsequent stitches: 6. Identify the foundation chain of the previous stitch. Look just below the top “V” of the HDC you just made; you’ll see a sideways “V” (two strands). That is the chain you formed in Step 4. 7. Insert the hook under both strands of that “V” (both loops). Some crocheters prefer one loop for extra stretch, but both loops give a sturdier edge. 8. Yo, pull up a loop (3 loops on hook). 9. Yo, pull through 1 loop (this makes the next foundation chain). 10. Yo, pull through all 3 loops (completes another HDC on top).
Repeat steps 6–10 until you have the required number of stitches. Count stitches by the top “V” loops, just as you would in any HDC row.
Left-handed note: The steps are the same; your work will mirror the right-handed orientation. Focus on consistently picking up the same two strands for the foundation chain each time.
Variation for specific edge behavior:
- Extra stretch: Insert under one strand (the front loop of the foundation chain only). This can increase stretch but may add gap or reduce durability.
- Extra stability: Insert under both strands plus the back bar if visible (three-loop pickup). This adds rigidity for heavy garments but slightly reduces stretch.
Stitch Anatomy: How to Identify the Right Insertion Point
- Top of the stitch: The HDC’s familiar “V” that you’ll use in Row/Round 2.
- Foundation link: The “V” just below the stitch top. This is where you insert for the next FHDC. It looks like a small chain, and consistent insertion under both strands produces a neat, uniform lower edge.
A quick self-check: After a few stitches, look at the bottom edge. It should show a tidy line of chain “Vs” similar in appearance to a traditional chain. If you see gaps or ladders, you’re probably not catching both strands consistently.
Stitch Math: Converting Any Chain-Based HDC Start to FHDC
The key idea: The number of FHDC stitches should equal the number of HDC stitches you would have after working Row 1 into a chain.
General formula:
- If a pattern says “ch C, hdc in Xth ch from hook, hdc across,” then Row 1 HDC count = C - (X - 1).
- Therefore, FHDC count F = C - (X - 1).
Examples:
- Pattern: ch 102, hdc in 3rd ch from hook. Here X = 3, so F = 102 - (3 - 1) = 102 - 2 = 100 FHDC.
- Pattern: ch 81, hdc in 2nd ch from hook. X = 2, so F = 81 - (2 - 1) = 81 - 1 = 80 FHDC.
Multiples and repeats:
- If a pattern says “Work a multiple of m + r, then hdc in the 3rd ch from hook,” your Row 1 stitch count will be a multiple of m + (r - 2). For FHDC, just work that many stitches.
- Example: “Multiple of 4 + 2, hdc in 3rd ch from hook” → Row 1 stitch count is a multiple of 4 + 0 = multiple of 4. For FHDC, work a multiple of 4 stitches.
- Example: “Multiple of 5 + 1, hdc in 2nd ch from hook” → Row 1 stitch count is a multiple of 5 + 0 = multiple of 5. For FHDC, work a multiple of 5.
- If r - skipped_chains is negative or odd from the original, re-check the pattern—it’s uncommon but not impossible depending on turning chain conventions.
Edge stitches:
- If the pattern sets aside 1 or 2 stitches at each edge for selvedge or border, keep that same structure. FHDC produces the same stitch count and behaves like Row 1; treat it as such.
Quick tip: Write your FHDC target count in your notes before you begin long foundations. Place a stitch marker every 25 or 50 stitches; it’s much easier to catch errors early than at 300.
Joining FHDC in the Round (Without a Starting Chain)
You can absolutely use FHDC to start top-down sweaters, skirts, and other in-the-round projects. The catch: FHDC doesn’t form a continuous ring by itself—you have to close both the top stitches and the bottom foundation chain. Here are reliable methods.
Method A: Join the top, close the base with the tail (simple and clean)
- Work the required number of FHDC stitches flat.
- Ensure the foundation edge isn’t twisted.
- Sl st to the first FHDC (through the top “V”) to join the round.
- Use the starting tail to sew the small gap at the base between the first and last foundation chains. A whipstitch or mattress stitch closes it invisibly.
Method B: Slip-stitch the base before joining the top (minimizes the gap)
- Work your FHDC count.
- With the working loop on your hook, insert the hook under both strands of the very first foundation chain “V.”
- Sl st to connect the last foundation chain to the first foundation chain.
- Now sl st to the first FHDC (top “V”) to close the round at the stitch level.
Method C: Invisible seam after the first round (tail-only finish)
- Join the top as in Method A, work one more round, and then use the tail to sew the base chain seamlessly. This can hide the base join even better when your yarn is slightly fuzzy or the gauge is small.
Spiral rounds vs joined rounds:
- For HDC fabrics, joined rounds are cleaner at the seam. If working spirals (no joins), accept a jog line unless your pattern includes a jogless technique. FHDC doesn’t change that dynamic; it only affects the start.
Getting the Gauge Right: Matching FHDC to Your HDC Fabric
The most common issue when switching to FHDC is a hem that behaves differently than the rest of the fabric. The culprit is almost always Step 4—“yo, pull through 1” (the foundational chain part of each FHDC).
- If your foundation edge is tight (narrower than Row 2): Loosen Step 4 consciously. You can also go up 0.5 mm in hook size for the FHDC row only.
- If it’s flaring (wider): Tighten Step 4 or go down 0.5 mm for the FHDC row only.
- If your bottom edge shows uneven tension bumps: Mark the step in your mind—some crocheters find it helps to exhale and slightly relax the hook hand before pulling through 1.
Swatch protocol:
- Make 20–30 FHDC.
- Work 4–6 rows of HDC normally (same hook).
- Block as intended for the project (steam for acrylic—hover and pat; wet block for wool; dry flat). Then measure.
- The width across the foundation should equal the width across Row 2. Adjust tension/hook size for the foundation if needed.
Troubleshooting: Common FHDC Problems and Fixes
- Wavy or scalloped bottom edge: Your “pull through 1” is too loose, or you’re inconsistently grabbing the base chain loops. Tighten Step 4 and ensure you consistently insert under both strands.
- Tight, puckered hem: Loosen Step 4, or use a larger hook for the FHDC row.
- Visible holes at the base: You’re catching only one loop of the foundation chain accidentally, or your tension is uneven between stitches. Insert under both strands and keep Step 4 consistent.
- Uneven stitch height: Don’t yank the hook upward after Step 4; keep movements smooth and the work relaxed against your non-dominant hand.
- Miscounts: Place stitch markers every 25–50 stitches; count top “Vs,” not base chain links, since each FHDC = one HDC.
- Twisted foundation when joining in the round: Lay the work flat with the foundation “Vs” aligned, and join only after you verify there’s no twist. If you spot a twist after joining, it’s faster to frog immediately than to “live with it.”
- Confusion about the first FHDC: The initial ch-2 doesn’t count as a stitch. Your first completed FHDC is the one you count as stitch #1.
Edge Behavior and Finish Quality
- Borders: The FHDC base looks like a chain and accepts stitches cleanly. For a blanket border, work your border stitches into the bottom “Vs” as you would into a regular starting chain.
- Reversible edges: Because FHDC builds a real chain, the bottom can mirror the top edge nicely, especially helpful for reversible blankets or scarves.
- Ribbing from the base: If you plan to pick up for ribbed hems or cuffs later, FHDC provides a robust “pick-up edge” that resists distortion better than a too-tight chain.
Use Cases and Pattern Context
- Blankets: FHDC prevents flared or cinched edges. For stitch patterns that work HDC into third loops (a.k.a. camel stitch) or dense HDC textures, FHDC gives a cleaner, more harmonious foundation.
- Sweaters and tops: For bottom-up sweaters, FHDC provides a hem that stretches with the body. For top-down yokes picked up later at the neckline, FHDC can be used to create a comfortable, non-strangling neck edge.
- Skirts and dresses: The hem or waistband benefits from the elastic base, especially if you add ribbing or negative ease. If using elastic inside a casing, FHDC makes a pliable edge that won’t cut in.
- Baby garments: Babies squirm; FHDC edges stretch and recover, improving fit and comfort.
Fiber-specific notes:
- Cotton/linen/bamboo: Consider a smaller hook for the FHDC row or firmer Step 4 tension; these fibers can relax and grow.
- Acrylic: Tension tends to spring back; block lightly with steam (no direct iron contact) to set the foundation straight.
- Wool: Excellent memory; FHDC produces highly wearable hems and necklines.
Variations and Advanced Tips
- Decorative lower edge: Insert under just the back loop of the foundation chain “V” to leave a corded ridge at the base. This is purely visual and can be attractive on hems.
- Two-hook method: Use a larger hook for FHDC and switch to the pattern hook for Row 2; popular for tight chainers seeking a consistent edge.
- Counting helpers: For very long foundations (200+), use removable markers every 25 stitches and tally in a notebook. FHDC makes adding or removing a few stitches easier than ripping a long chain.
- Increases/decreases in the foundation: If a pattern intentionally shapes in Row 1, you can mirror that in FHDC by working more or fewer FHDCs where needed. However, shaping on a foundation row is less common; most shaping occurs later.
FHDC vs FDC vs Starting Chain (Pros and Cons)
FHDC (for HDC-based fabrics):
- Pros: Matches HDC gauge from the start; stretchy; easy to count; clean base for borders; great for wearables and long foundations.
- Cons: Slightly more to learn; slower for the first dozen stitches (you’ll speed up); the base join in the round needs an extra moment of attention.
FDC (for DC-based fabrics):
- Pros: All the same benefits as FHDC, but height matched to DC fabric.
- Cons: Taller stitch may feel too loose or drapey if used in an HDC pattern; don’t substitute unless the pattern is DC-based or you’ve swatched and like the result.
Traditional chain start:
- Pros: Familiar; minimal technique; may be desirable for rigid or lace starts.
- Cons: Easy to mis-tension; counting errors on long chains; can flare or pucker; less forgiving as a garment hem.
My recommendation: Use the foundation stitch that matches your fabric. If Row 1 is HDC, start with FHDC. If Row 1 is DC, start with FDC. If you need a rigid lace architecture or a chain-based motif, use chains.
Frequently Asked Questions
- Does the starting ch-2 count as a stitch? No. Only the completed FHDC stitches count.
- How do I count FHDC? Count the top “V” loops as you would in any HDC row.
- Can I add a border into the foundation? Yes. The base “Vs” accept stitches just like a regular chain.
- Can I work FHDC in the back bump? The FHDC equivalent is inserting into the foundation chain “V” of the previous stitch. You can choose one loop or both loops; both loops are standard.
- Is FHDC the same as FSC or FDC? No. FSC = foundation single crochet; FDC = foundation double crochet. Use the stitch that matches your fabric.
- UK terms? FHDC corresponds to FHTR (foundation half treble crochet) in UK terms.
Step-by-Step Recap (Compact)
- Ch 2.
- Yo, insert hook into the second chain from hook.
- Yo, pull up a loop (3 loops on hook).
- Yo, pull through 1 loop (foundation chain).
- Yo, pull through all 3 loops (HDC complete).
- For each new stitch: insert hook under both strands of the foundation chain “V” of the previous stitch; repeat steps 3–5.
Keep Step 4 even. That’s the secret to an FHDC edge that looks and behaves like the rest of your HDC fabric.
Example: Converting a Pattern Start to FHDC
Pattern says: “Ch 154. Hdc in 3rd ch from hook and in each ch across. (152 hdc)”
- Here, C = 154, X = 3, so F = 154 - (3 - 1) = 152. Work 152 FHDC instead of chaining 154.
- Proceed to Row 2 per the pattern. Nothing else changes.
Pattern says: “Ch a multiple of 6 + 2. Hdc in 2nd ch from hook and in each ch across.”
- Here, skipped chains = 1.
- Row 1 stitch count = (multiple of 6 + 2) - 1 = multiple of 6 + 1. But because we skip only 1, your Row 1 stitch count becomes a multiple of 6 + 1. If your stitch pattern requires a multiple of 6 in-row, adjust your target count so the Row 1 total meets the multiple requirement. Many designers specify multiples with the skip in mind; if confused, swatch the repeat to confirm.
- Practical conversion: If your pattern’s Row 1 results in a multiple of 6 stitches, simply work that many FHDC.
When in doubt: Identify the exact number of stitches that Row 1 will produce and match that number in FHDC.
Practical Joining Demo (In-the-Round Hem)
Suppose you’re starting a bottom-up sweater with 180 HDC stitches.
- Work 180 FHDC flat.
- Bring ends together without twisting.
- Slip stitch to the first FHDC (top “V”) to join the round.
- Use the tail to sew the base chain gap closed. Now continue in joined rounds of HDC.
Optional: If you tend to see a small ladder at the base, do Method B (sl st into the first foundation chain before joining the top).
Testing and Blocking
- Foundation adjustment swatch: Make 30 FHDC with your pattern hook, then 4 rows of HDC. If the foundation edge is tight, redo the FHDC with a 0.5 mm larger hook and compare.
- Final blocking: Align the foundation edge straight on the mat; if any scallop remains, gentle steam or wet block will usually set it flat if your tension is consistent.
References and Further Learning
- Craft Yarn Council: Standards for terms, abbreviations, and recommended gauges. https://www.craftyarncouncil.com/standards
- Moogly: “Foundation Half Double Crochet” tutorial (clear photos and video). https://www.mooglyblog.com/foundation-half-double-crochet/
- New Stitch a Day: Video tutorial on FHDC (excellent close-ups). https://newstitchaday.com/
- The Spruce Crafts: How to Foundation Crochet (includes FHDC among foundation stitches). https://www.thesprucecrafts.com/
- Interweave Crochet: Foundation stitches overview and use cases. https://www.interweave.com/
Note: Terminology and conventions vary; always verify whether your pattern uses US or UK terms.
Final Opinions and Best Practices
- If your fabric is HDC-based, FHDC is the most reliable way to achieve a hem or neckline that behaves like the rest of your project. The bottom line will stretch and recover with wear, which is crucial for comfortable, long-lasting garments and flat, non-wavy blankets.
- The single most important technical detail is Step 4—keep that “pull through 1” even in tension. I recommend practicing 2–3 short samples to calibrate before committing to a large project.
- For in-the-round starts, always close both the top and the base. A one-minute tail close yields a professional finish.
- Match the foundation stitch to the fabric: FHDC for HDC patterns, FDC for DC patterns. Don’t force a DC foundation onto an HDC fabric unless you like the resulting drape difference after swatching.
Once you internalize FHDC, you’ll rarely go back to long starting chains for HDC projects. It’s faster in practice, more accurate to count, kinder to your wrists on long foundations, and it dramatically improves the look and function of finished edges.